> ## Documentation Index
> Fetch the complete documentation index at: https://docs.runalloy.com/llms.txt
> Use this file to discover all available pages before exploring further.
# NetSuite
> So you want to connect your NetSuite account to Alloy and start automating the most complex part of your tech stack? Well you've come to the right place.
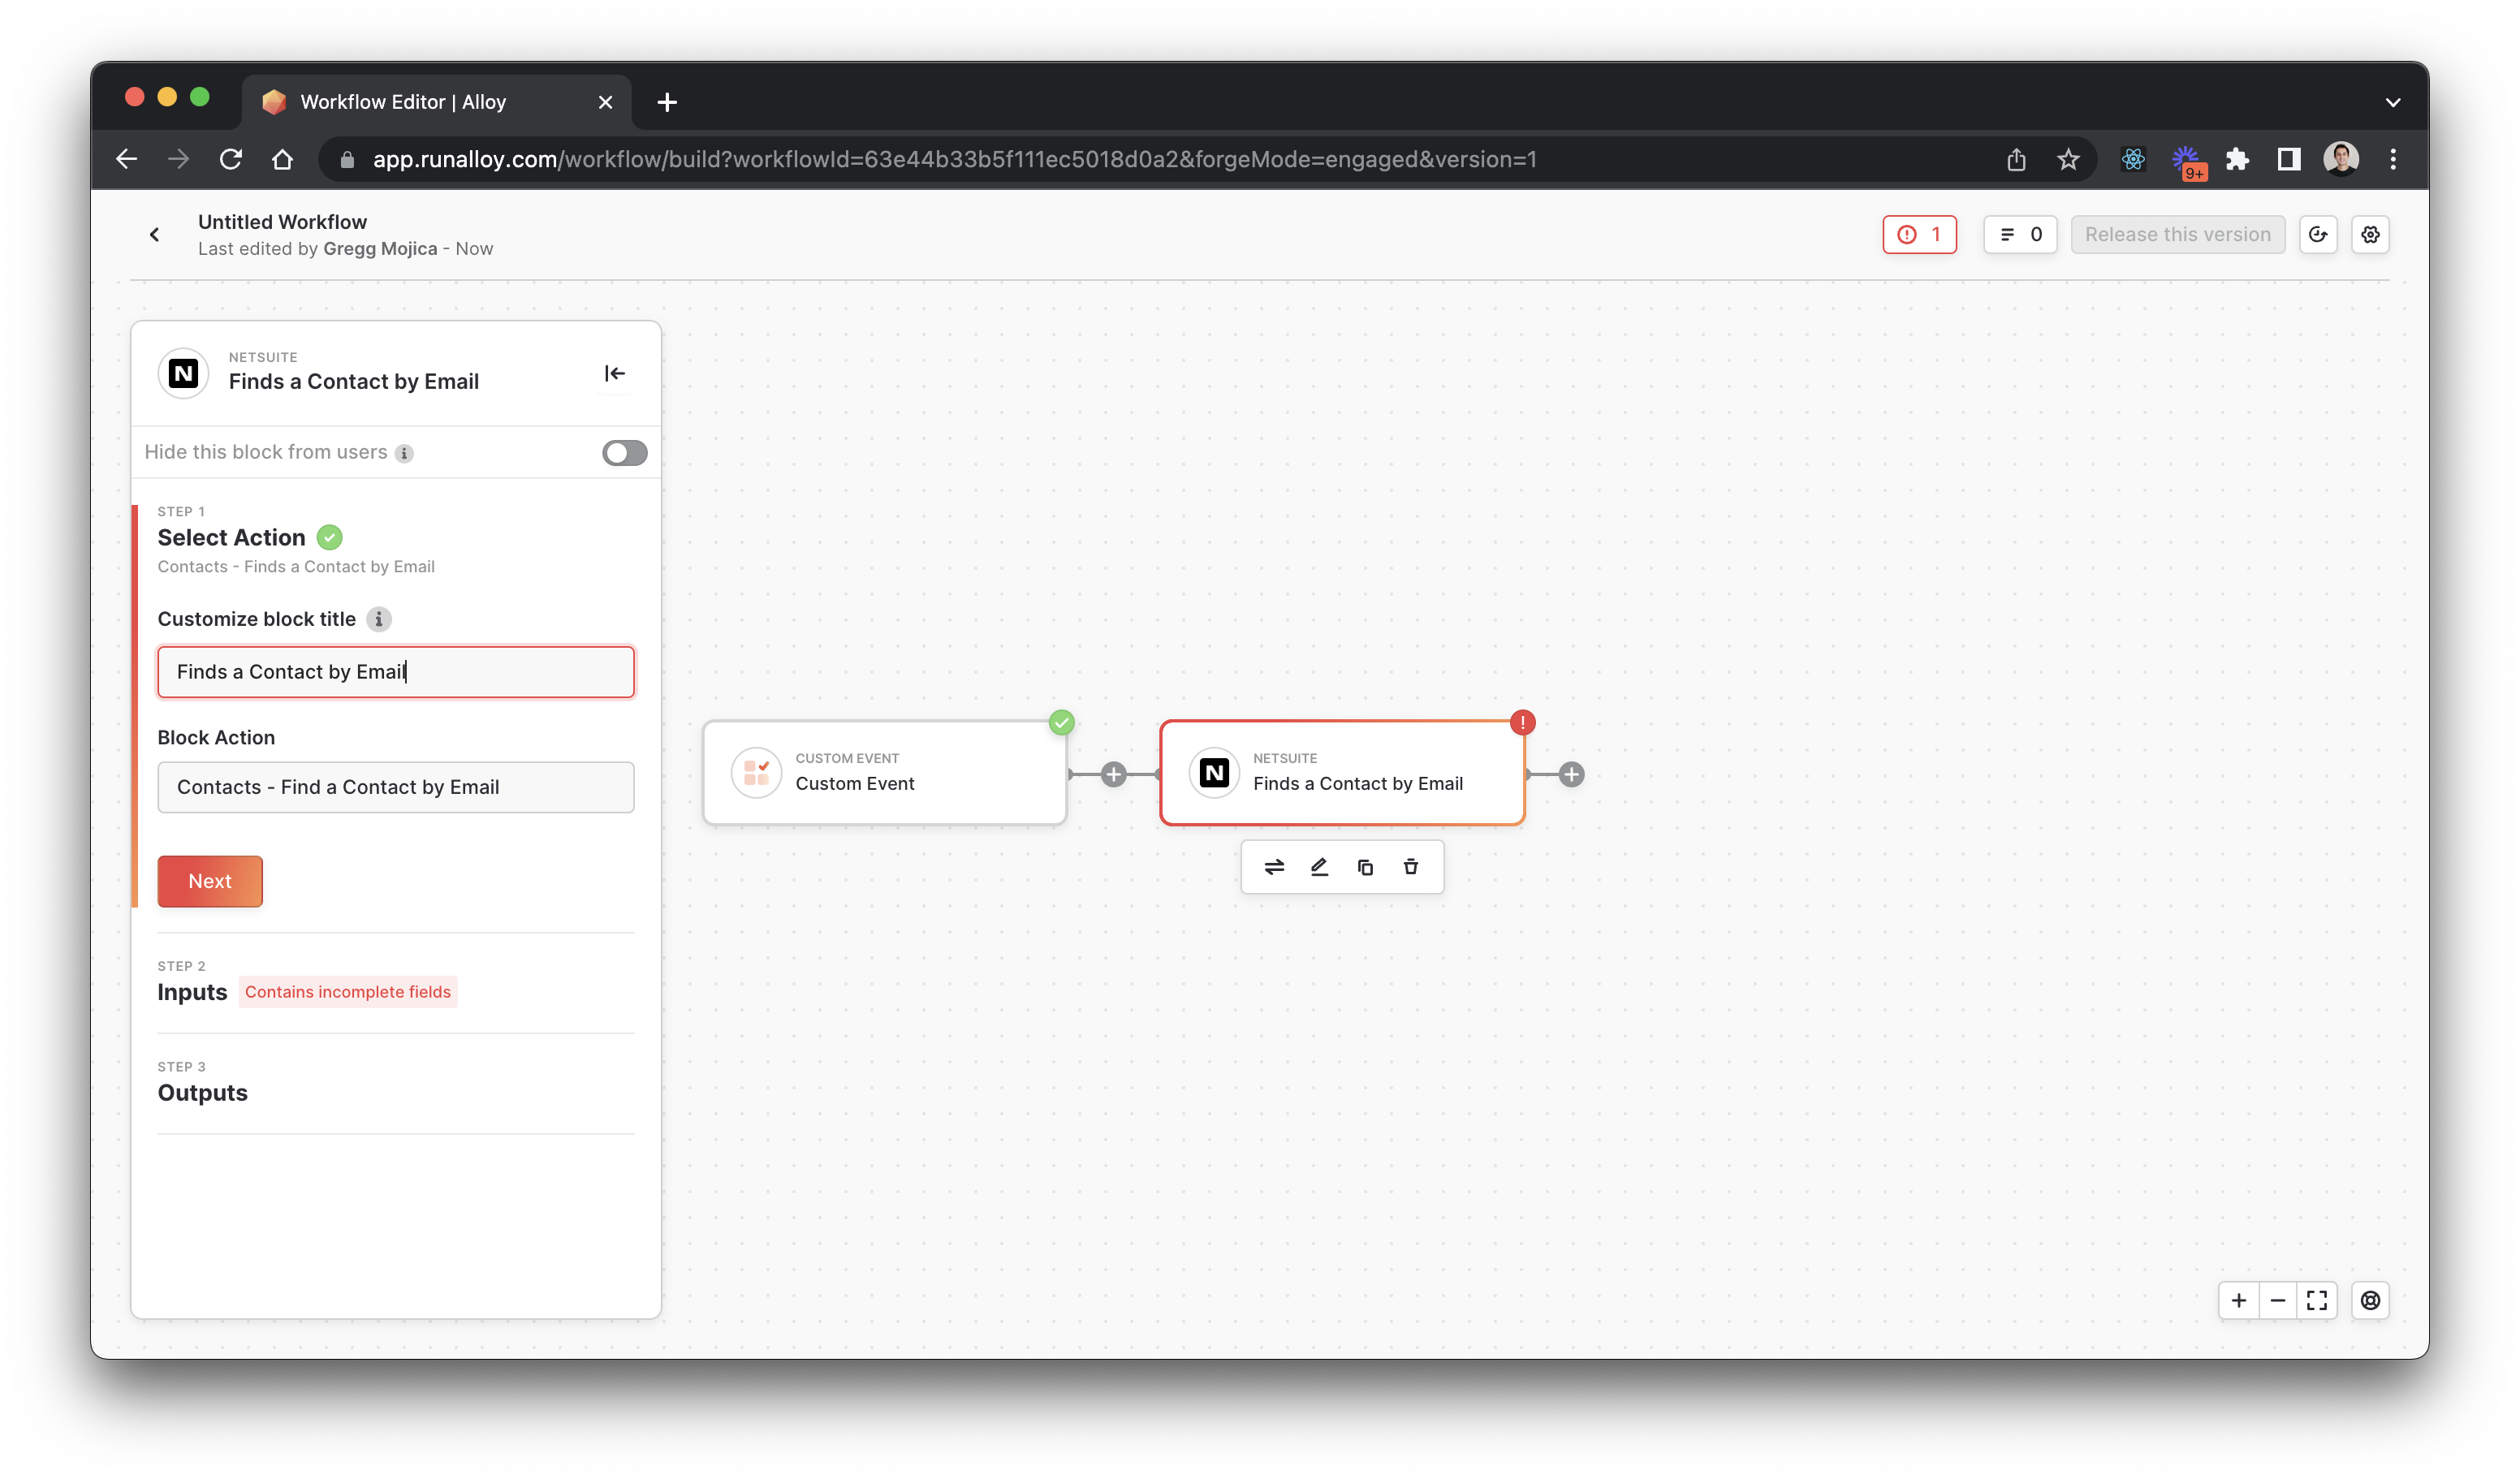
To get started with our NetSuite integration, you'll need to enable what's called **Token-based Authentication** in NetSuite. Let's take a look at the steps to do so below.
## Step 1: Create an App
Login to your NetSuite account as the Admin user.
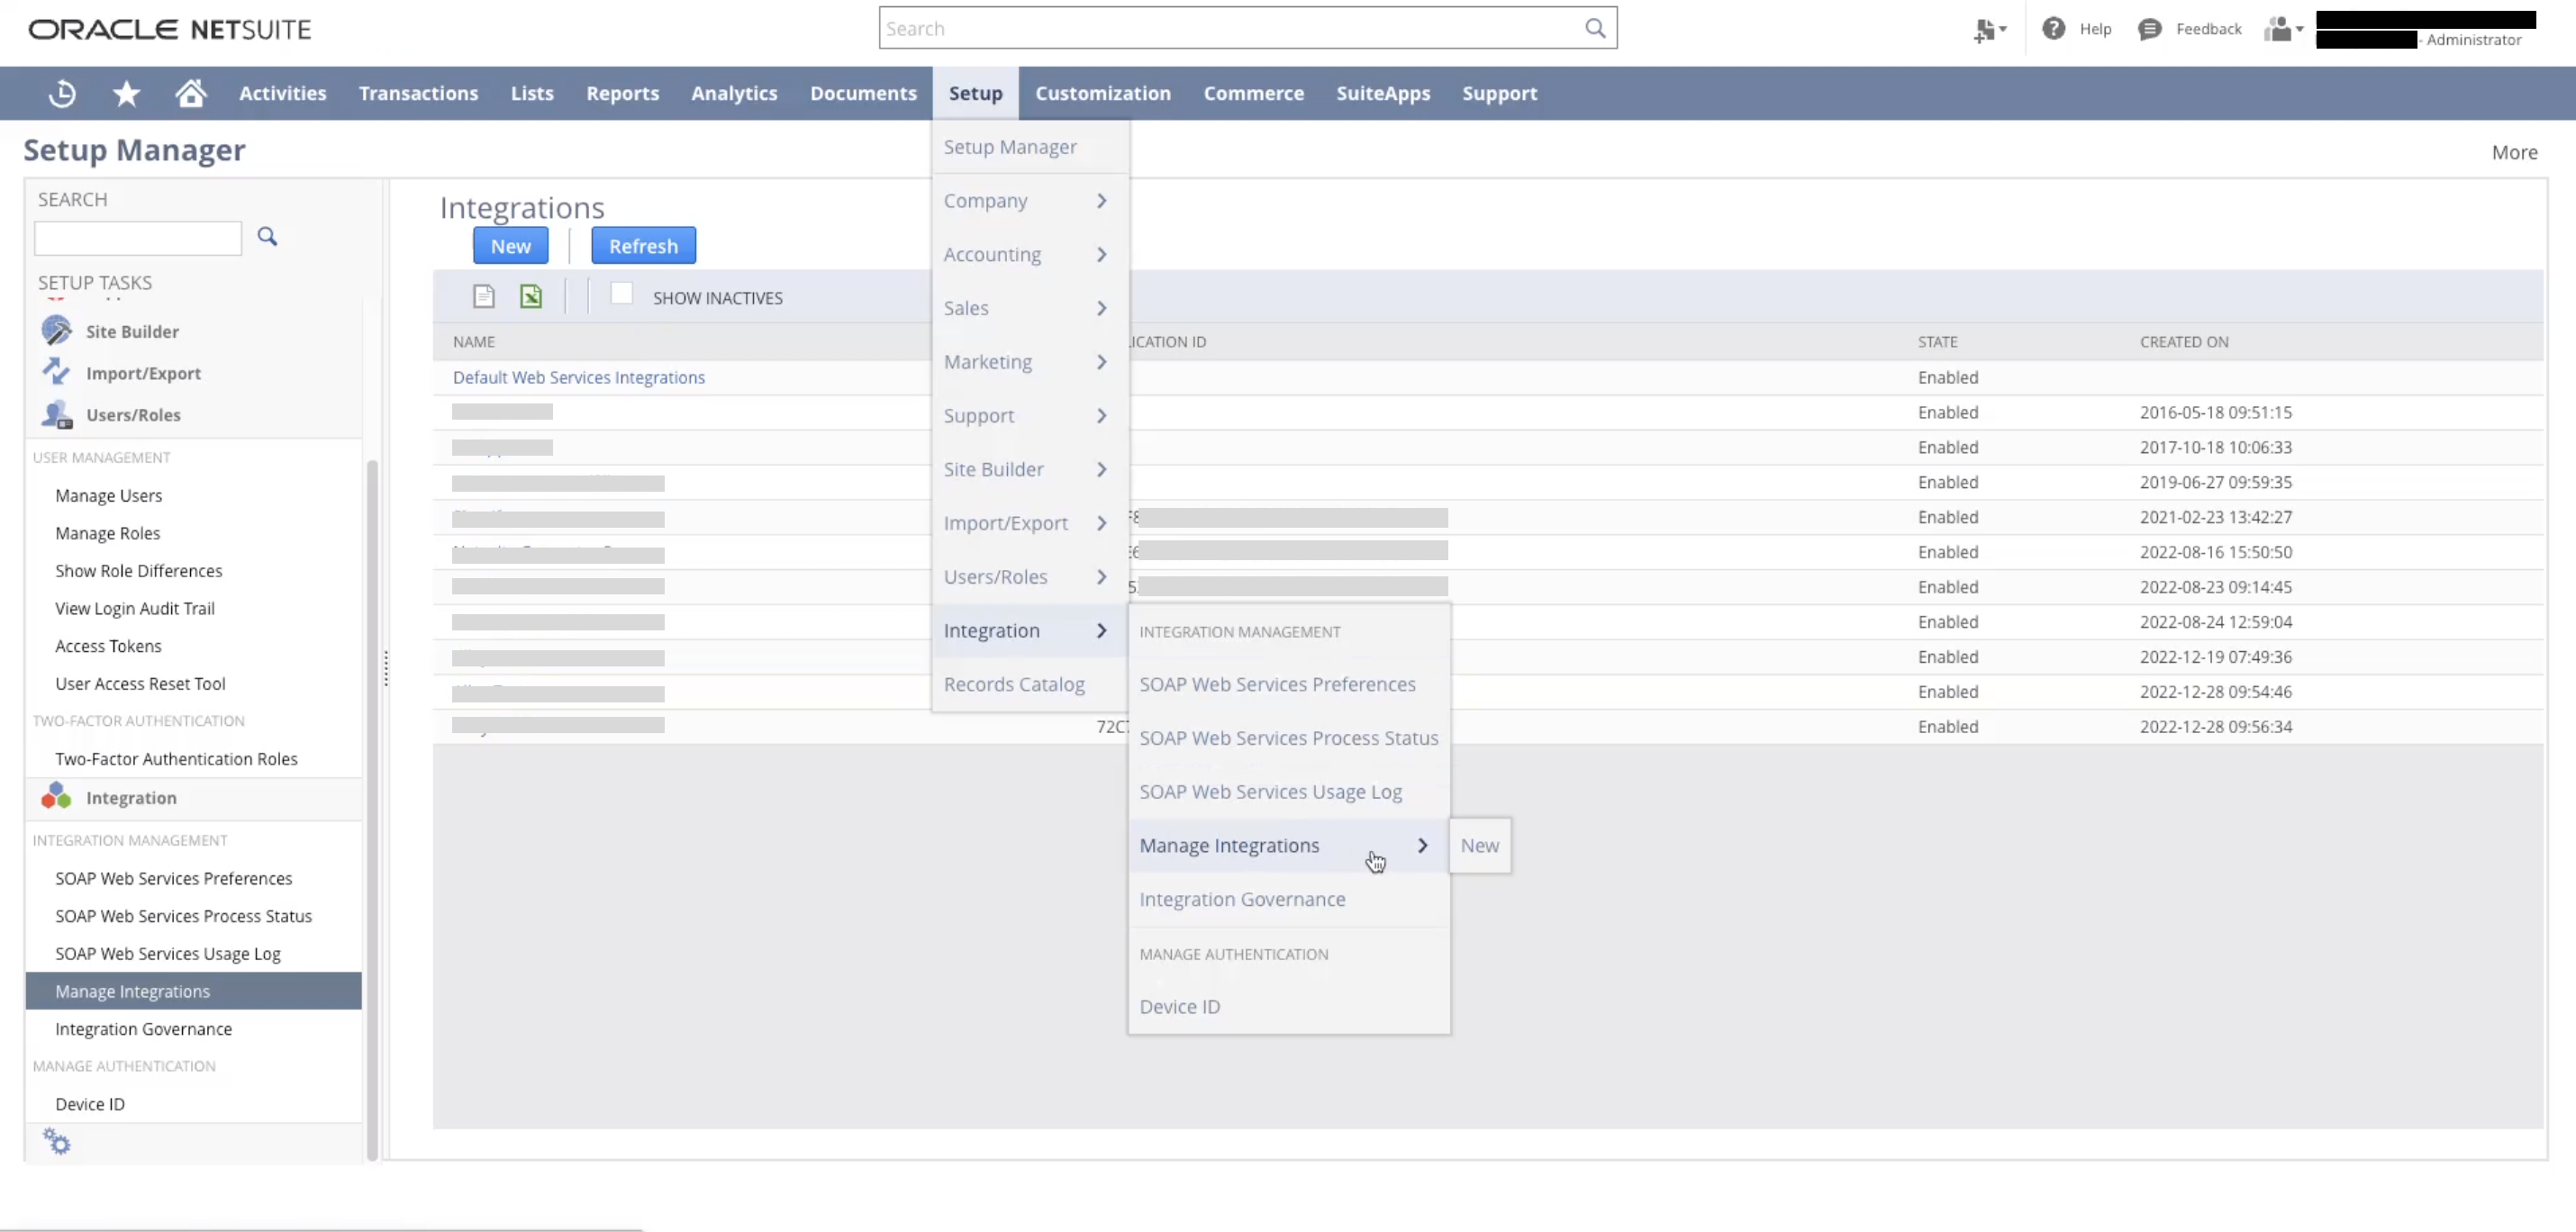
Navigate to the **Setup** > **Integration** > **Manage Integrations** > **New** section of your NetSuite account.
You should see a list of any integrations you've previously created (if any).
From here, you'll need to create the integration. Give the integration a **name**, set the **state** as **enabled** and select **"Token-Based Authentication"** as the **Authentication Sublist.**
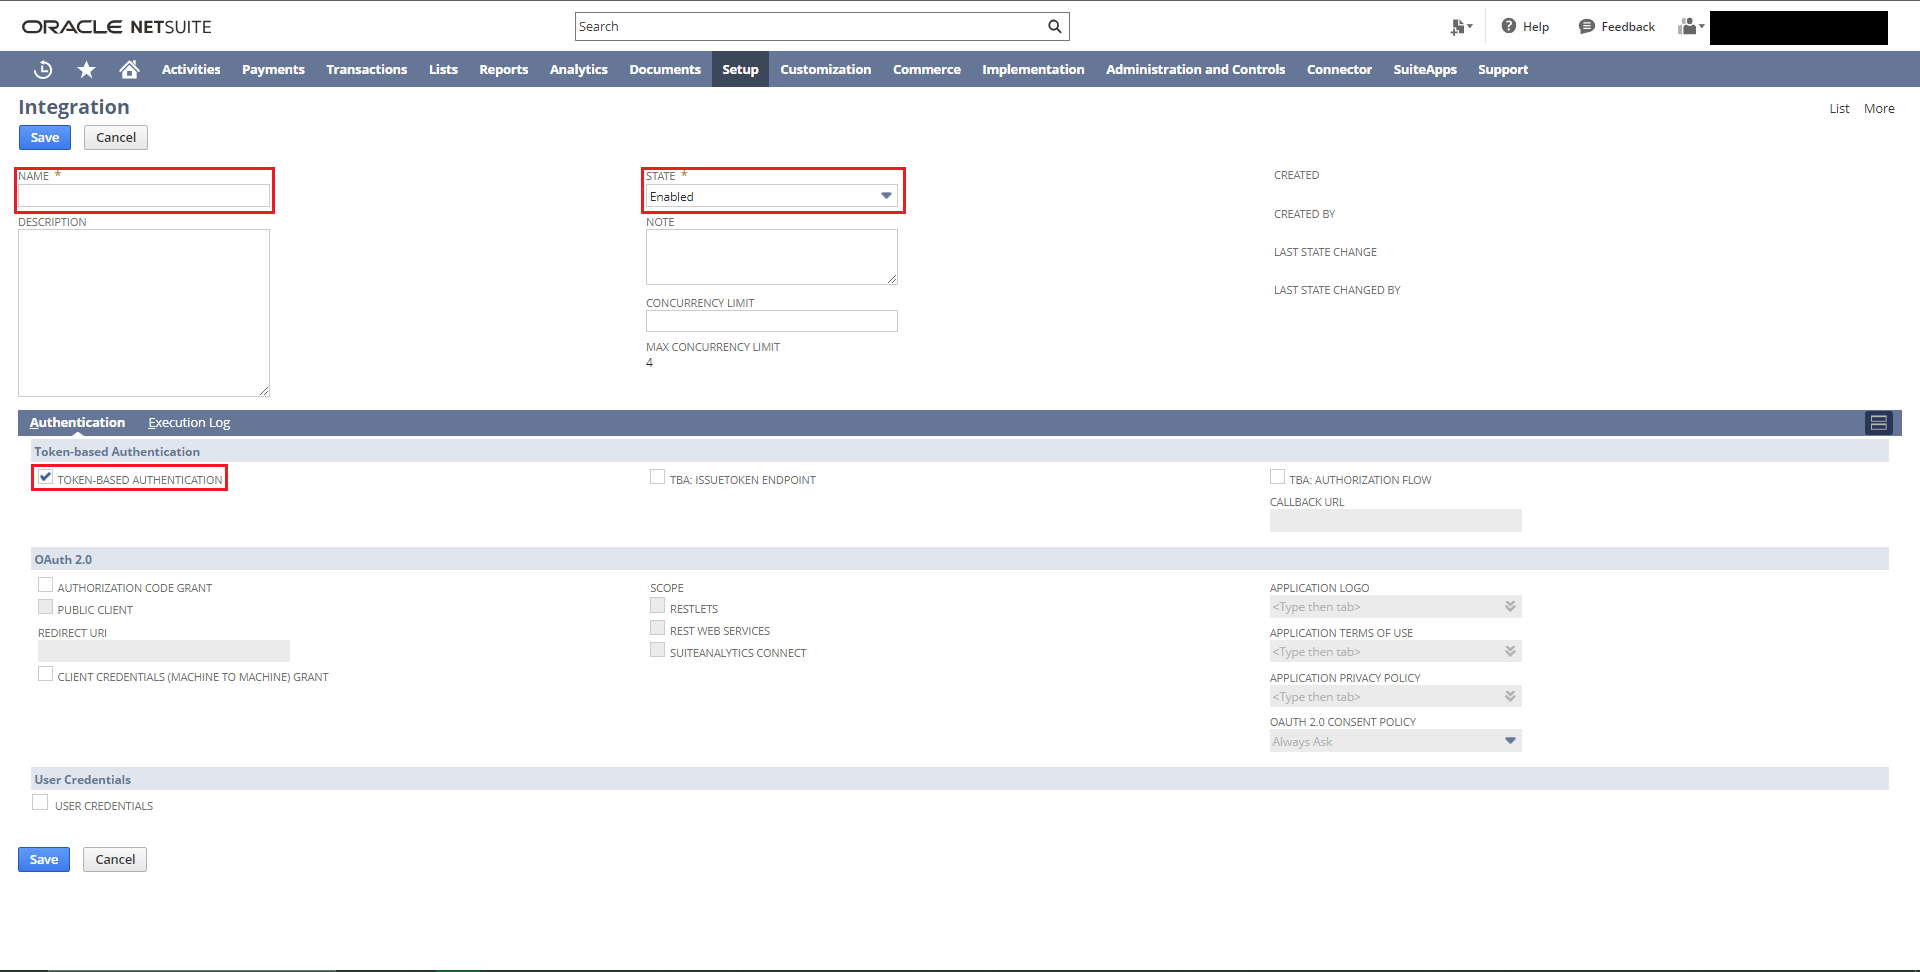
Once you've created the app, you'll get a **Consumer Key** and a **Consumer Secret.** Make sure to store these in a secure location as we'll be using these at the end of this tutorial.
## Step 2: Enable Web Services and Enable Token-Based Authentication
Next, you'll need to enable Token-based Authentication in your NetSuite account. To do so, navigate to **Setup** > **Company** > **Enable Features** > \*\*SuiteCloud \*\*> then scroll down until you see **SuiteTalk Web Services.**
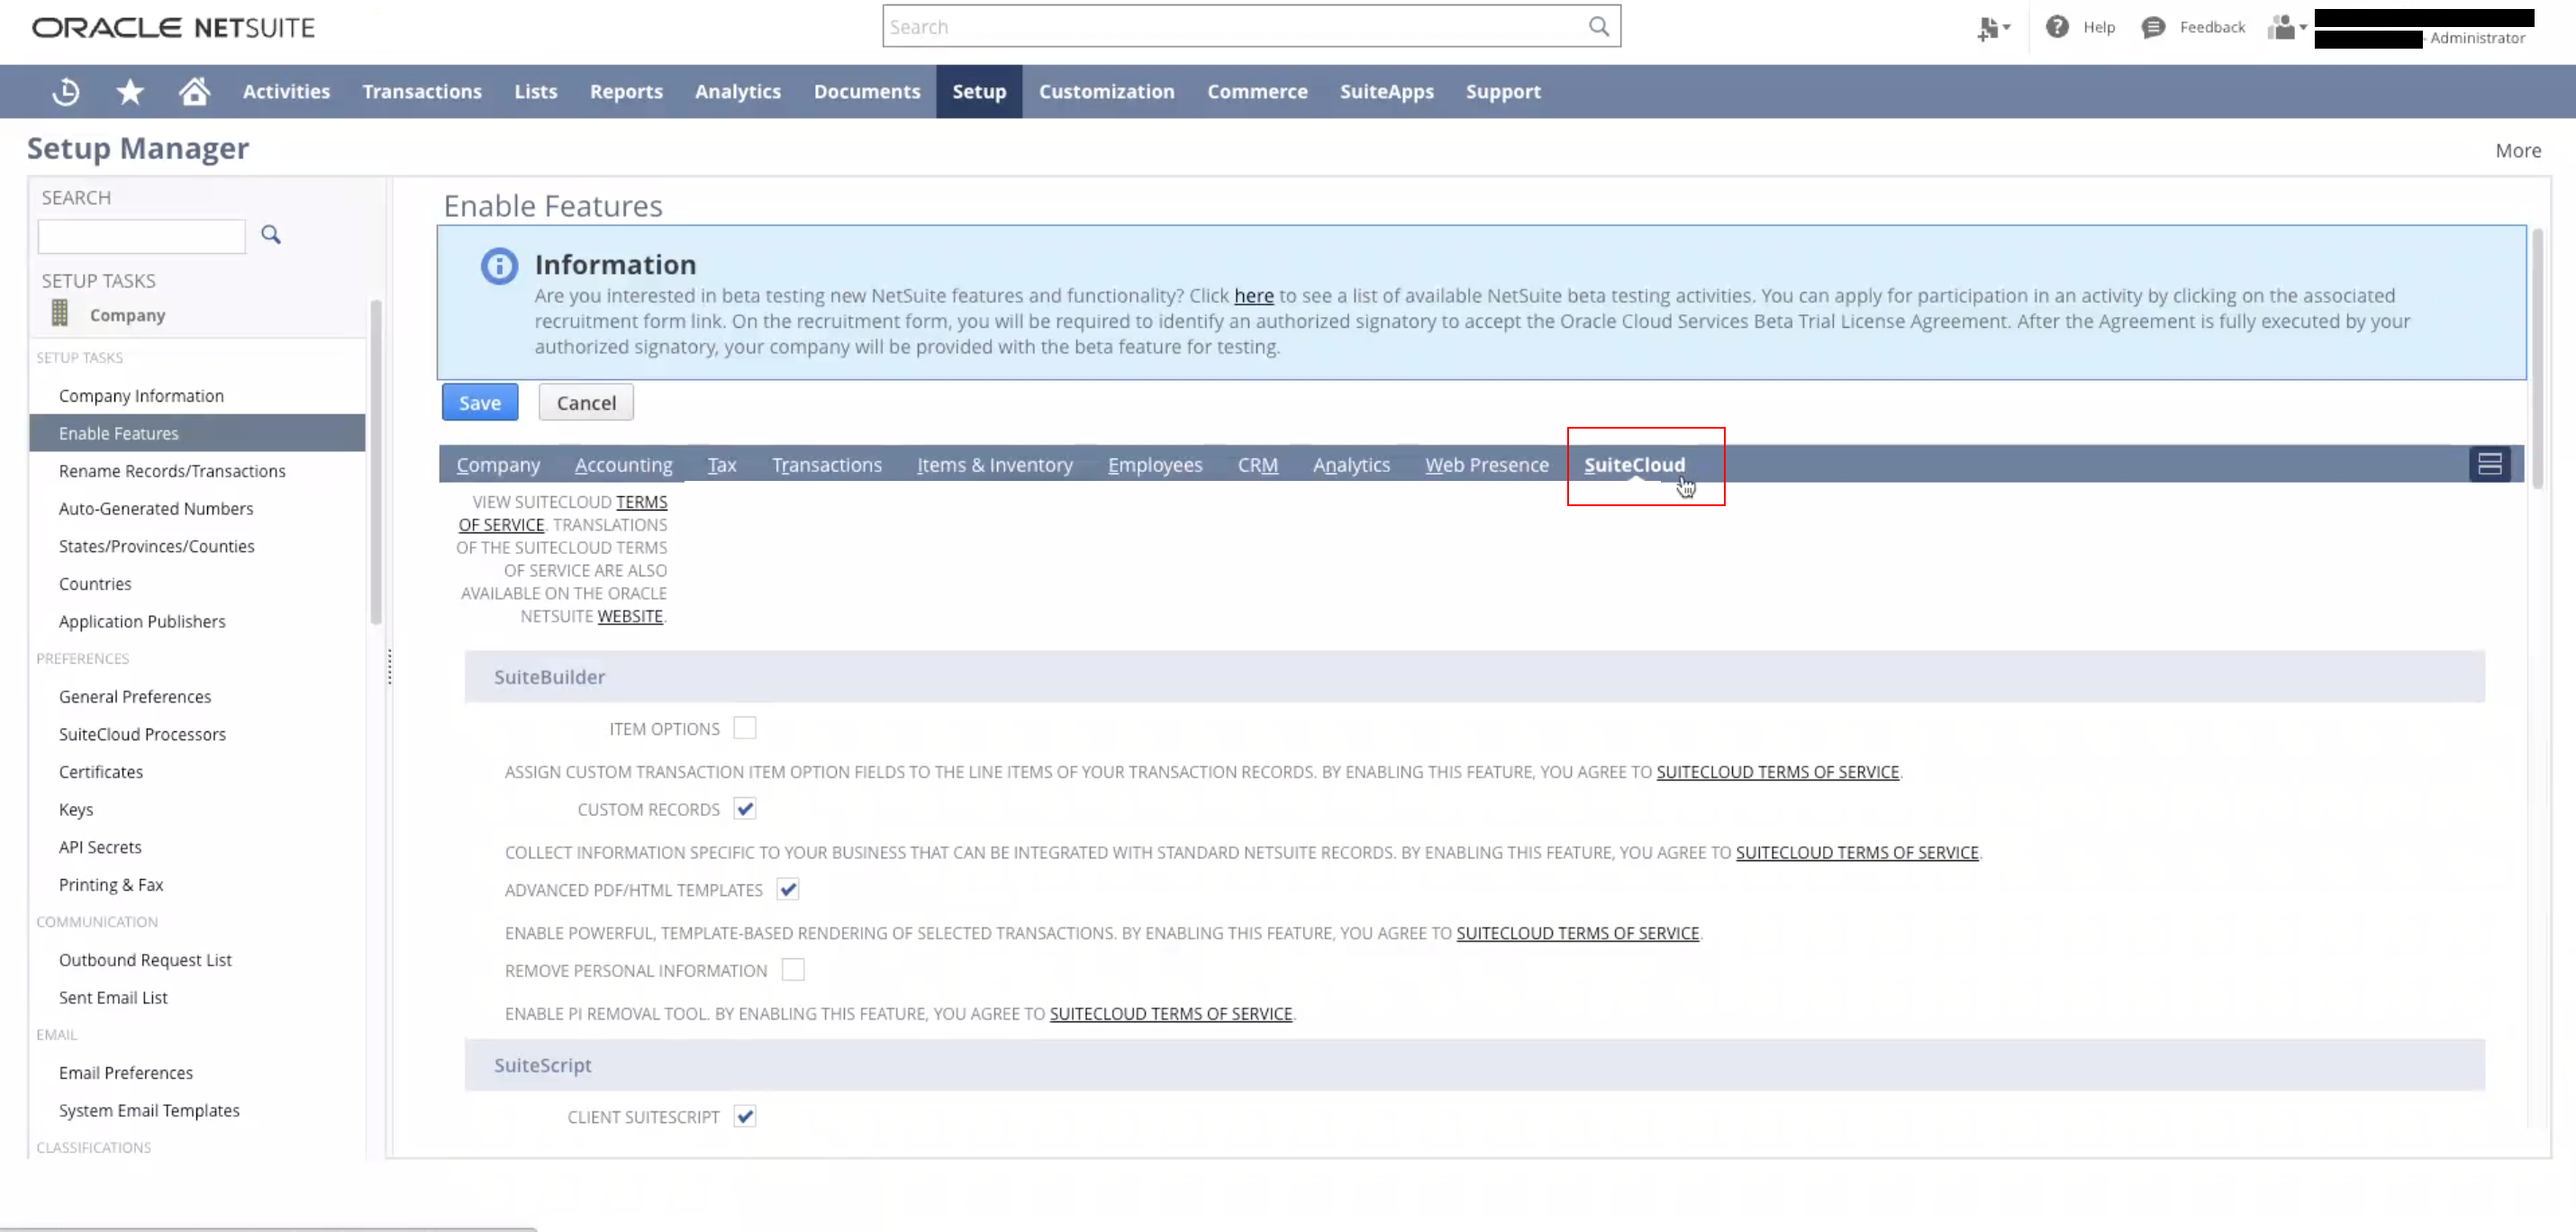
From here, make sure you select SOAP and REST web services.
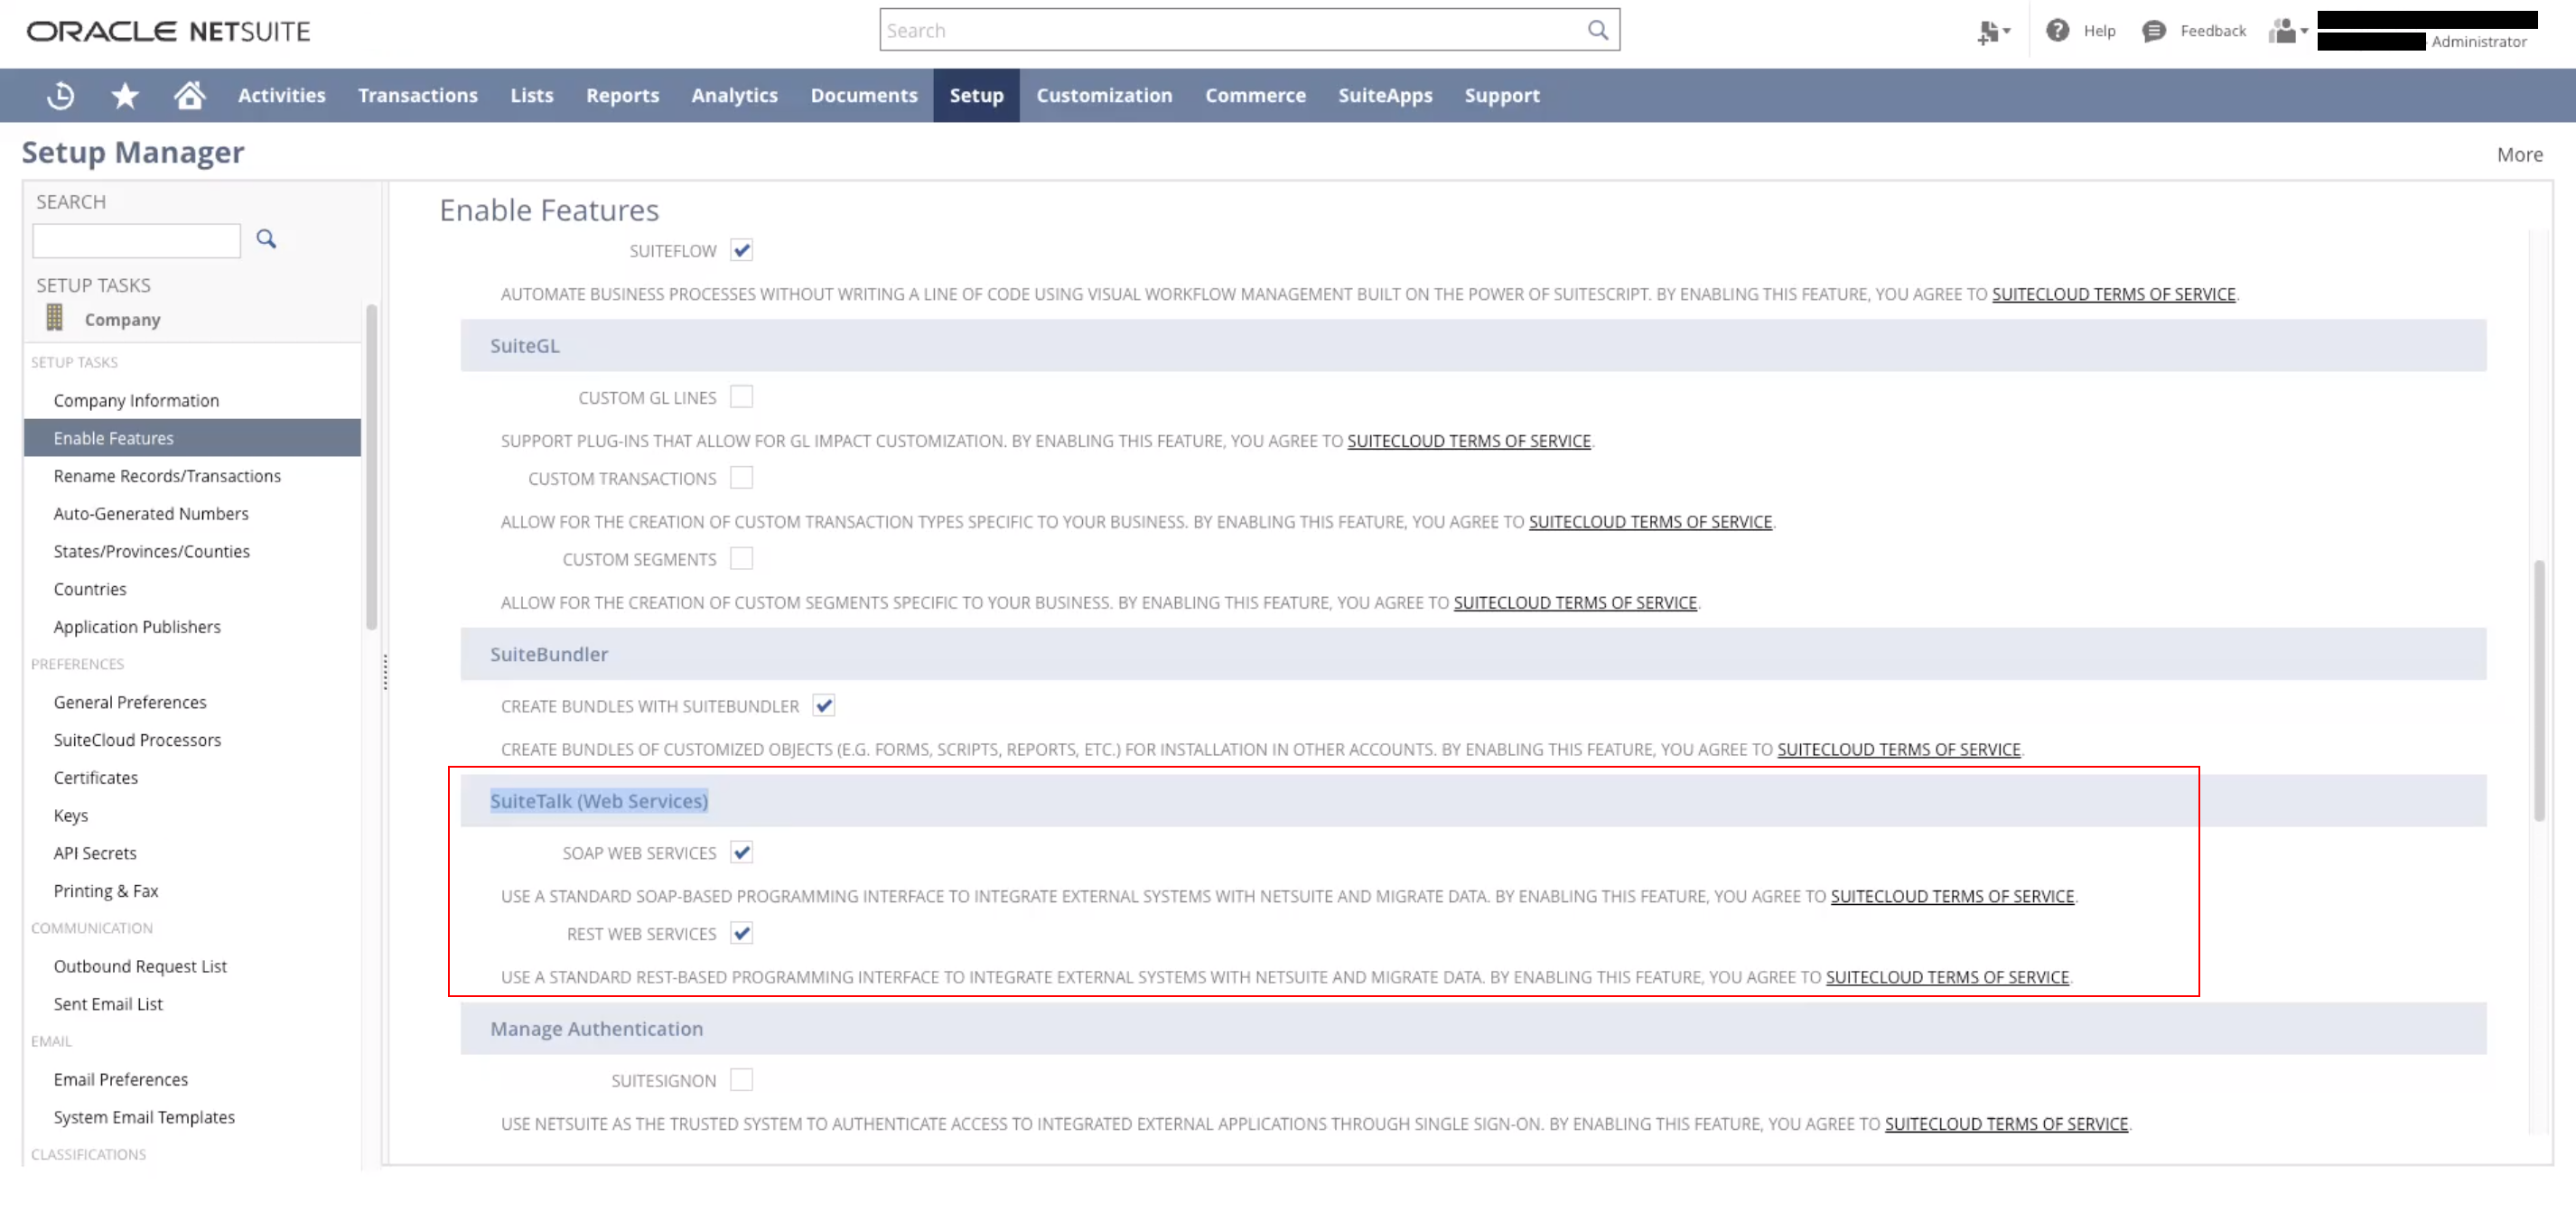
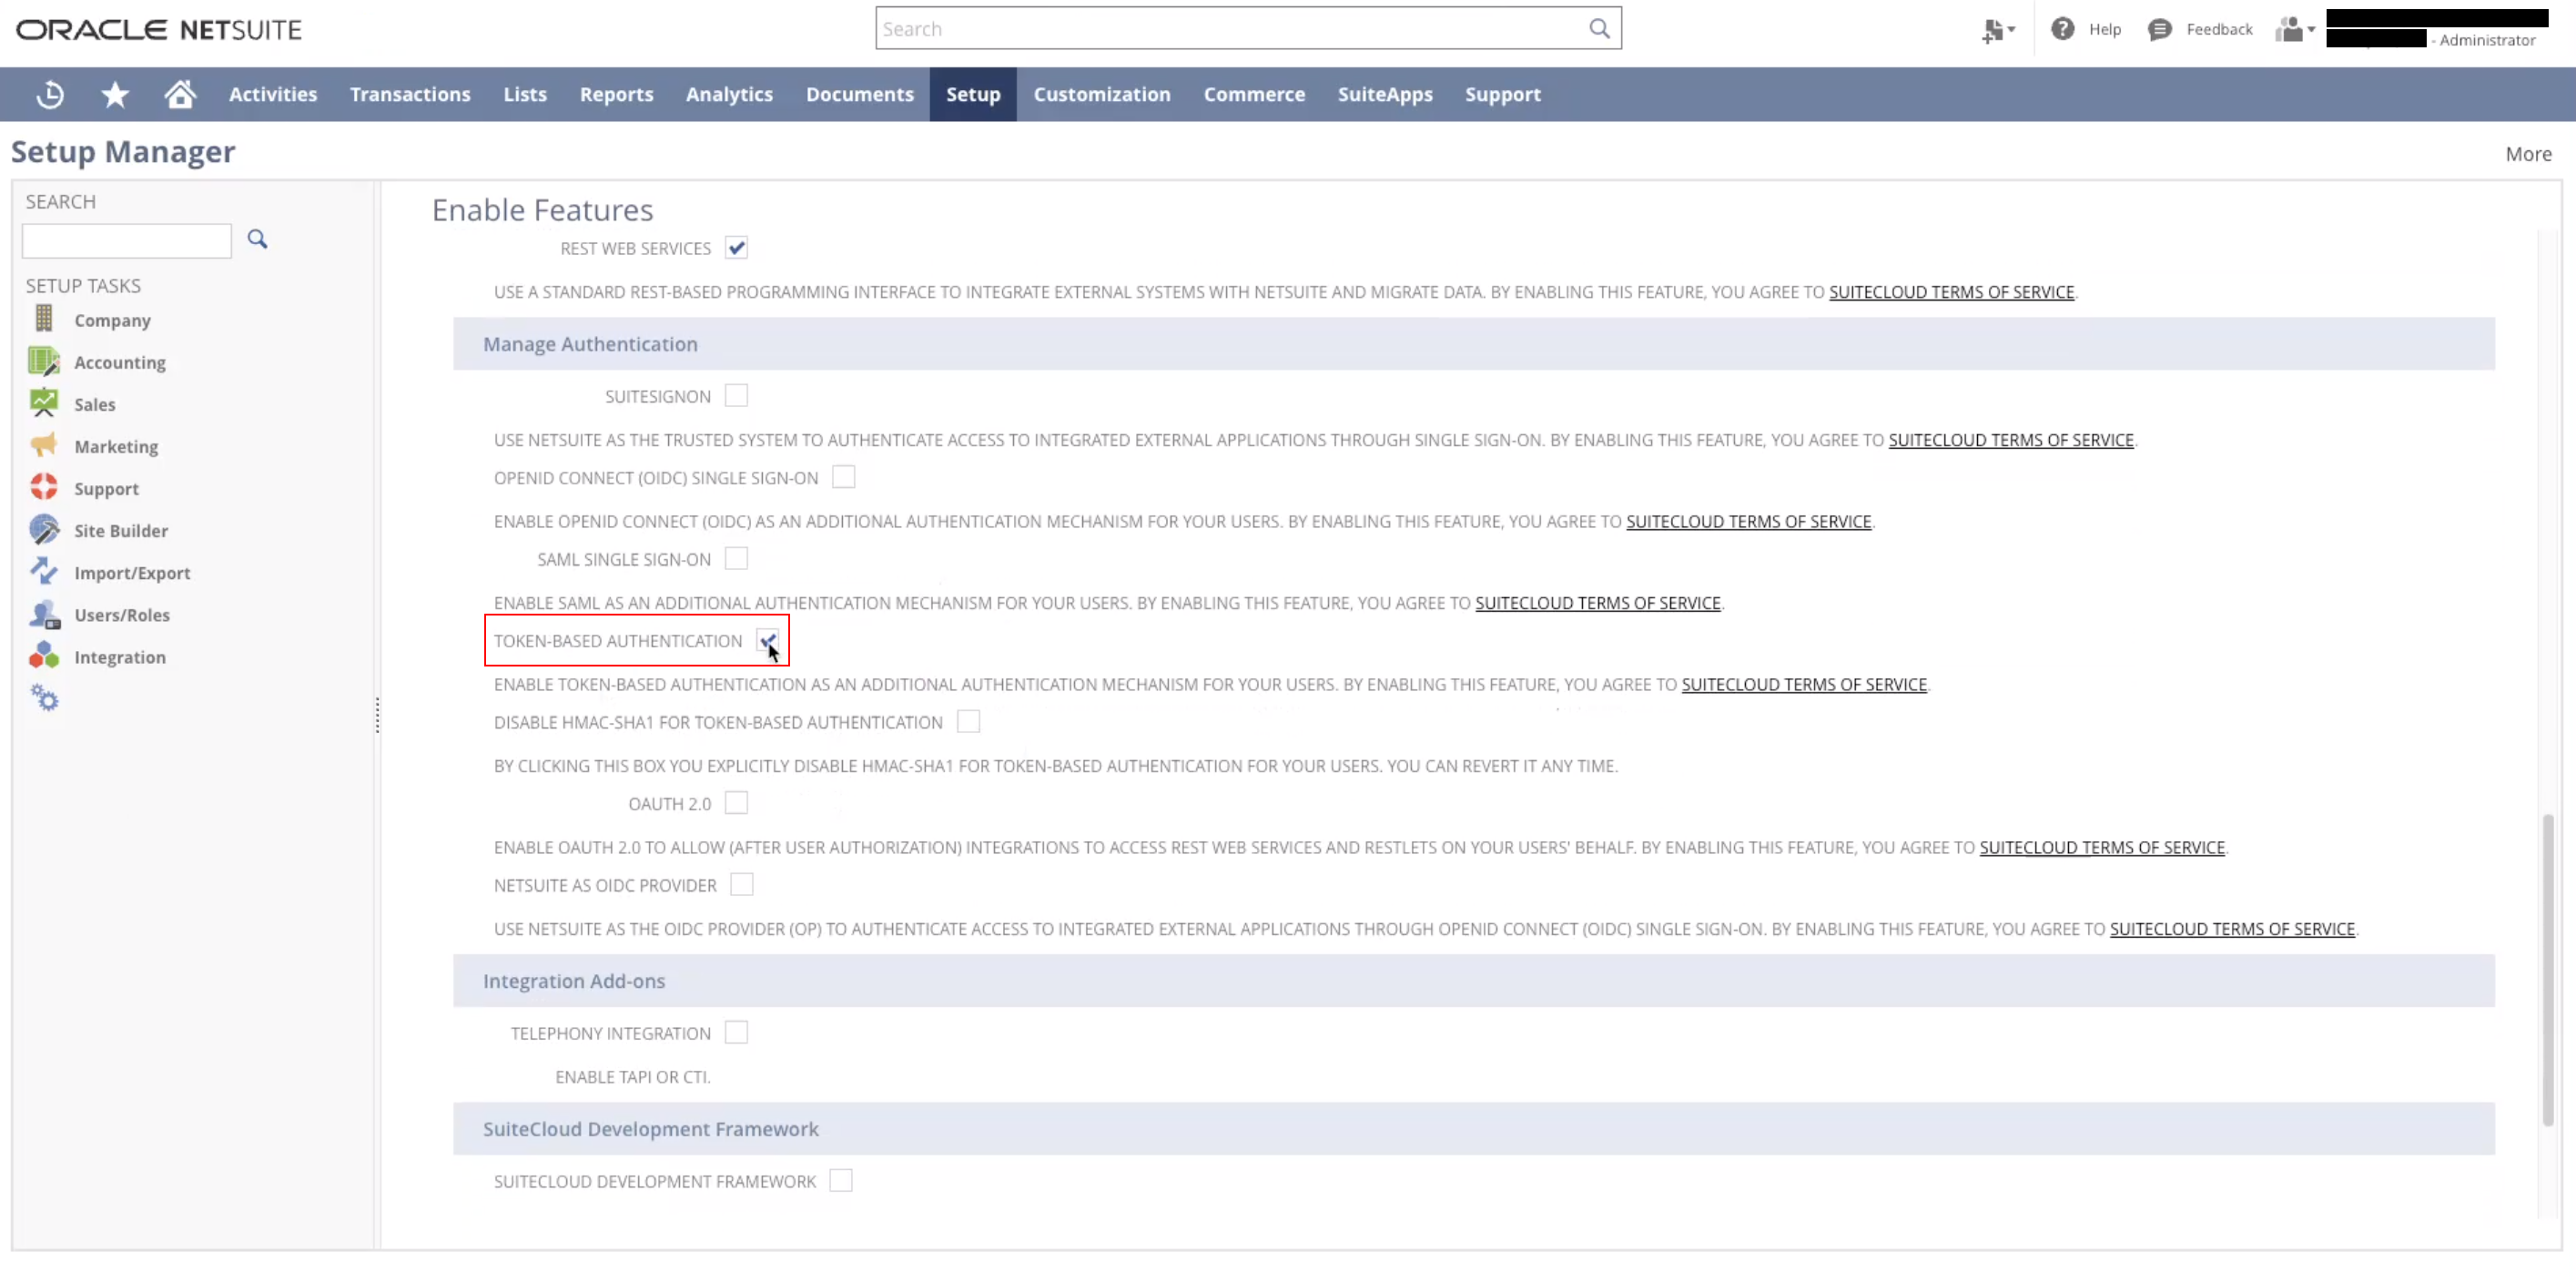
Just below this, you'll need to enable **Token-Based Authentication**.
## Step 3: Create a Token Role
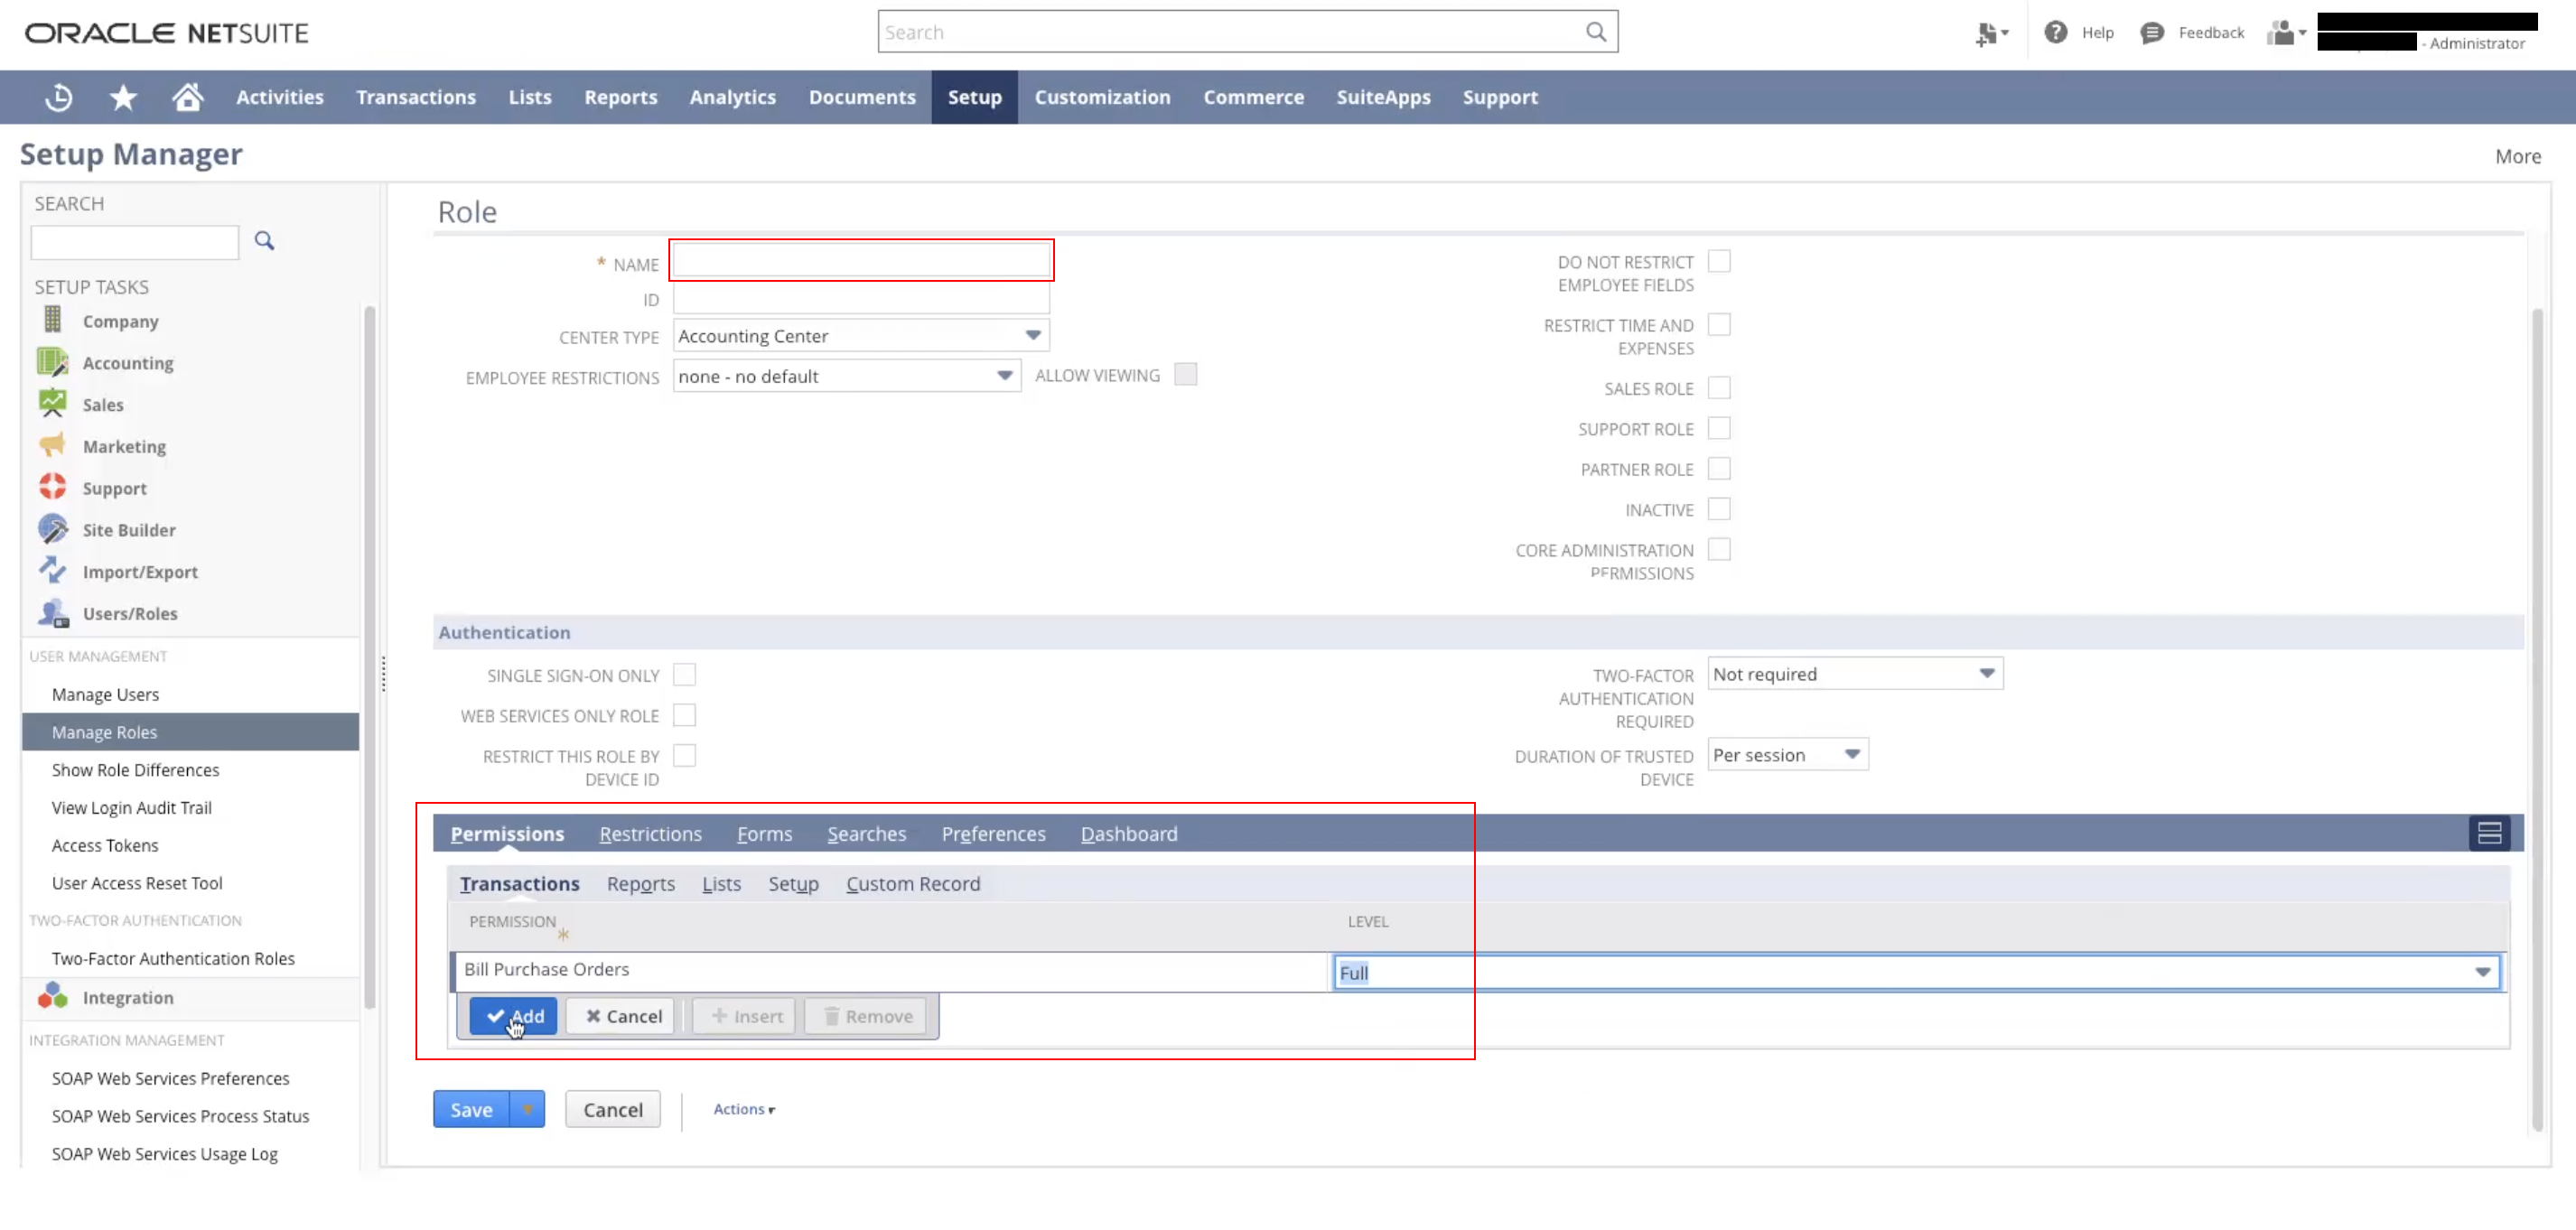
Now, you'll need to actually give your token permissions so that Alloy can use this token to automate things in your NetSuite account. Once more, navigate to **Setup** > **Users/Roles** > **Manage Roles**> **New**
From here, give your role a **name** and an **Id.**
Then, navigate to **Permissions Sublist** > **Setup** and select **Full** for the following permissions:
* Access Token Management
* Log in using Access Tokens
* Both API Web Services
* REST Web Services
* SOAP Web Services
* SuiteScript
* User Access Tokens
Then, navigate to **Permissions Sublist** > **Reports** and select **Full** for the following permission:
* Integration
* Inventory
* Sales
* Sales Order Reports
* SuiteAnalytics Workbook
Then, navigate to **Permissions Sublist** > **Lists** and add **Full** for the following permission:
* Items
* Perform Search
Then, navigate to **Permissions Sublist** > **Transactions** and add **Full** for **all permissions.**
## Step 4: Create Access Tokens
Lastly, navigate to **Setup** > **Users/Roles** > **Access Tokens**
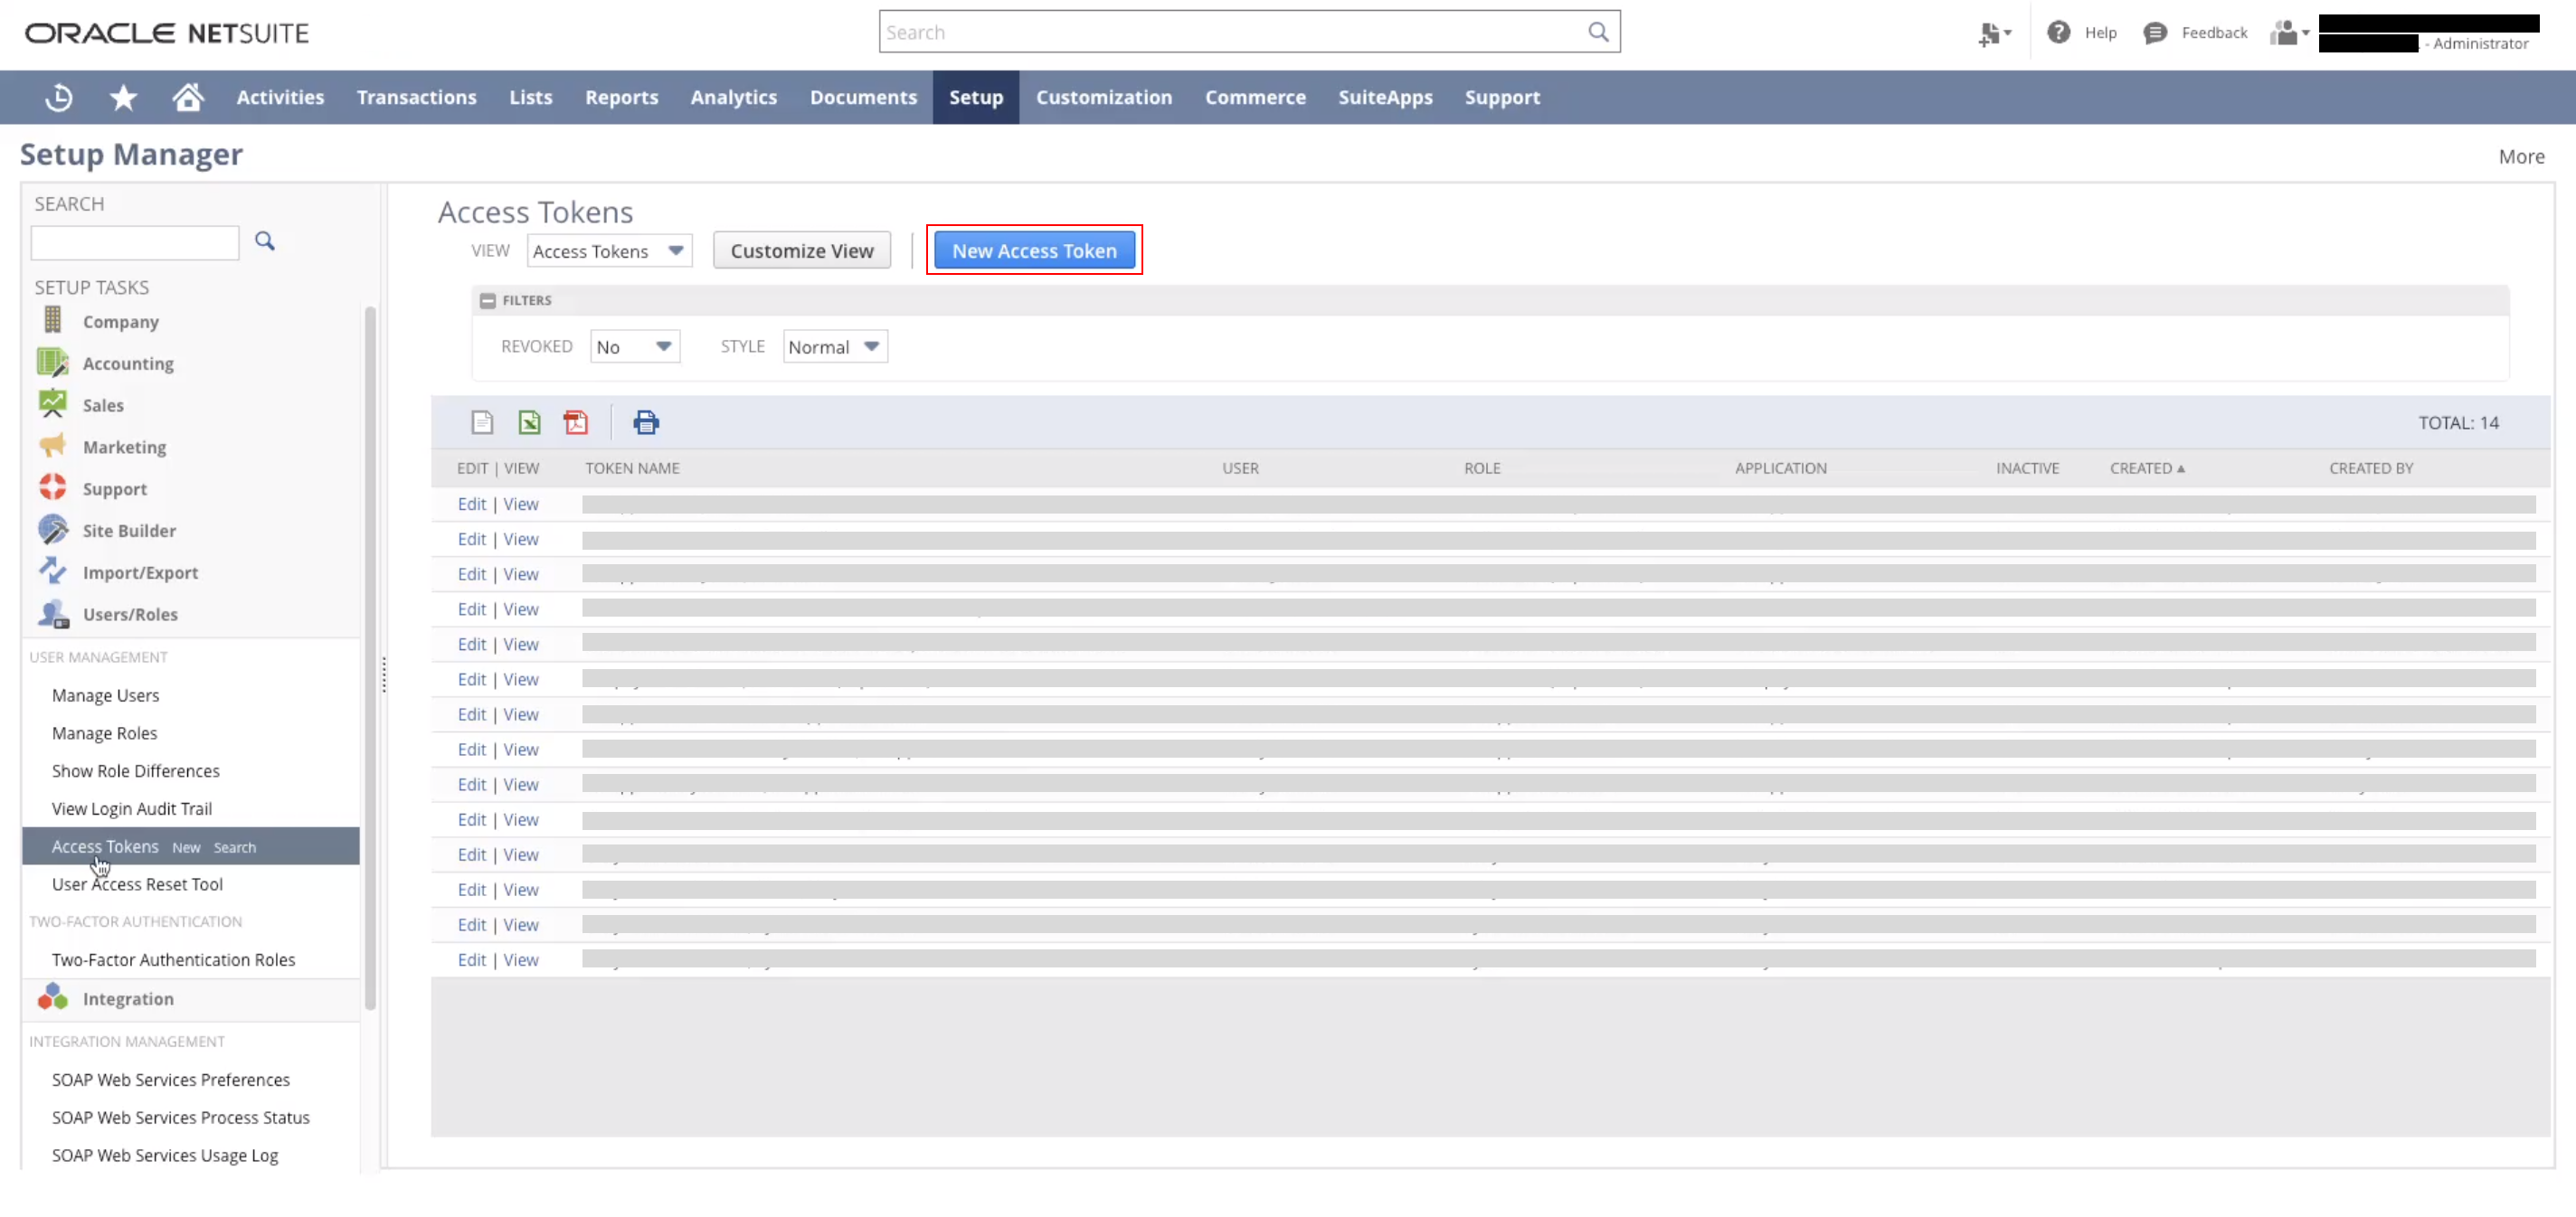
Click the **New Access Token** button as seen above.
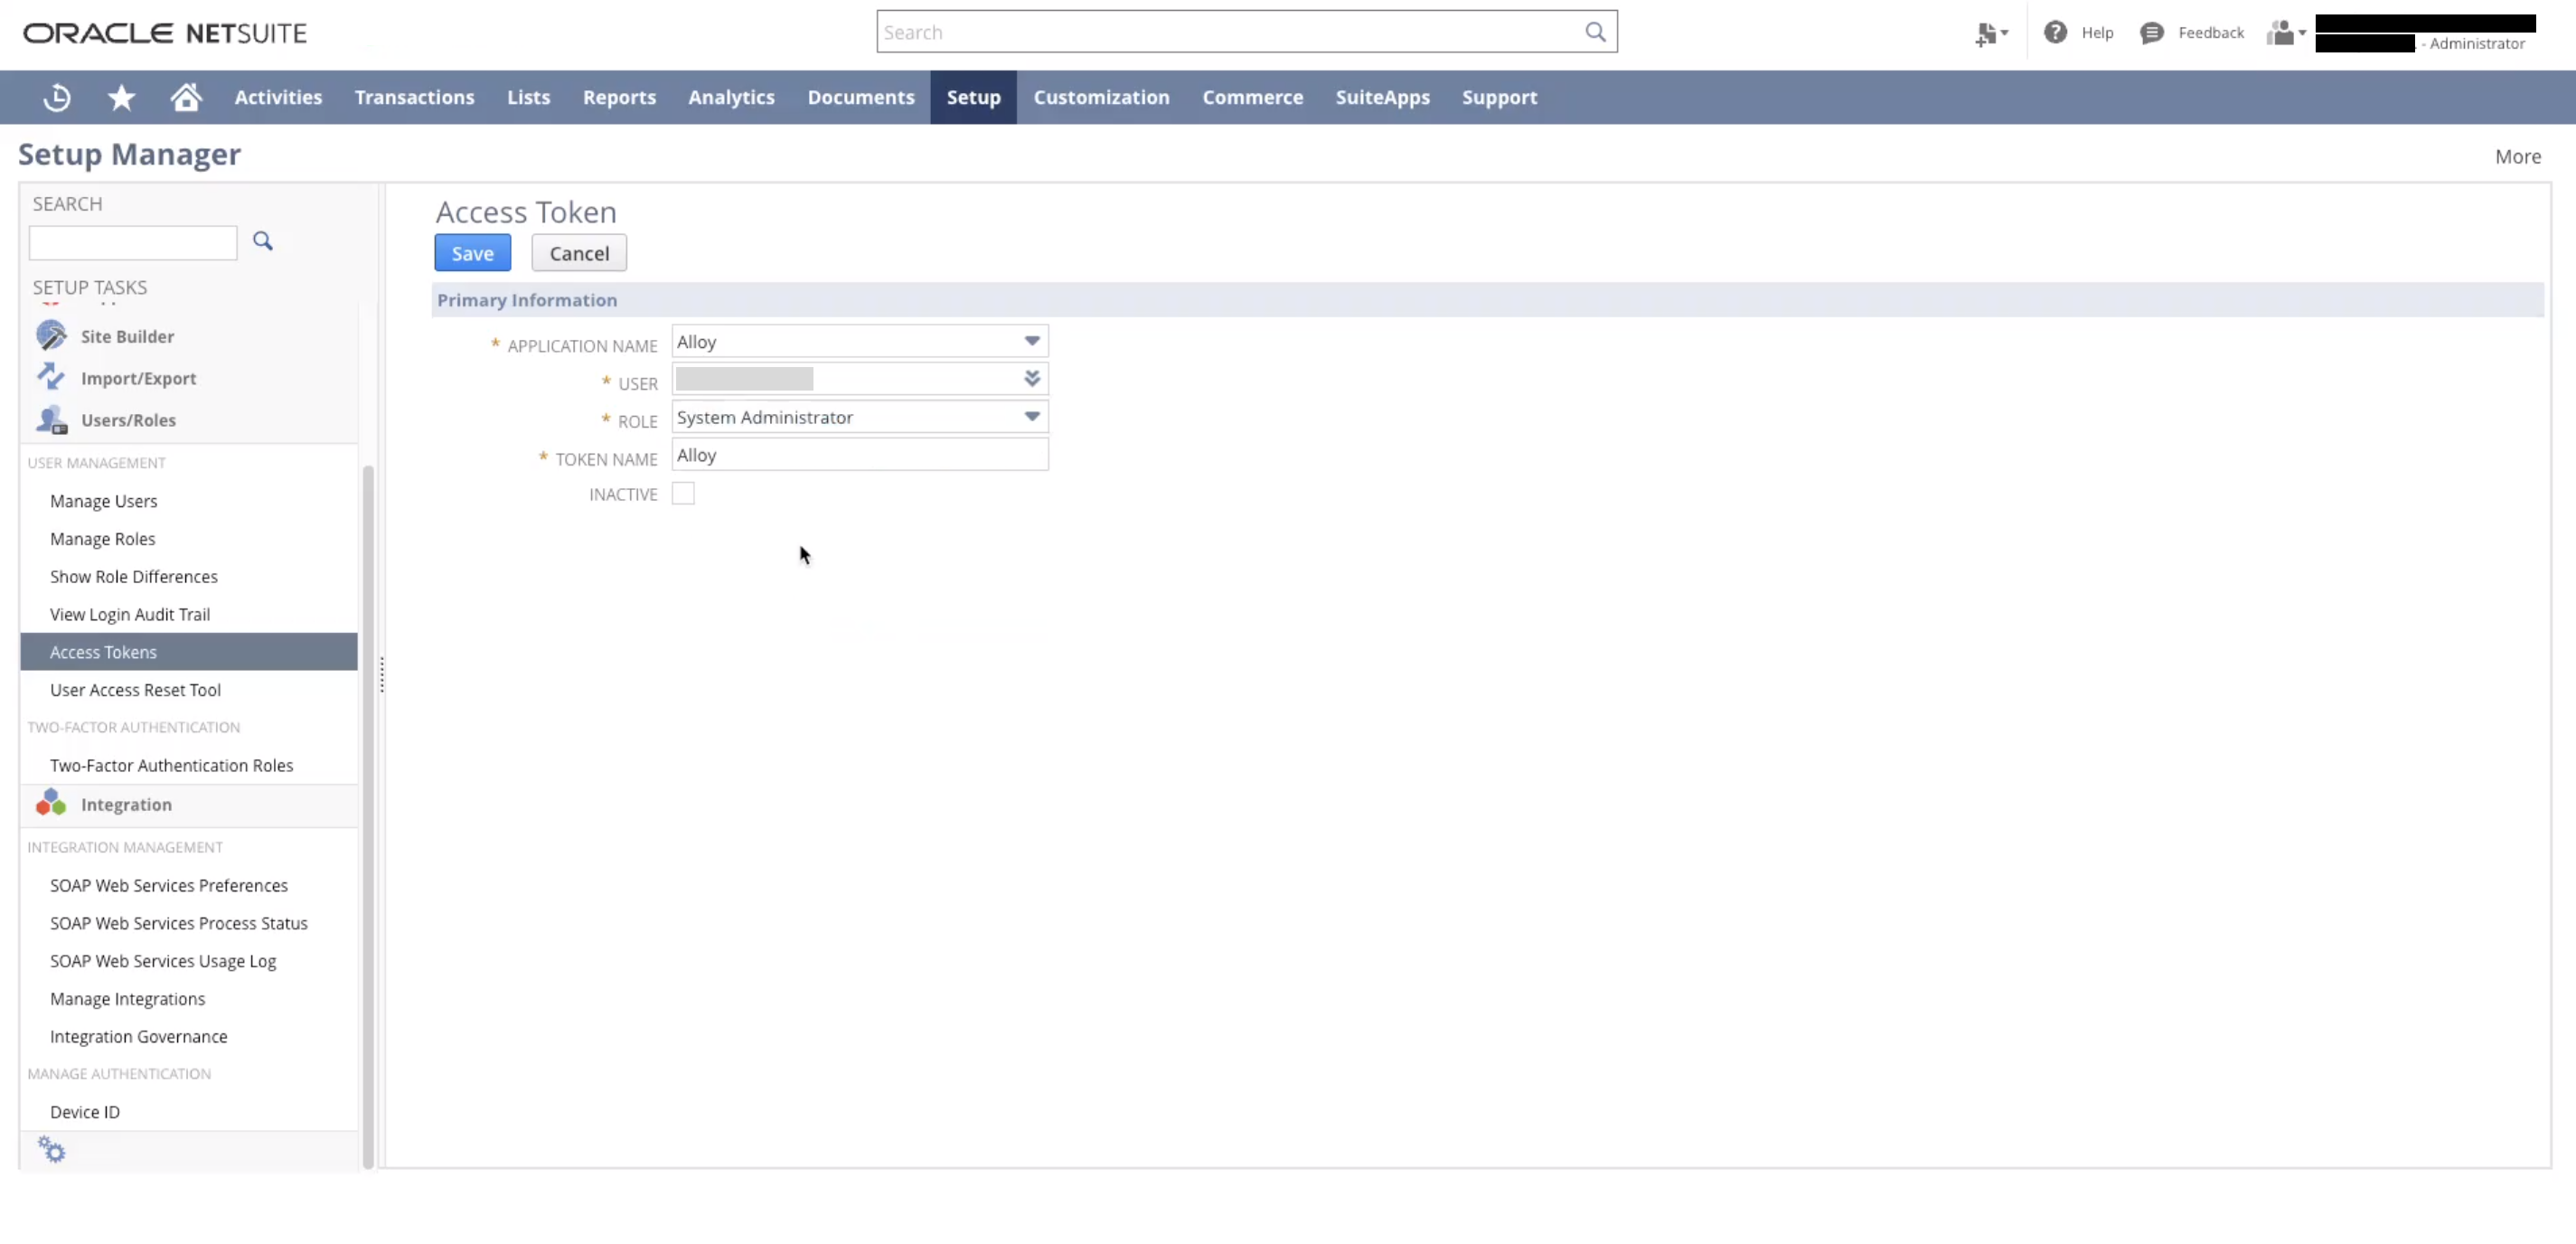
Fill out the following fields
* **Application Name:** Select the integration created Step #1
* **User**: Select the employee you wish to grant access for
* **Role:** Select the specific role if you created one in Step #3
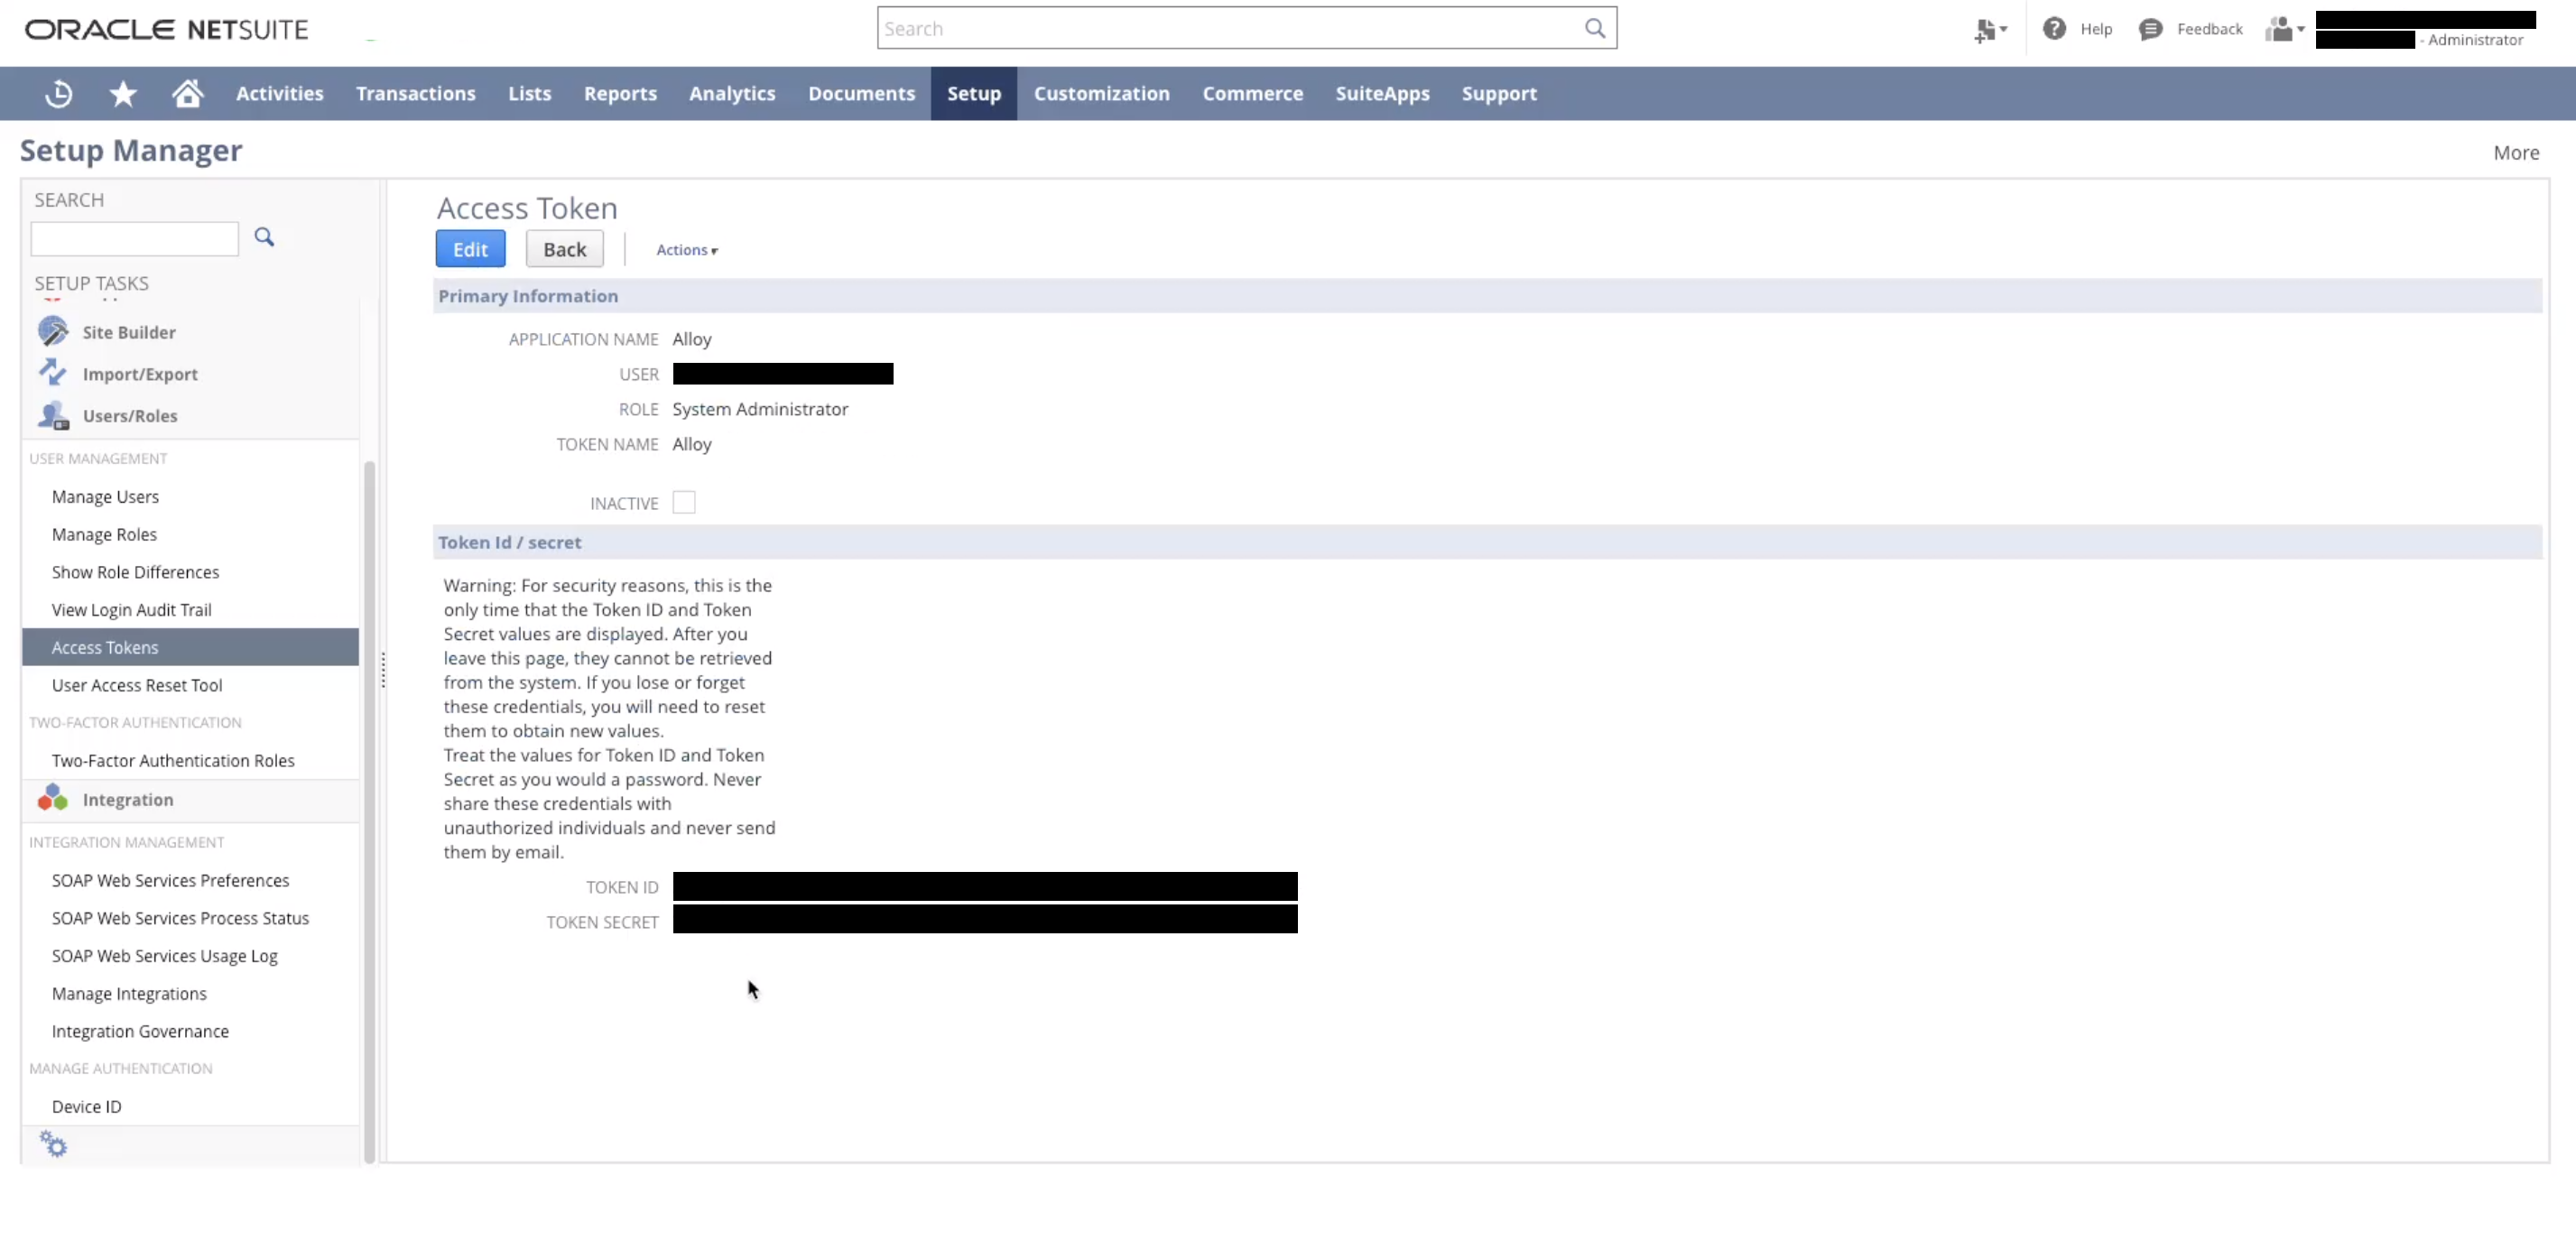
You'll be presented with a Token Id and Secret.
## Wrapping Up
That's a wrap! You'll need these keys and the consumer secret and key from before. Use the keys you obtained from this tutorial when configuring NetSuite with Alloy.
To get the `realm` you can locate the 6 digit number in the URL (it should prefix `app.netsuite.com`).
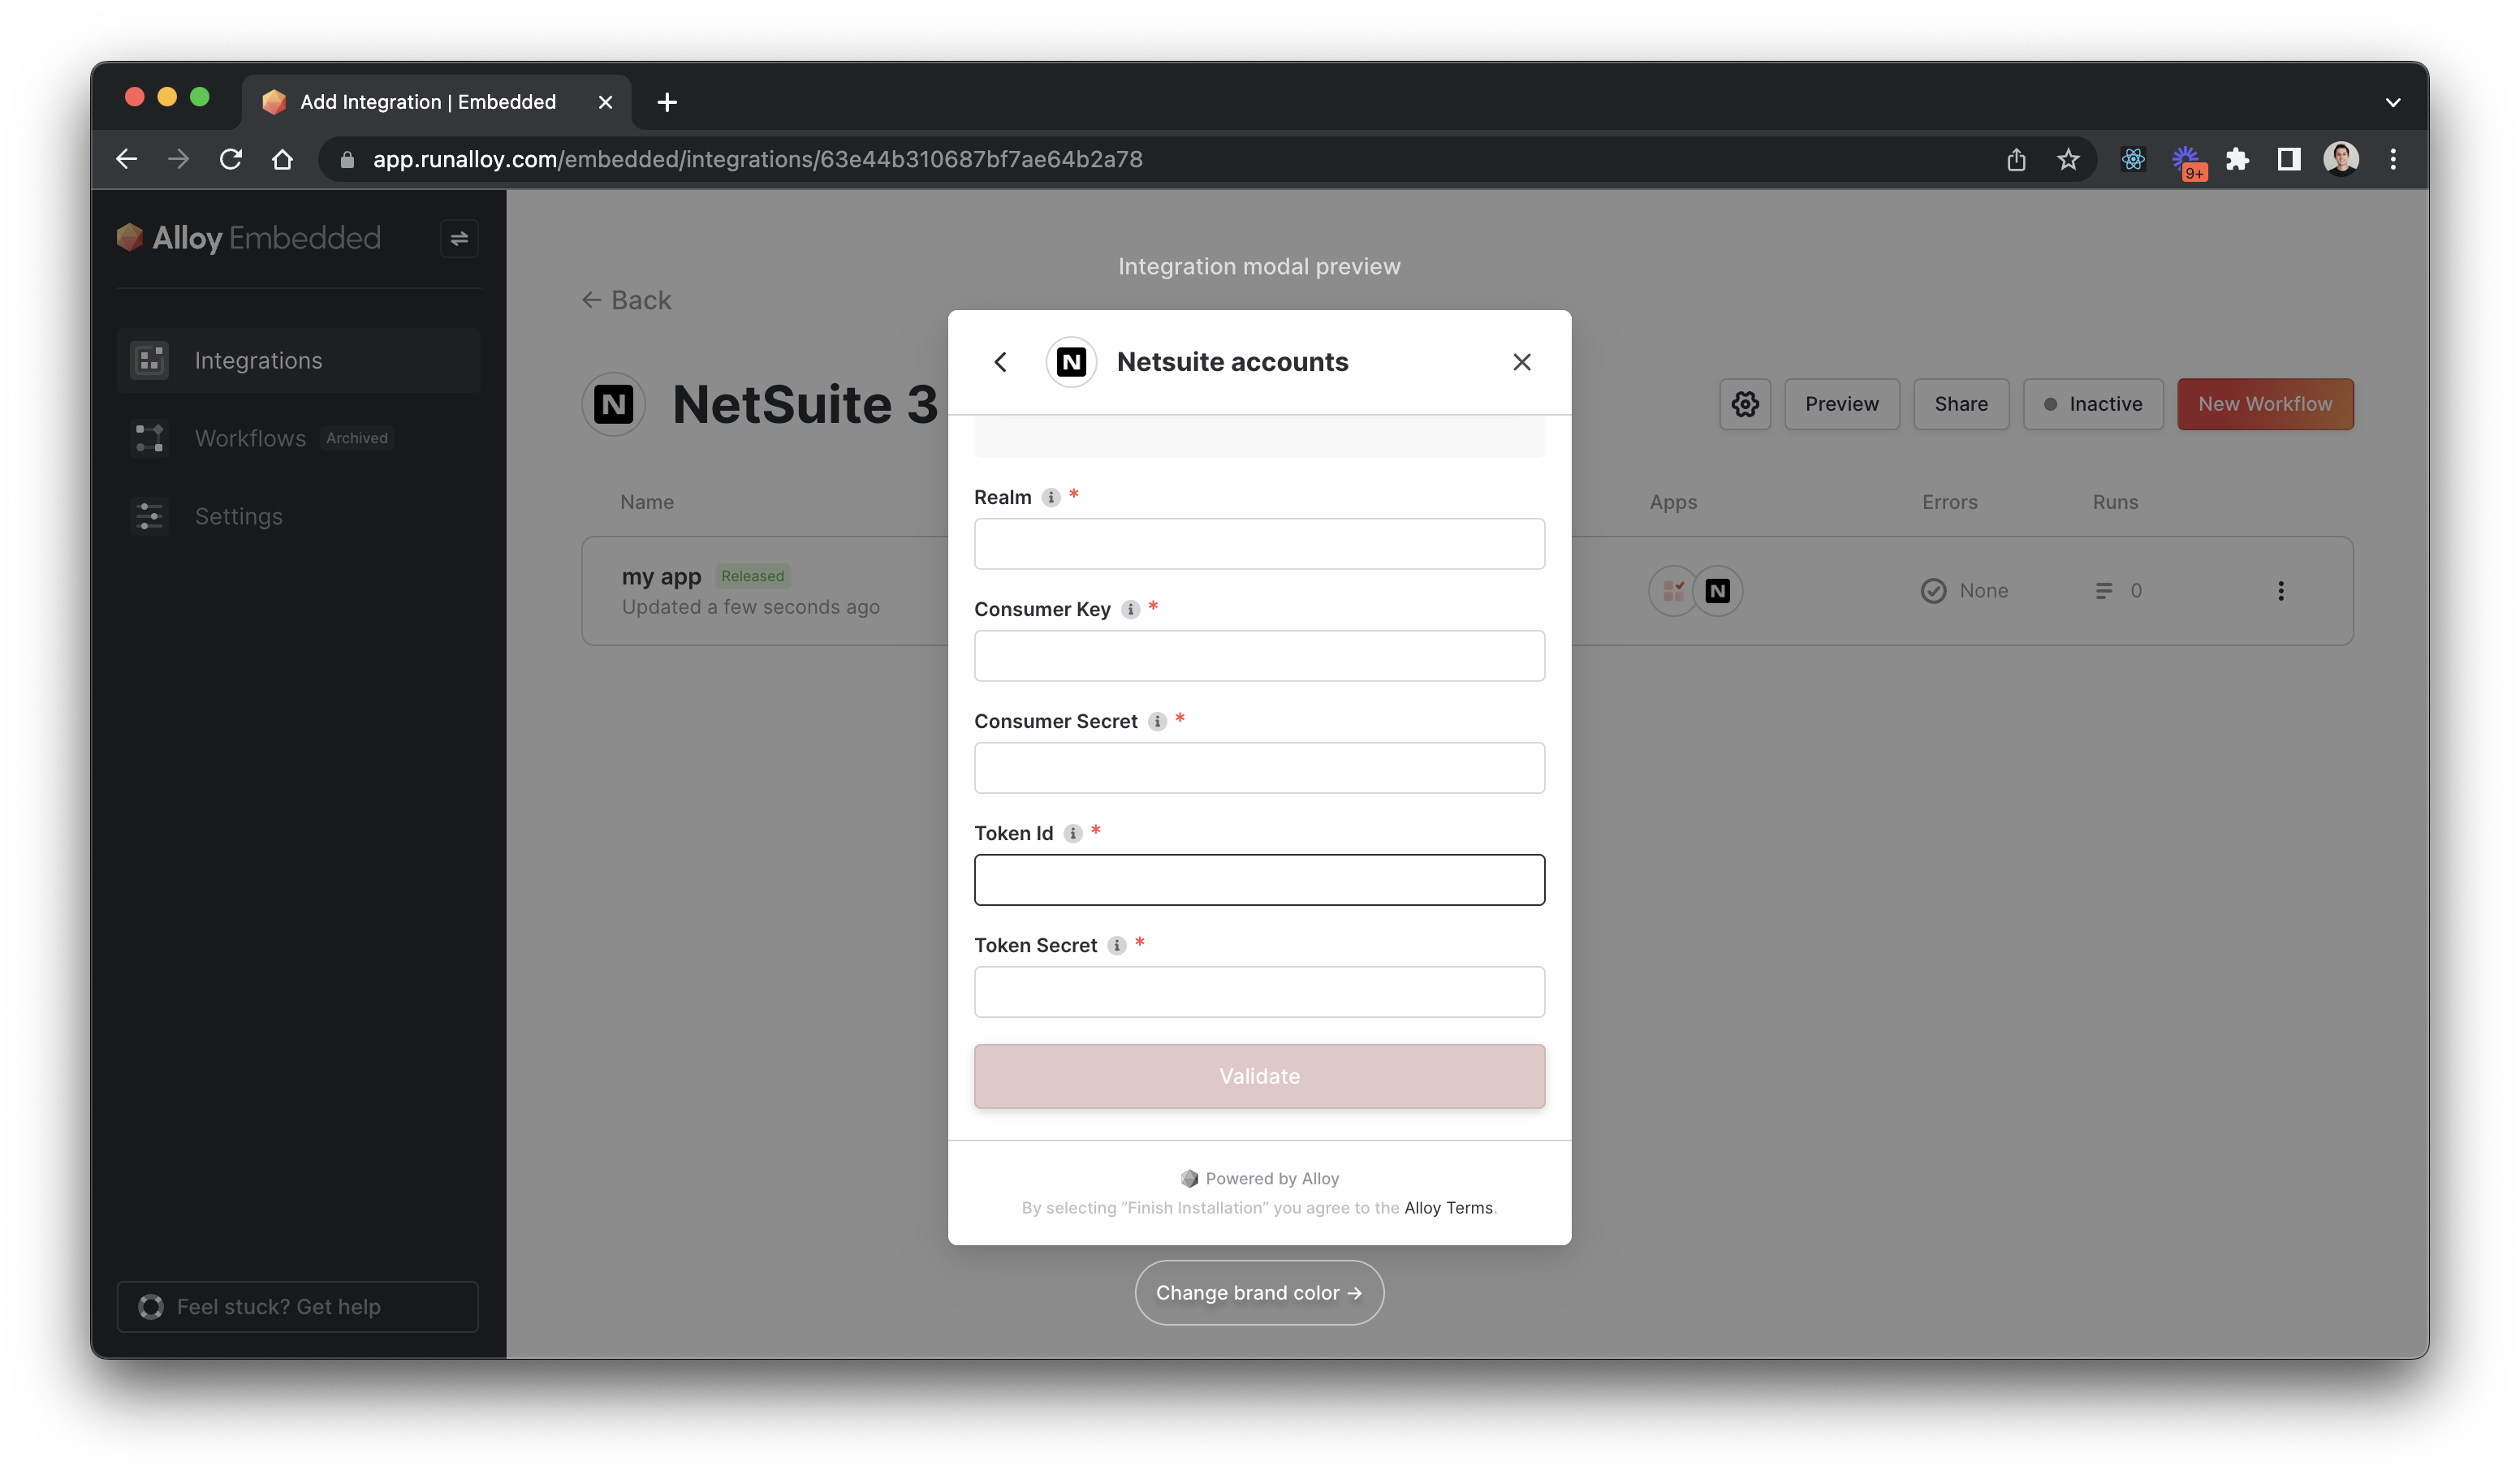
Once you're ready, input the values in Alloy as seen below.