> ## Documentation Index
> Fetch the complete documentation index at: https://docs.runalloy.com/llms.txt
> Use this file to discover all available pages before exploring further.
# Custom Action
> The Custom Action connector allows developers to define and execute arbitrary API requests using an existing application's authenticated credentials.
This feature only applies to Embedded iPaaS
## Overview
The Custom Action connector provides low-level access to any REST or GraphQL endpoint for a connected application. It is used when Embedded iPaaS does not yet expose a specific endpoint through a pre-built connector.
Custom Action inherits the authentication context of the parent app connector, allowing requests to be made with the same credentials and authorization scopes already configured for that connection.
***
## How It Works
When a workflow runs, Embedded iPaaS executes the Custom Action call using the stored app credentials. The connector automatically appends the correct base URL, handles authentication headers, and surfaces the raw API response as output to downstream connectors.
This enables direct interaction with any valid API method, without needing to wait for new connector versions.
Example:\
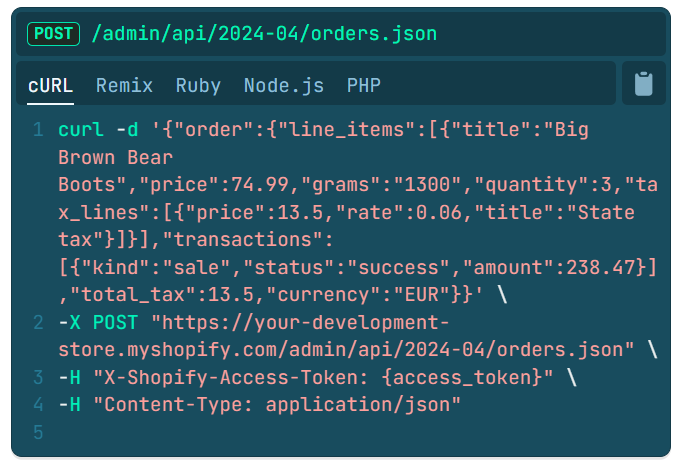
Shopify releases a new **`POST /orders`** endpoint that isn’t yet mapped in the Shopify connector. You can use Custom Action to call this endpoint directly and return the JSON response into your workflow.
***
## Setup
**1. Add a Trigger**
Insert any trigger connector (for example, *Shopify Trigger* or *HTTP Request*).
**2. Add the Target App**
Add the app connector whose credentials you want to reuse—e.g. *Shopify* under **Destinations**.
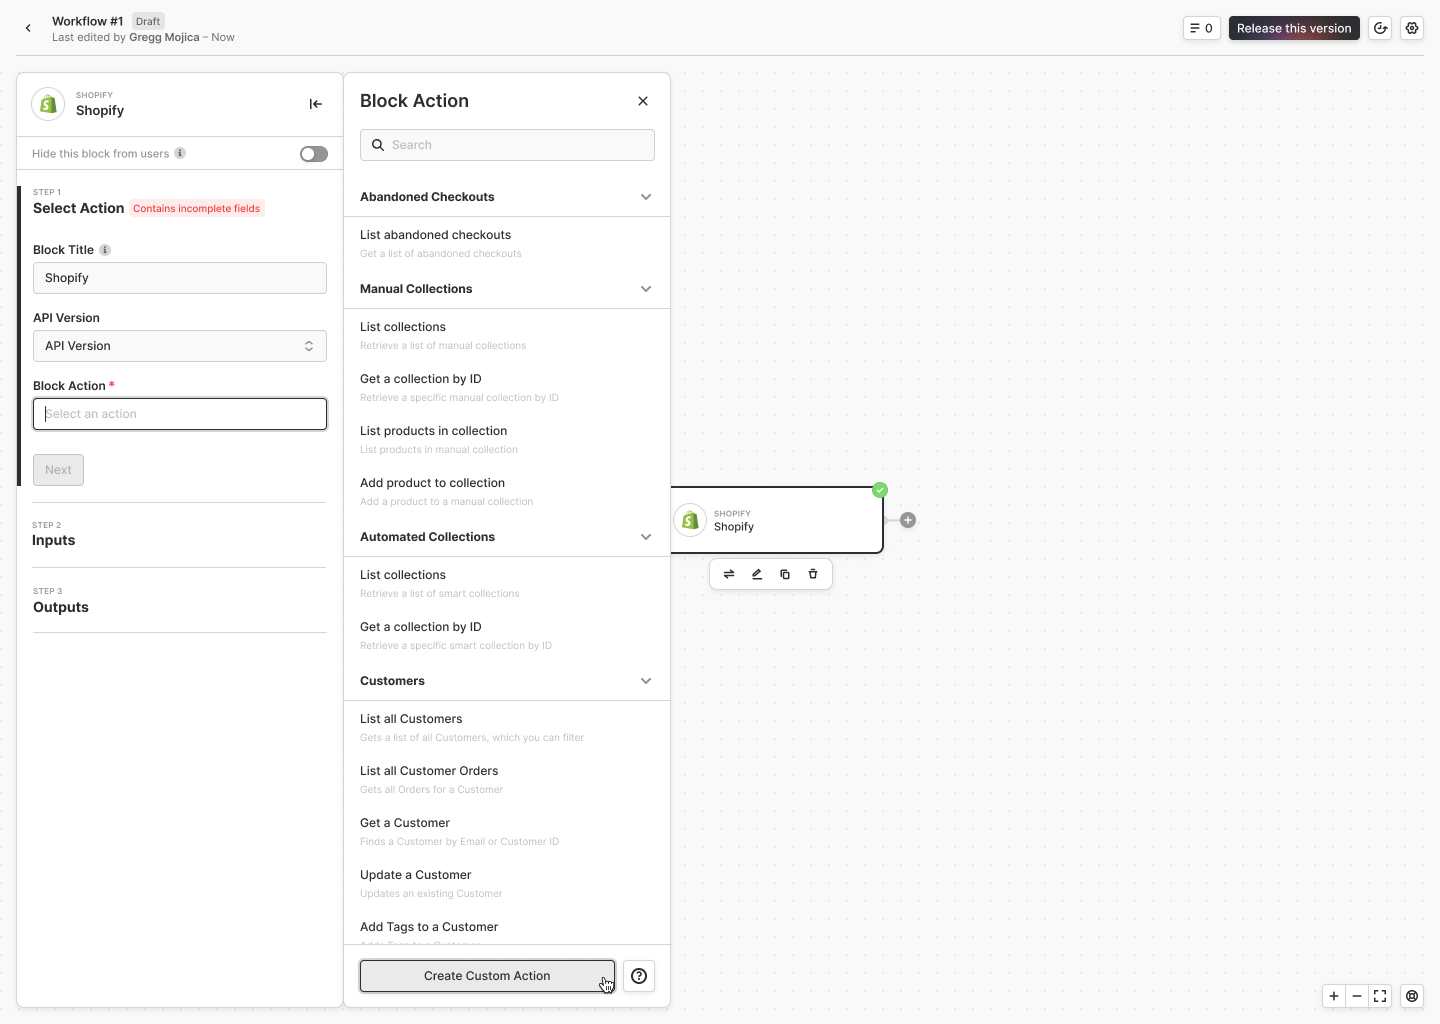
**3. Create a Custom Action**
Under **Action**, select **Create Custom Action**.
**4. Select Credentials**
Choose an existing credential from the **Authentication** tab.\
This credential determines the OAuth or API key used to sign requests.
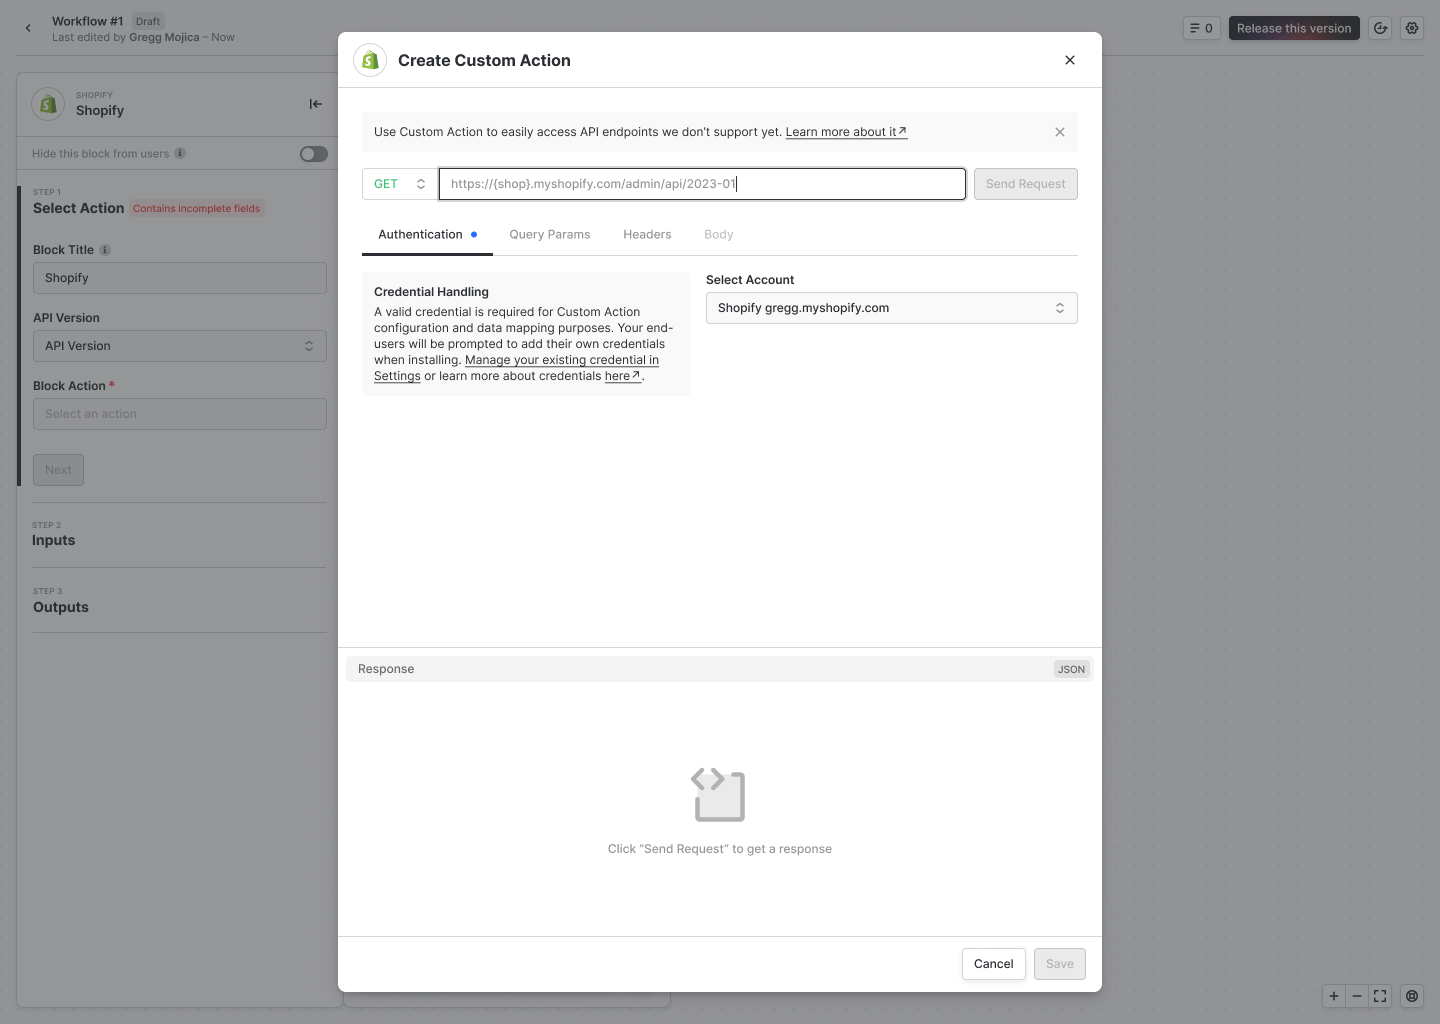
**5. Configure the Request**
Specify the HTTP **Method** (`GET`, `POST`, `PUT`, etc.) and the **Request Path** relative to the app’s API root.
Example: for `POST https://api.shopify.com/admin/api/2023-10/orders.json`,\
enter only `/orders.json`. Embedded iPaaS prepends the base URL automatically.
**6. Add Parameters and Body**
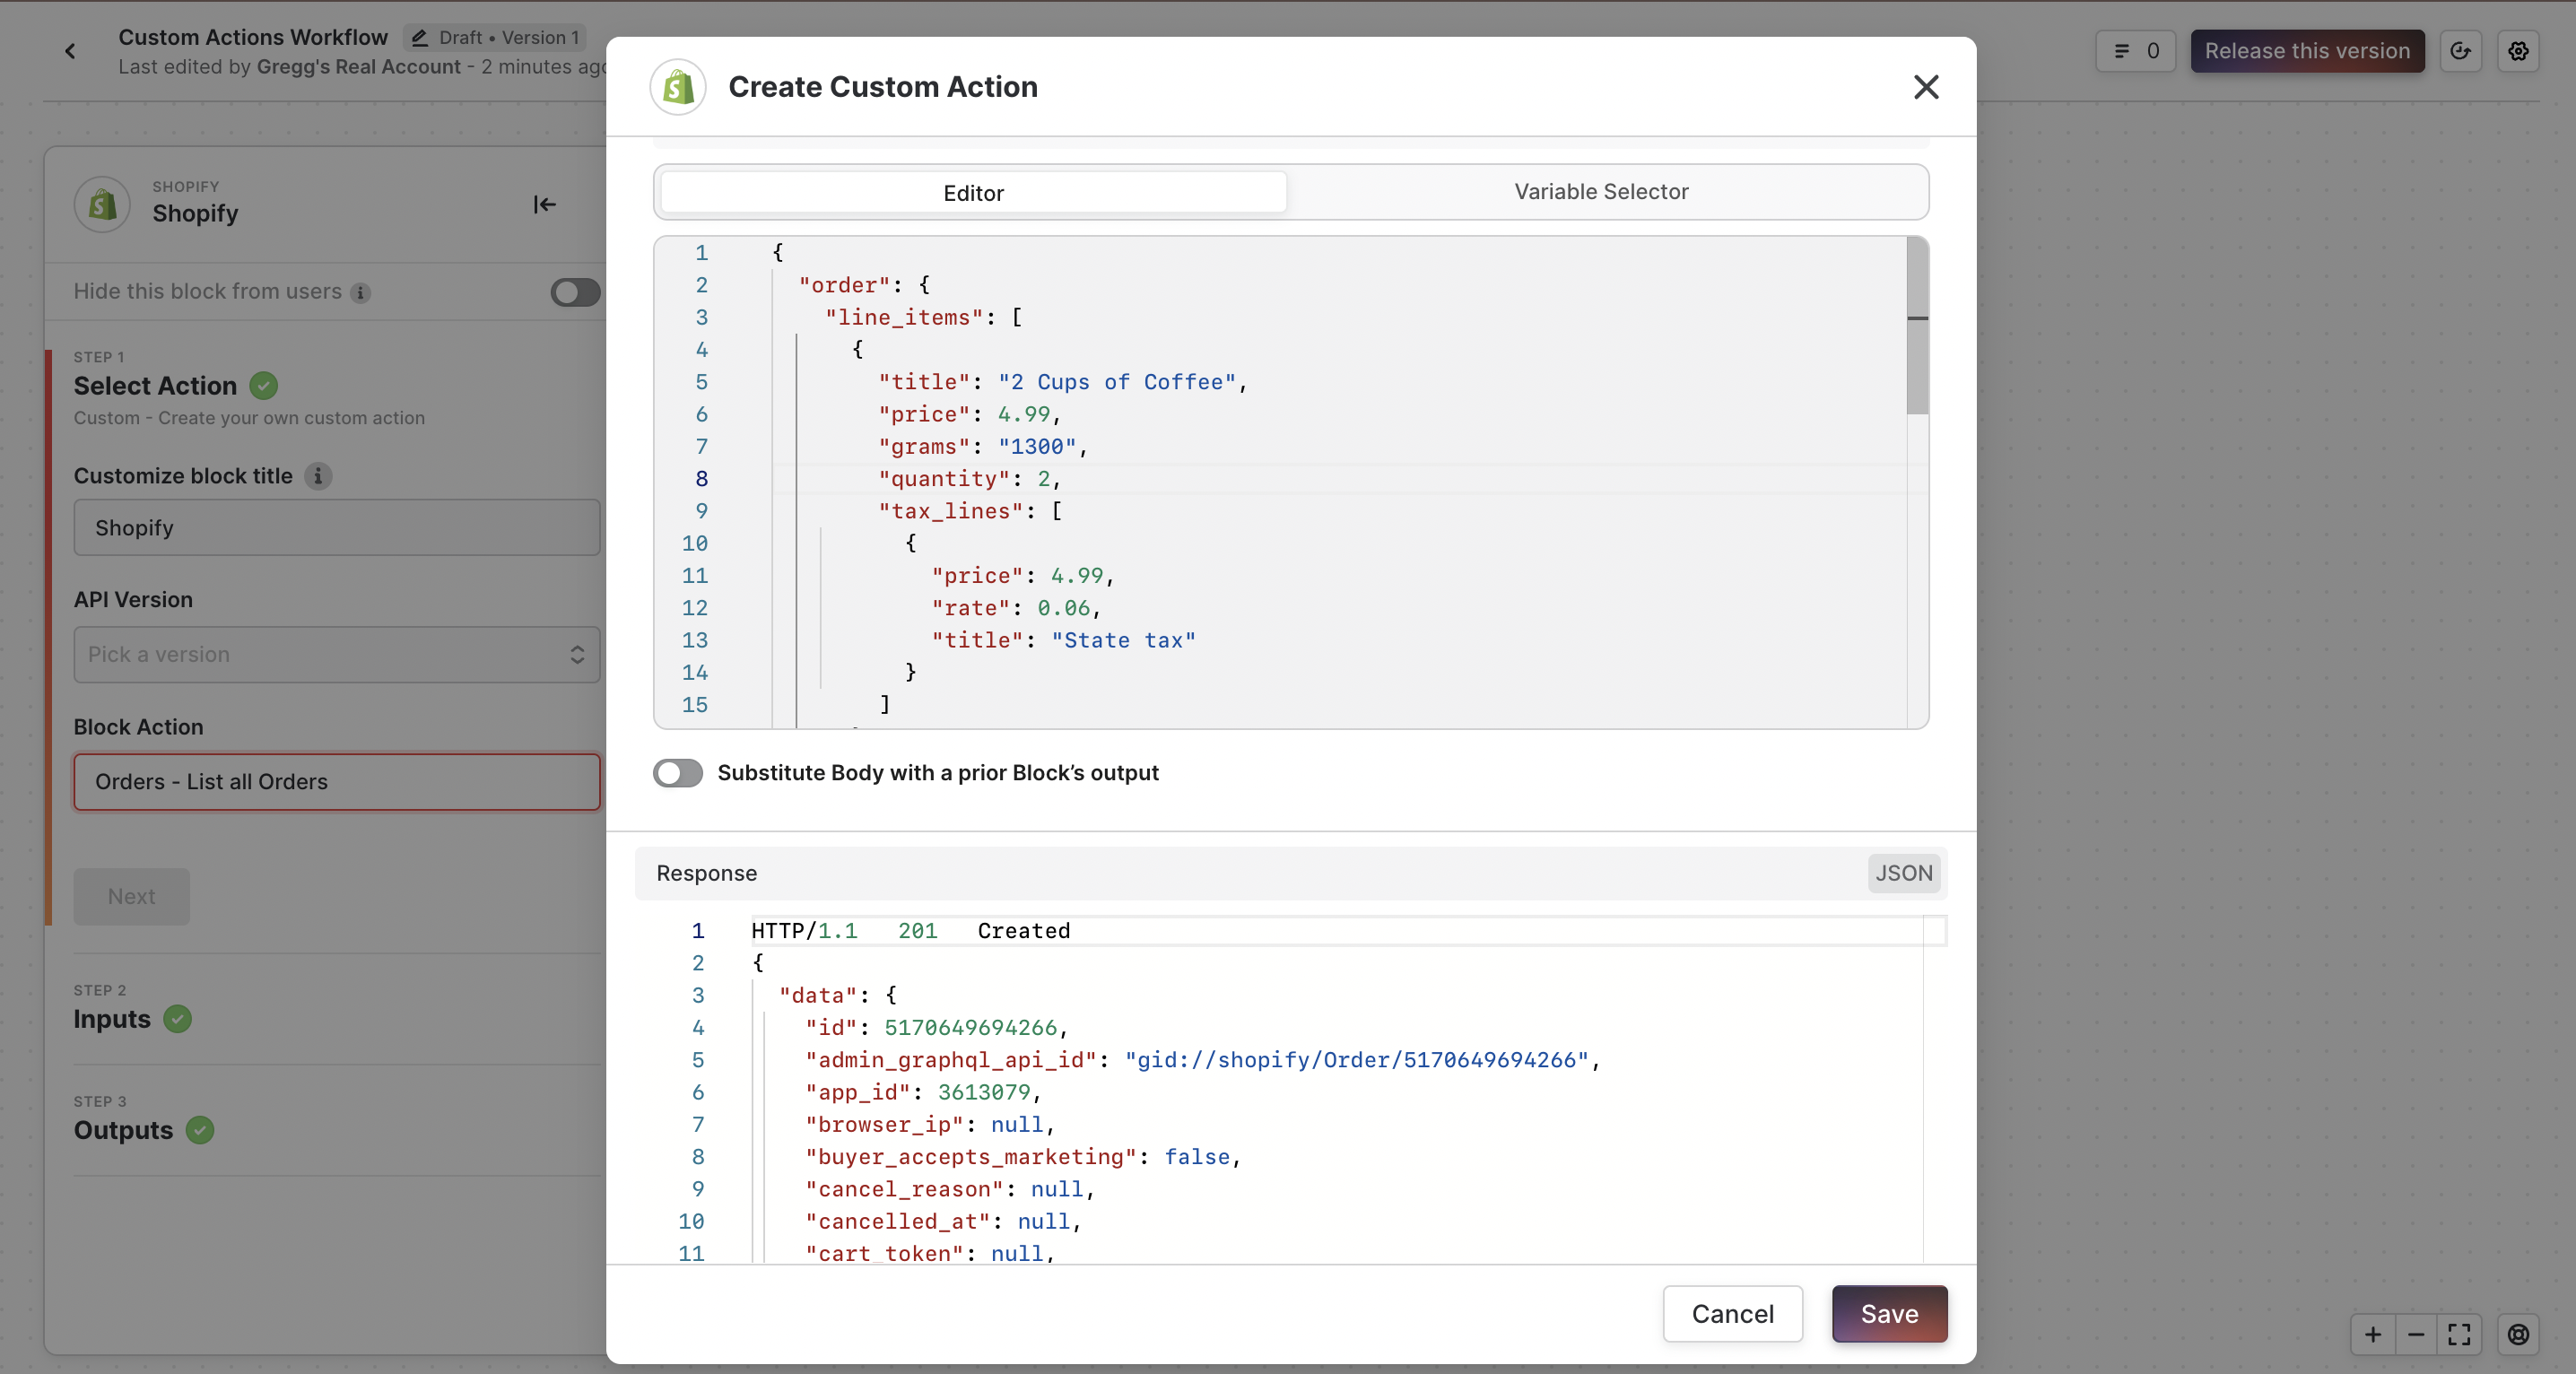
Configure query parameters, headers, or a JSON request body.\
Authentication headers are not required—Embedded iPaaS injects them automatically.
Use **Send Request** to execute a test call and inspect the HTTP response payload.
***
## Dynamic Path Variables
Some endpoints include variable segments in their URL path.\
Use the templating syntax `{{variableName}}` to substitute dynamic values at runtime.
Example: