OAuth 2.0
Alloy's Custom Connector supports the most popular authentication types allowing you to easily configure end-user authentication for third-party apps we don't support natively. The Alloy modal makes it easy to add support for OAuth 2.0 authorization.
To set up an OAuth 2.0 authorization flow, follow the steps below:
Step 1: Follow the instructions to Create a Custom Connector.
Step 2: Navigate to the Authentication step where the OAuth 2.0 authorization type is selected by default.
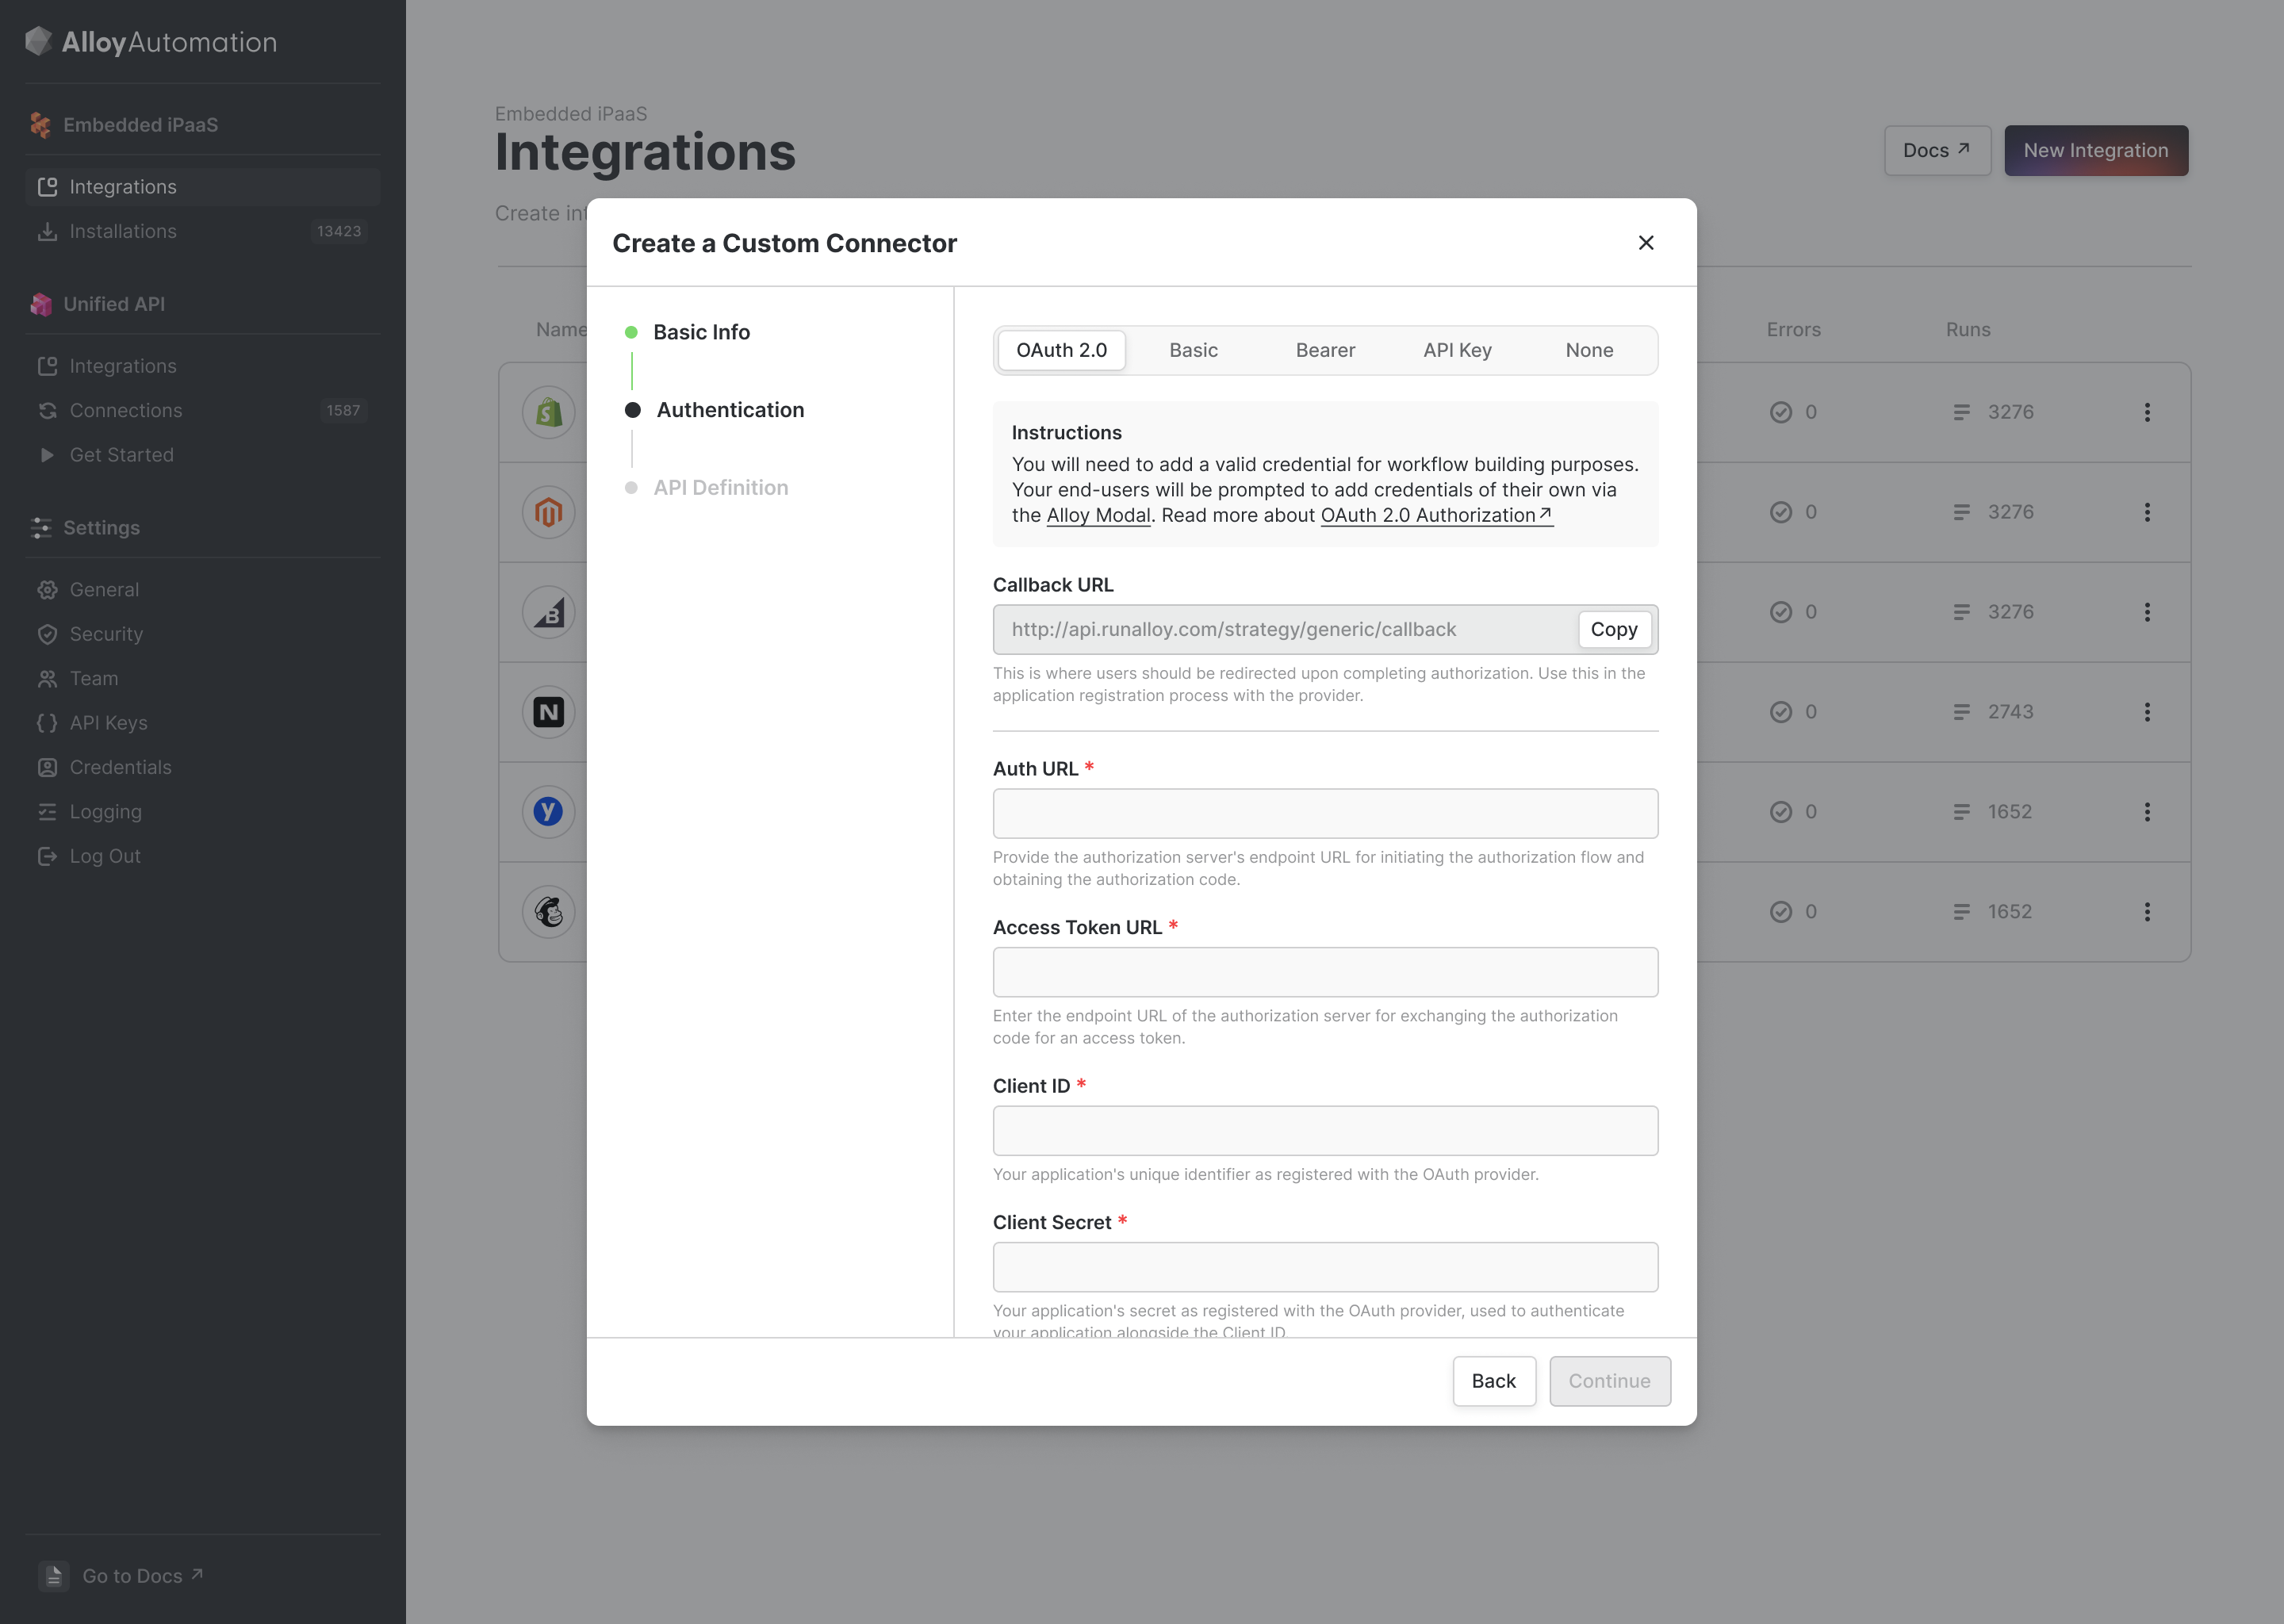
Step 3: Fill in the relevant fields with details from the third-party app you are creating a Custom Connector for. It's best to have the third-party app open in another tab while you complete this step.
OAuth 2.0 Fields
When configuring OAuth 2.0 for third-party apps, you'll need to provide information to help Alloy authorize your end-users. The required fields are detailed below:
-
Callback URL: This is where users should be redirected after authorization has been completed. Use this in the application registration process for the third-party app.
-
Auth URL: The authorization server's endpoint URL that initiates the authorization flow. Alloy will direct your end-users to this URL, allowing them to grant permissions to your app.
-
Access Token URL: Once an end-user has granted permission to your app, Alloy receives an authorization code. This Authorization code is exchanged for an access token by calling the Access Token URL on the authorization server.
-
Client ID: When you create or register an app with a third-party, a Client ID is generated for you. This
clientIDis a unique identifier used to identify your application when interacting with the OAuth2 server during the authorization flow. -
Client Secret: The Client Secret is generated by the third party you're integrating with. It's used alongside the Client ID for authenticating your application.
-
Scope: Scope is the level of access that Alloy can request permissions for to access protected resources on the third-party server. During the OAuth2.0 flow, Alloy will prompt the end-user to give permissions using the scopes you have defined in this field. Scope may have spaces or comma-delineated variables.
Step 4: Fill out the Refresh Configuration fields. Then, hit the Validate Credential button to ensure your credentials have been entered correctly. Once successful, hit Save to continue setting up your Custom Connector.