> ## Documentation Index
> Fetch the complete documentation index at: https://docs.runalloy.com/llms.txt
> Use this file to discover all available pages before exploring further.
# Users
> How to create, manage, and remove users within Embedded iPaaS.
We provide a **Users API** to create, manage, update, and disable user accounts for Embedded iPaaS. Each end user of your application who will use integrations should have a corresponding user in Embedded iPaaS.
This guide covers:
* Creating users
* Managing user tokens
* Listing and finding users
* Deleting users
* Accessing workflow logs
 ## Creating users
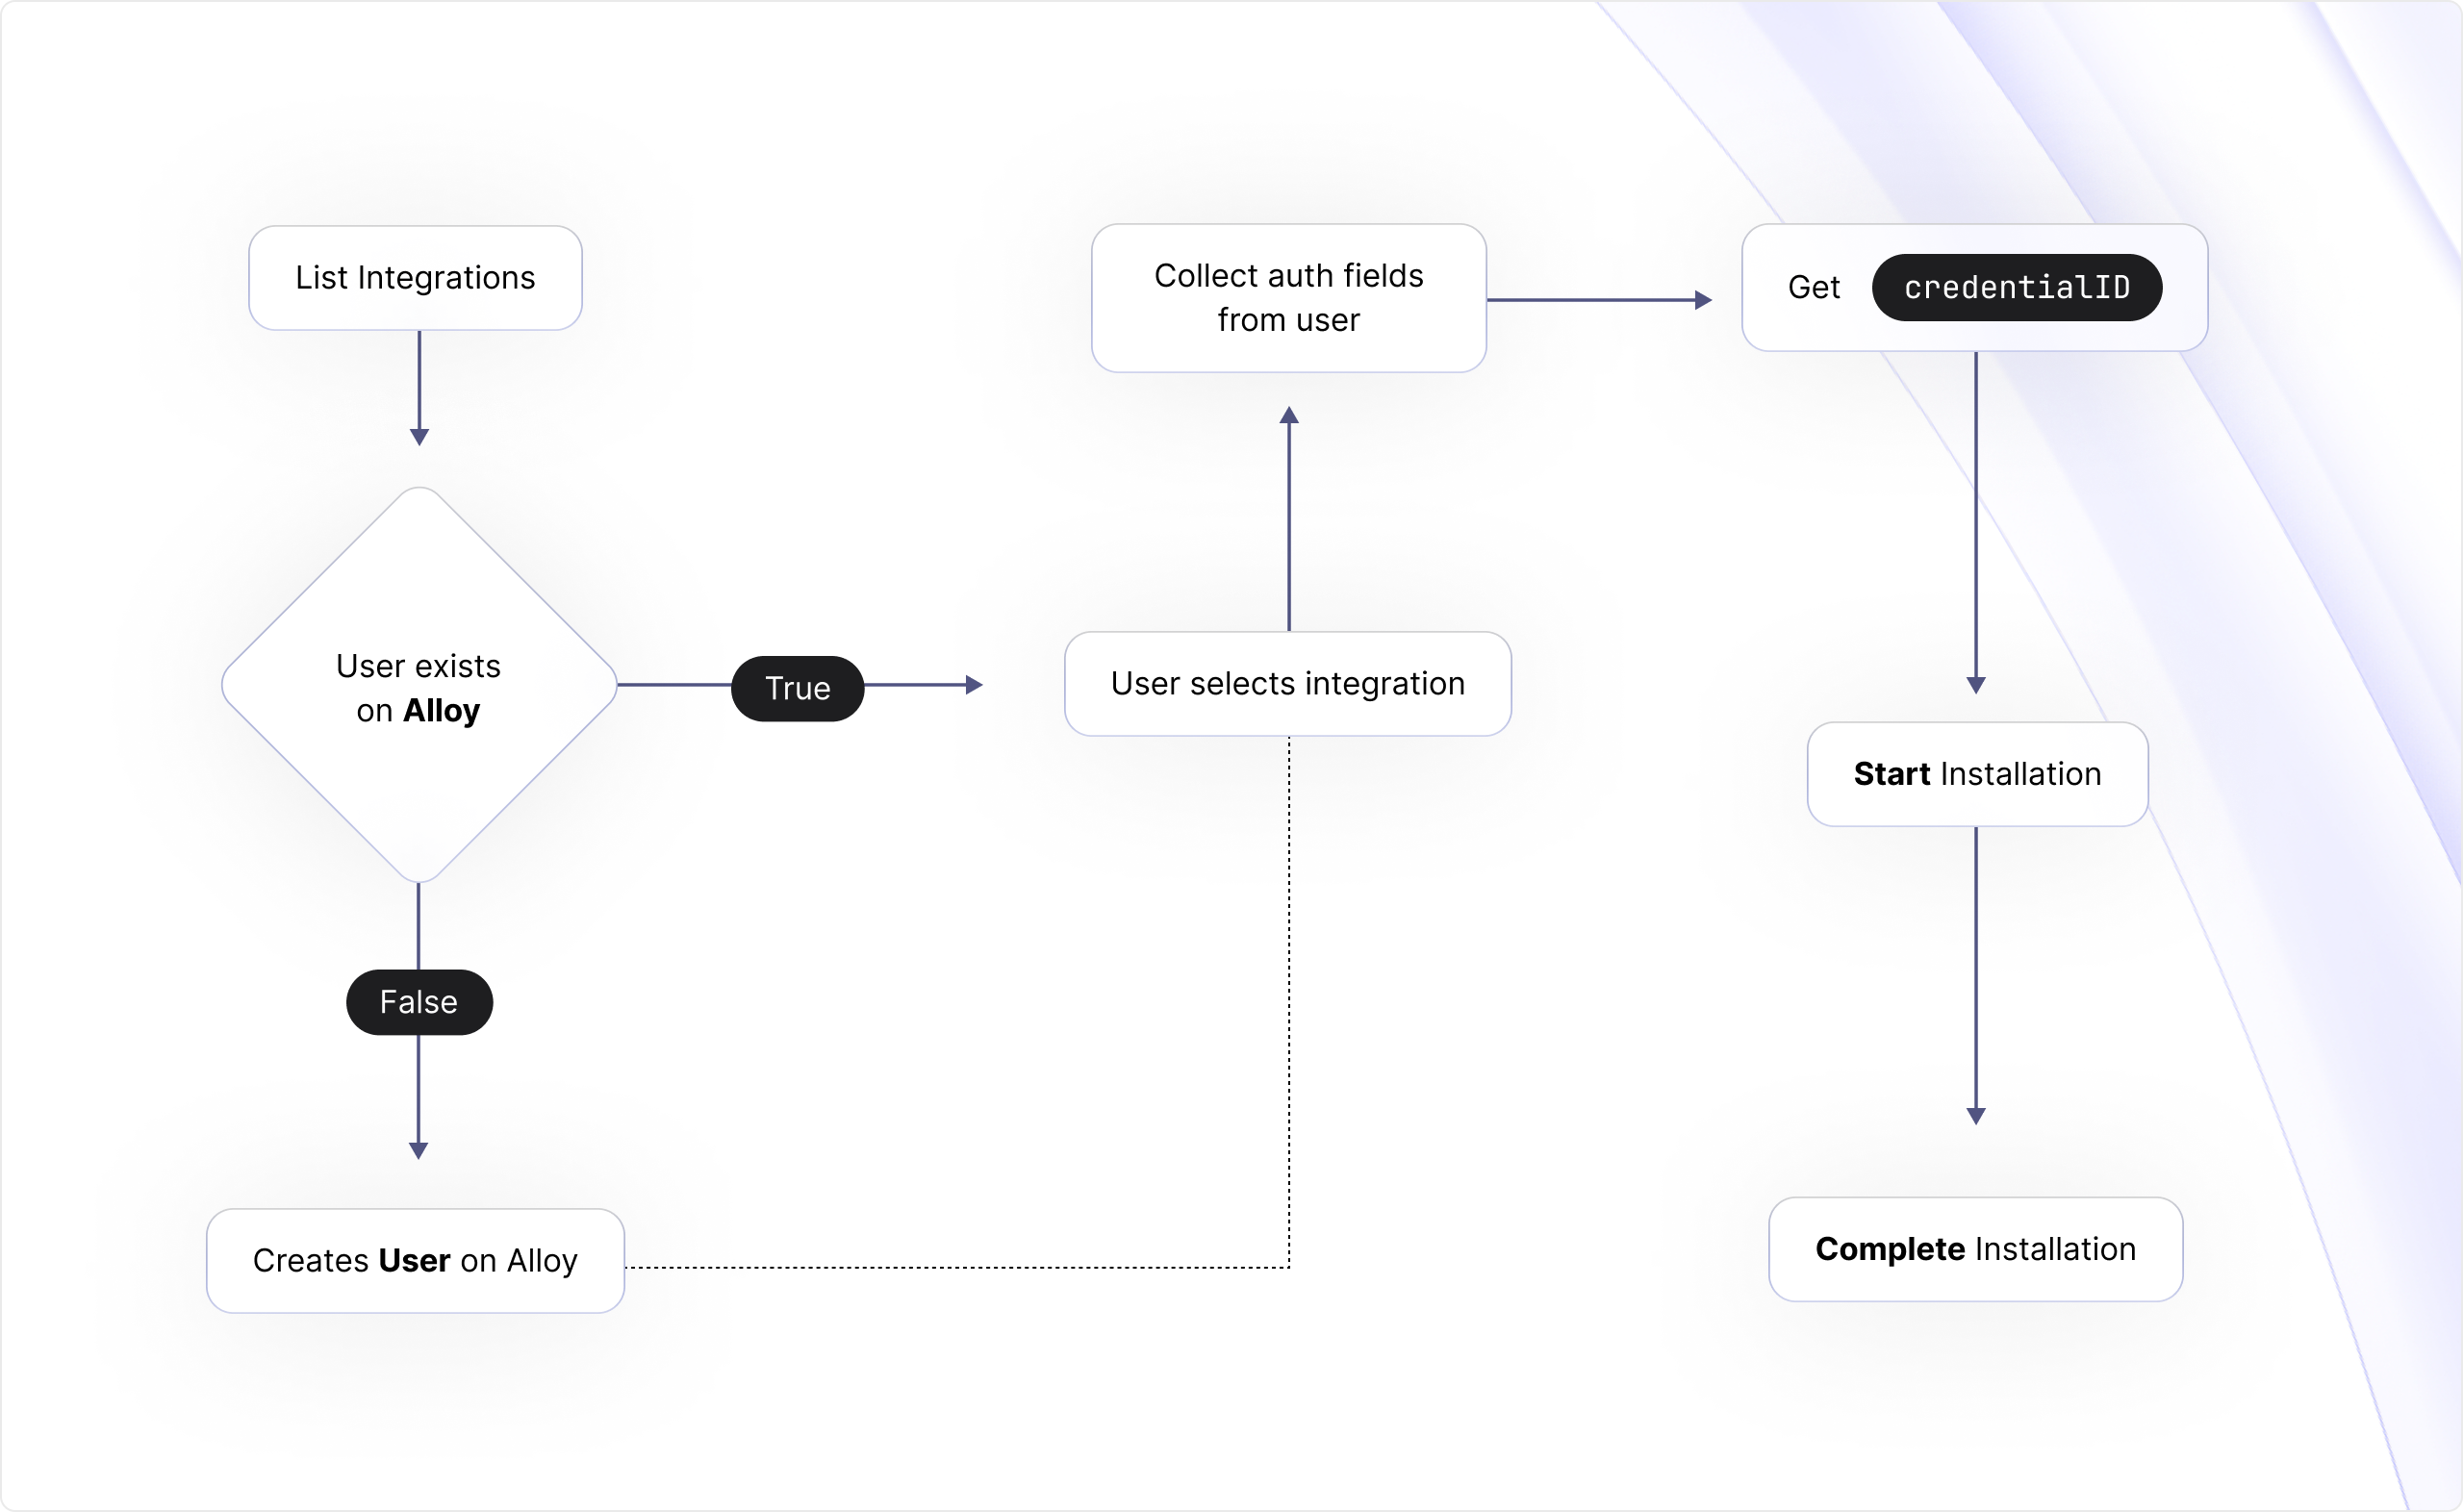
Create a user in Embedded iPaaS for each account in your app that needs integrations. For example, when a new user signs up in your product, call the **Create User** endpoint with their email. Store the returned `username` in your database. You can retrieve users later via **Get User** or **List Users**.
Proactive creation for existing accounts is recommended to surface any email conflicts early and to speed up the first-time integration flow.
* API reference: [Create a User](https://alloyautomation.readme.io/reference/create-a-user)
## Managing user tokens
To render the Embedded iPaaS modal, generate a **User Token** (JWT) for the target user each time you show the modal. Tokens expire after a maximum of 30 minutes.
* API reference: [Get User Token](https://alloyautomation.readme.io/reference/get-user-token)
Token refresh
\
Invoke the User Token endpoint every time you render the Embedded iPaaS modal. Do not cache tokens beyond their TTL.
## Listing and finding users
Use **List Users** or **Get User** to look up users by `userId`.
* API reference: see Users endpoints in the reference
## Deleting users
Deleting a user removes their account, stored credentials, and all associated workflows. This action cannot be undone.
* API reference: see Delete User in the reference
## Accessing workflow logs
You can retrieve errors through the API, receive them in real time via webhook, or stream them to AWS EventBridge.
### Error Logging API
Pull error entries for workflows that failed execution.
* API reference: [Get Error Logs](https://alloyautomation.readme.io/reference/get-error-logs-1)
### Real time error webhooks
Configure Embedded iPaaS to POST failures to an HTTPS endpoint you control. Example payload:
```json theme={null}
{
"_id": "6155b192a13d750013322432",
"workflowId": "613b2be307575700132ef293",
"executionId": "6155ac246093840013297377",
"blockId": "edb4e8e8-1e0e-4fac-84fd-9f9d4855ce93",
"blockType": "alloy.shopify",
"error": "Error: Request failed with status code 403",
"createdAt": "2021-09-30T12:46:10.562Z",
"updatedAt": "2021-09-30T12:46:10.562Z",
"__v": 0
}
```
## AWS EventBridge
Embedded iPaaS also supports direct integration with AWS Eventbridge for streaming error logs. To enable this feature, navigate to the AWS Eventbridge connection in the Embedded Settings. You'll be prompted to enter your AWS keys which are securely encrypted in Alloy Embedded. From there, enter your Event Bus Name and hit save. Turning on this integration will automatically stream Alloy Embedded error logs directly to AWS. You can disable this feature at any point by toggling the Event Bridge connector off.
## Creating users
Create a user in Embedded iPaaS for each account in your app that needs integrations. For example, when a new user signs up in your product, call the **Create User** endpoint with their email. Store the returned `username` in your database. You can retrieve users later via **Get User** or **List Users**.
Proactive creation for existing accounts is recommended to surface any email conflicts early and to speed up the first-time integration flow.
* API reference: [Create a User](https://alloyautomation.readme.io/reference/create-a-user)
## Managing user tokens
To render the Embedded iPaaS modal, generate a **User Token** (JWT) for the target user each time you show the modal. Tokens expire after a maximum of 30 minutes.
* API reference: [Get User Token](https://alloyautomation.readme.io/reference/get-user-token)
Token refresh
\
Invoke the User Token endpoint every time you render the Embedded iPaaS modal. Do not cache tokens beyond their TTL.
## Listing and finding users
Use **List Users** or **Get User** to look up users by `userId`.
* API reference: see Users endpoints in the reference
## Deleting users
Deleting a user removes their account, stored credentials, and all associated workflows. This action cannot be undone.
* API reference: see Delete User in the reference
## Accessing workflow logs
You can retrieve errors through the API, receive them in real time via webhook, or stream them to AWS EventBridge.
### Error Logging API
Pull error entries for workflows that failed execution.
* API reference: [Get Error Logs](https://alloyautomation.readme.io/reference/get-error-logs-1)
### Real time error webhooks
Configure Embedded iPaaS to POST failures to an HTTPS endpoint you control. Example payload:
```json theme={null}
{
"_id": "6155b192a13d750013322432",
"workflowId": "613b2be307575700132ef293",
"executionId": "6155ac246093840013297377",
"blockId": "edb4e8e8-1e0e-4fac-84fd-9f9d4855ce93",
"blockType": "alloy.shopify",
"error": "Error: Request failed with status code 403",
"createdAt": "2021-09-30T12:46:10.562Z",
"updatedAt": "2021-09-30T12:46:10.562Z",
"__v": 0
}
```
## AWS EventBridge
Embedded iPaaS also supports direct integration with AWS Eventbridge for streaming error logs. To enable this feature, navigate to the AWS Eventbridge connection in the Embedded Settings. You'll be prompted to enter your AWS keys which are securely encrypted in Alloy Embedded. From there, enter your Event Bus Name and hit save. Turning on this integration will automatically stream Alloy Embedded error logs directly to AWS. You can disable this feature at any point by toggling the Event Bridge connector off.