Use Case Overview
When developing features for small businesses, it’s crucial to quickly assess their financial position. Implementing workflows to retrieve a merchant’s accounts receivable data can help you automate services such as cash advances and business loans.Define the Payload
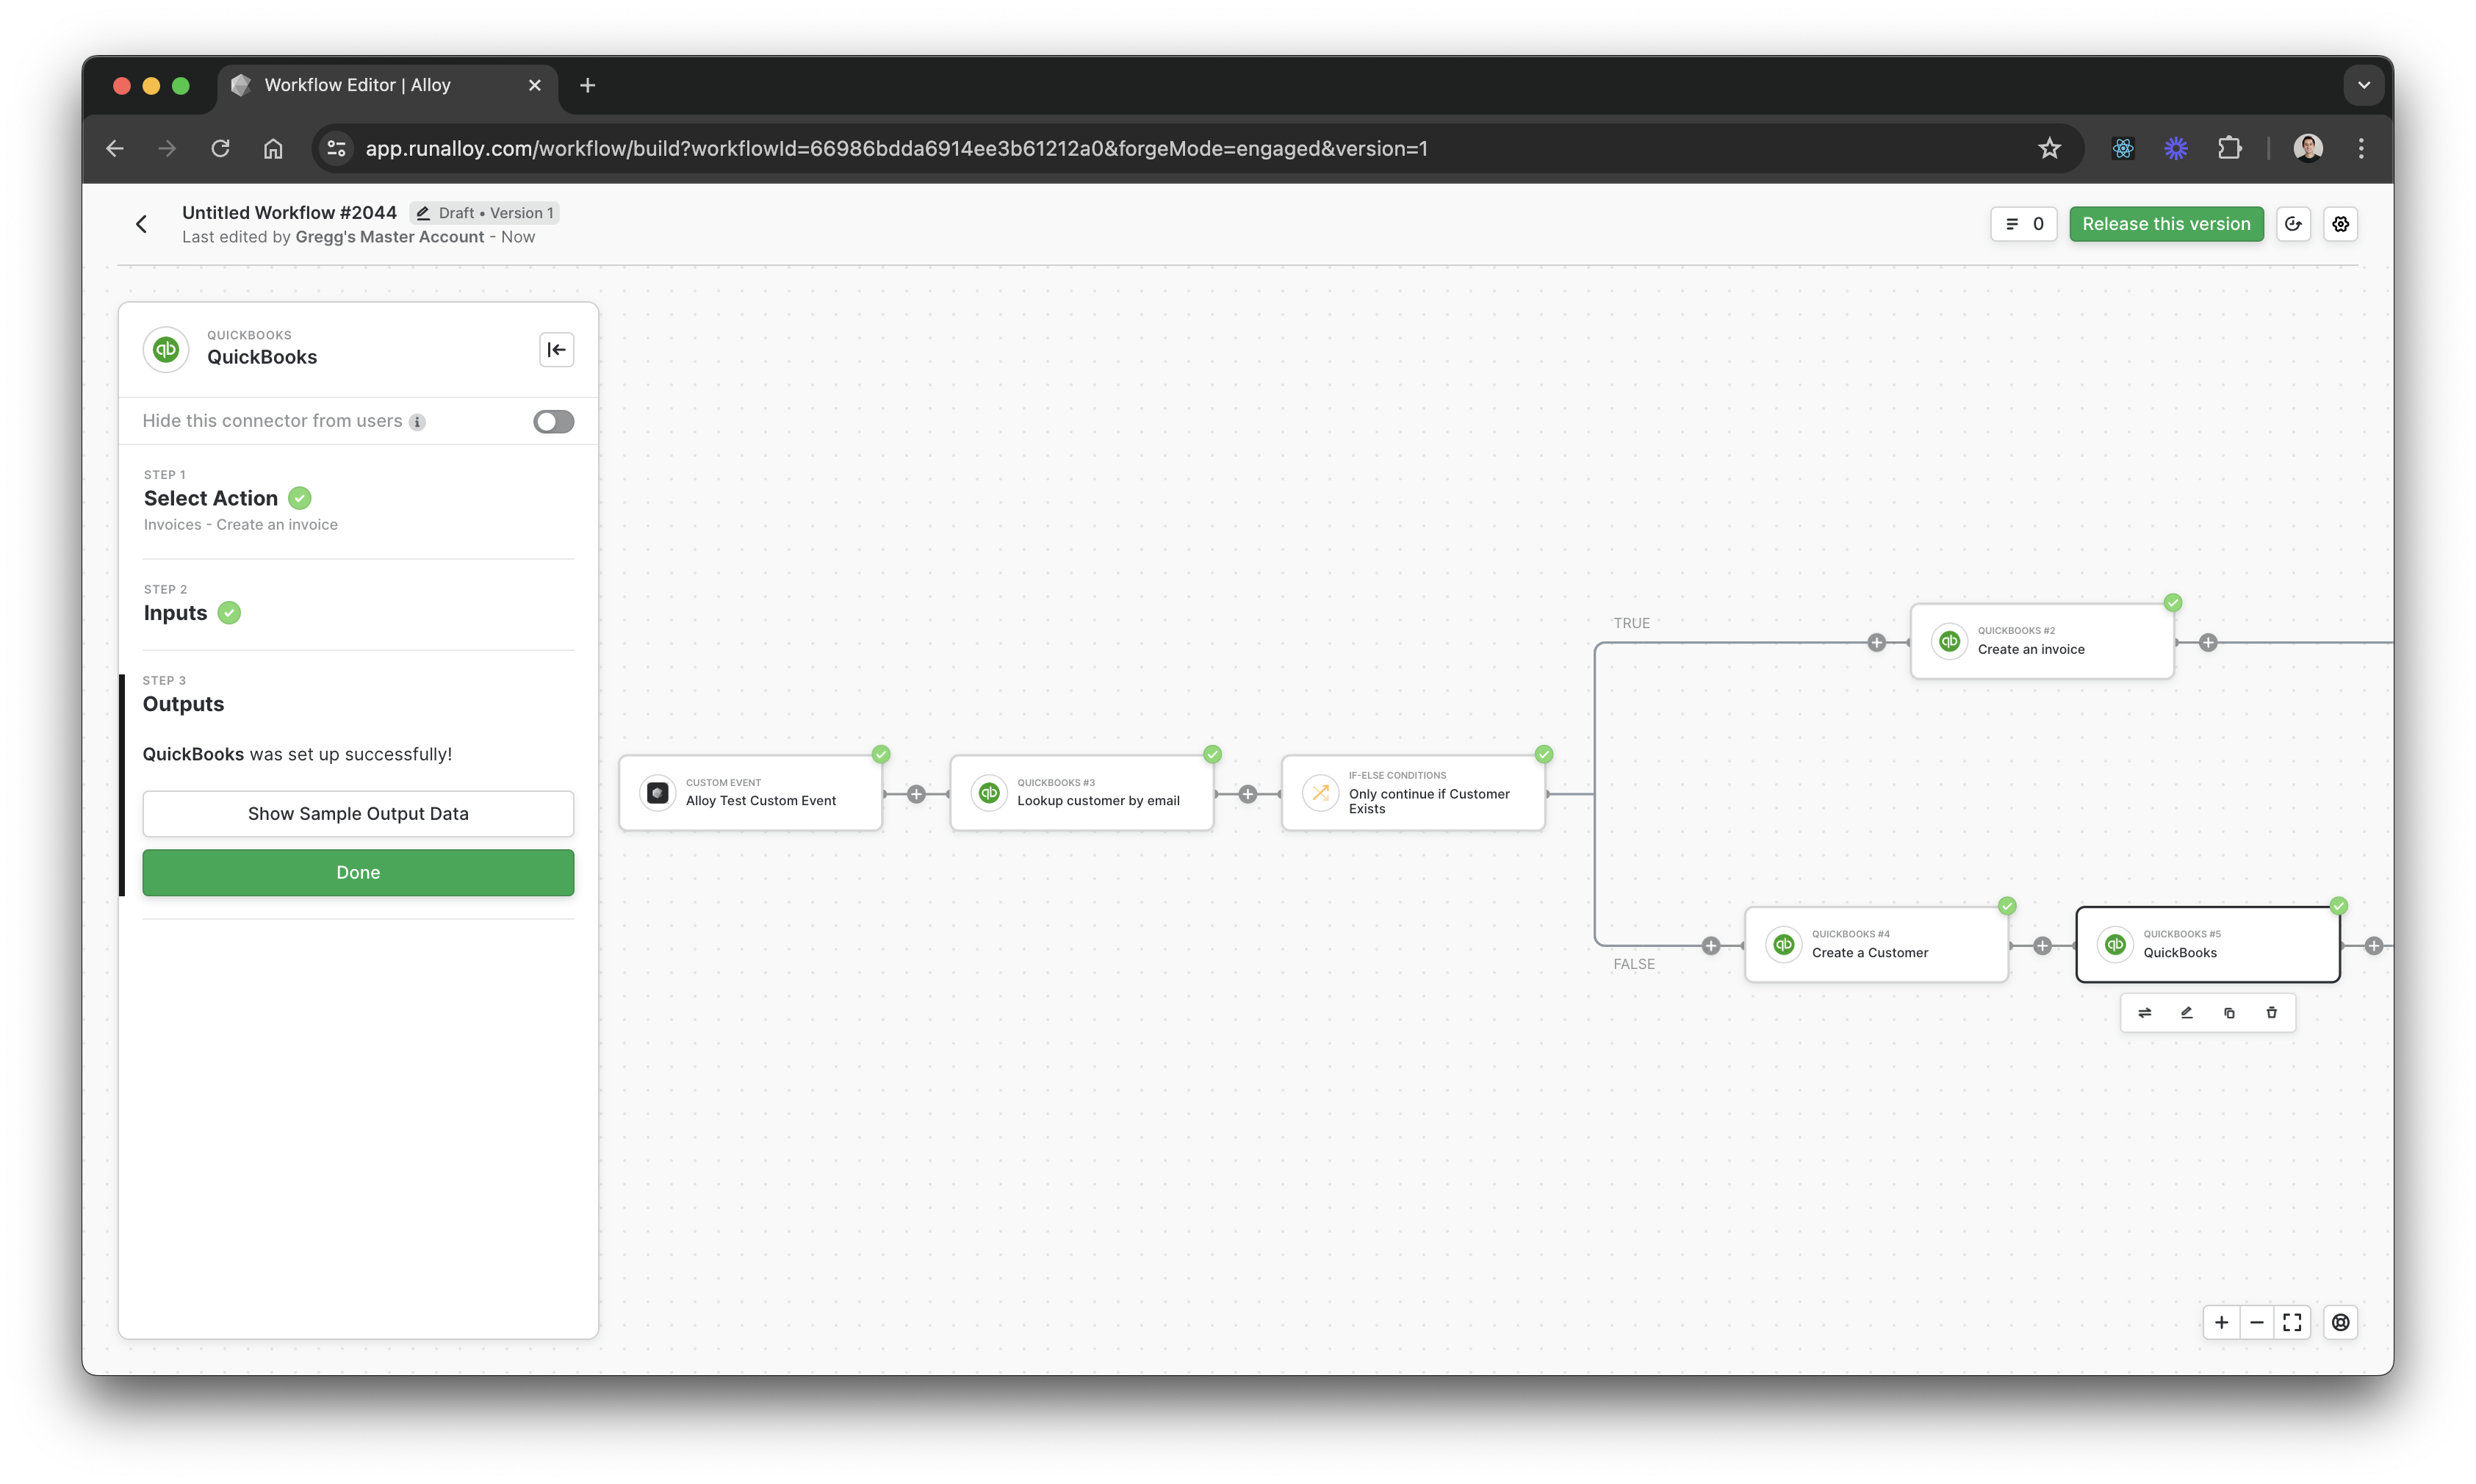
To get started, create a workflow with a Custom Event and select the Accounting System of your choosing. You will need to define the schema you’ll be sending over to Alloy in your Custom Event payload. Next, select the Accounting System of choice. For our demo, we’ll use Quickbooks.Lookup a Customer by Email
Next, we’ll check if the Customer exists in the Accounting System. To do so, we can look them up by email. If the customer exists, we’ll use the Customer Id when we create the Invoice.Add a conditional
Next, we’ll introduce a conditional that checks if the Customer exists. If the Customer exists, we’ll create an Invoice. If the Customer does not exist, we’ll first create a Customer record and then Create the Invoice after the Customer record has been saved.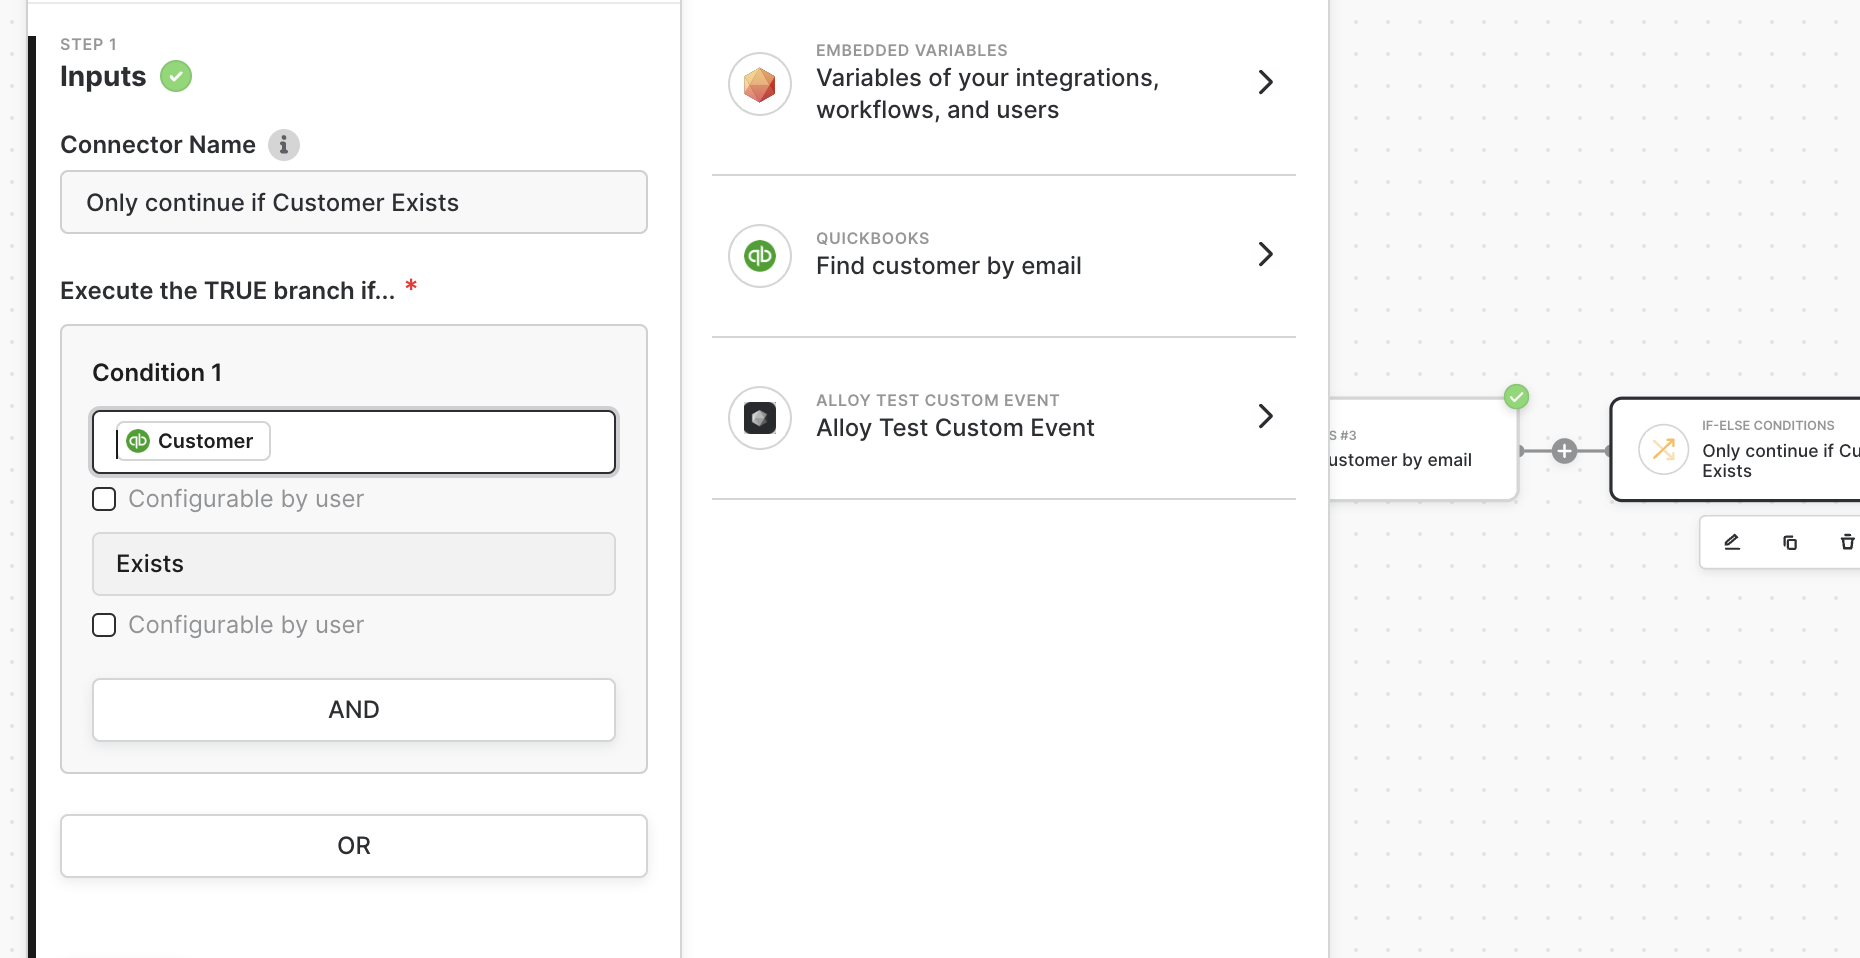
Create a Customer
If the Customer does not already exist within the Accounting System, we’ll need to first create a Customer record. Creating a customer is necessary in order to properly associate a Customer to an Invoice record. Select the Create Customer action and map the relevant fields accordingly.Create Invoice
Now that we’ve created a Customer, we can associate the Customer with an Invoice and create the Invoice accordingly. You’ll be prompted to map various data fields like Country, Customer Reference, and Line Items. You can find a more complete example in the Workflow Builder.Wrapping Up
By now, your workflow should look like the below. To recap, let’s walk through how this flow functions:Everything starts with a Custom Event. The Custom Event defines the payload your app will send over.
Next, we attempt to look up a Customer record in the Accounting System. You must have a Customer record created in order to create an Invoice.
We then introduce a conditional to check if the Customer record exists or not. If the Customer record exists, we create the Invoice record.