Quick Start
Discover how easy it is to get up and running with Alloy Flow in this 10 minute tutorial. In this guide, we'll walk through how to get started building your first workflow with Alloy Flow.
Overview
Assuming you're the COO at AcmeCo - a medium sized company that sells a range of jewellery. Currently your company is doing $10m in annual revenue across its 20 locations but sales have somewhat plateaued over the past year. You've decided to launch an E-commerce website using Shopify to start selling your jewellery online but you're concerned about how this will affect your accounting and financial reporting, especially since all your current bookkeeping is managed in NetSuite.
Alloy Flow is perfect in a situation like this. You can use it to track your Shopify orders into NetSuite, update inventory levels in real-time and even send invoices to customers.
Integration Structure
Let's plan our your first workflow based on the problem above.
- When an order is placed on the AcmeCo Shopify website, the order details should be sent to NetSuite so that your warehouse staff know which items have been ordered, inventory levels can be updated and a purchase order can be created. Down the line, this will also allow for easy reconciliation and reporting.
- If the value of the order is greater than $500, an email should be sent to the accounting team with the order details so the transaction can be manually reviewed for potential fraud or other issues.
Building the Workflows
Shopify Order -> NetSuite
-
Navigate to the Alloy Flow dashboard. Click on New Workflow -> Start from Scratch. This will open up the workflow builder. In the top left corner, click untitled workflow # to rename your workflow. It's always good practice to give your workflow a name eg "Shopify Order -> NetSuite".
-
Search for Shopify trigger in the list of trigger connectors. Select the Shopify trigger connector and click continue. This will add the connector to the workflow canvas.
-
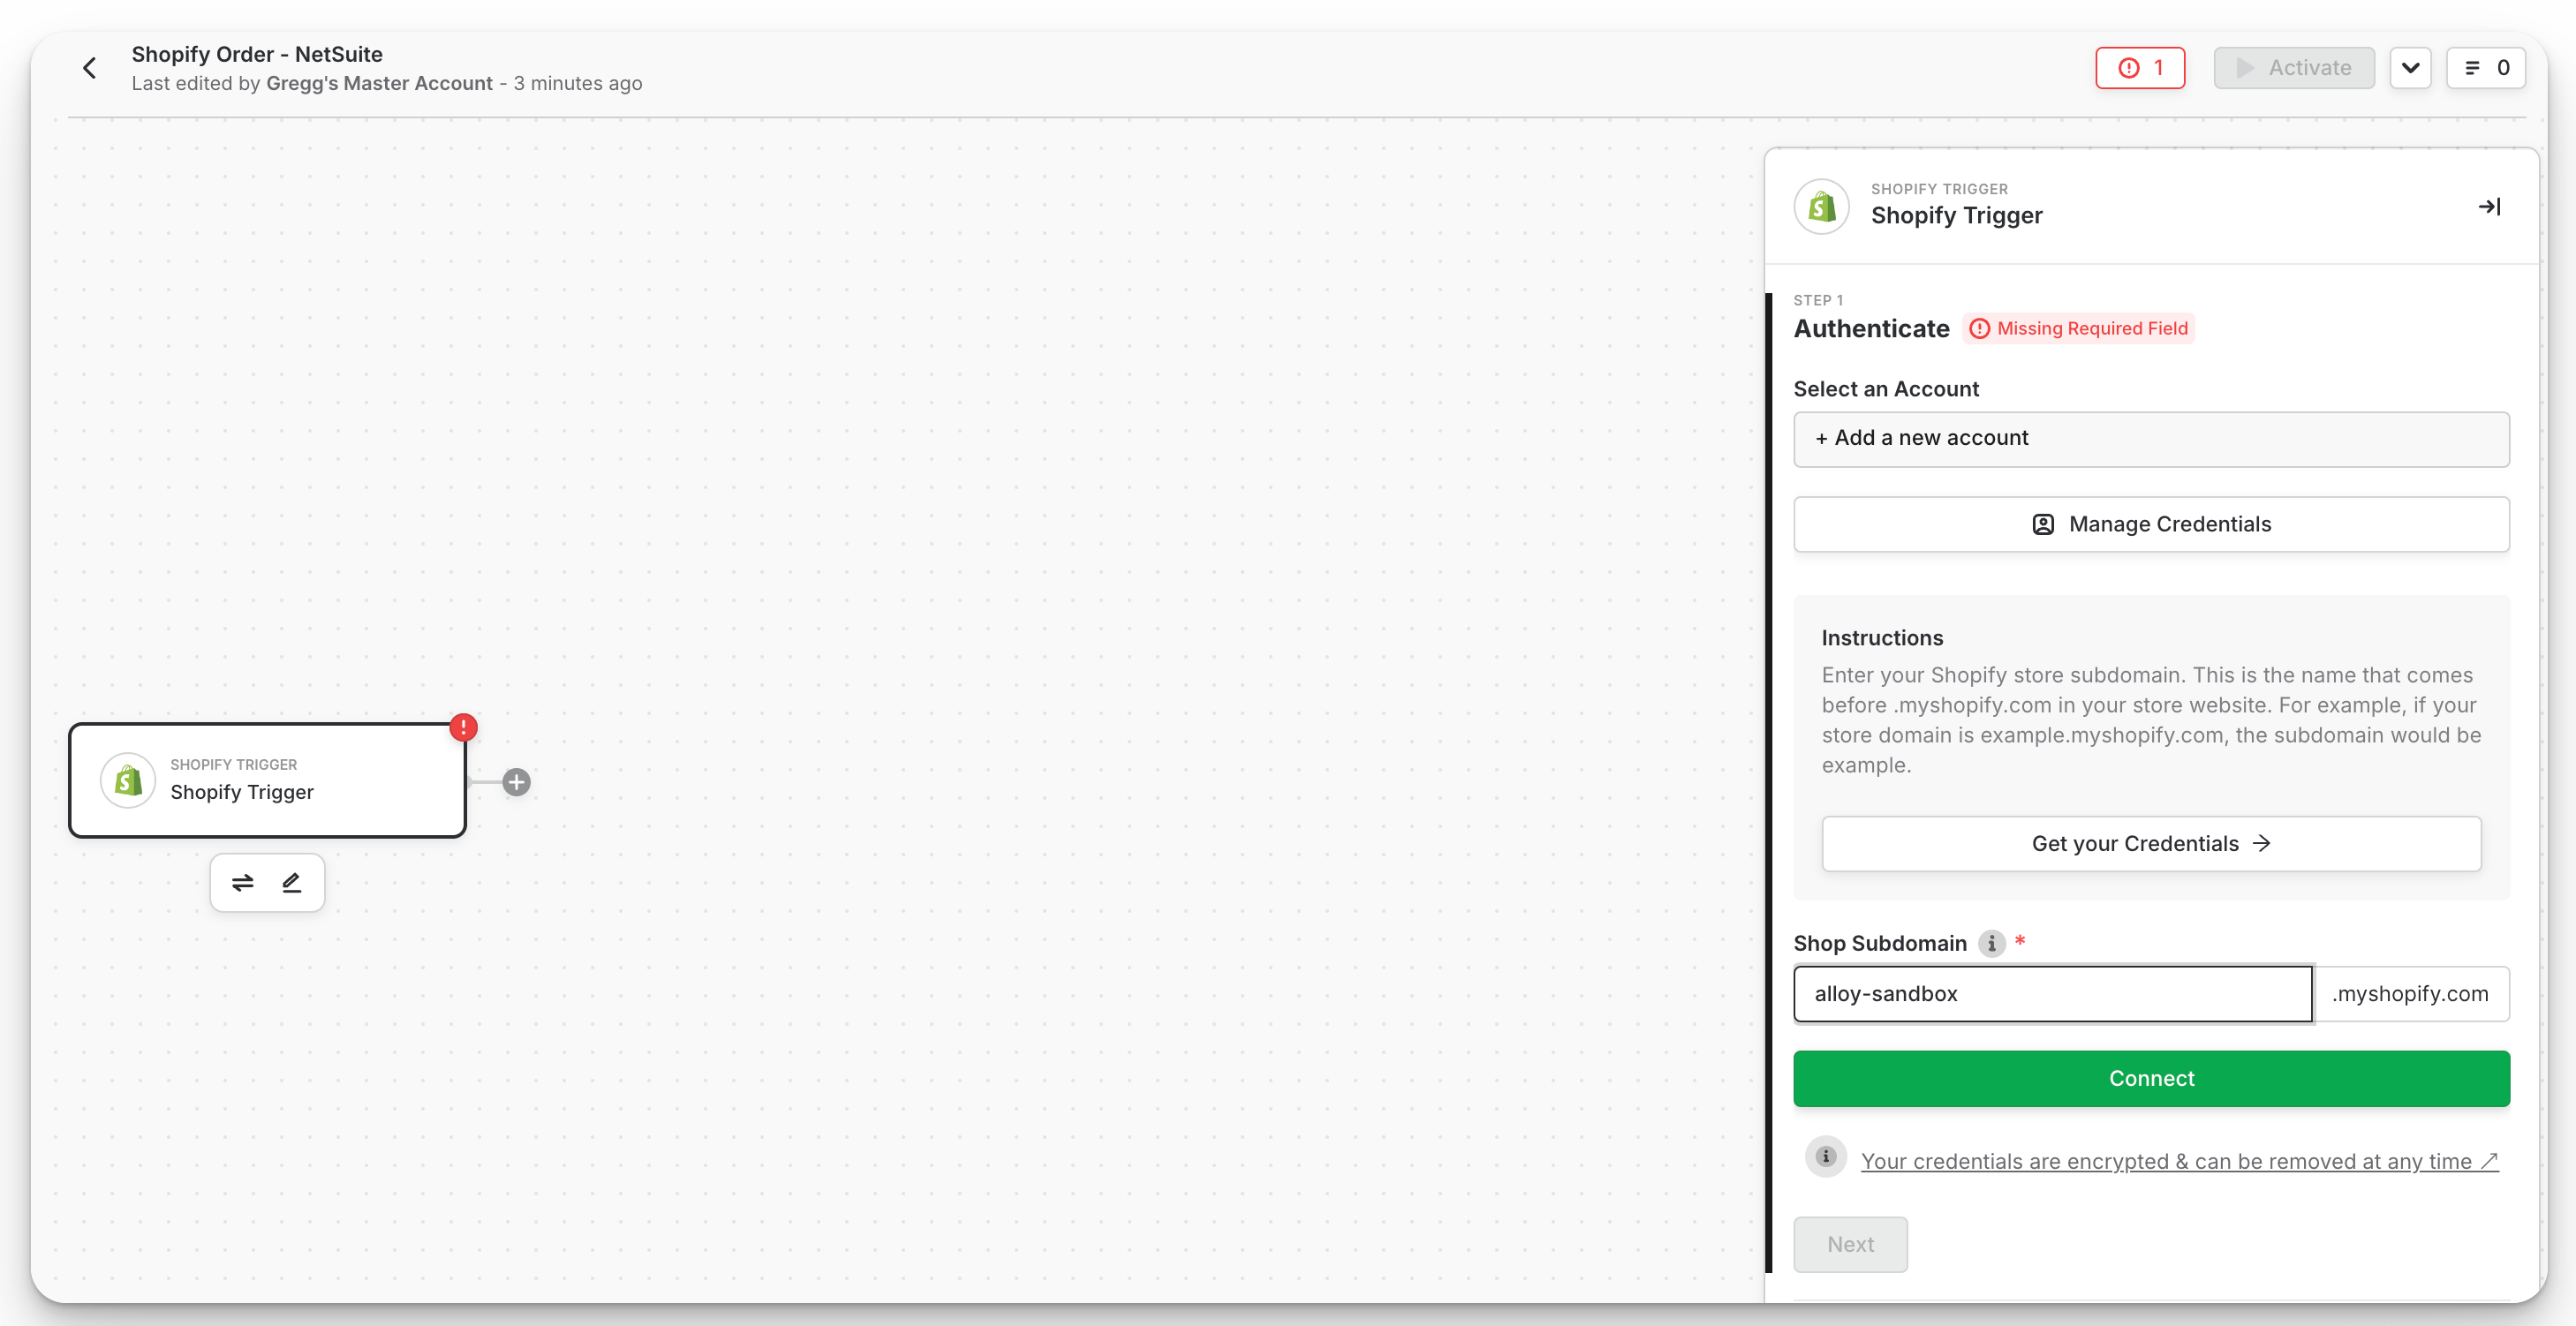
With the Shopify trigger added to the canvas, you can now begin building your workflow. To get things going, you'll need to authenticate to your Shopify store. Click on Step 1 -> Add a new account. Now, enter your Shopify subdomain in the input field.

-
In the trigger event dropdown, select the Orders Created event. Click Next, then Done.
-
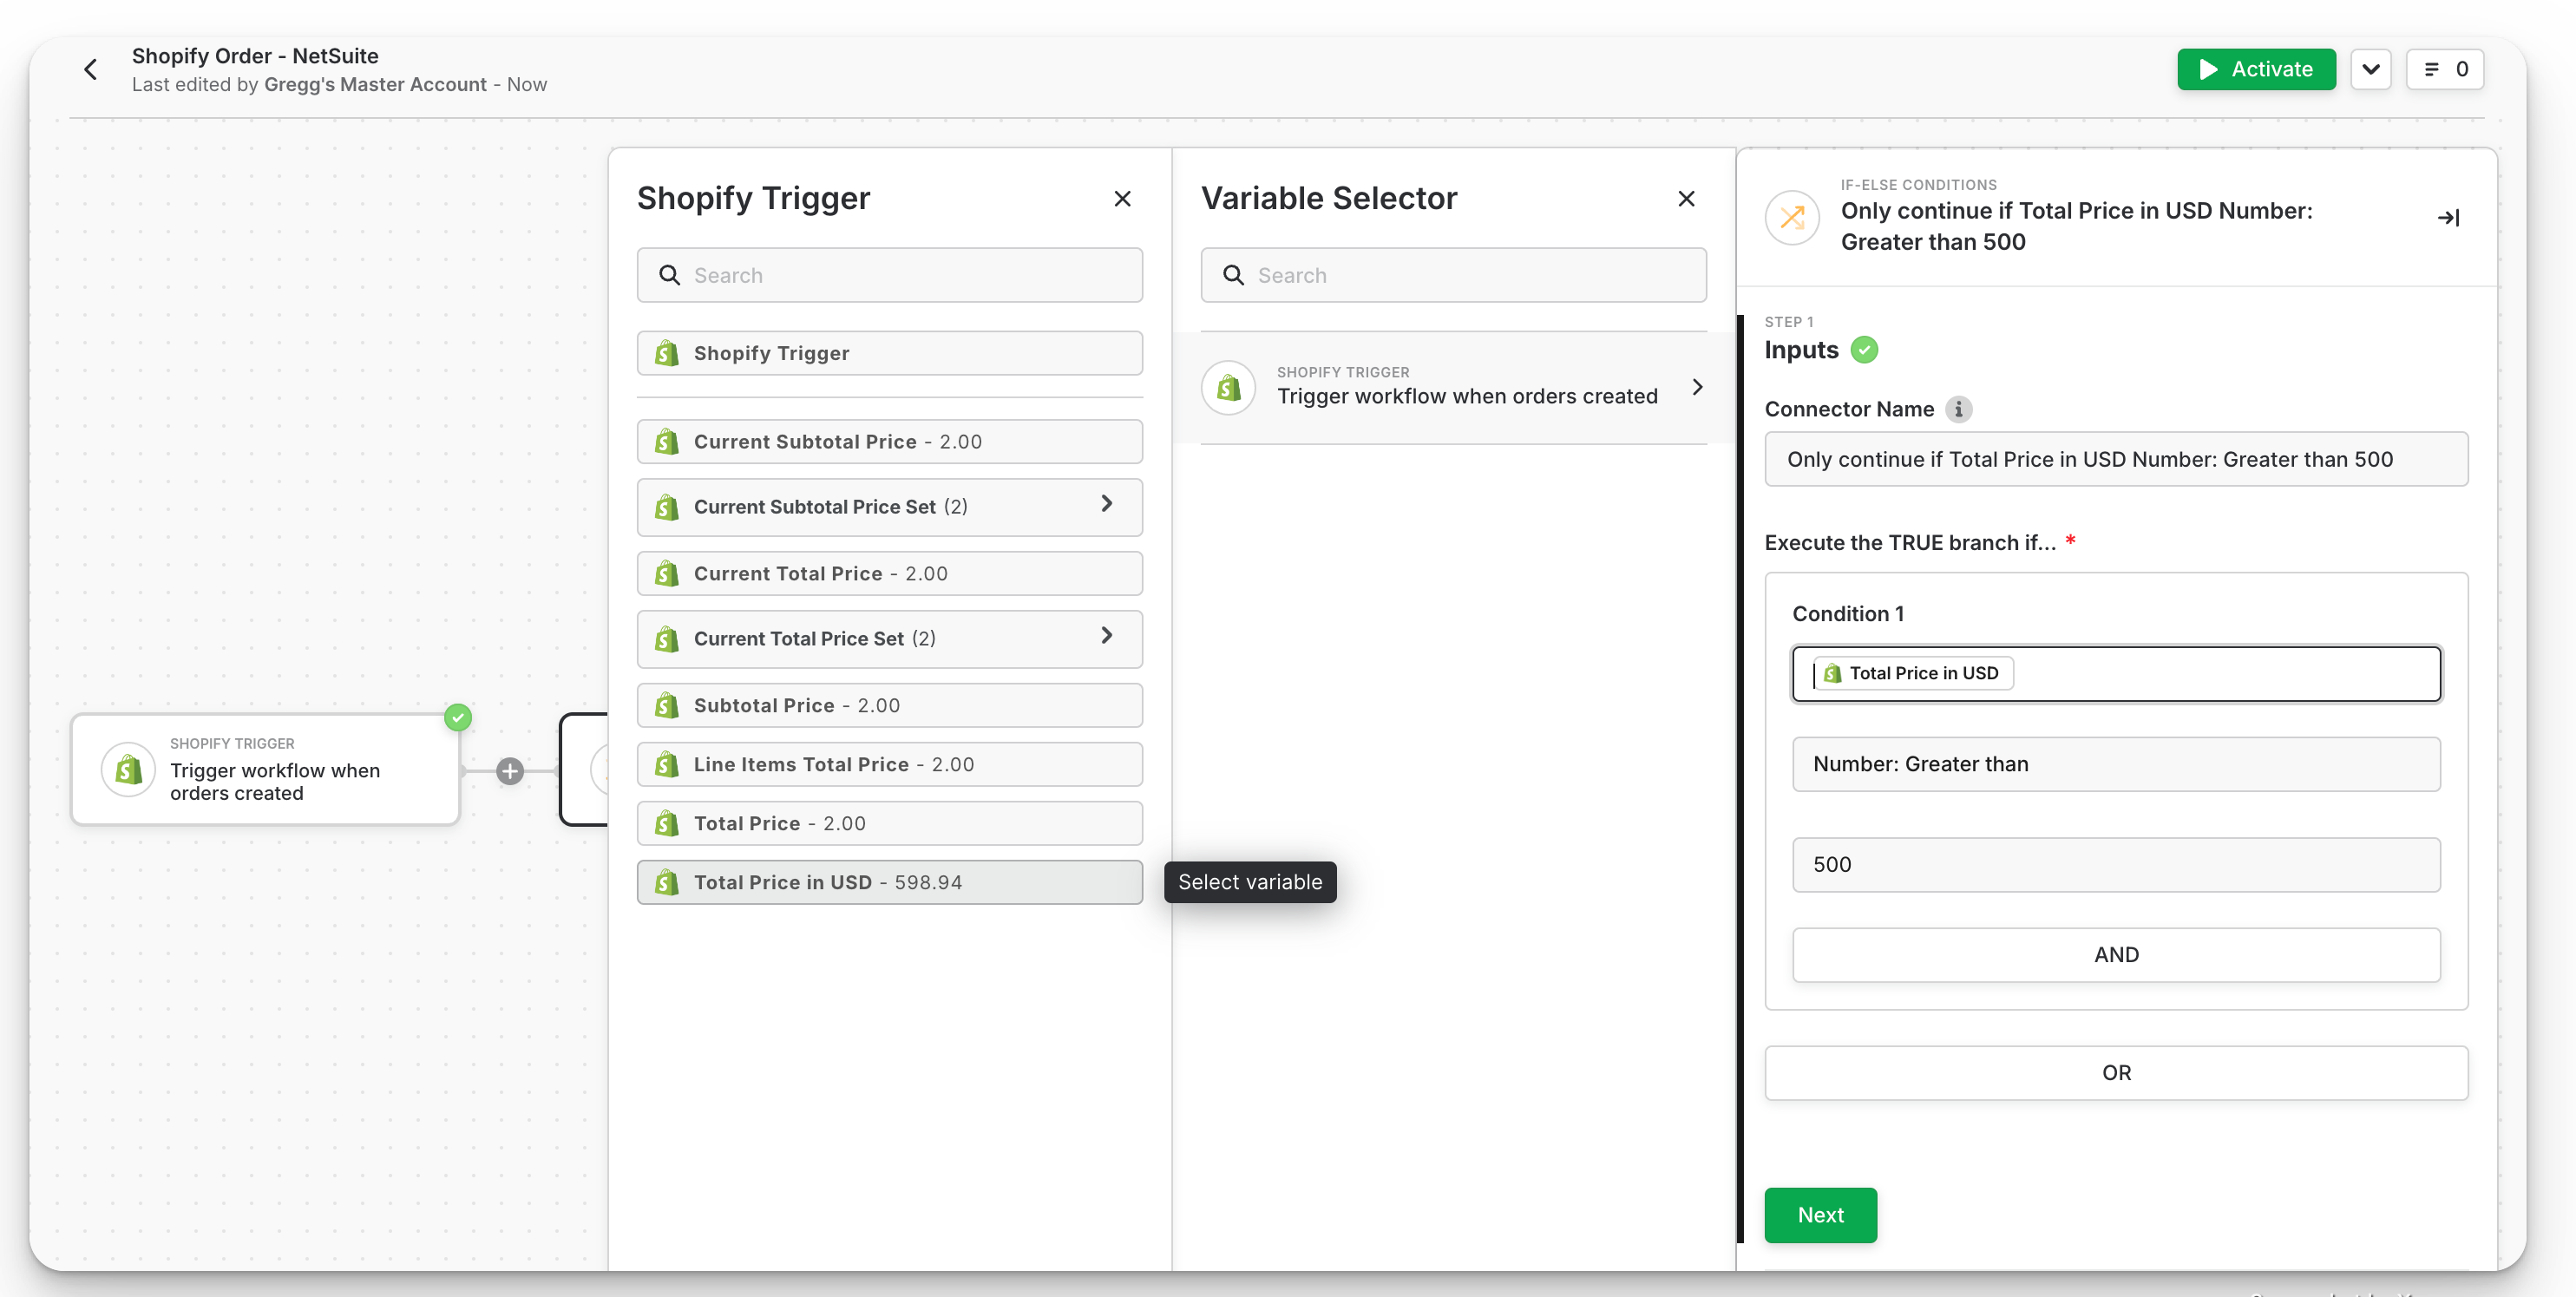
Next, select the if-else connector (learn more about logic connectors). Alloy allows you to pass dynamic variables right within the workflow builder. In this case, we'll pass the Total price in USD of the order into condition 1 like below.

Now, we can finish building the logic. Execute the TRUE branch if the order total is greater than or equal to $500.
-
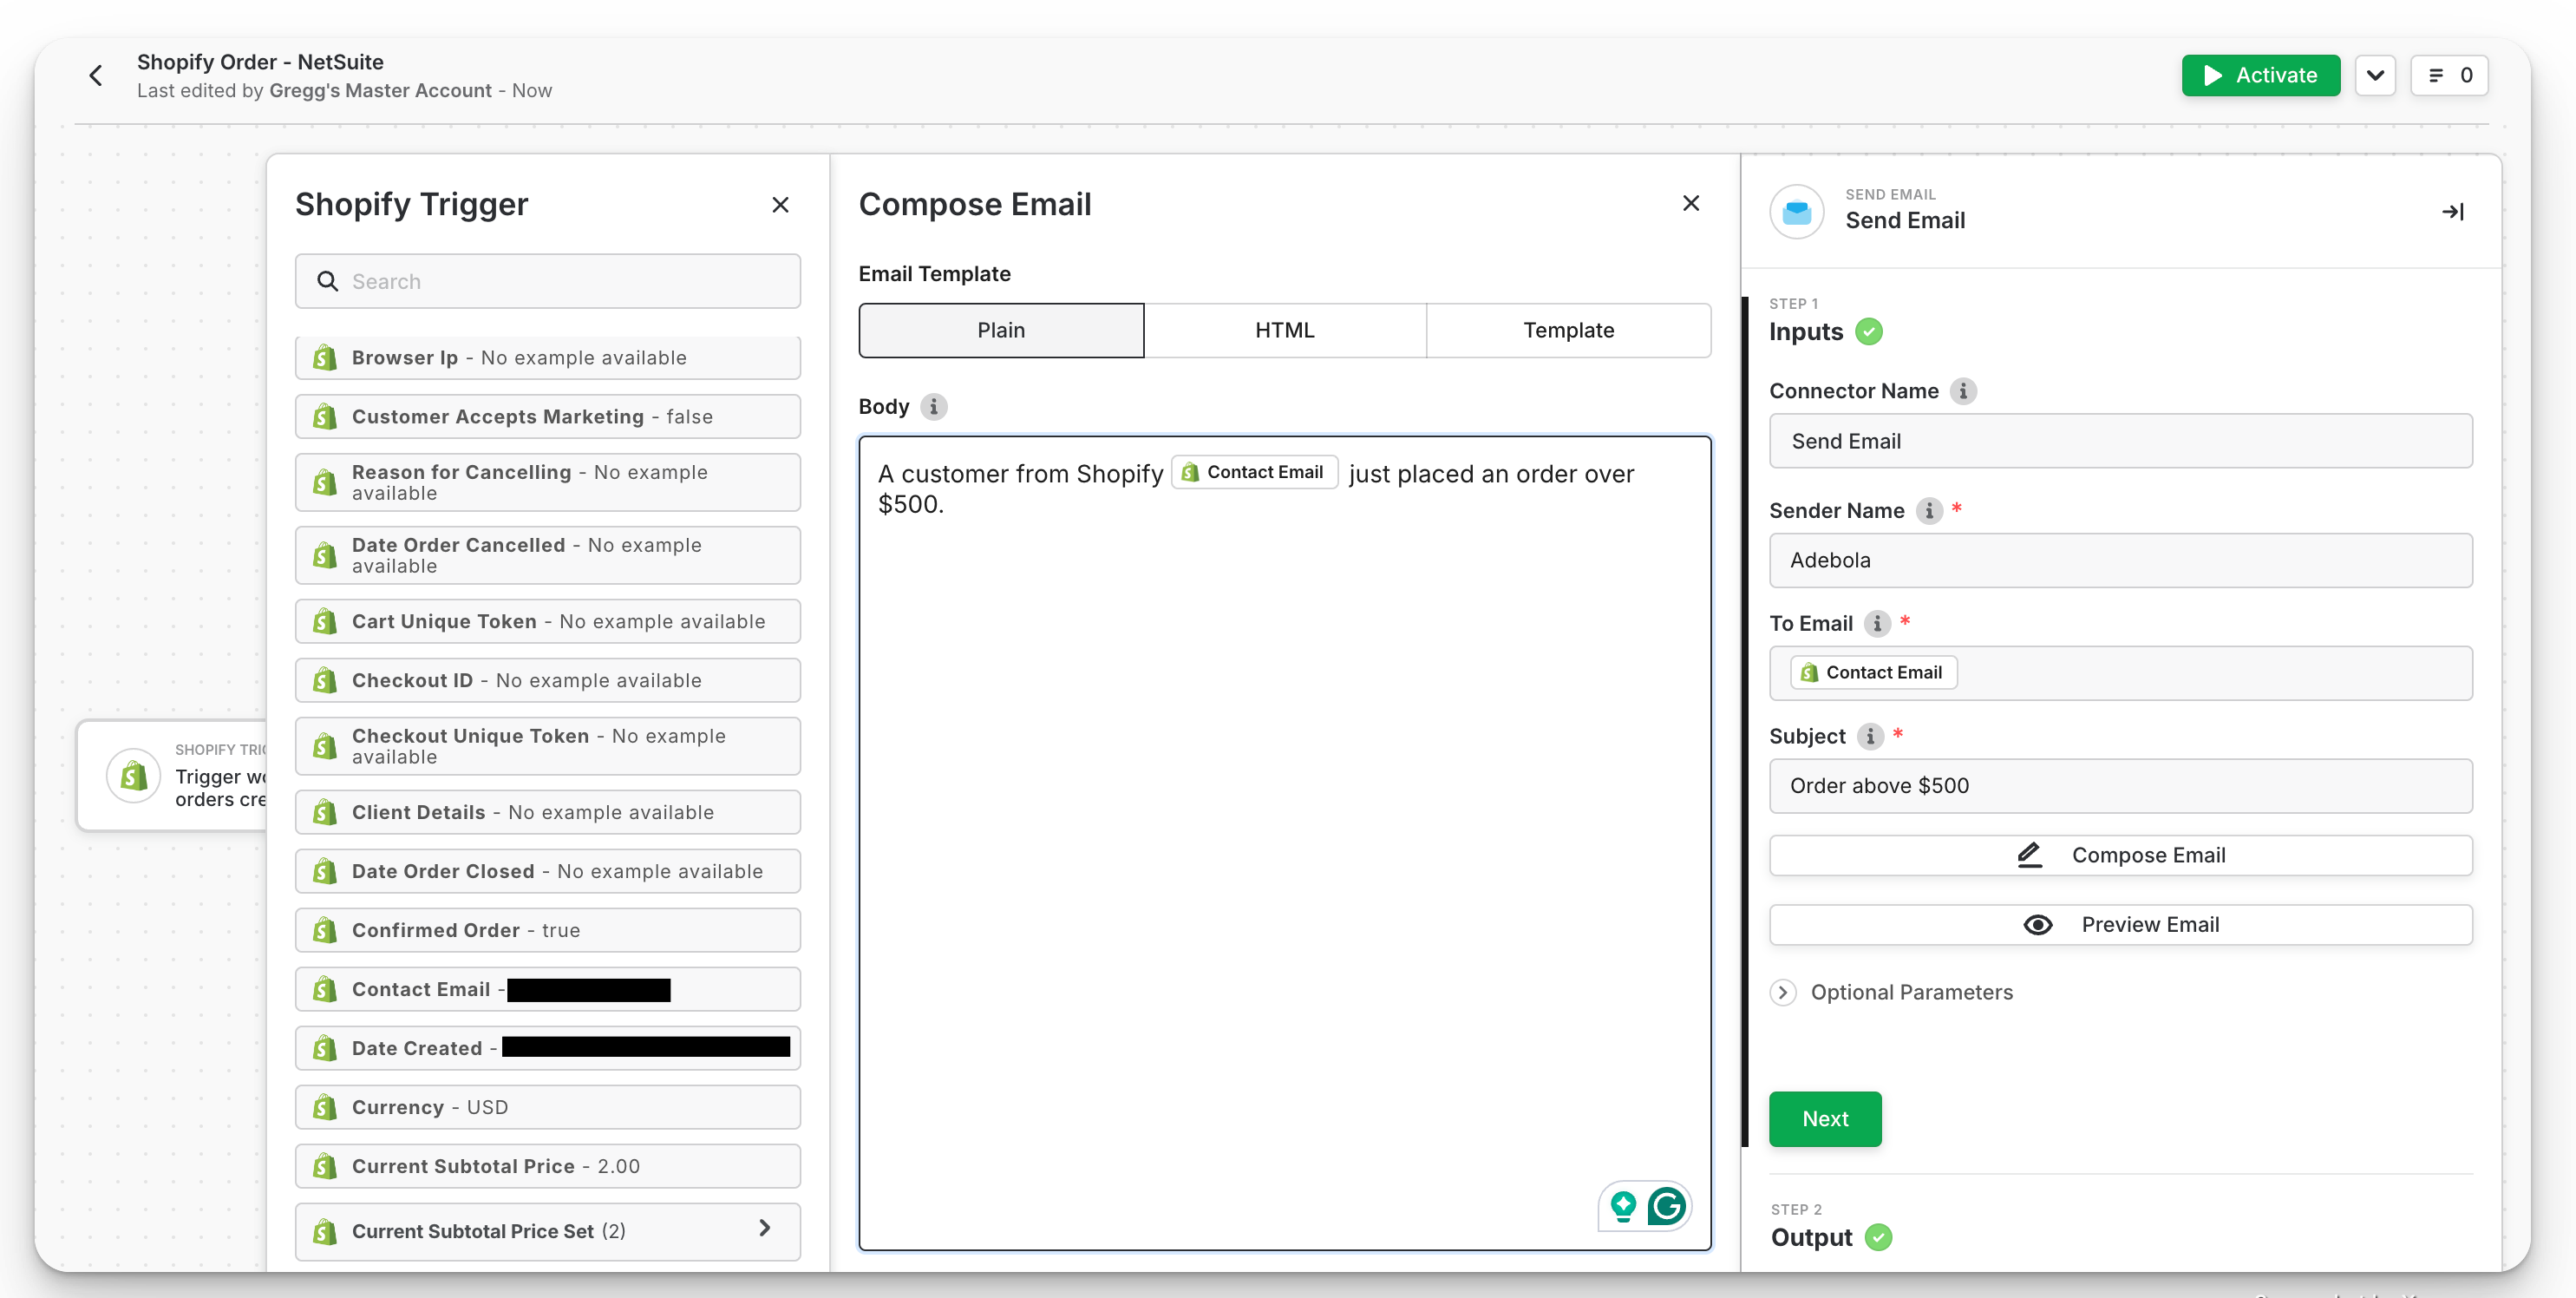
On the TRUE branch of the if-else connector, select the Send Email connector located under Utilities. Customise the E-mail using the dynamic variables from the Shopify connector.

-
Now, it's time to add the Netsuite connector. Select the Create a new sales order connector action then fill out the fields using the dynamic variables from the Shopify trigger connector.
-
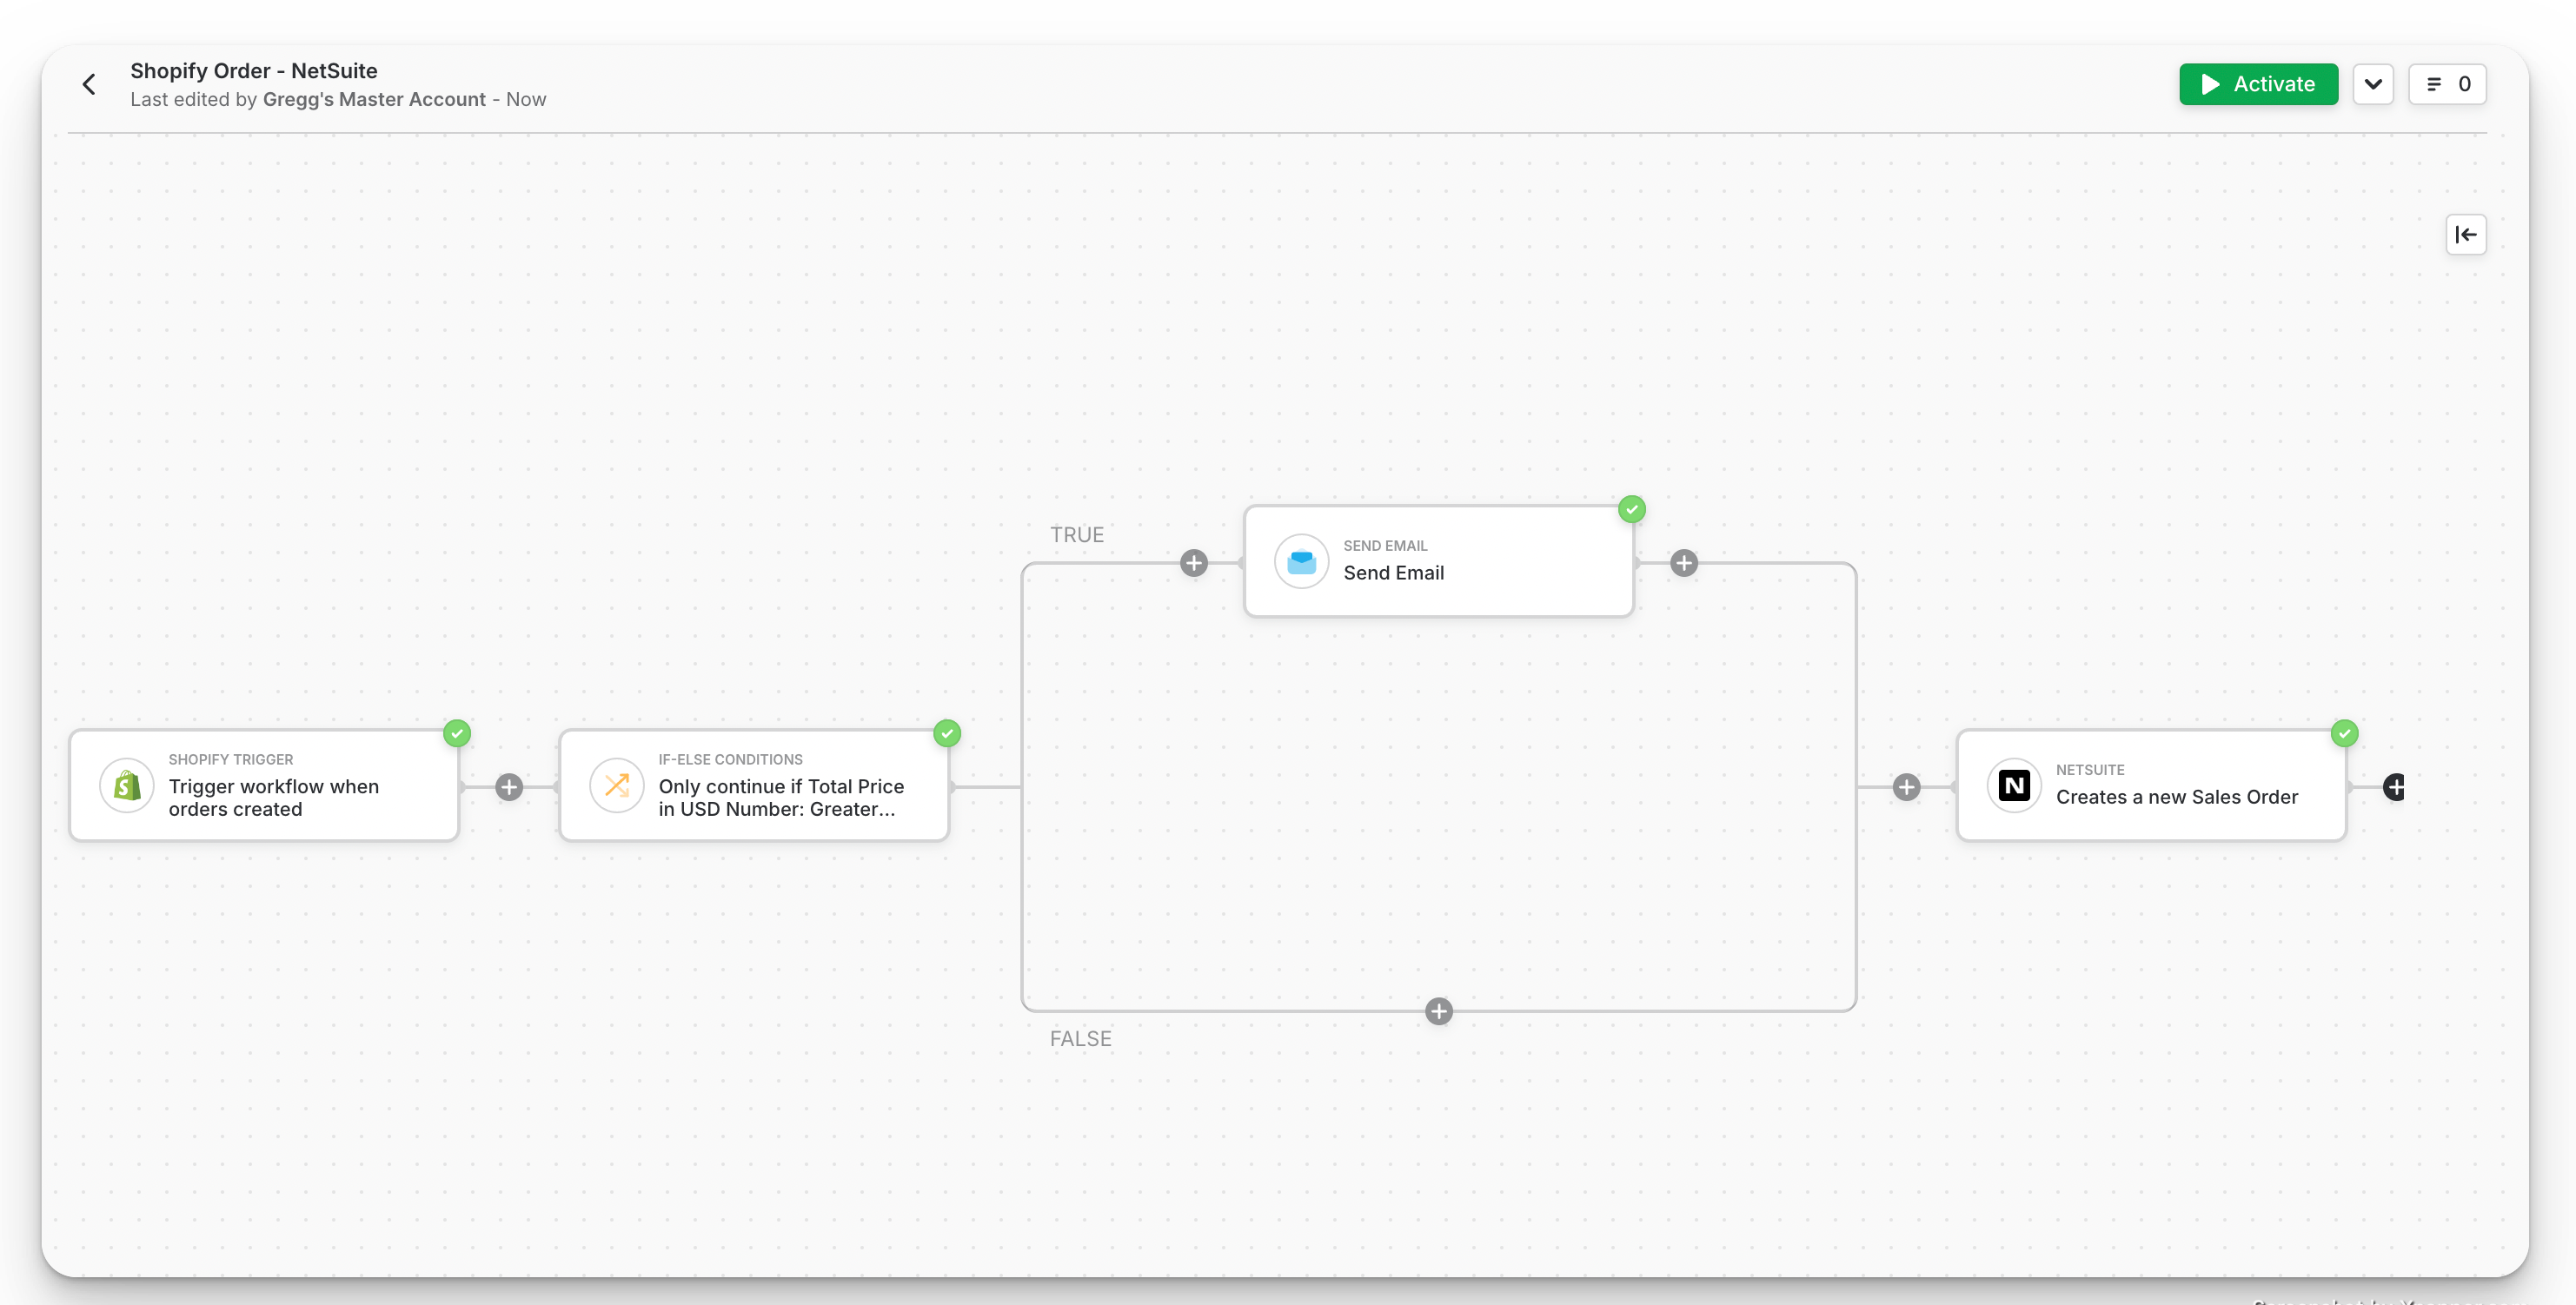
At this point, your workflow should look like below. You can click the Activate button to begin running your workflow.

At this point, you've successfully built your first workflow. You can go ahead to test it out.
Testing your workflow
To test your workflow, click the activate button in the top right. You can start off by placing test orders to see that data is being synced correctly between your Shopify and Netsuite accounts.
Wrapping up
Well done on setting up your first workflow on Alloy!
Now, try building a second workflow syncing data from Netsuite -> Shopify. Each time a sale is made in any of your physical locations and recorded in NetSuite, the inventory levels on Shopify should be updated so that customers know when an item is low or out of stock.