Overview
In this tutorial, we’ll look at how to customize the Alloy Embedded OAuth experience with your own branding.How it Works
By default, when an end user authenticates any Third Party App that uses OAuth (examples include Shopify, Salesforce CRM, etc) via Alloy Embedded they see a prompt saying “Alloy Automation is requesting access to…” You may wish to have additional customization and control over the authentication experience as seen in the below example. On the left hand side, we have a Shopify integration that is not using Custom OAuth. As you can see, the Alloy logo is visible. On the right hand side, we’ve enabled Custom OAuth. As you can see, when an end user authenticates you’re able to customize the branding to include your company name and logo.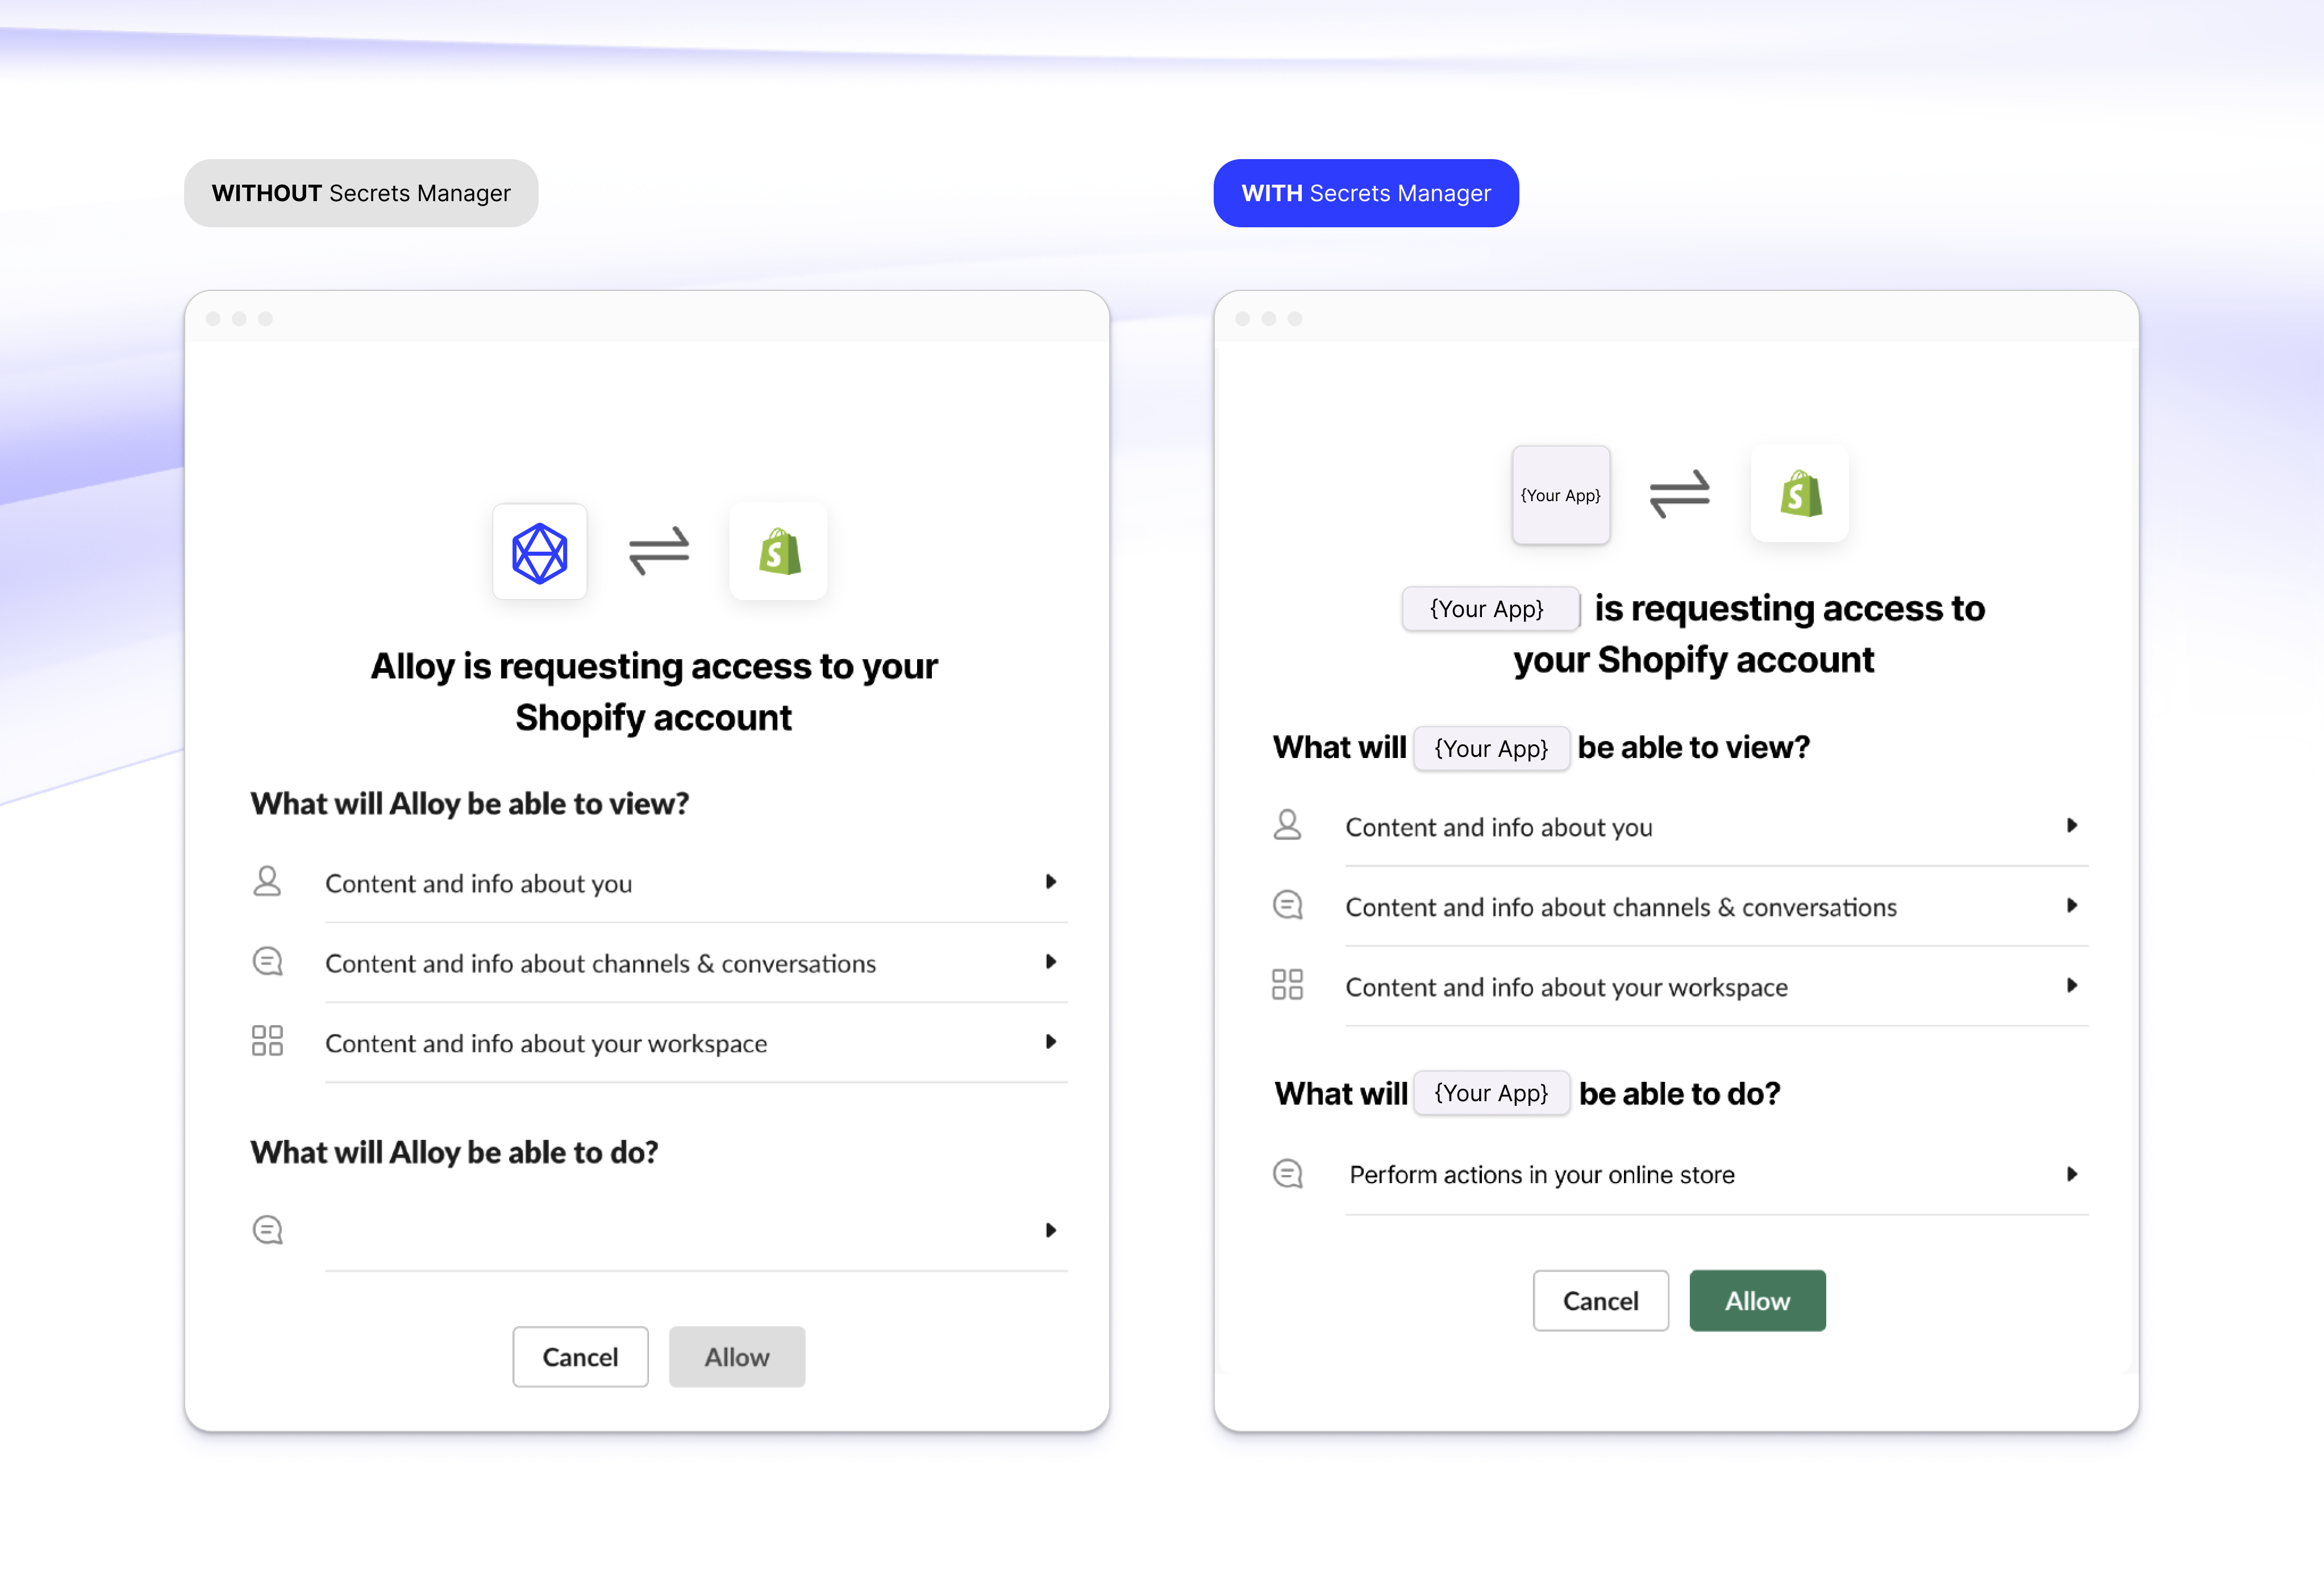
Getting Started with Custom OAuth
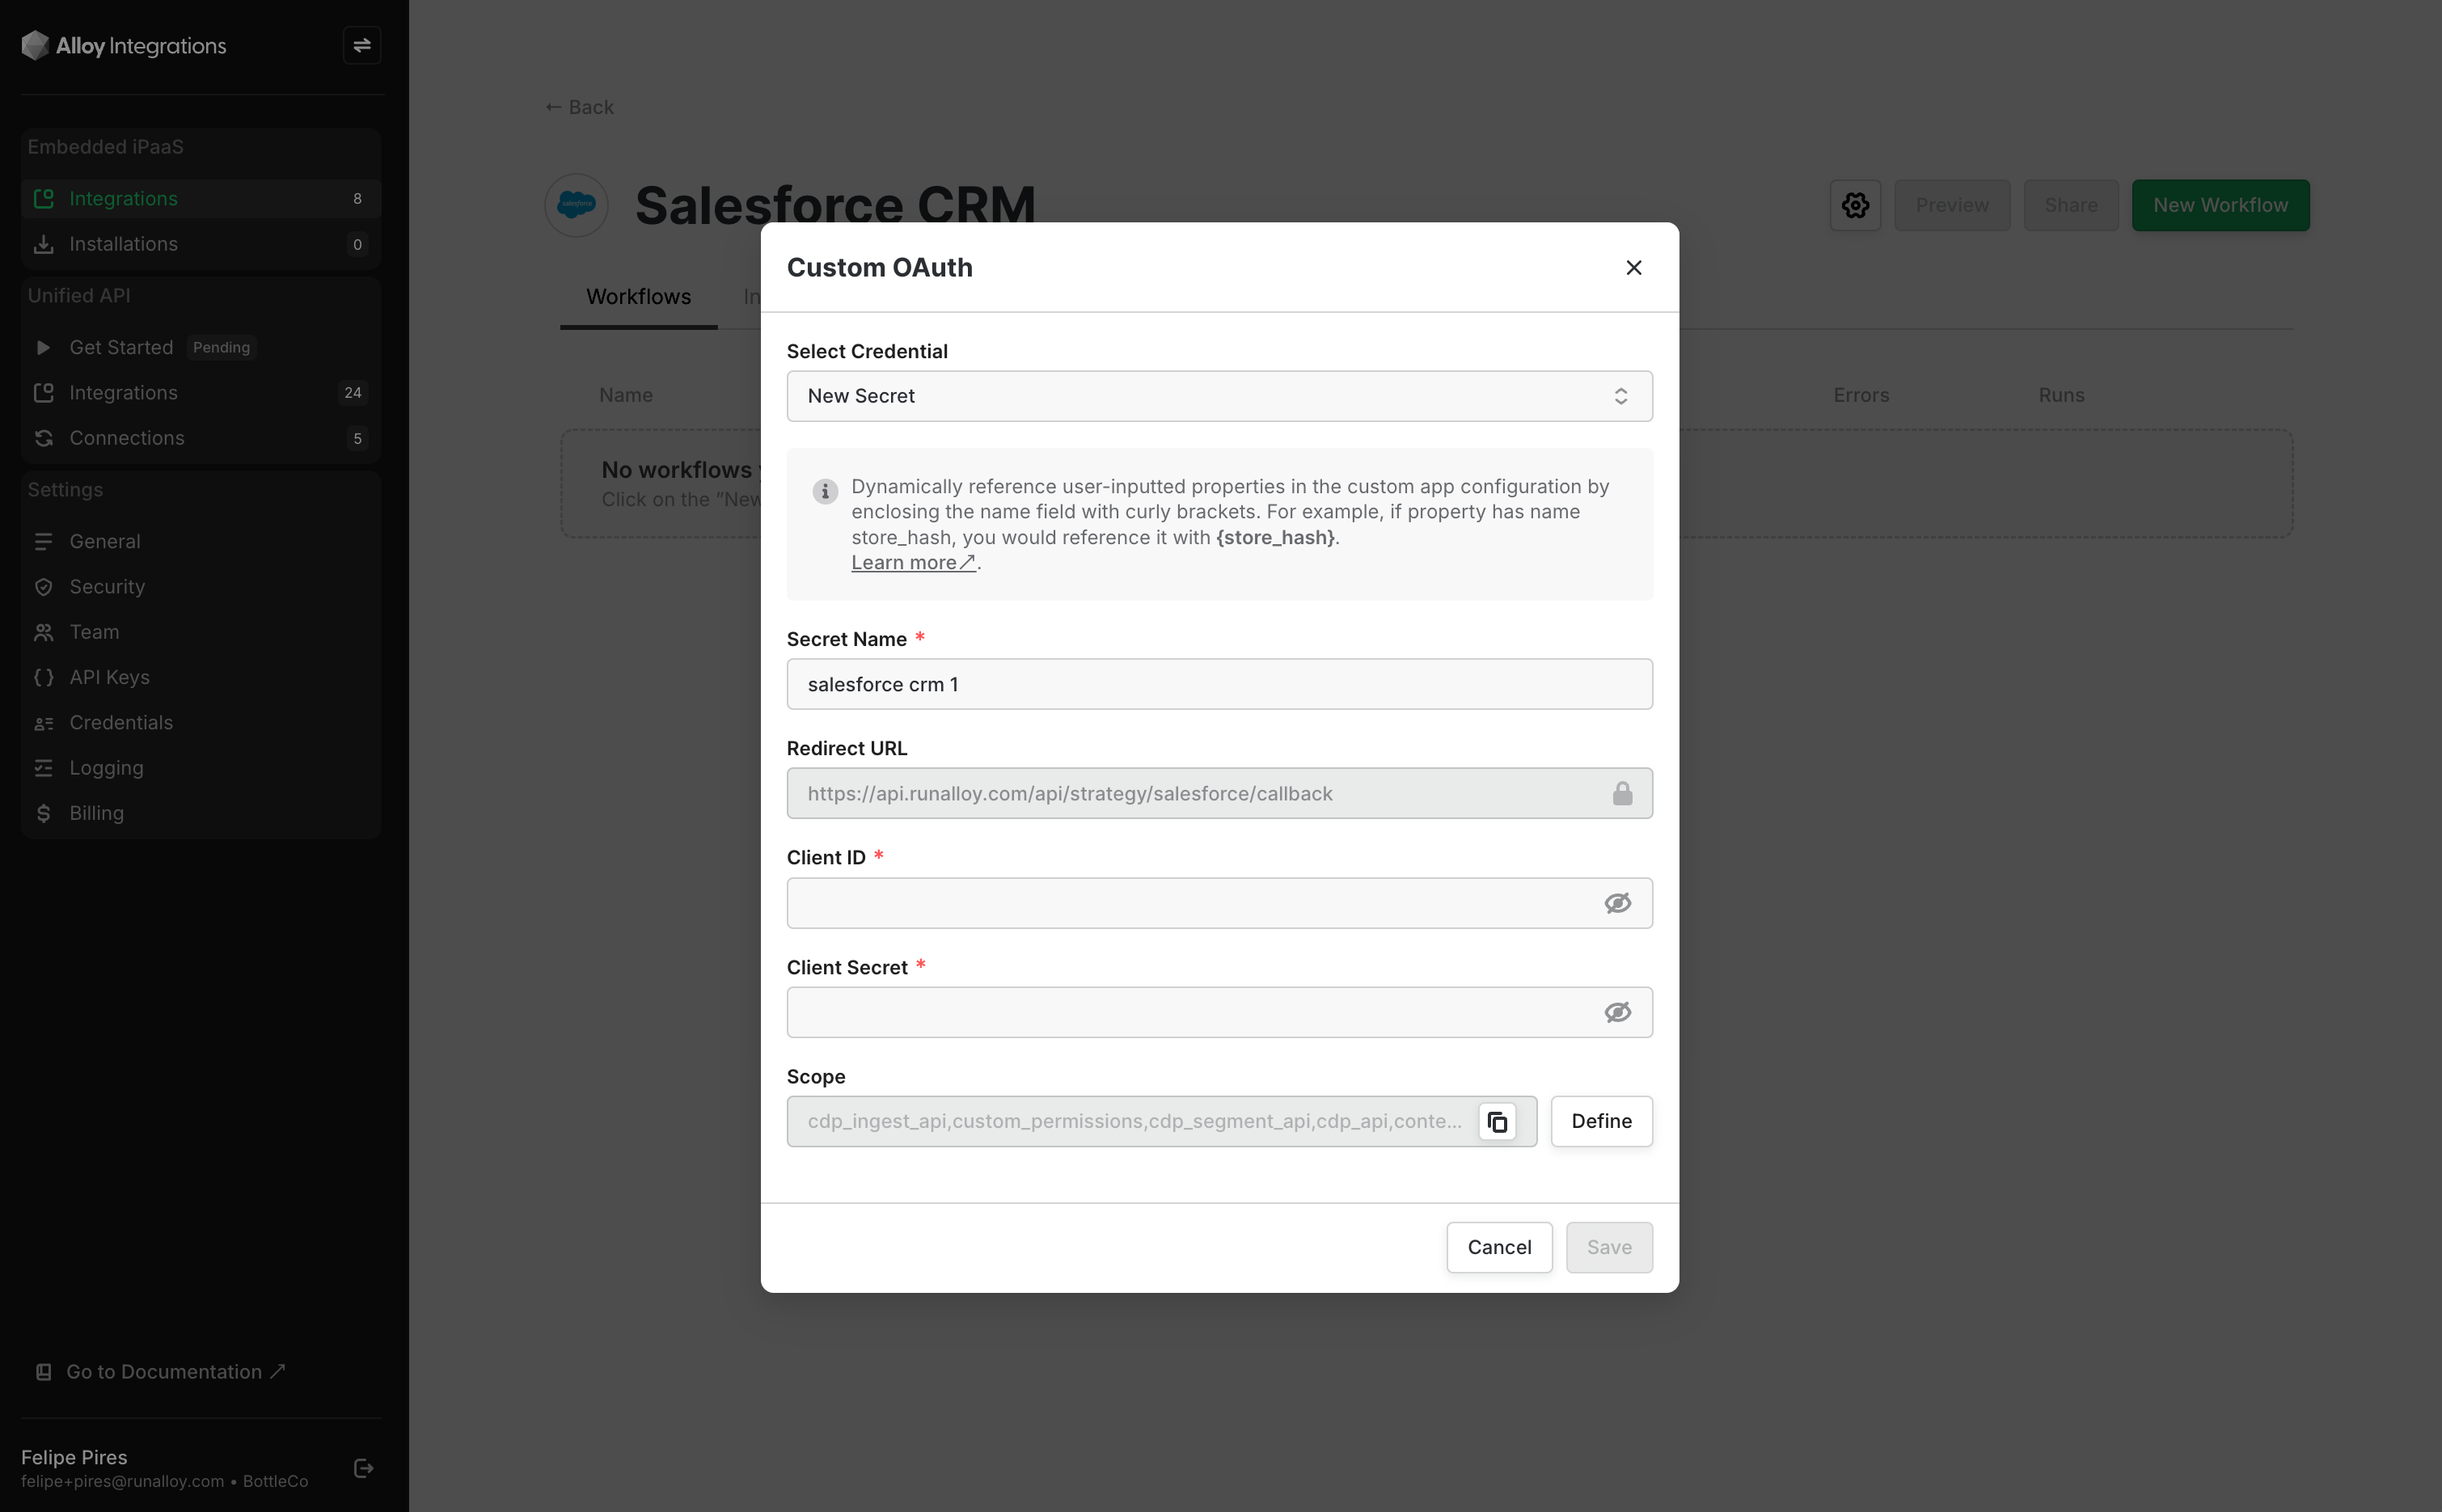
On every OAuth block you’ll see a configuration in the integration Settings as seen below in the Salesforce CRM example.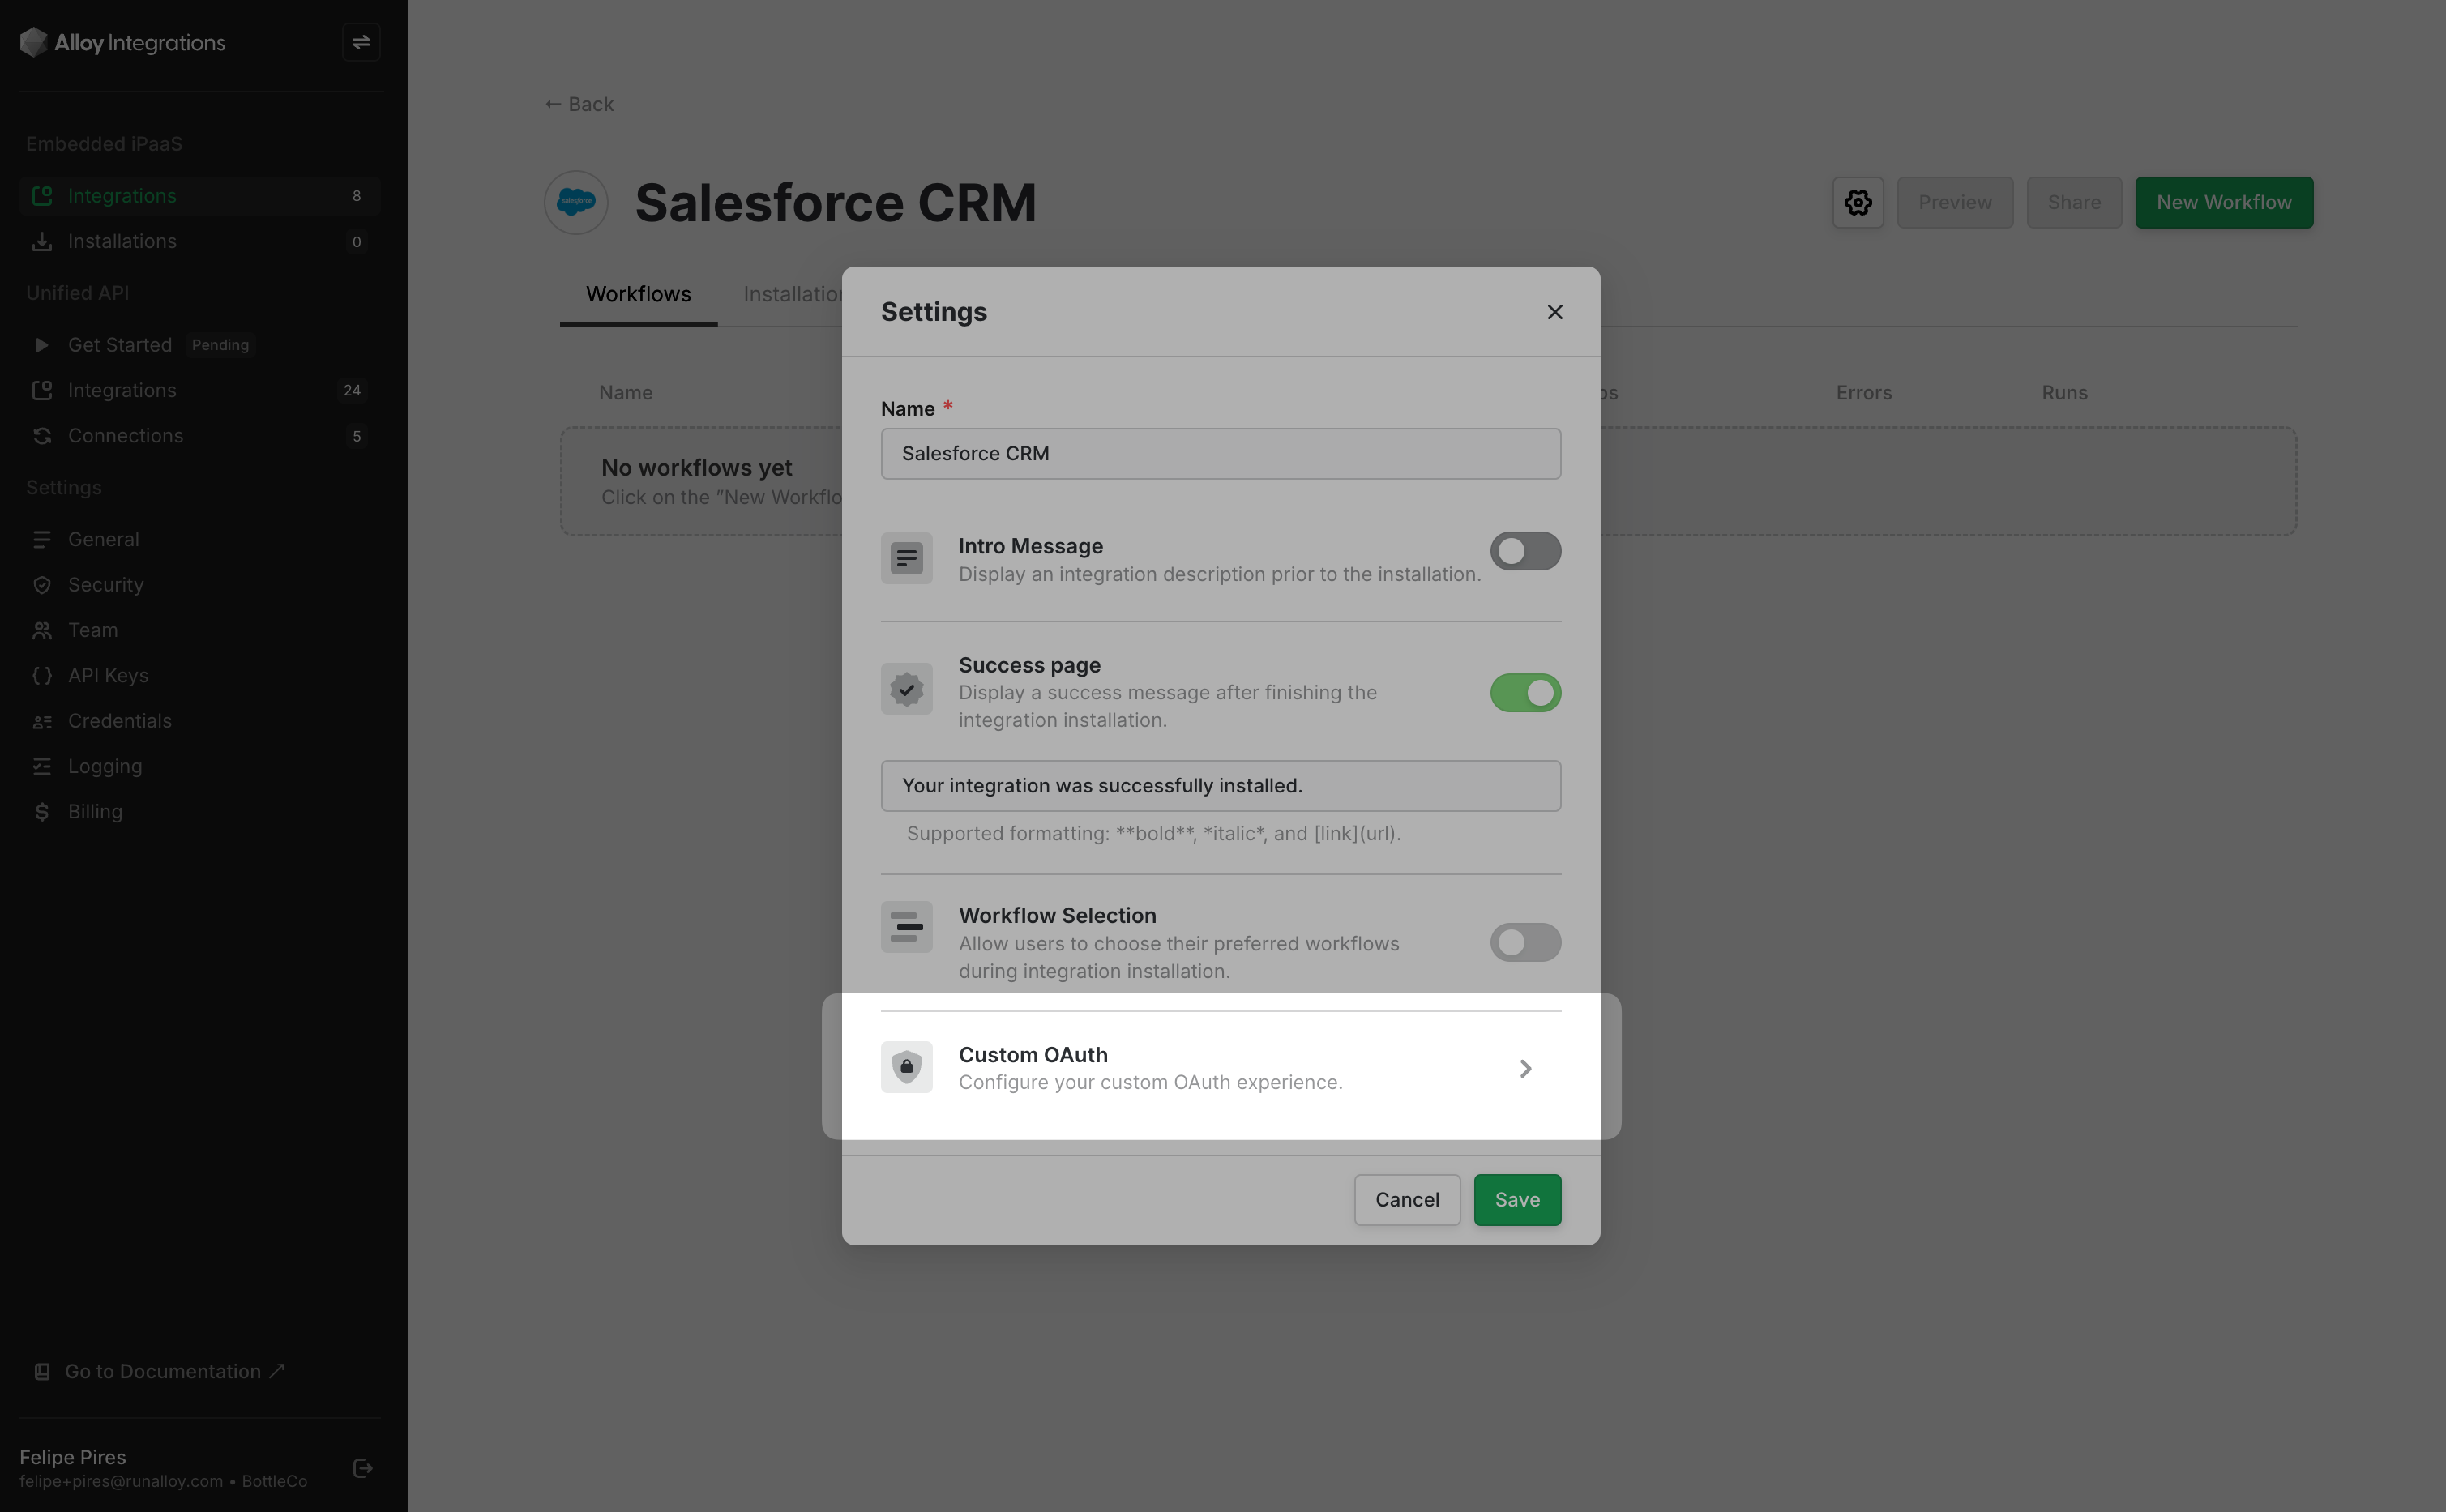
- Client Id: The client Id of your Salesforce CRM app
- Client Secret: The client secret for your Salesforce CRM app
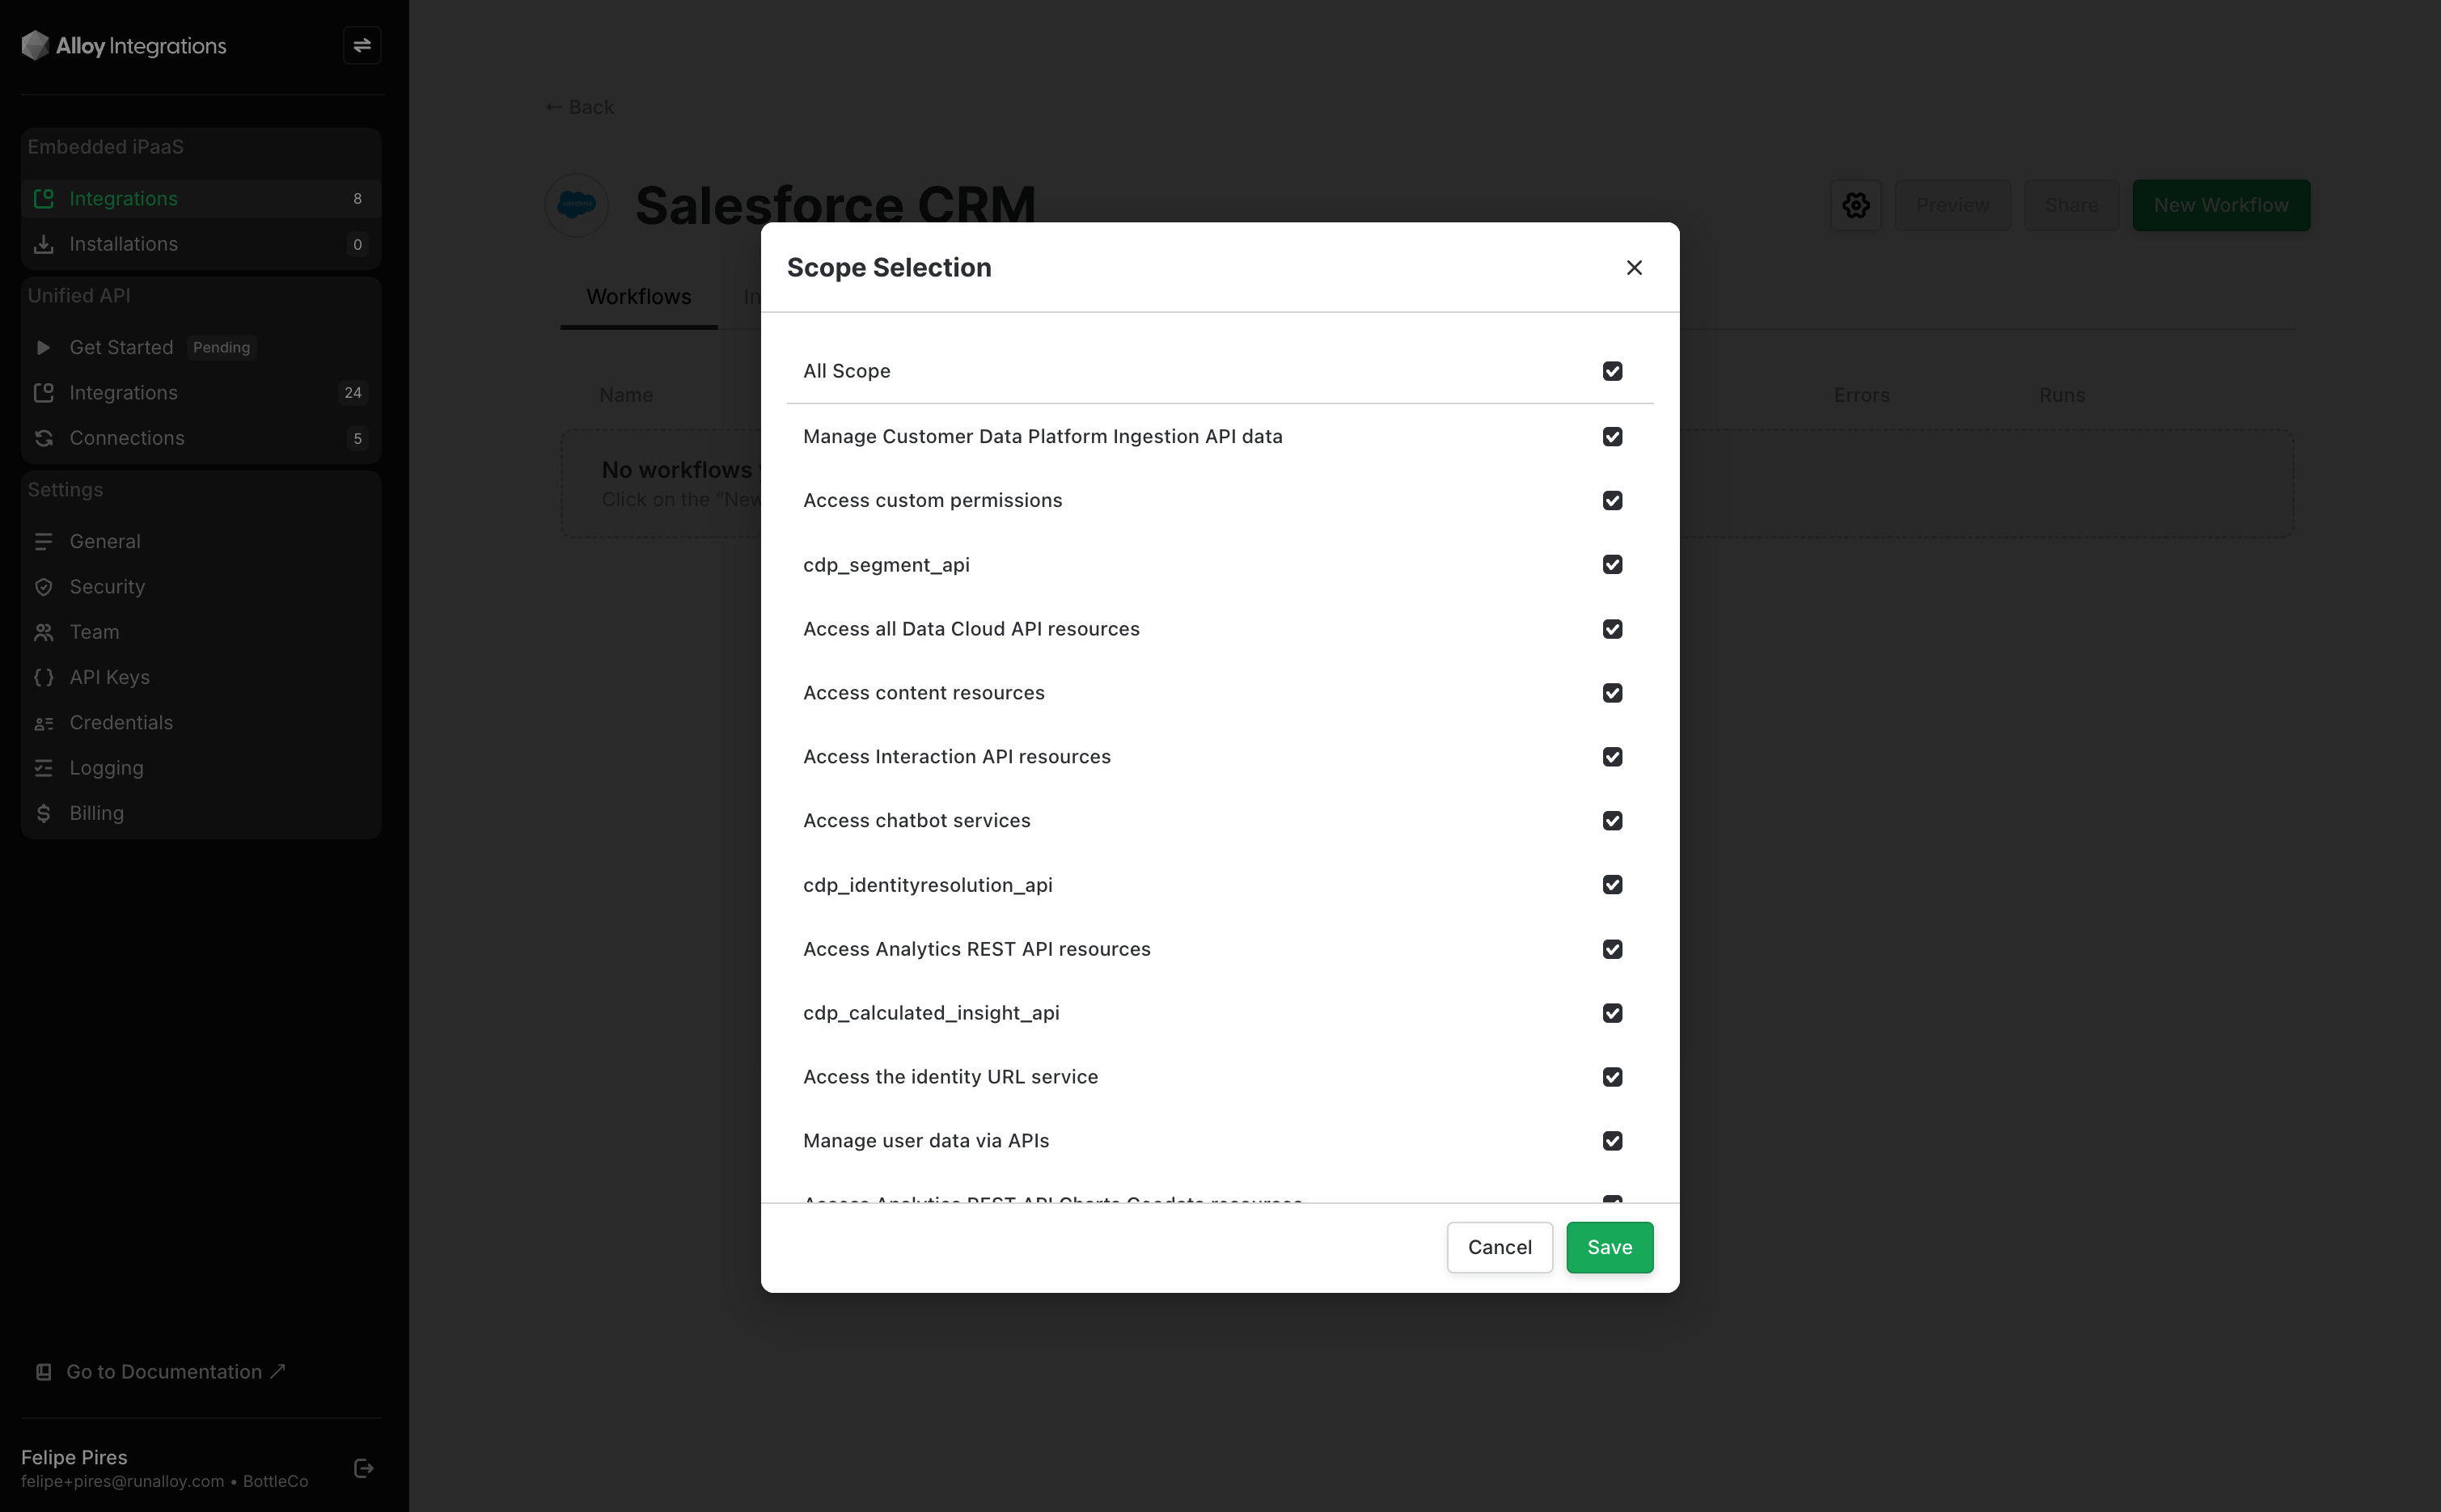
- Scope: The scopes (provided by Alloy) Alloy Embedded needs to collect. You may need to request these scopes in your Salesforce CRM OAuth app configuration.
- Redirect URL: The URL (provided by Alloy) where the OAuth app should redirect to. You may need to specify this in your Salesforce CRM OAuth app configuration. This tells Salesforce how to properly handle the redirection request after the OAuth handshake is completed and customers will be routed back to your site upon redirection.