Overview
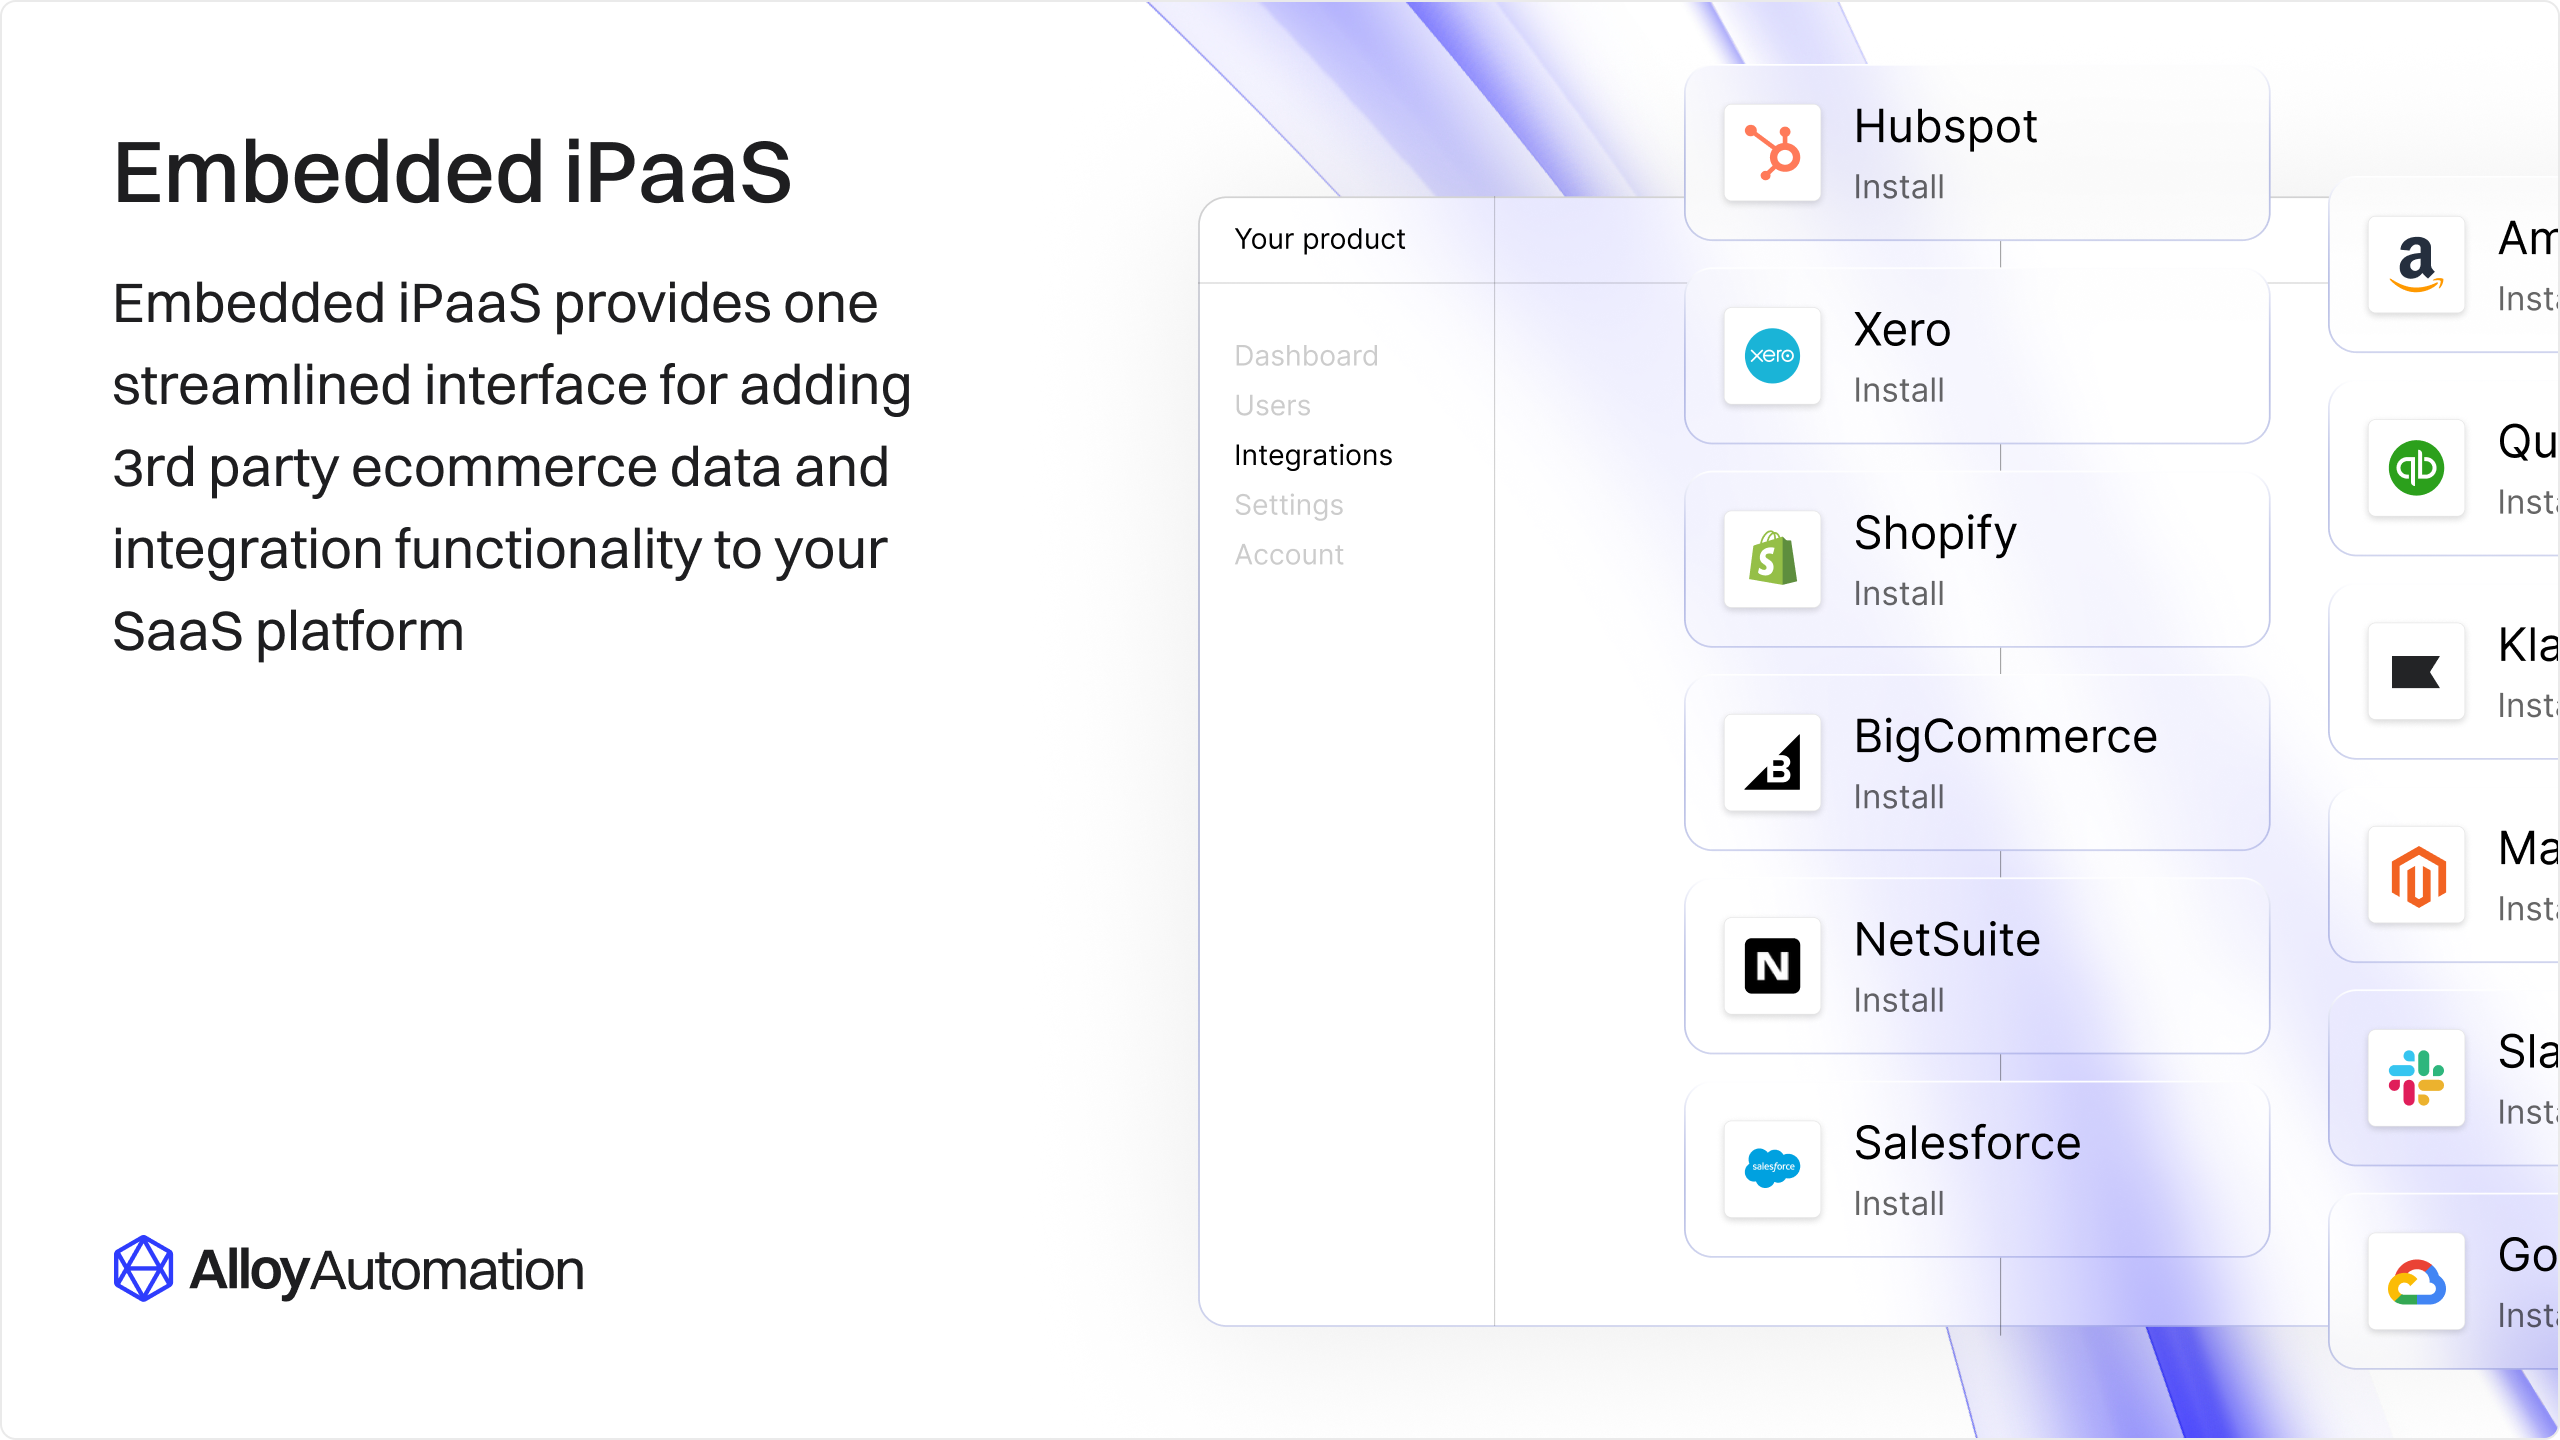
In this guide, we’ll walk through how to get started building integrations with Alloy Embedded. Alloy Embedded is the easiest and fastest way to go live with not just one but hundreds of pre-built, maintained, and powerful integrations. Offering your users integrations with Third Party Apps (3PA) has increasingly become an essential part of any successful SaaS product. But building and maintaining dozens of robust integrations require a sizable time and financial commitment that ultimately takes time away from your product roadmap. Enter Alloy Embedded. Alloy Embedded is an Embedded iPaaS product designed to streamline building native integration experiences. Let us handle the complexity of managing integrations – just implement our SDK once and build integrations with ease. In this Quick Start guide, you’ll learn how to create comprehensive integrations with the Alloy Embedded platform. We’ll cover the following topics:- Key concepts
- How to build an integration
- How to add Alloy Embedded to your application
- Going live
Key Concepts
Before we begin, let’s align on a handful of key terms:Integration Structure
Before we build our first integration, let’s take a moment to plan it. Assume you’re a software engineer at AcmeCo were given the following product requirements: We’ll need to build two workflows to support this use case:- Workflow #1: When a new order is created in BigCommerce, create a new record in AcmeCo
- Workflow #2: When a fulfillment status is updated in AcmeCo, update the order status in BigCommerce
Info:AcmeCo wants to offer a BigCommerce integration to its customers. The integration must support bi-directional data syncing. It should update the order record’s status in the linked BigCommerce store every time a fulfillment status is updated in AcmeCo’s systems. Also, AcmeCo needs to be alerted each time an order is placed in the client’s BigCommerce store.
Building the Integration
Let’s start designing your first integration with the Alloy Embedded Workflow Builder. Let’s assume your company, AcmeCo, is a fulfillment management tool. As per the product requirements above, we’ll need to design the two workflows to satisfy the task.Selecting the Integration
Navigate to the Alloy Embedded dashboard and select New Integration > then locate BigCommerce.
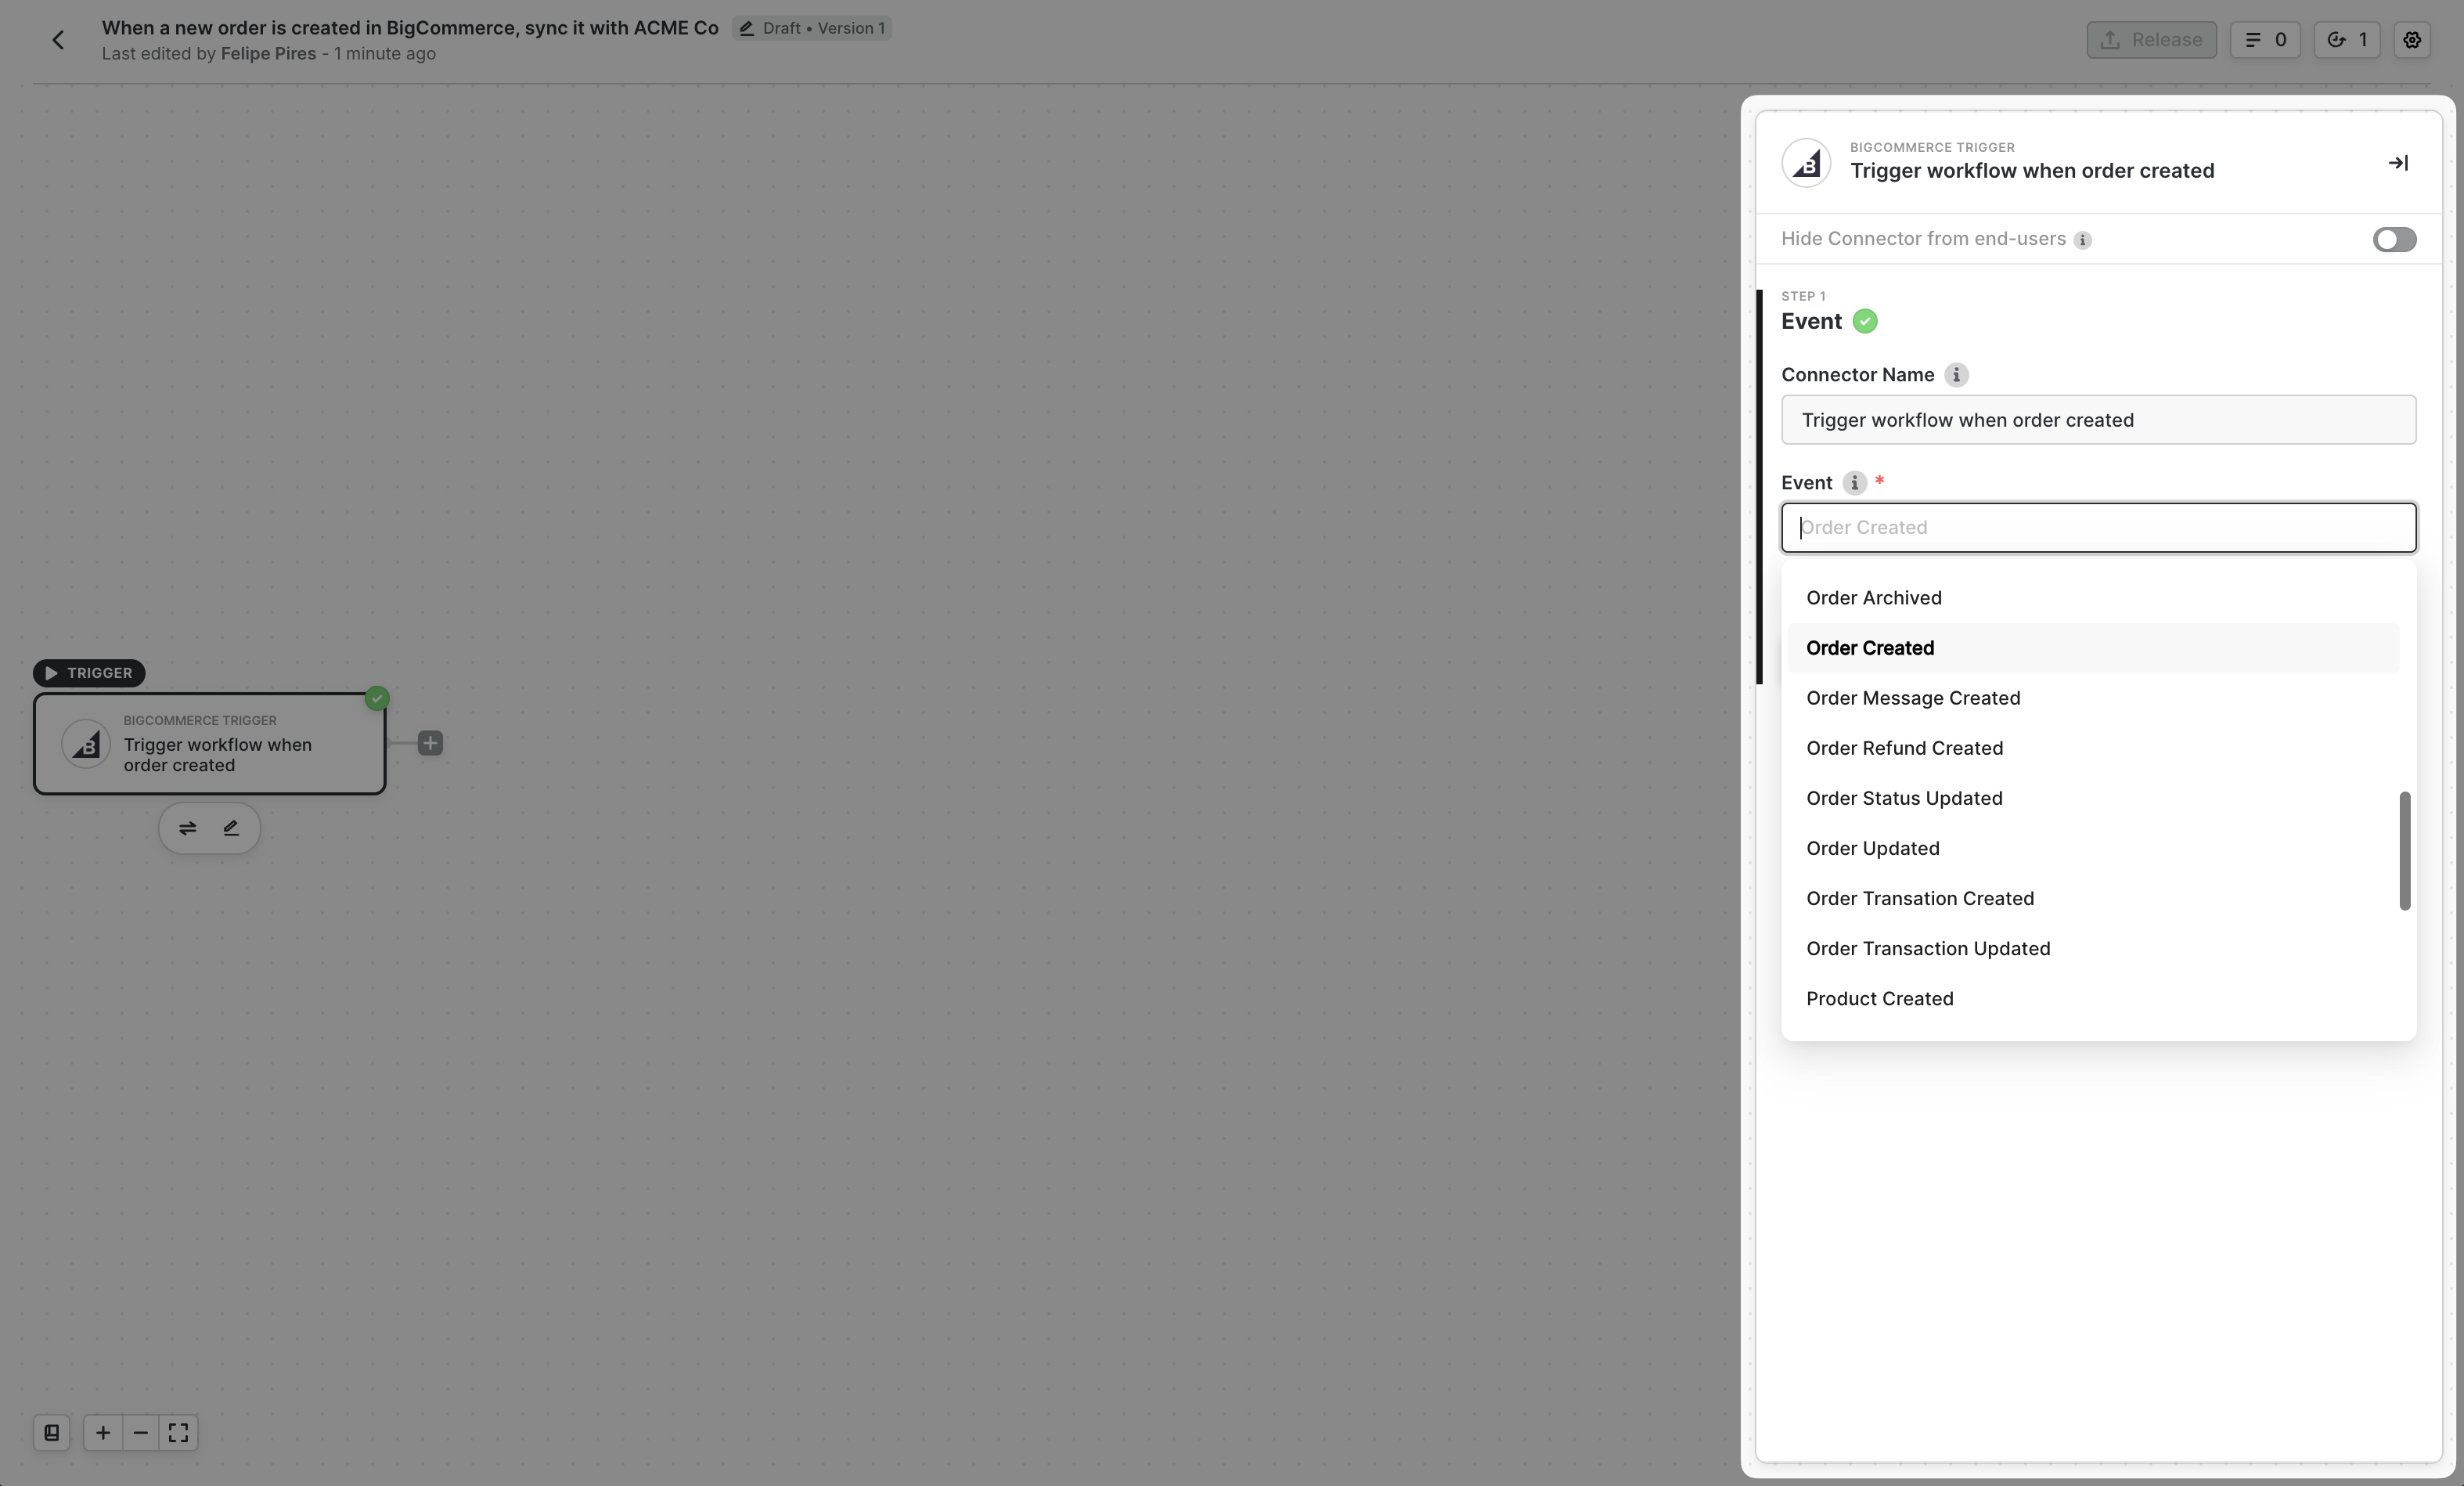
Workflow #1: BigCommerce → Your App
To create a workflow click New Workflow. This will create your first workflow and take you inside the Alloy Workflow Builder.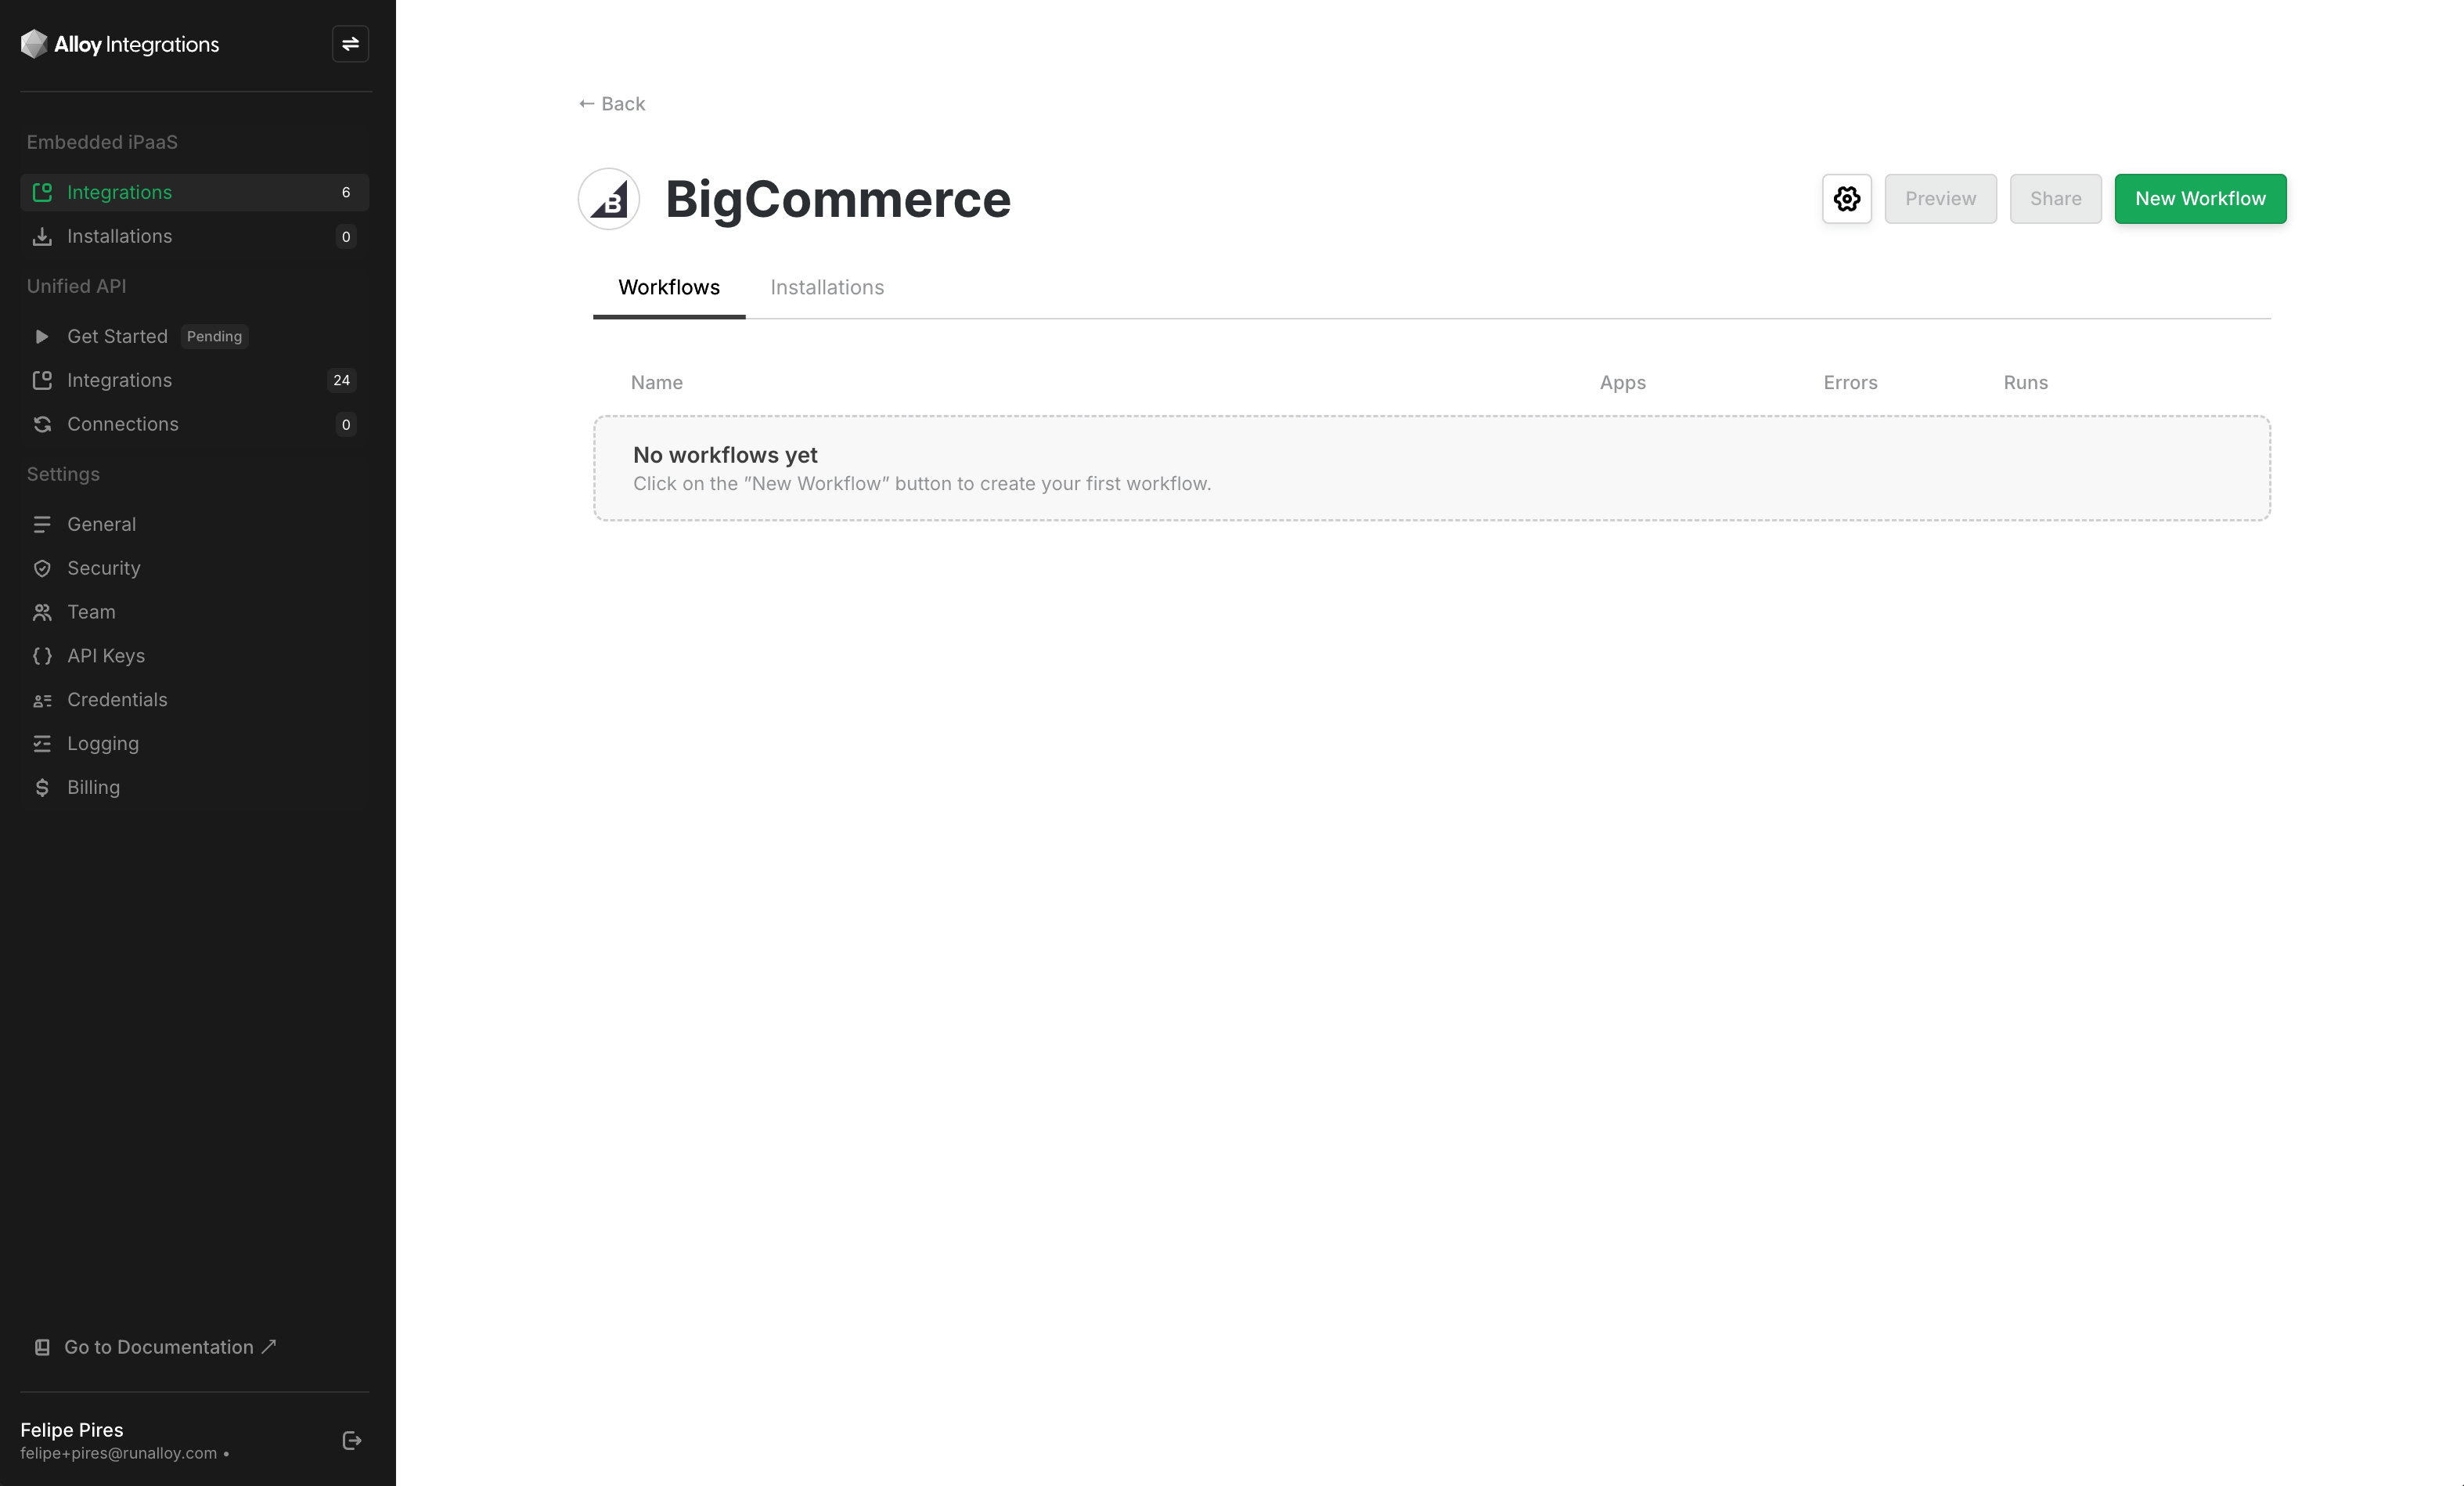
Info:When a new order is created in BigCommerce, create a new record in AcmeCo

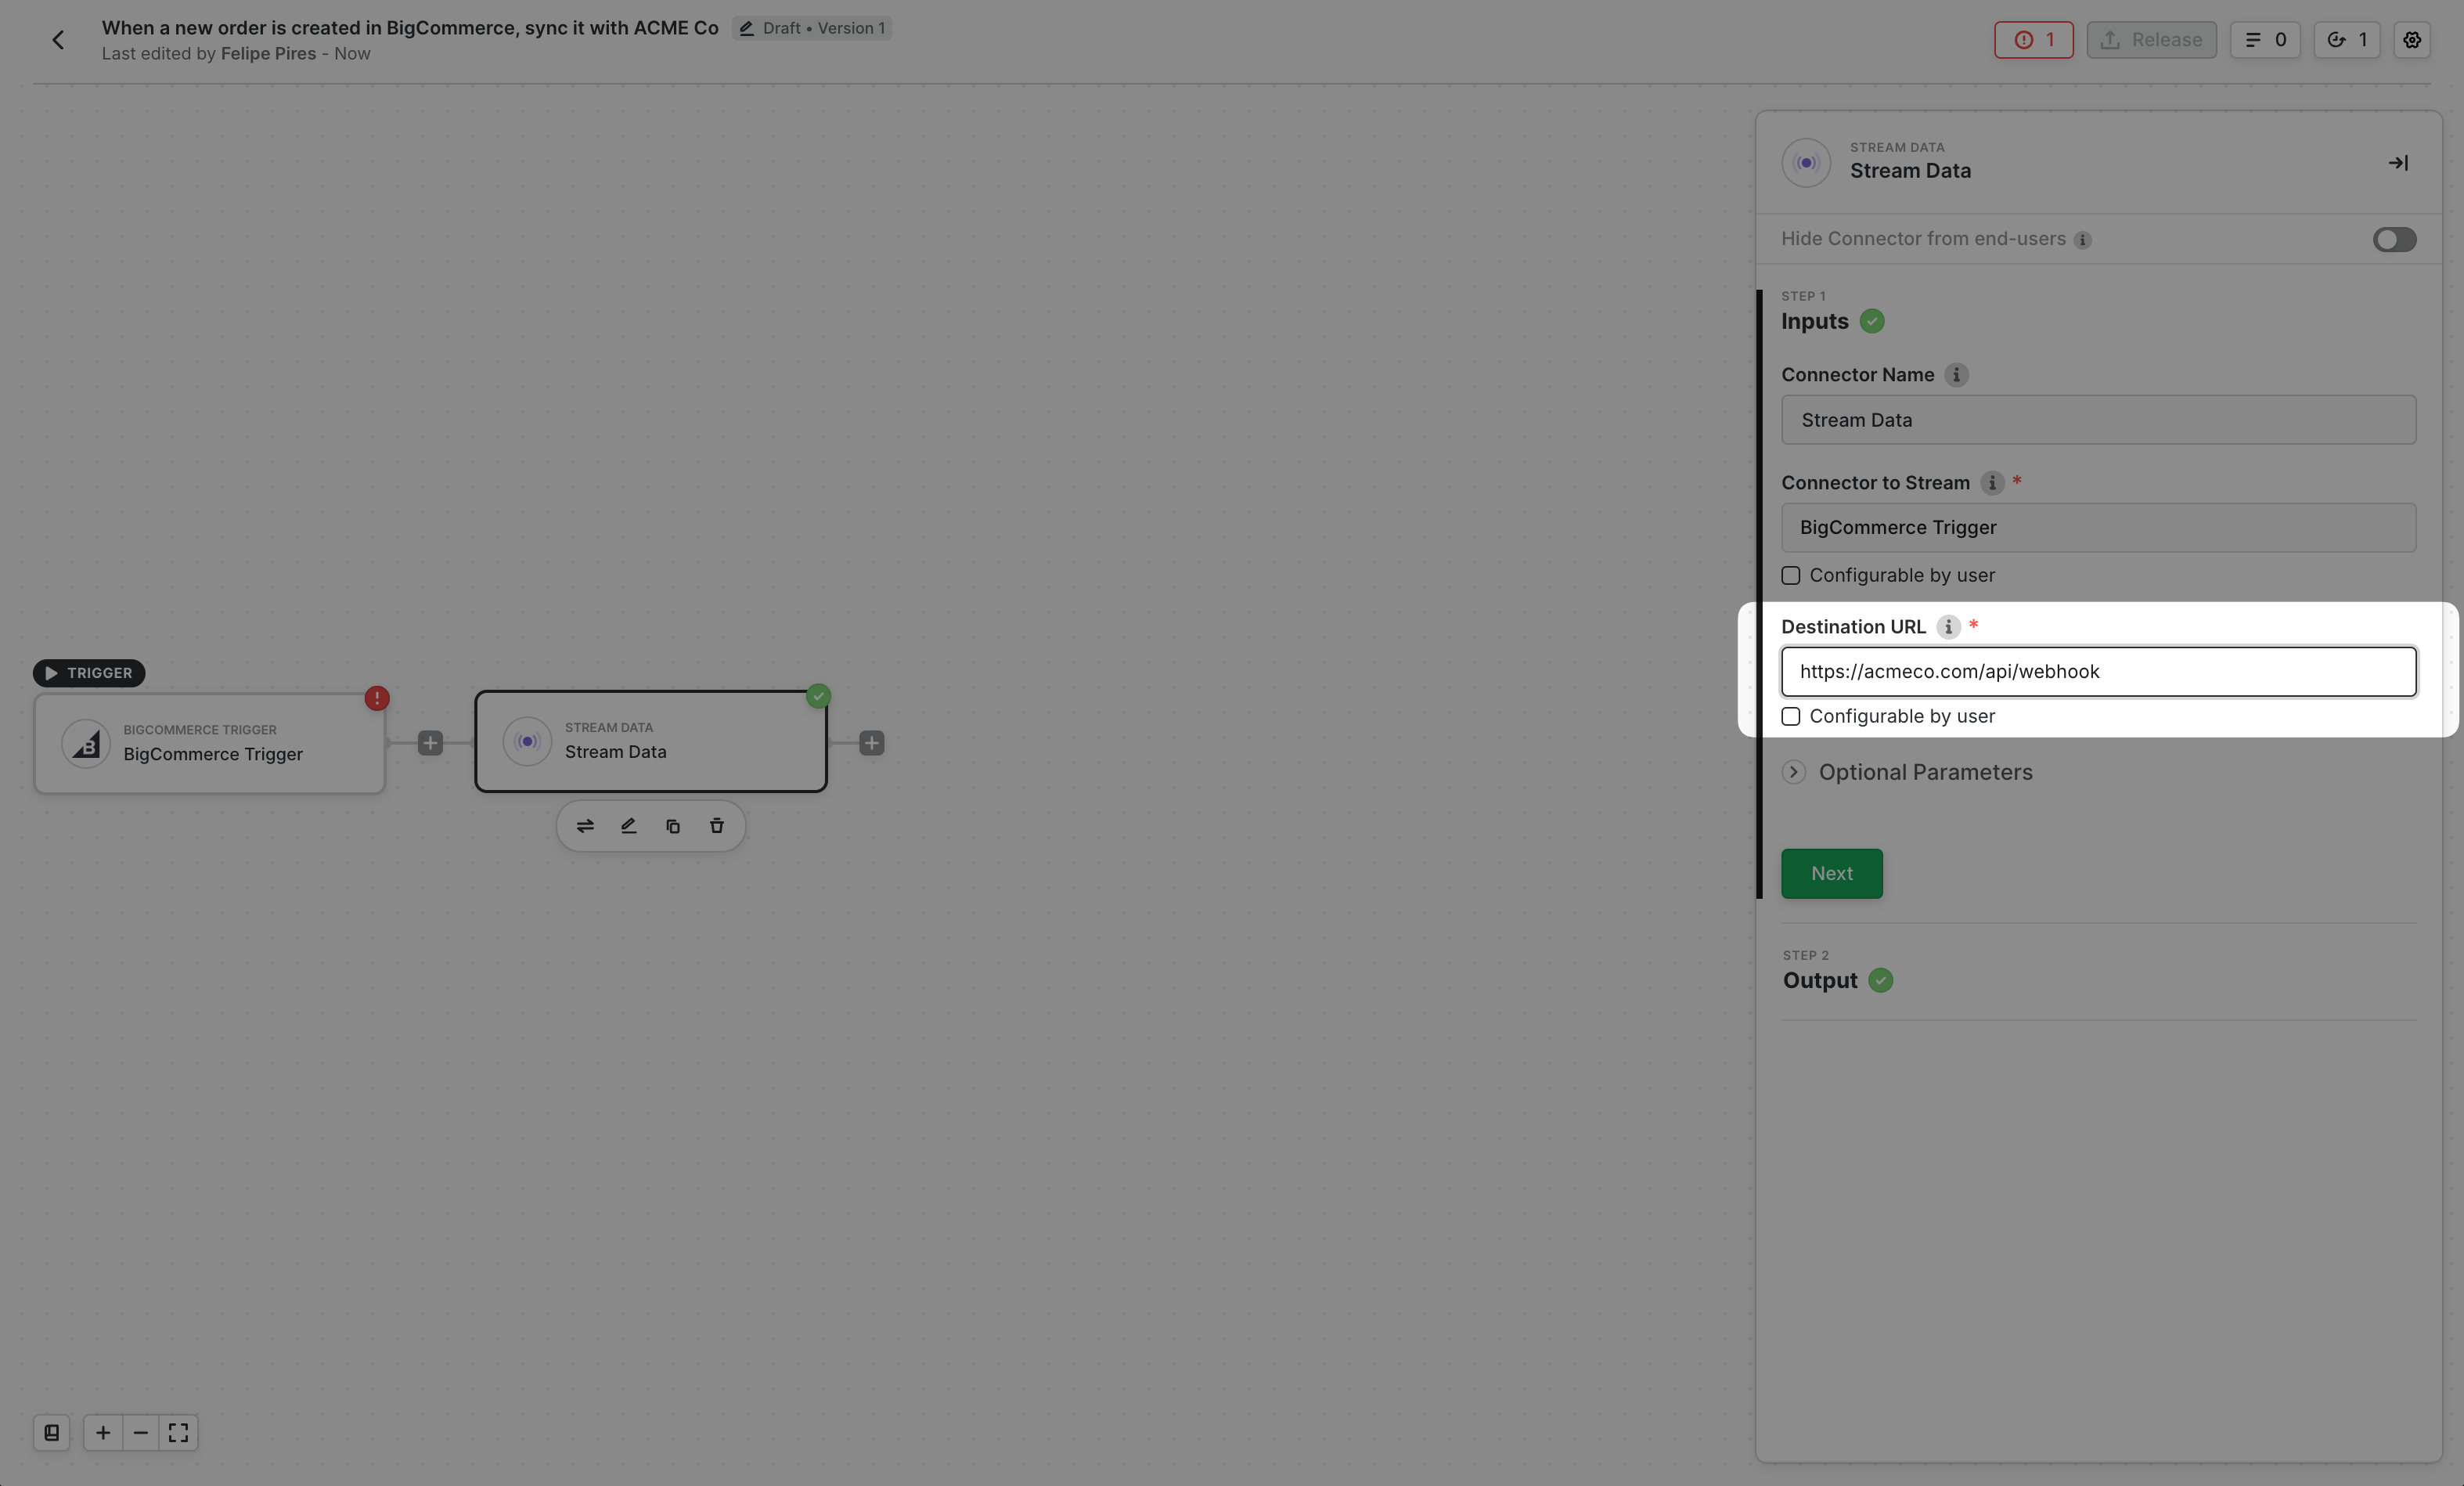
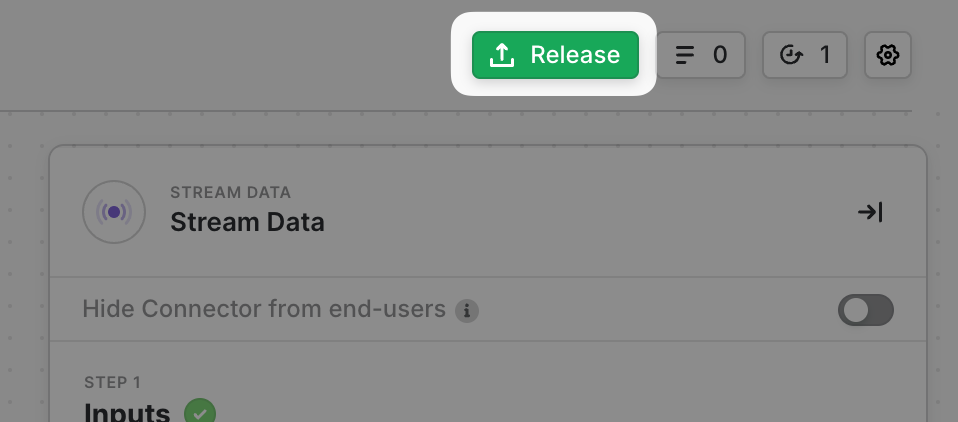
Info:In this example, we elected to stream data to our own webhook server via the Stream Data block. However, you can also send data to any of our various destination blocks including data warehouses like Snowflake, databases like MySQL, or even ingestion pipelines like Amazon EventBridge.
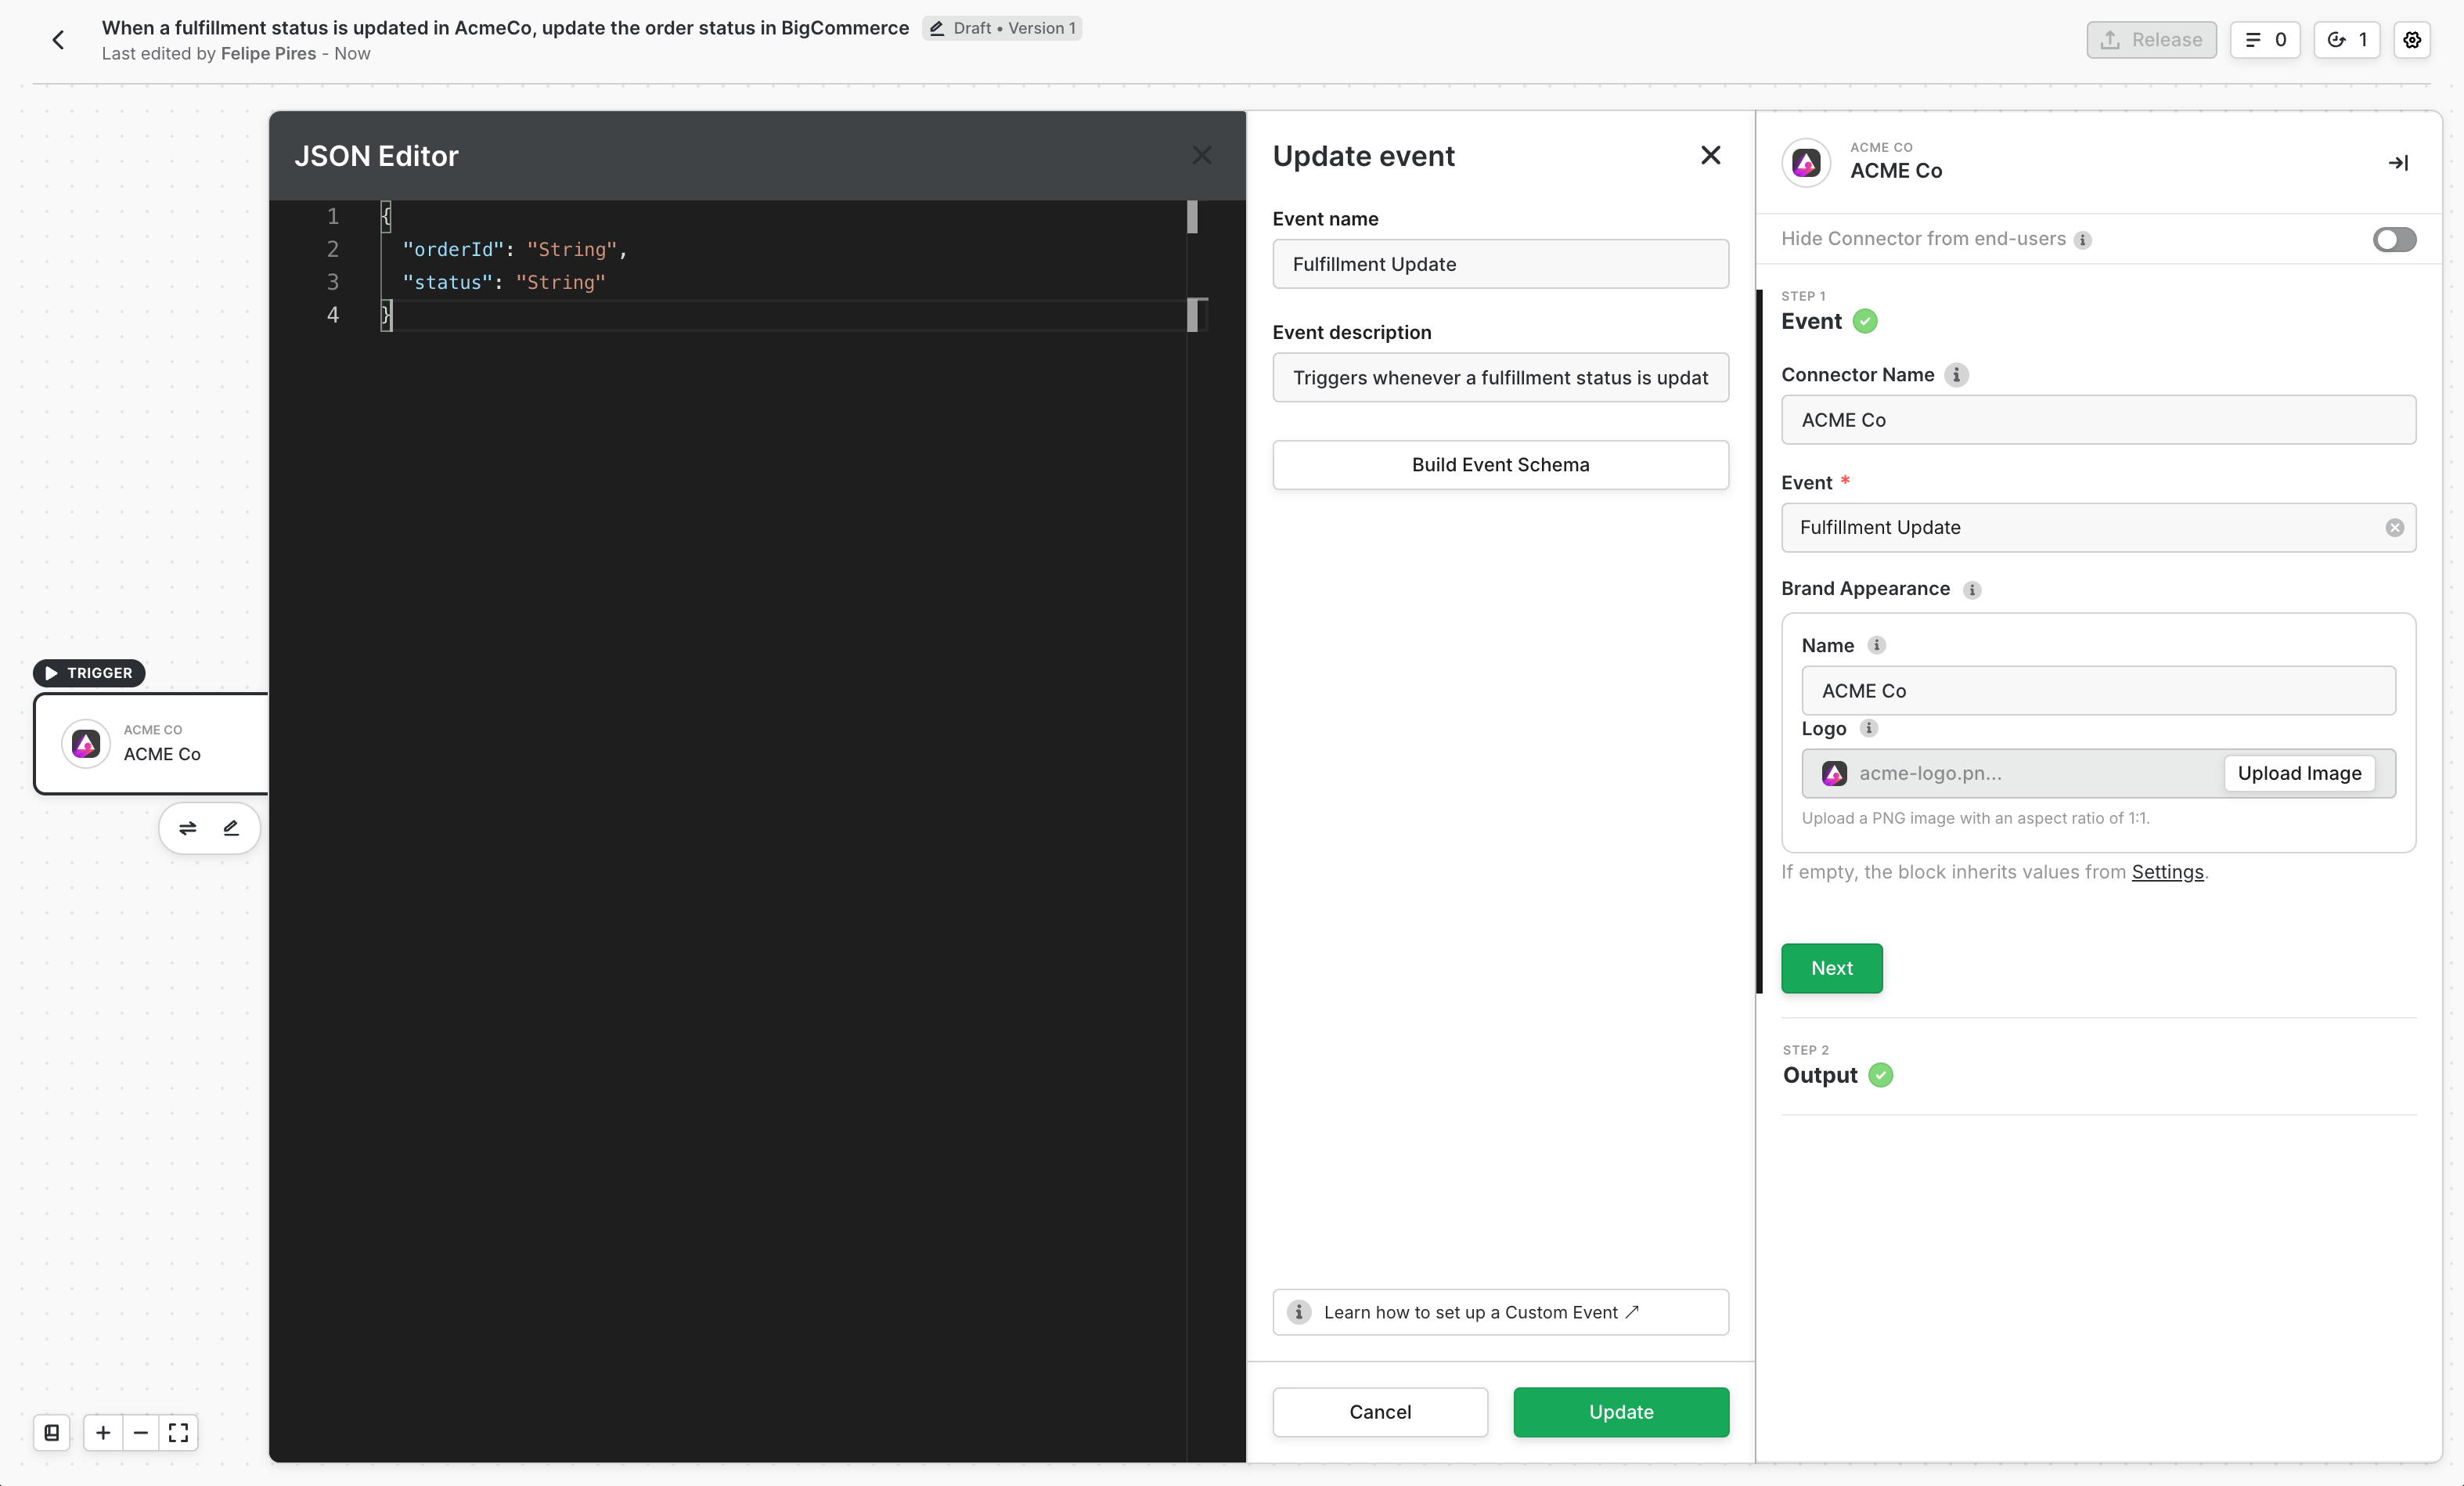
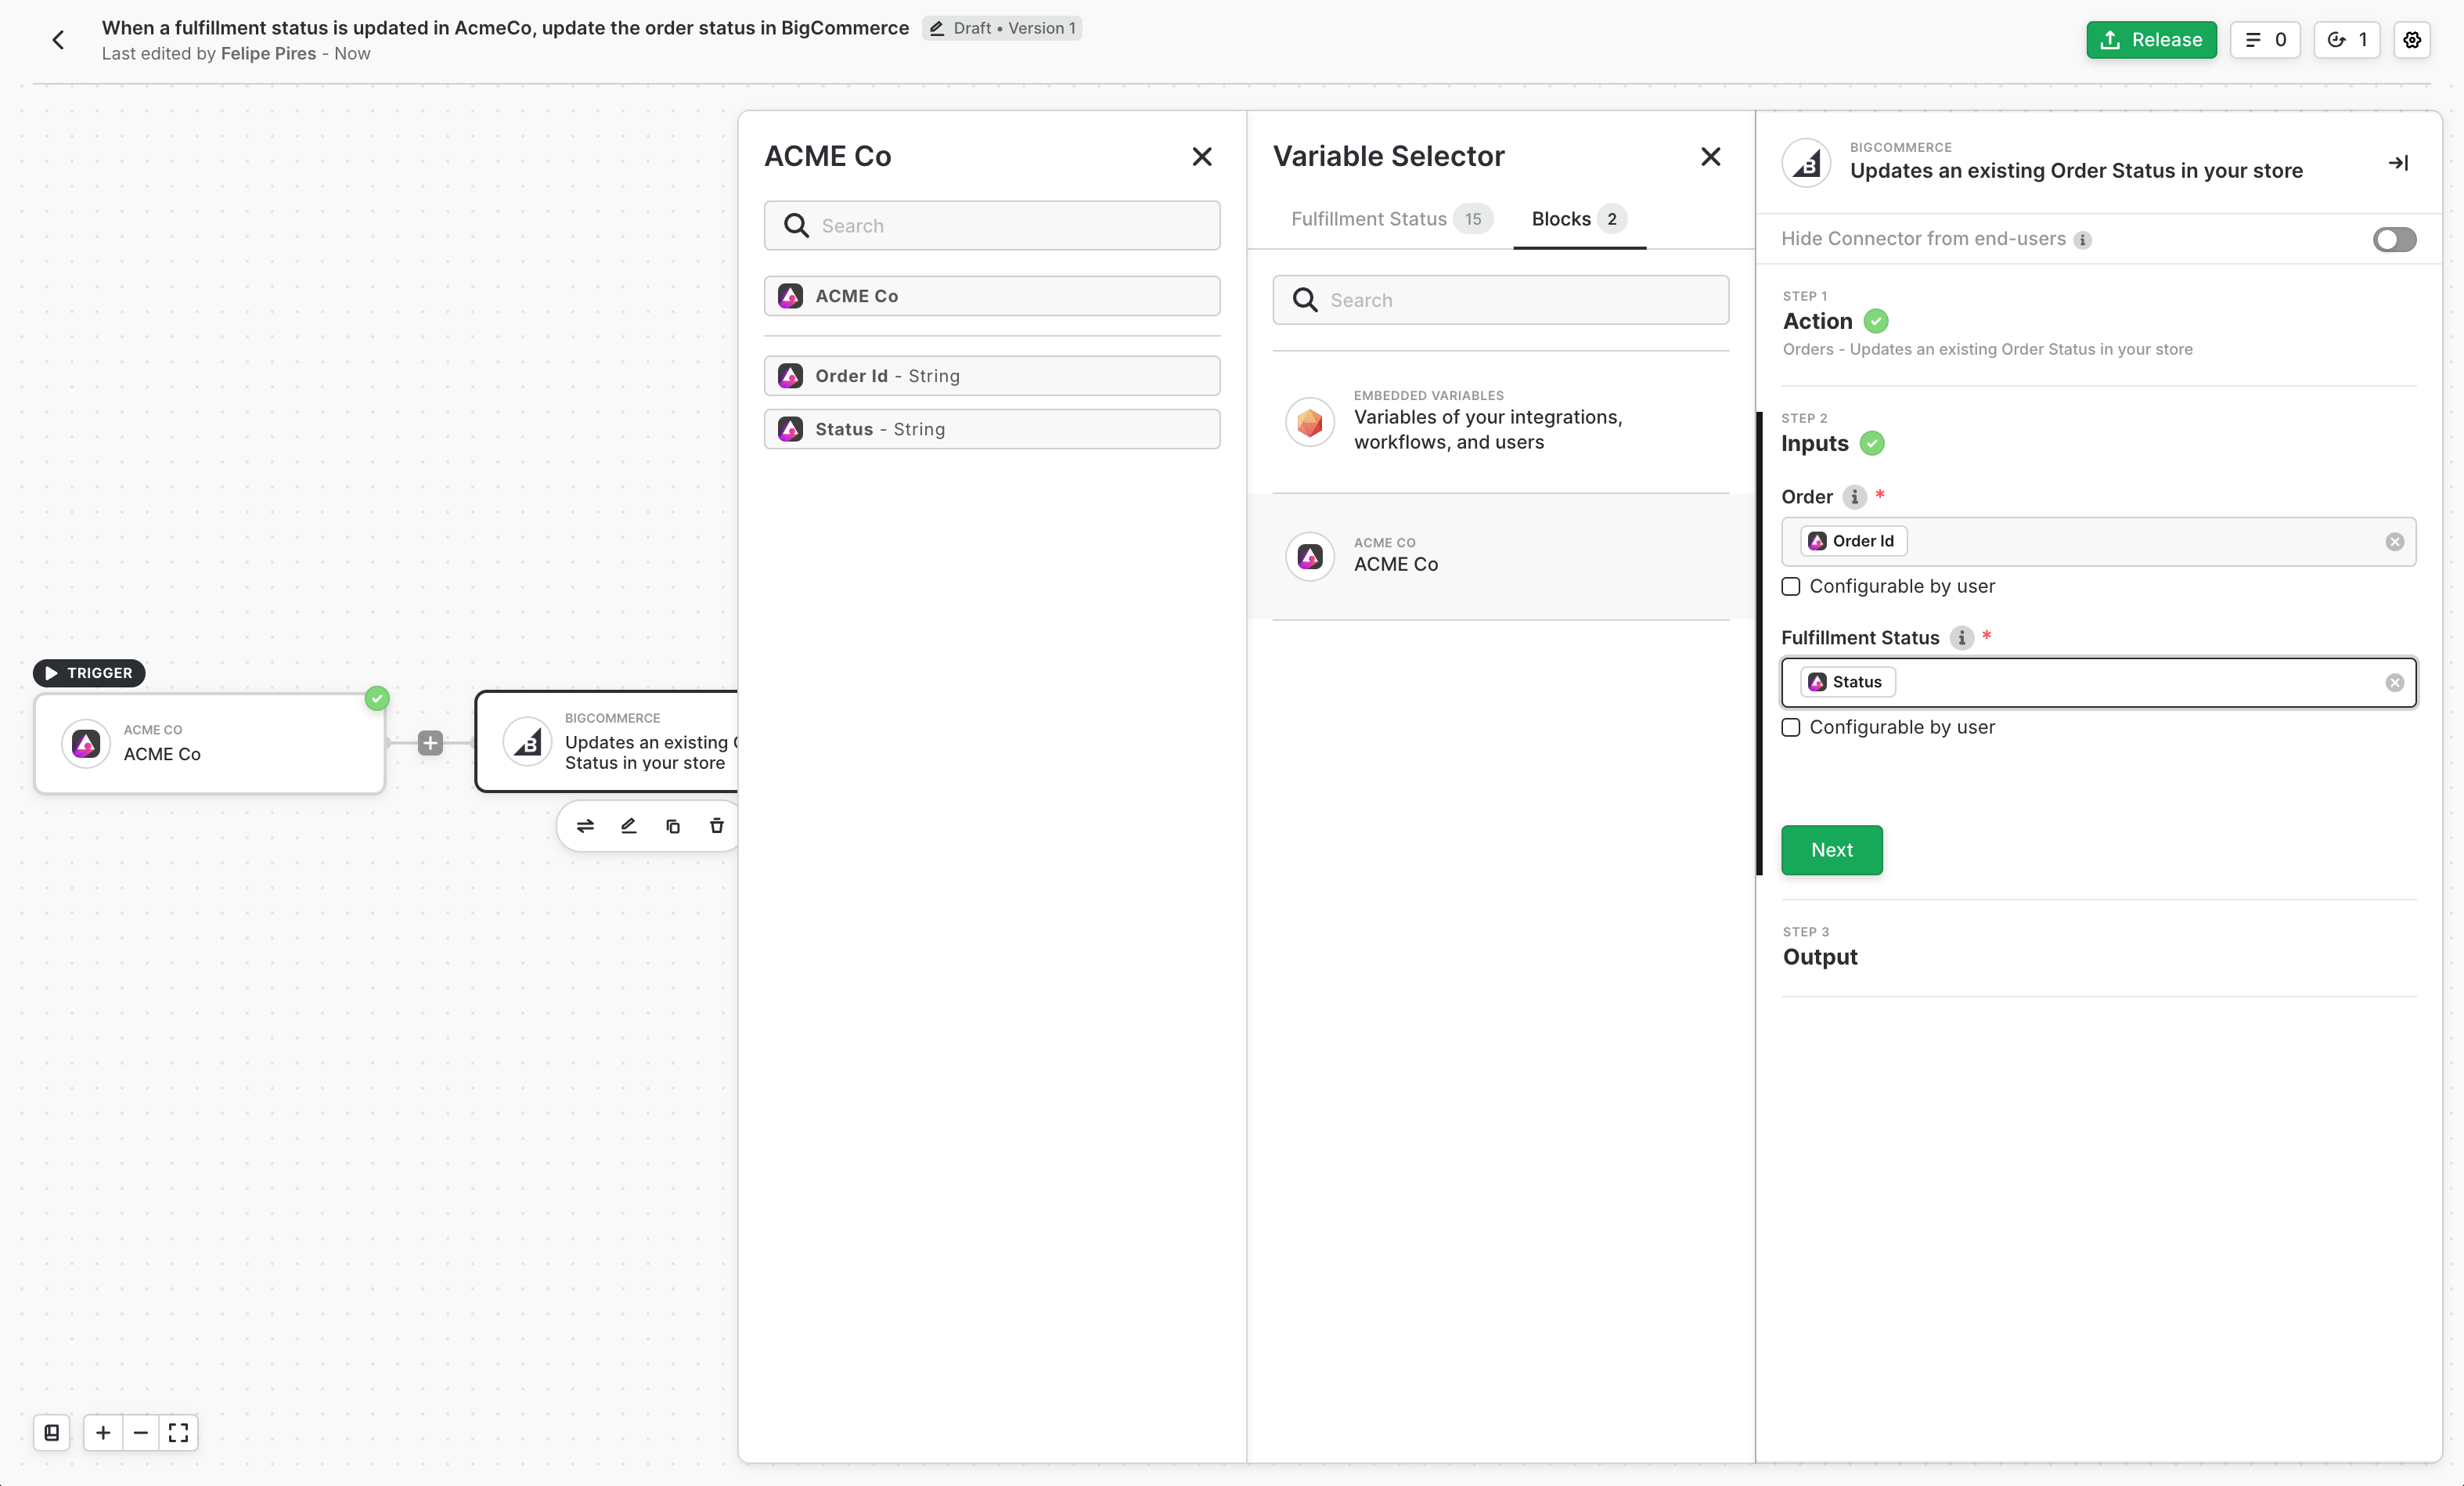
Workflow #2: Your App → BigCommerce
Next, let’s build the second workflow. As a reminder, Workflow #2 must function as follows:Info:When a fulfillment status is updated in AcmeCo, update the order status in BigCommerce.
Info:A Custom Event is a special type of event block that allows you to specify your own payload to trigger a workflow. Because we want to update an order status in BigCommerce from AcmeCo’s application, we’ll use Custom Event.
JSON
Note:Once you’ve defined a custom event, you can reuse that event across multiple workflows – any workflows with that event will be automatically invoked. To invoke a custom event, you can do so via our SDKs or with the Run Event endpoint.
Setting up the Code
Authentication
Congratulations on building your first integration. With that behind us, let’s switch gears and start configuring your application to work with Alloy Embedded. In order to make calls to the Alloy Embedded API, you will need to obtain an API key. Your Alloy Embedded API key is used to authenticate all API requests. API Keys are meant to be kept secret and should never be shared publicly (we recommend storing your API key in a secure location like AWS Secrets Manager). Navigate to the Embedded Settings page. From here, select API Key and under the Development Environment box, click Generate API Key. Since we’re just building, we’ll want to use this key for testing purposes. When you’re ready to go live, make sure to switch to the Production Environment key.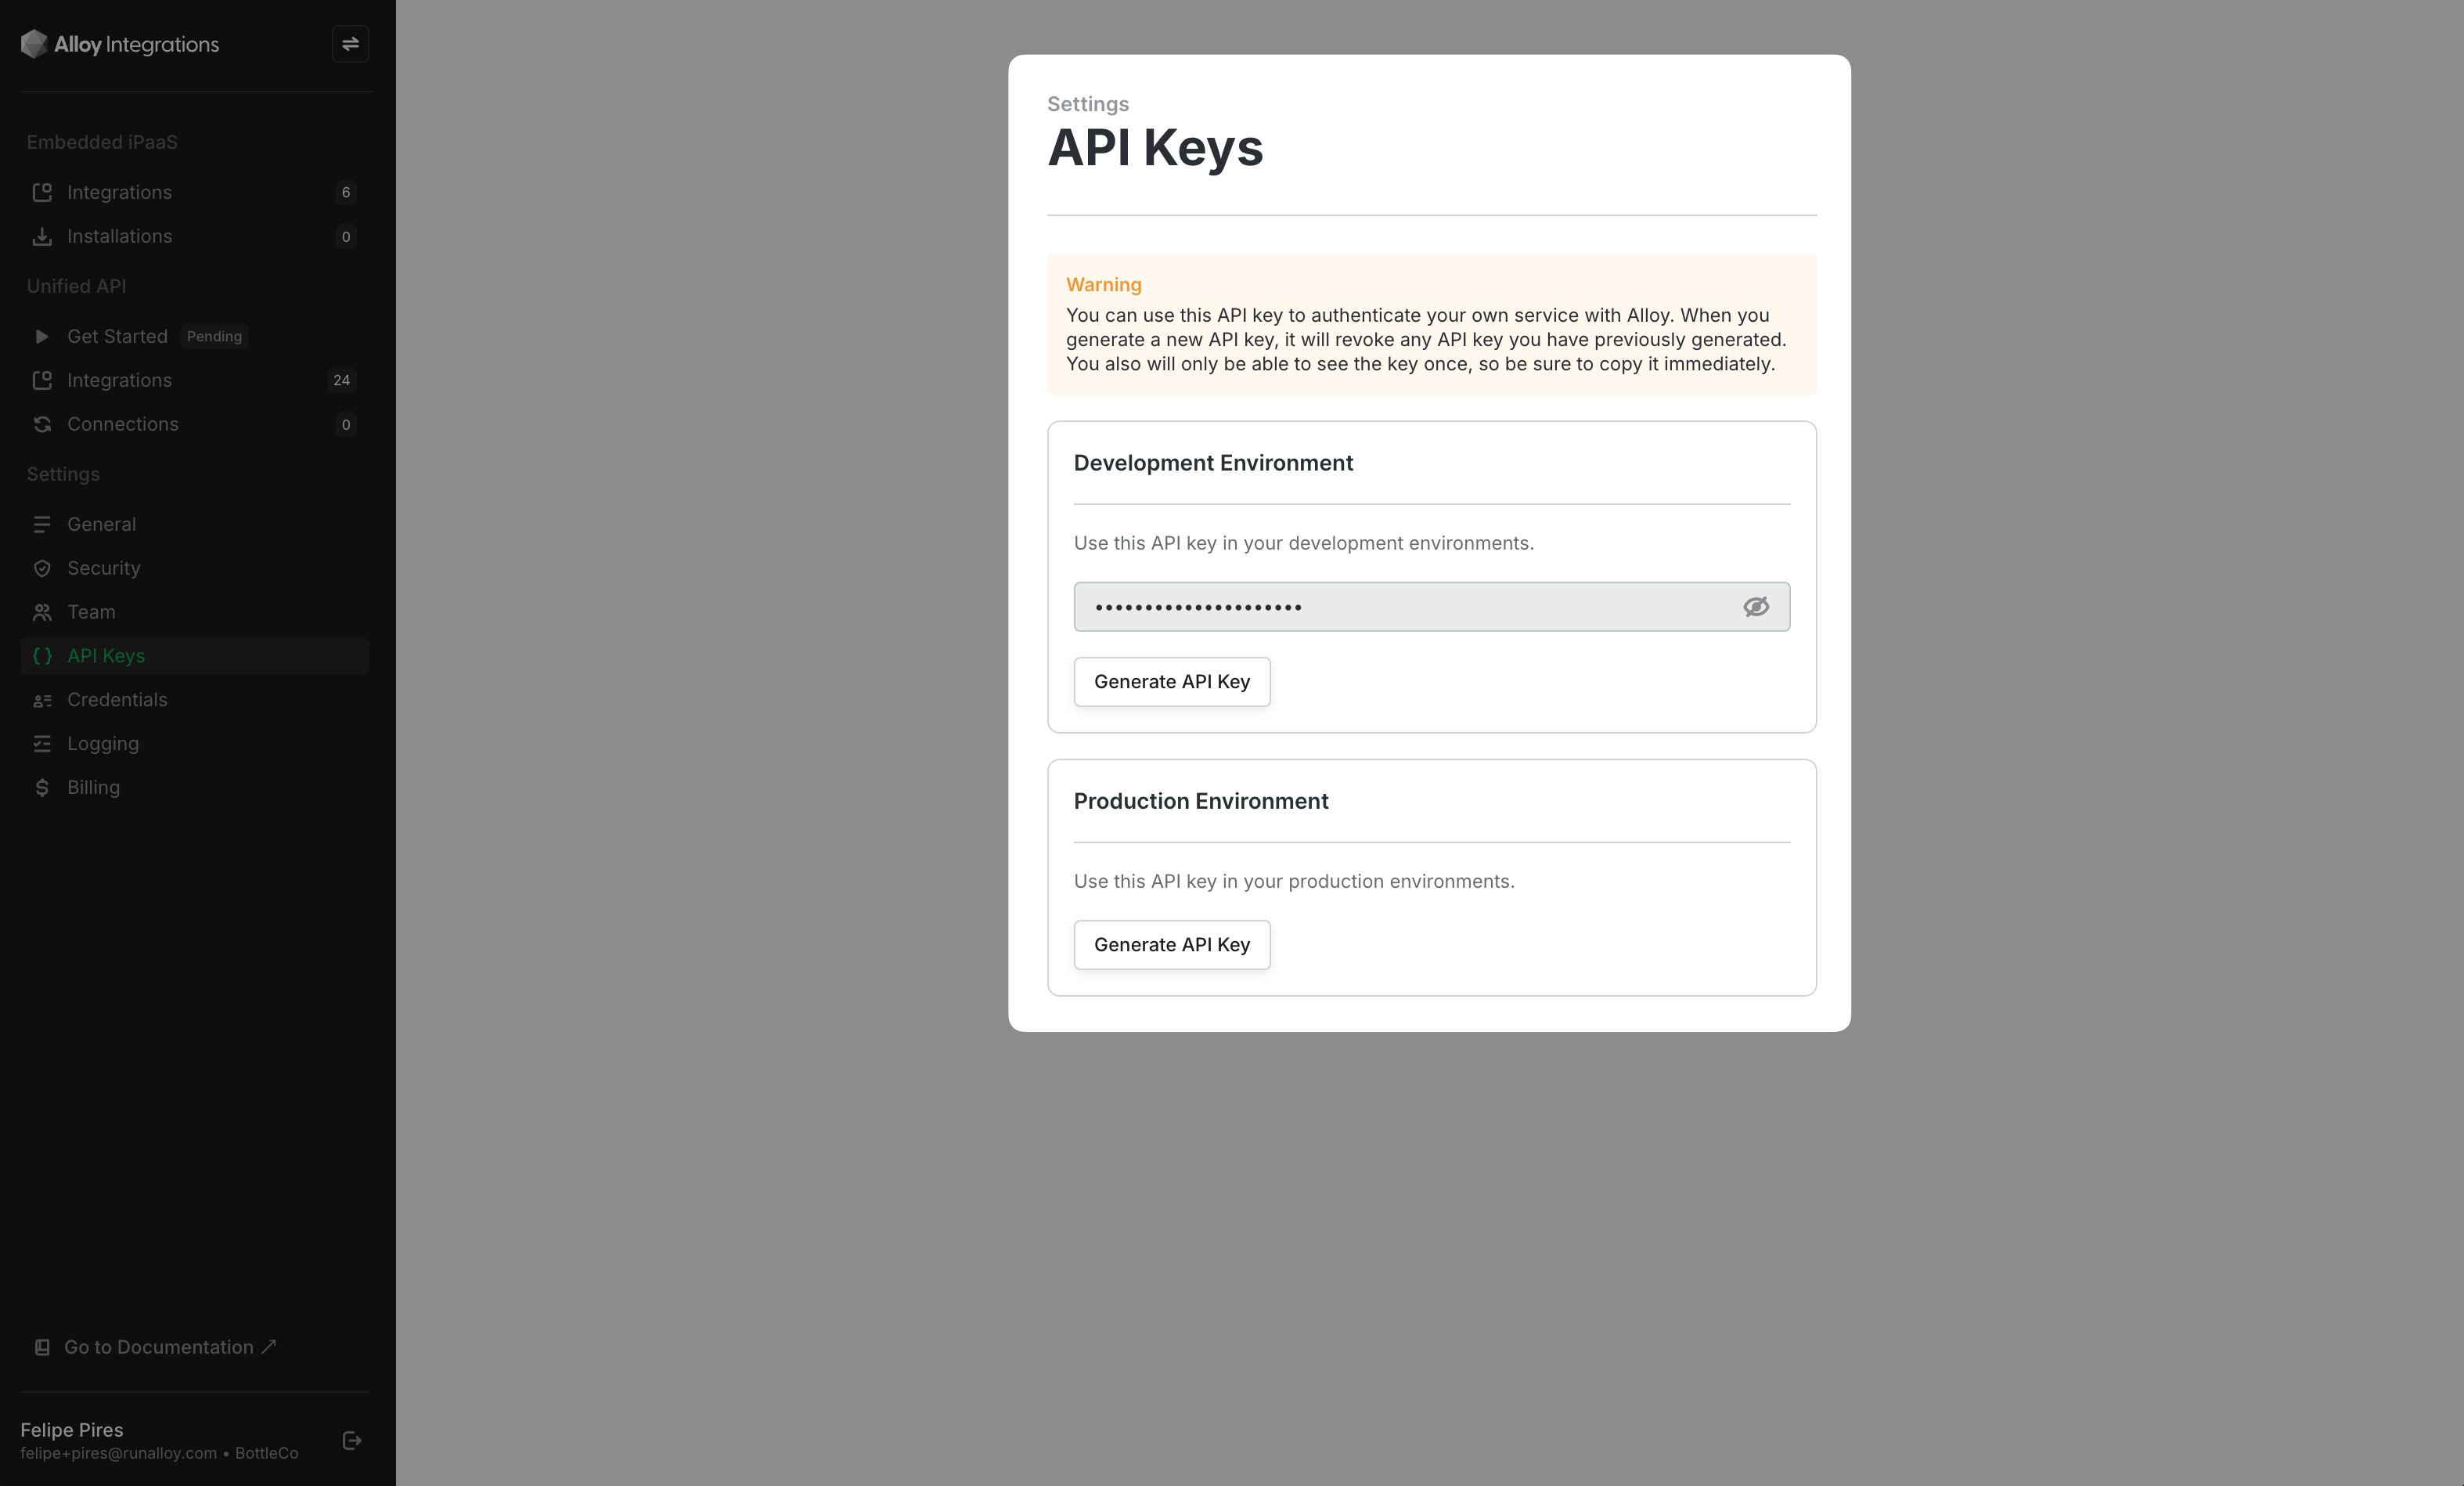
Creating a User
Using the API key, let’s make our very first API call. Before you can install an integration, you first need to create a user. An end user in Alloy Embedded represents a tenant/client in AcmeCo’s application. Any integrations/workflows your clients install will be linked to this end user account. Typically, we recommend creating an Alloy Embedded end user each time a new user is created in your application. To create a new end user, make an API call to the POST Create User endpoint. We’ve included an example below. Be sure to pass your API key along in the header. This endpoint requires ausername and an (optional) fullName be passed over. Note that the username must be a unique value.
Sample Request
userId as seen below. Depending on how you architect your system, you might want to store this identifier for later use in your database.
Sample Response
JSON
Listing Integrations
Now that you’ve created your first user, let’s next make a call to the GET Integrations endpoint. This API returns a list of all the integrations in your Alloy Embedded account. Typically, ISVs use this endpoint to power an integrations page. Sample RequestNote:you must pass the
userId as a query string parameter when invoking this endpoint. This parameter tells Alloy Embedded who to return a list of integrations for.JSON
installed parameter which returns a boolean indicating if the end user has previously installed this integration.
Example Integrations Page
To see this in action, below you’ll find an example of Postscript, an Alloy Embedded customer, using the Get List Integrations endpoint to power their apps page. Figure 1.1 – Example Integrations Page This is a live customer (Postscript) using Embedded to power their integrations. Behind the scenes, the GET Integrations endpoint populates the data for this page.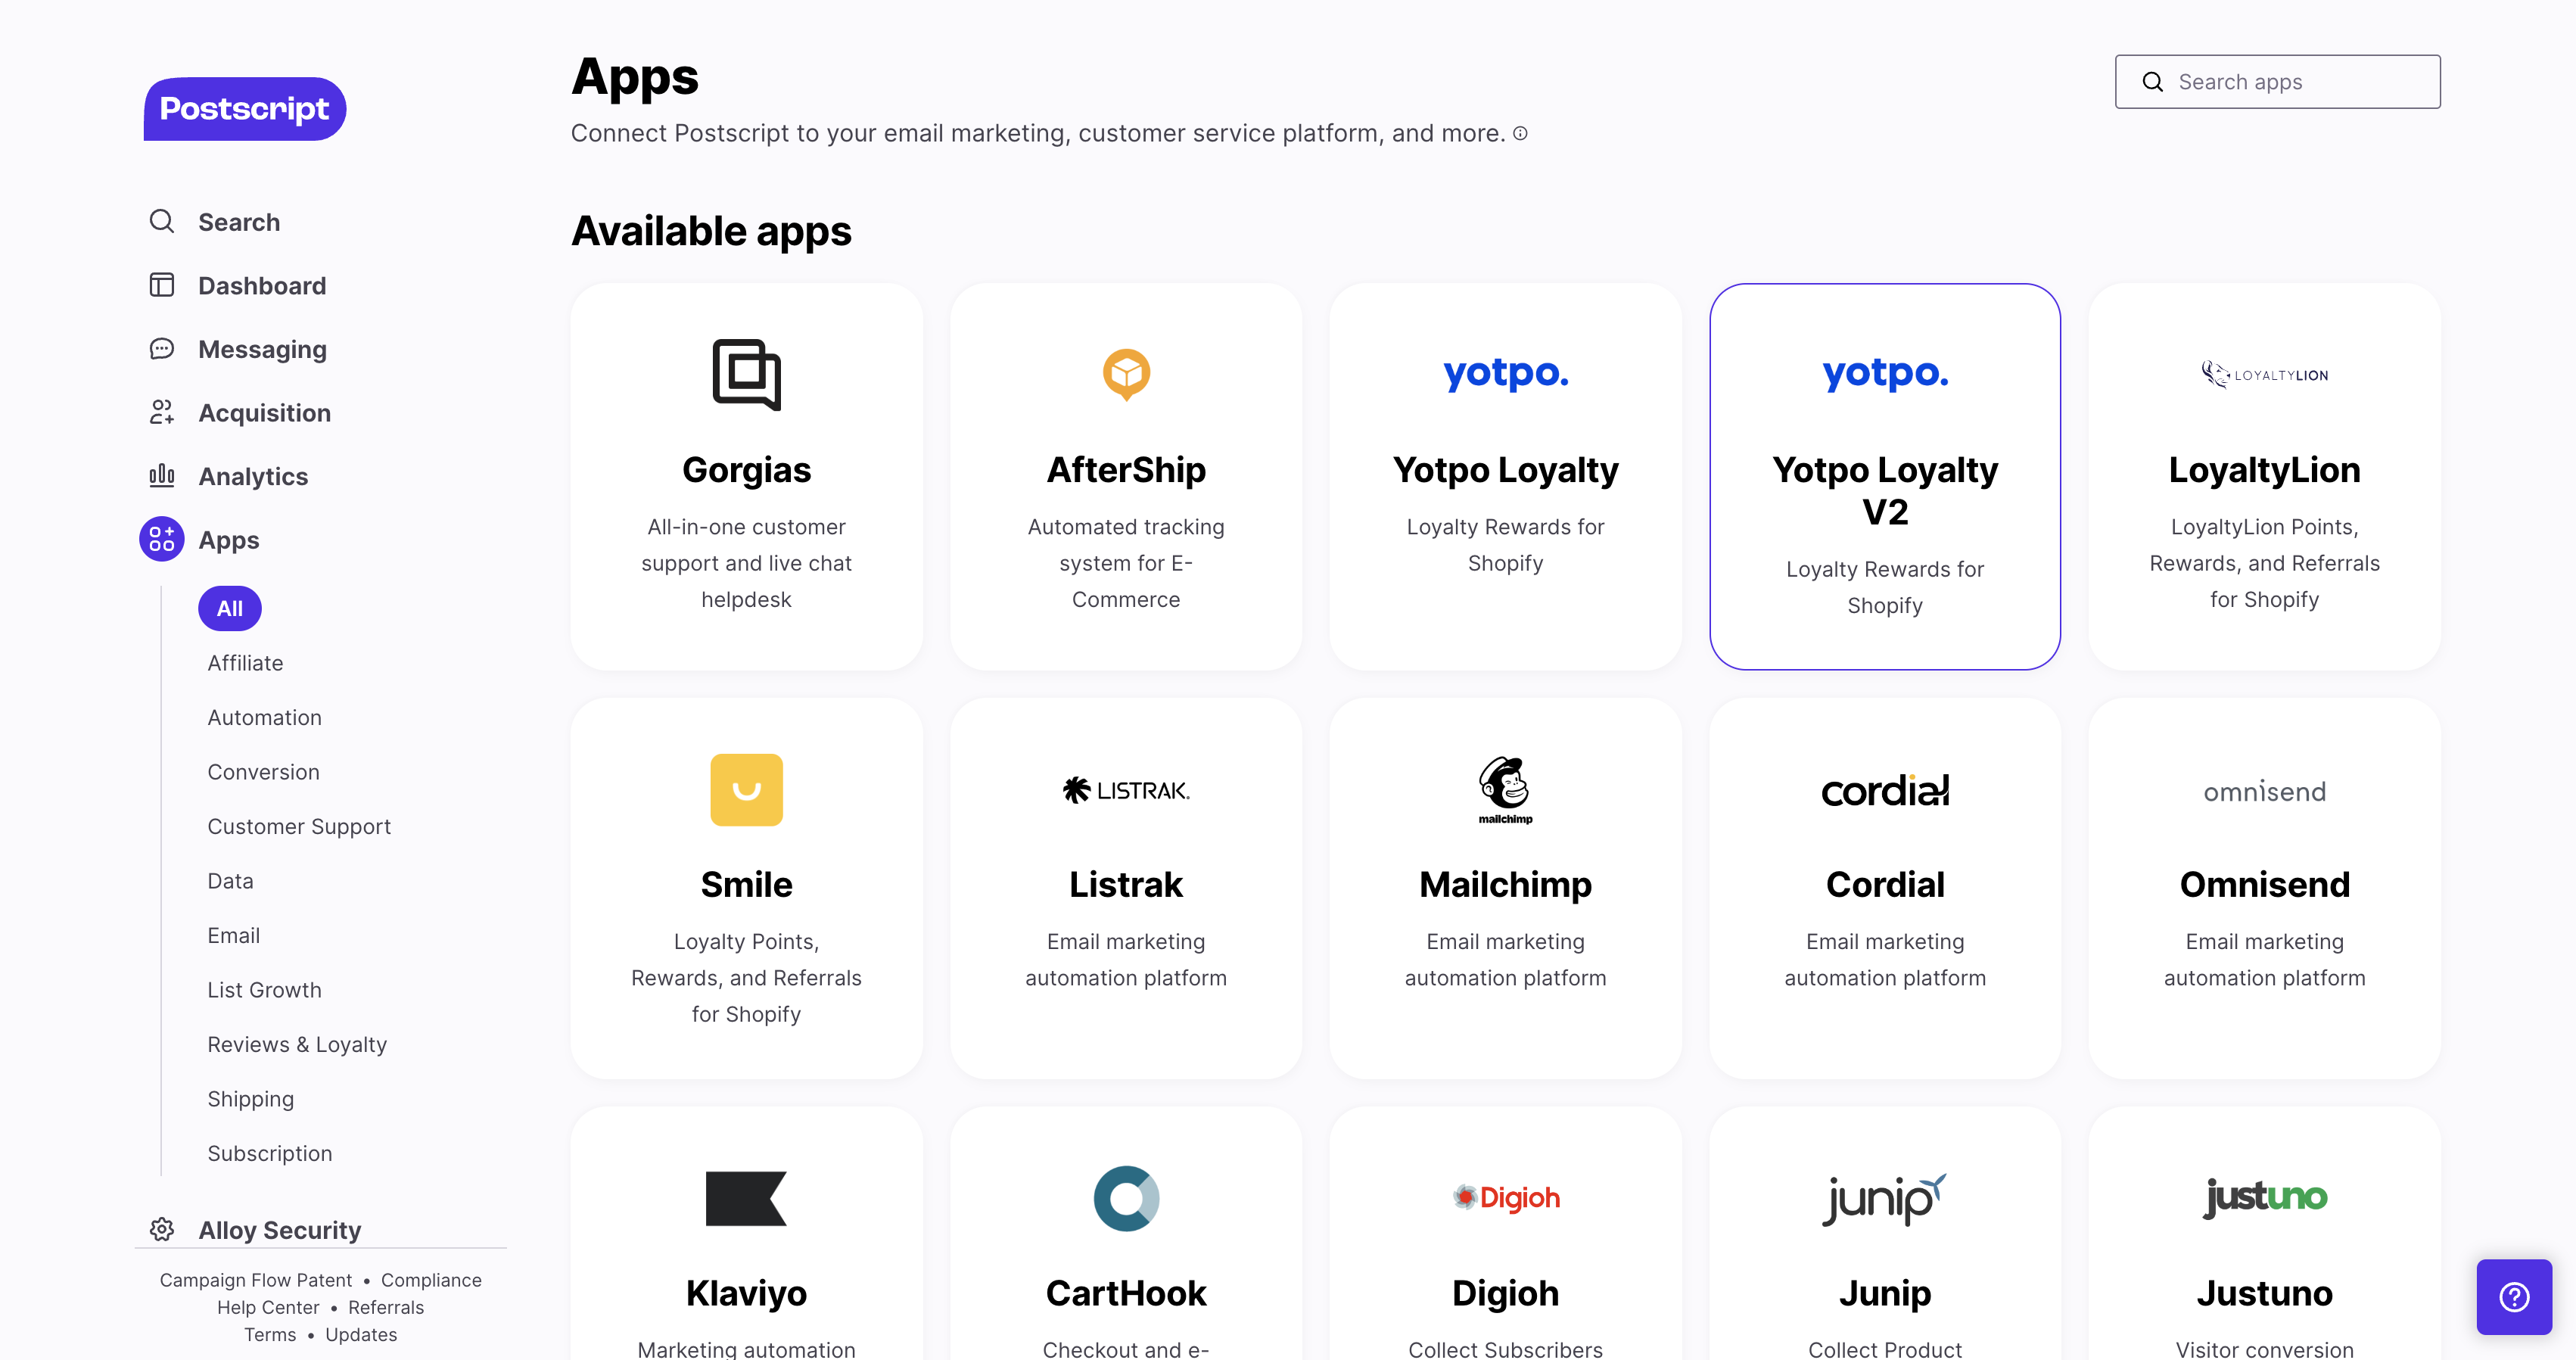
- Response Structure: Each integration that’s returned by the GET Integrations endpoint, we return an array of
workflowswhich each contain a corresponding workflowId - Installed Status: this endpoint also returns a status indicating if the workflow has been installed by the user yet. This is denoted by the
installedkey which has a boolean value oftrueorfalse. - Version: notice the
installedVersionandversionkeys. Theversionkey reflects the most updated and currently released version available. TheinstalledVersionrepresents the latest version the specified user has installed. If theversionis greater than theinstalledVersionyou’ll want to prompt your users to update to the latest version.
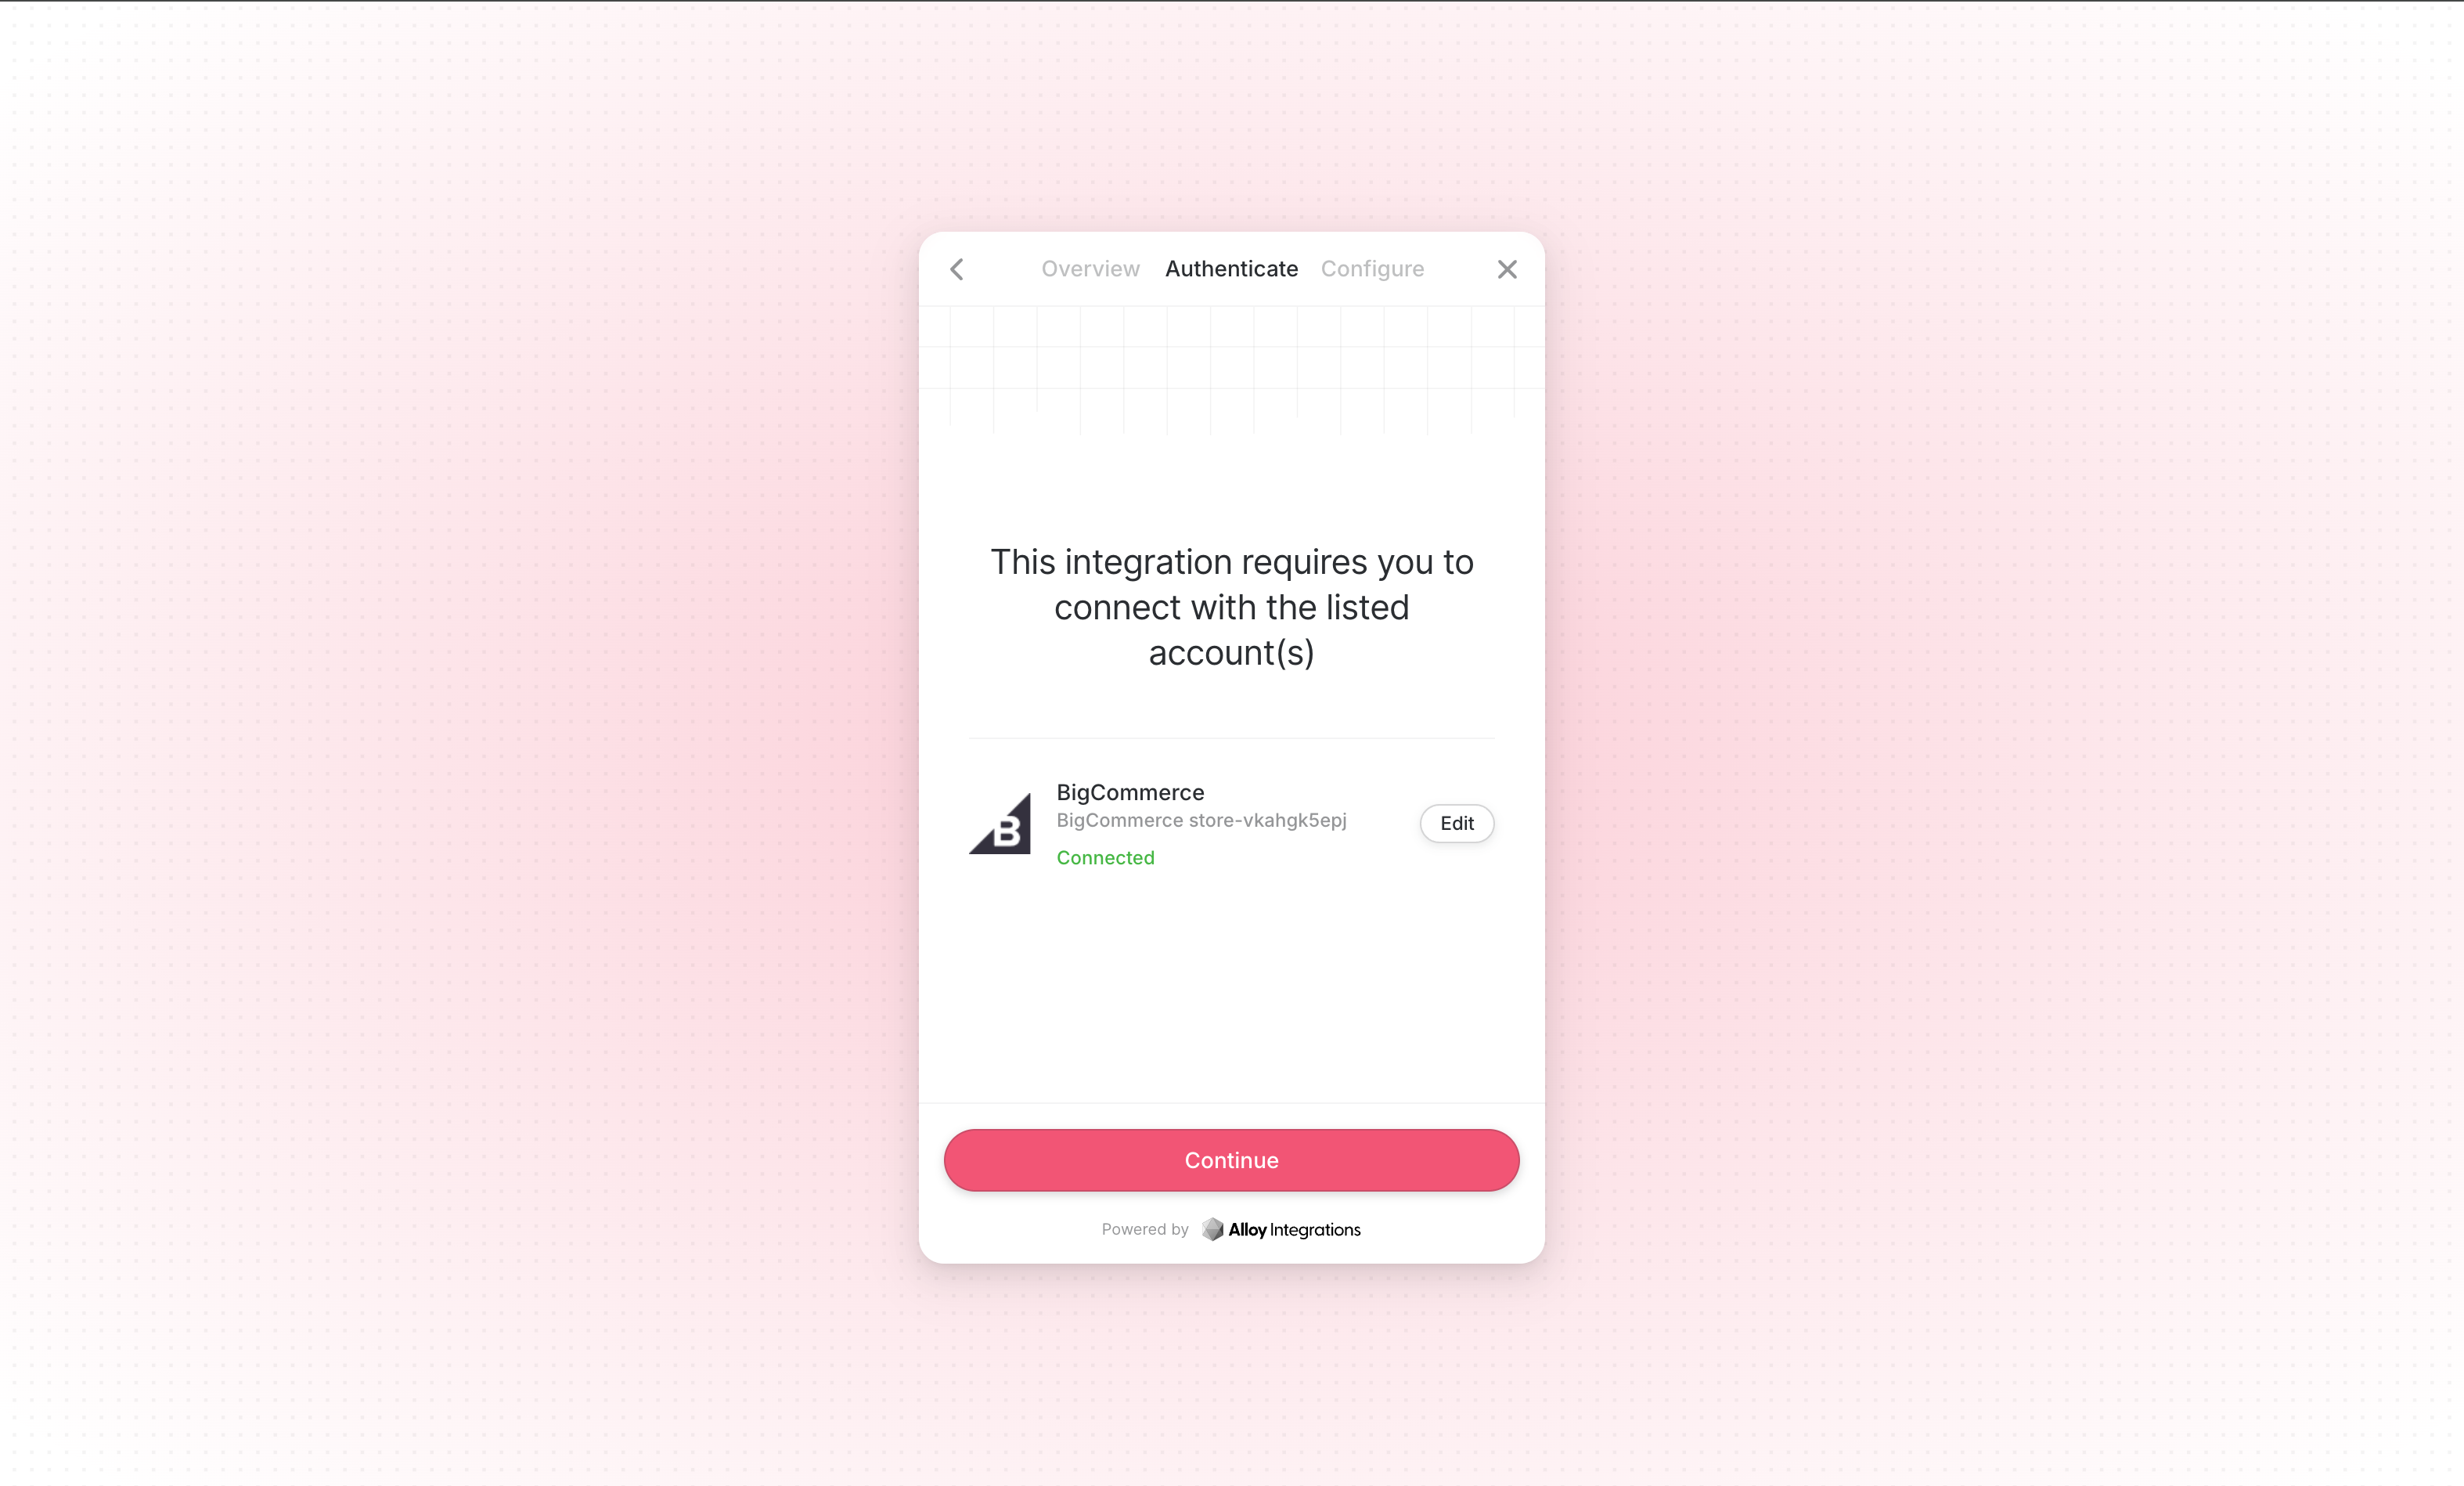
Installing the Frontend SDK
Our frontend SDK allows you to instantiate the Alloy Modal within your application. To install the frontend SDK, you have two options:- Install via npm
- Import the vanilla JS snippet into the header of your application
Note:The demo site comes pre-installed with the Frontend SDK so no need to import it in the demo project
Generating Short-Lived JWT
To generate a short-lived JWT, we need to invoke theGET /user/:userId/token endpoint on your backend. You can find an example cURL request below.
Sample Request
JSON
Frontend SDK Methods
Once you’ve passed the JWT to your frontend, pass the JWT as an argument to theAlloy.setToken() method on the frontend.
The setToken() method sets the JWT for this instance of the Alloy SDK and makes it available in every subsequent SDK method you call. All frontend SDK methods require that you must first invoke setToken().
Note:If you’re interacting with the Alloy.js SDK from a react app, you can call these methods by invoking
window.Alloy.install().setToken.
JavaScript
Alloy.install() method to show the modal. This endpoint takes an integrationId as an argument.
Sample Method
JavaScript
Triggering a Custom Event
Recall that Workflow #2 uses a custom event, and should only be triggered whenever an event happens on your application. In this section, we’ll take a look at how to trigger a custom event. We previously defined the following Custom Event schema to be as follows:JSON
Fulfillment Updated) and the corresponding userId you want to invoke the event for.
Pass along any data you defined in Custom Event schema. Any workflows using this Custom Event will immediately be triggered.
cURL
Going Live
We’re almost done. In this section, we’ll look at putting the finishing touches on our implementation before we call it quits. Alloy Embedded supports a number of features to reduce friction when debugging. To view workflow logs, invoke the GET Error Logs endpoint. This endpoint accepts aworkflowId and returns basic log information about the error.
Sample Request
cURL
message, the block that errored, and the errorOccurredAt date stamp.
Sample Response
JSON
Deactivating and Re-activating Workflows
To deactivate a workflow, invoke the PUT /workflows/deactivate endpoint by passing in theuserId and the workflowId. Similarly, you can reactivate the workflow at any time by invoking the PUT /workflows/activate endpoint with the same structure as below.
Sample Request
cURL
Upgrading Workflows
Every time you make a change to a live workflow, you’ll need to release an update. Users can be prompted to update their installation by calling thePUT workflows/ {workflowId} /upgrade endpoint.
To use this endpoint, the new workflow must have the same configurable fields as the original. If any new configurable fields were added, you will not be able to upgrade the workflow programmatically and instead would need to reinstall the workflow for the end user.
Workflow Logs
To return specific data about a workflow (e.g. historical success messages), make a request to the GET /workflow/:workflowId/logs endpoint. This endpoint returns an array of executions. An execution represents a single workflow run. For example, if the workflow has been invoked 100 times, you’ll be able to see 100 invocations and the associated logs for each invocation. Sample RequestcURL
Note:Alloy Embedded stores logs for 7 days. Any logs older than 7 days are automatically deleted and cannot be retrieved.
Compliance
To handle GDPR and CCPA compliance requests, we’ve built a deletion endpoint to purge user-related data. Sample RequestcURL