Embedded Link
Reader Alert
This tutorial assumes you have read our Quick Start guide. General Alloy Embedded concepts will not be re-explained in this article.
In our Quick Start guide, we took a look at how to use the Embedded SDK to implement Alloy Embedded's powerful technology into your application. Sometimes, however, you might need a more nimble approach.
We've built Embedded Link, a new way to interact with Alloy Embedded to solve for this. Let's take an example: say you need to build a Magento integration and want to stream incoming orders back to your platform. Maybe Magento isn't one of the core integrations your company offers and as a result, you don't want to make it available to everyone via your integrations page. Or maybe your team just doesn't want to embed our modal on your webpage. Whatever the reason, Embedded Link provides a simple and quick way to take advantage of our underlying technology.
Embedded Link via the Alloy Dashboard
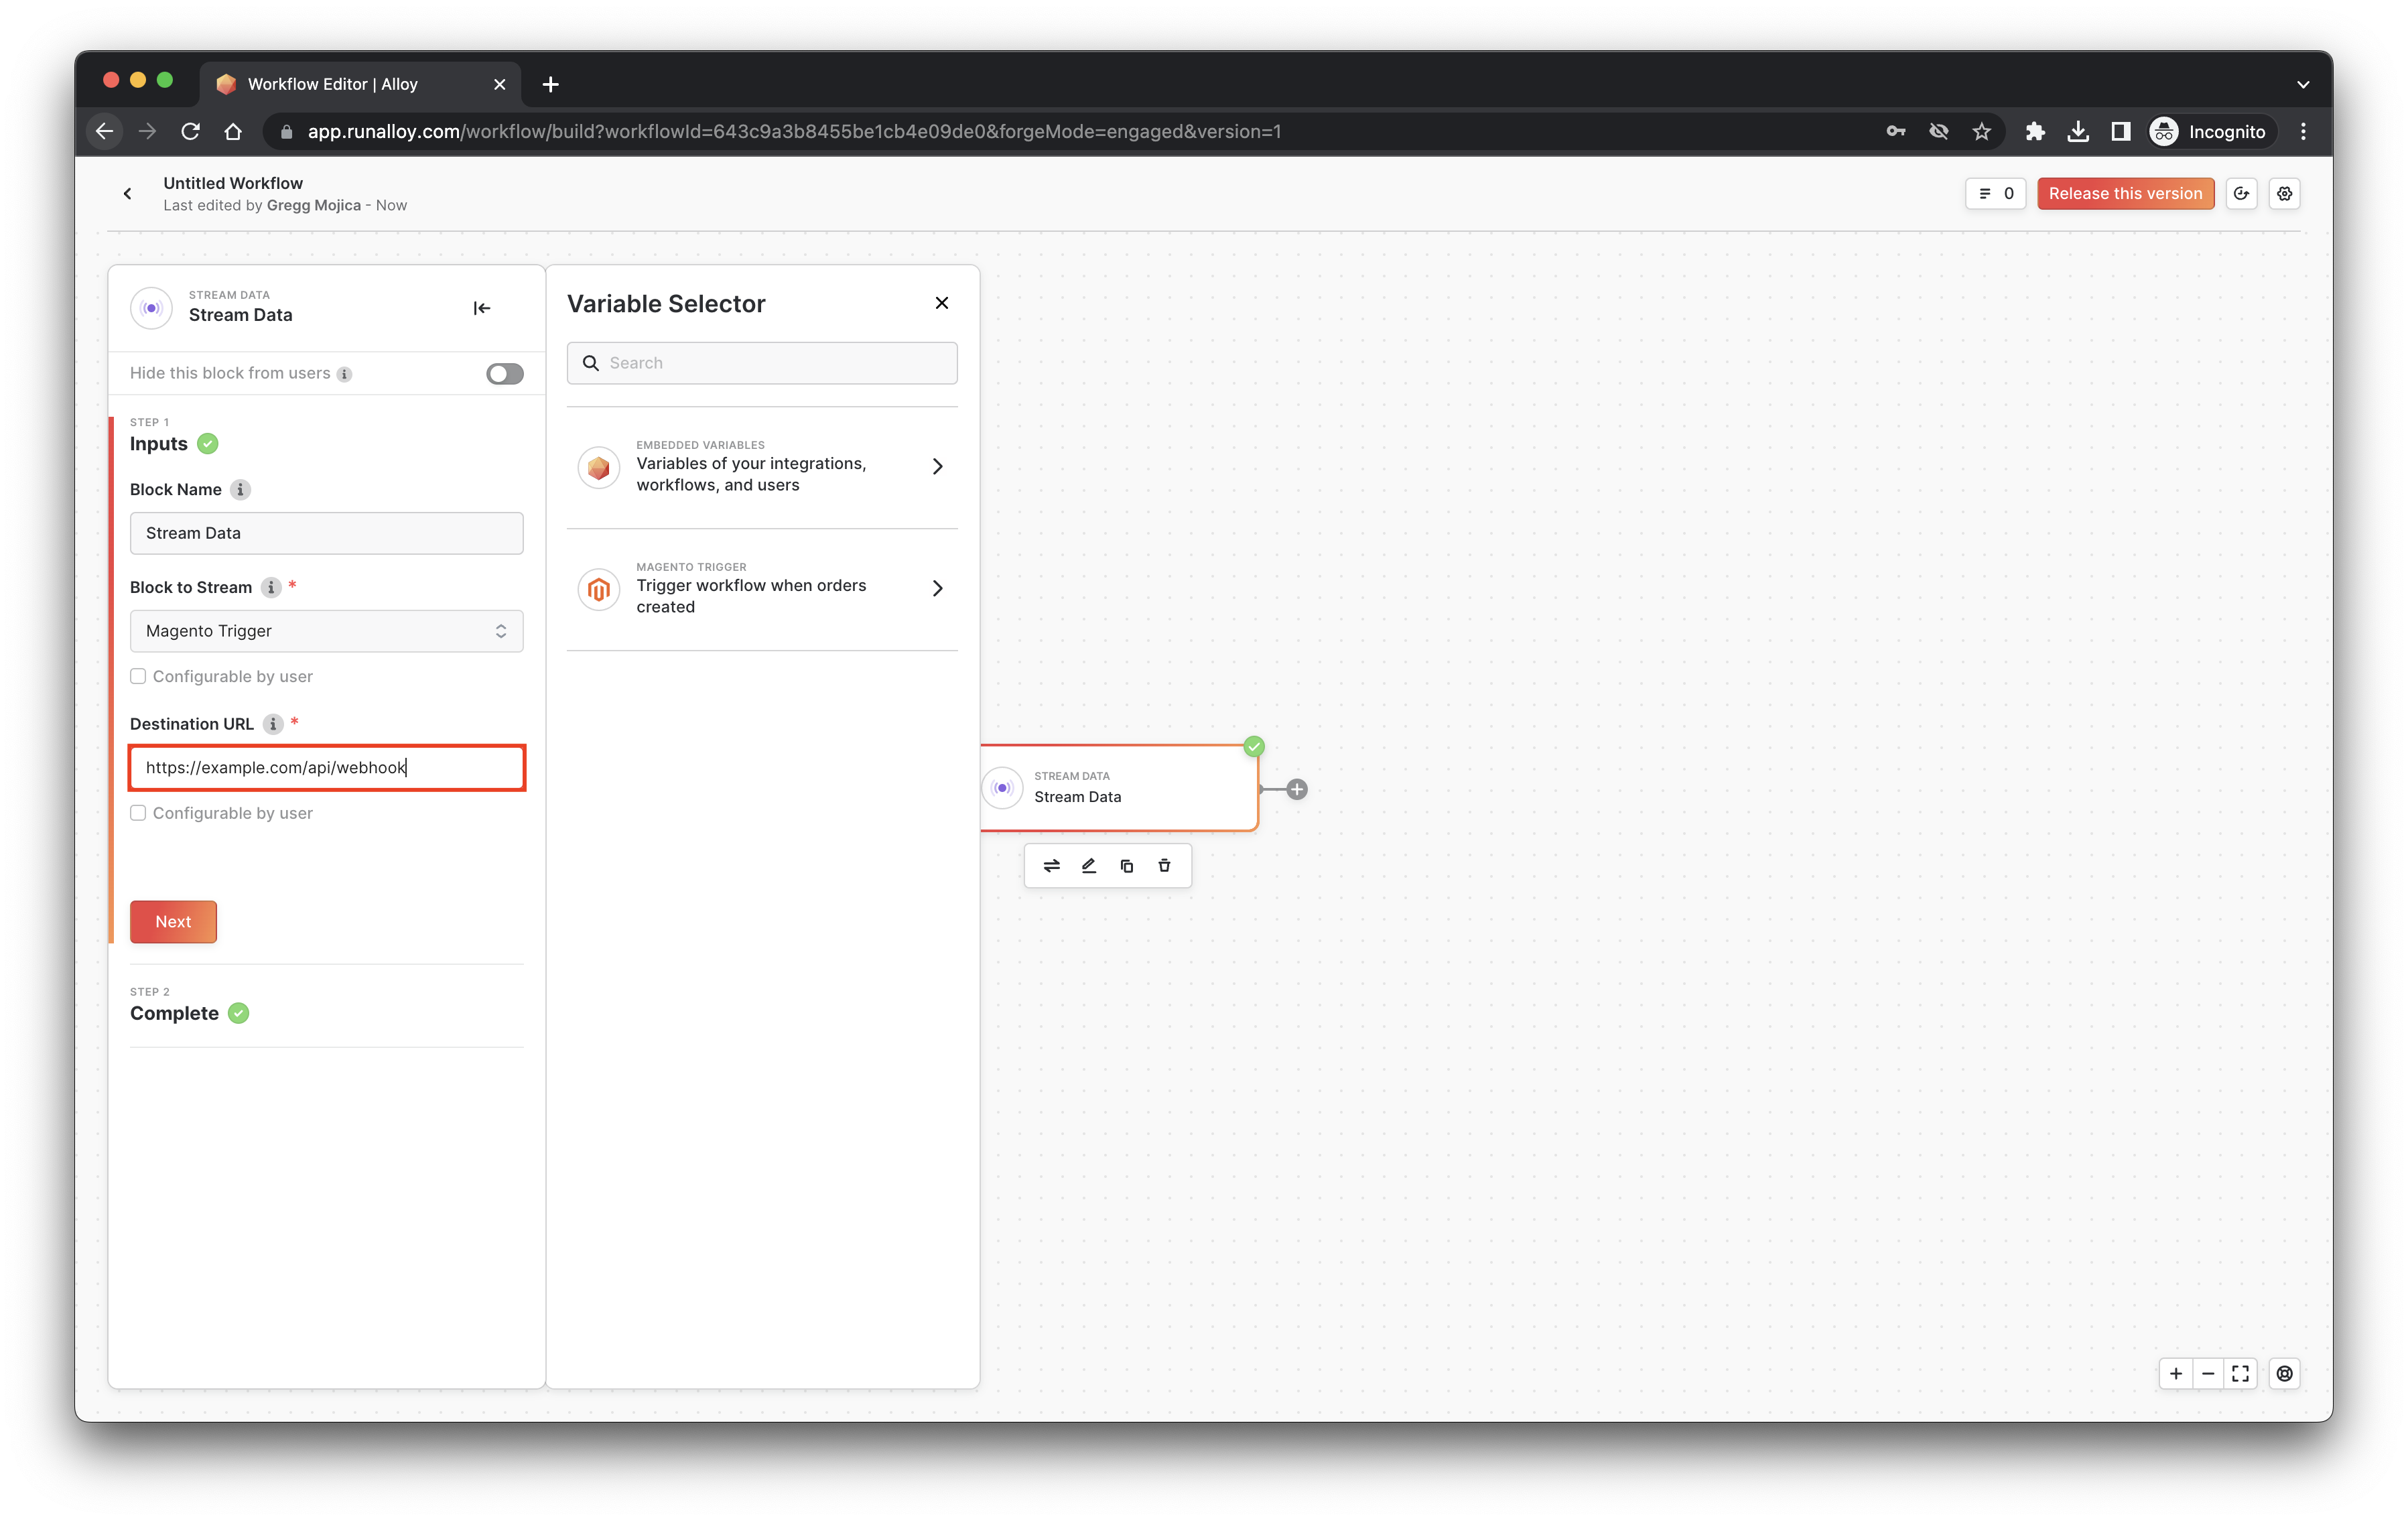
In our example above, let's say you want to build a quick integration with just one workflow: whenever an order is created in Magento > stream that data back to your webhook ingest server. Your workflow will probably look something like the below.
Assuming you've released your workflow, navigate back to the Magento Integration page. Make sure you've activated the integration by clicking the Inactive/Active button.
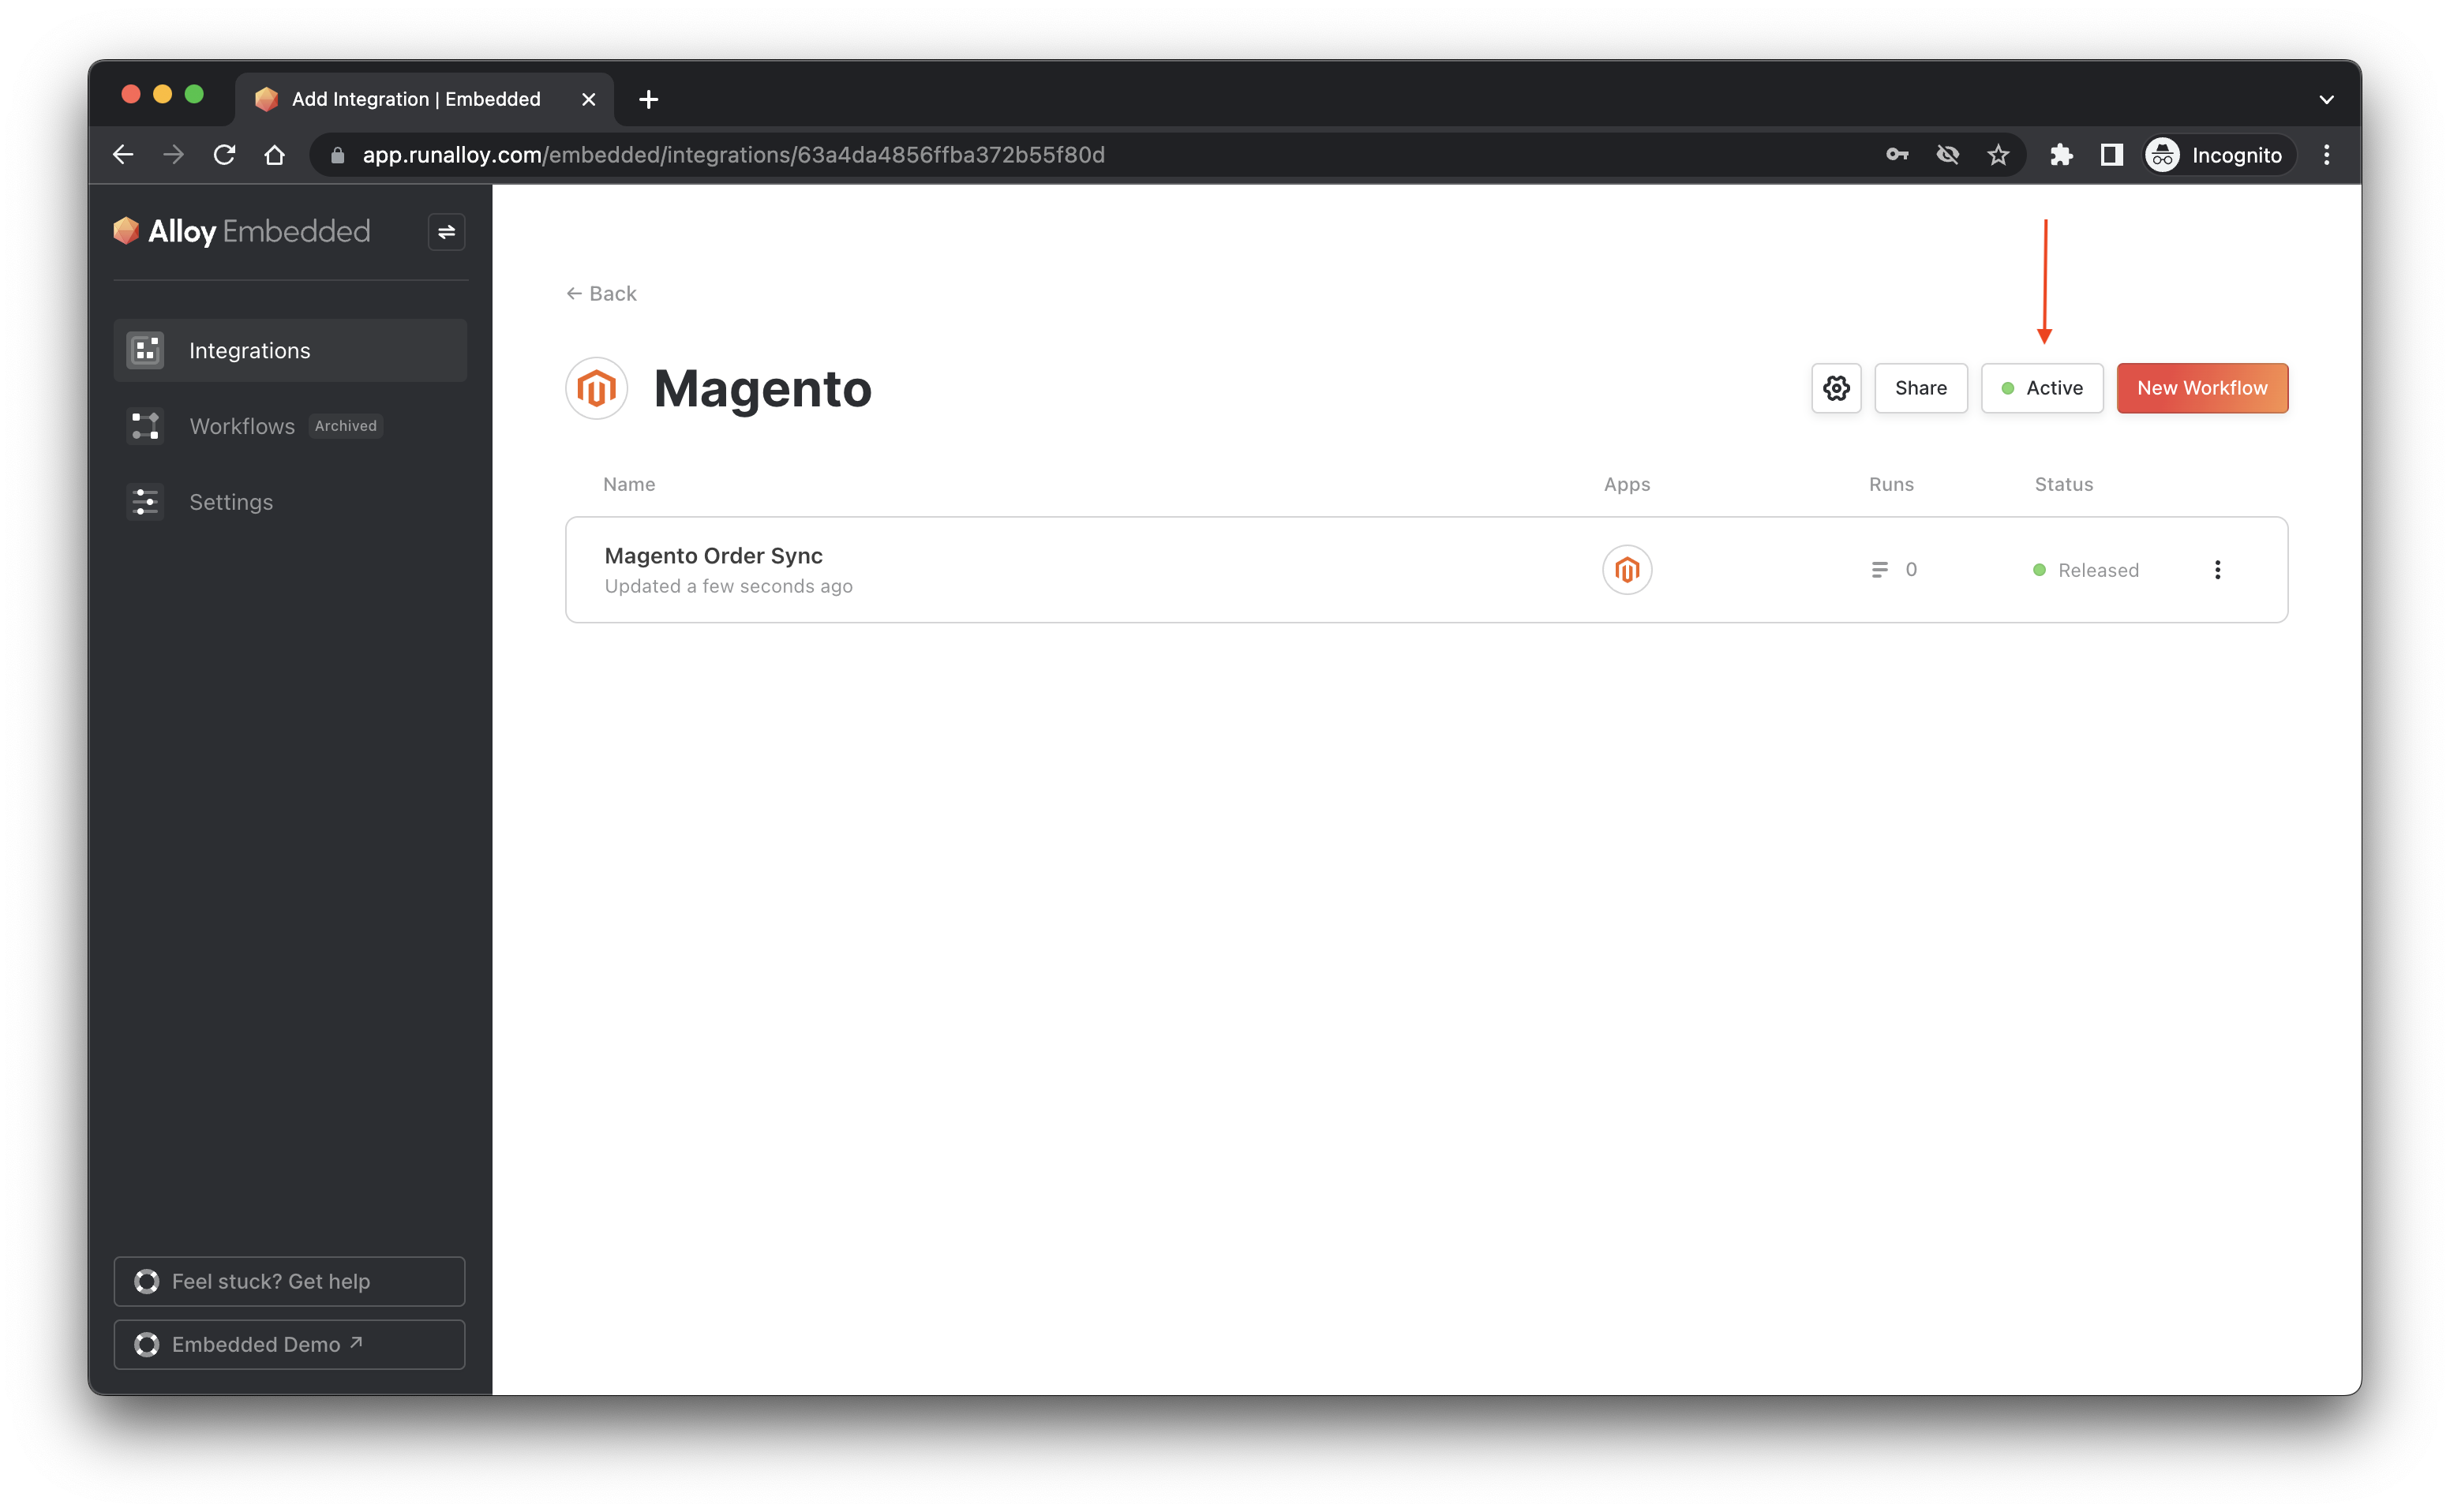
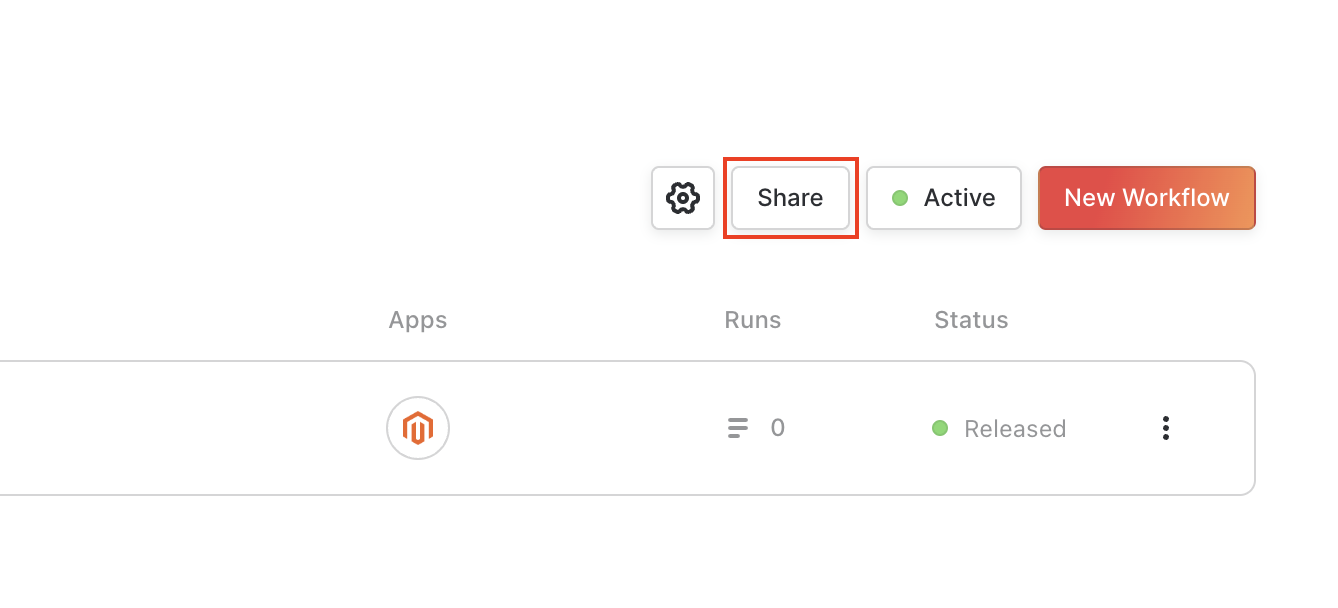
Once you've done this, you'll see the Share button activated.
Clicking this button will open a popup where you can configure the Embedded Link settings. Every Embedded link you generate must be associated with a user. You'll see a list of existing users associated with your Embedded account.
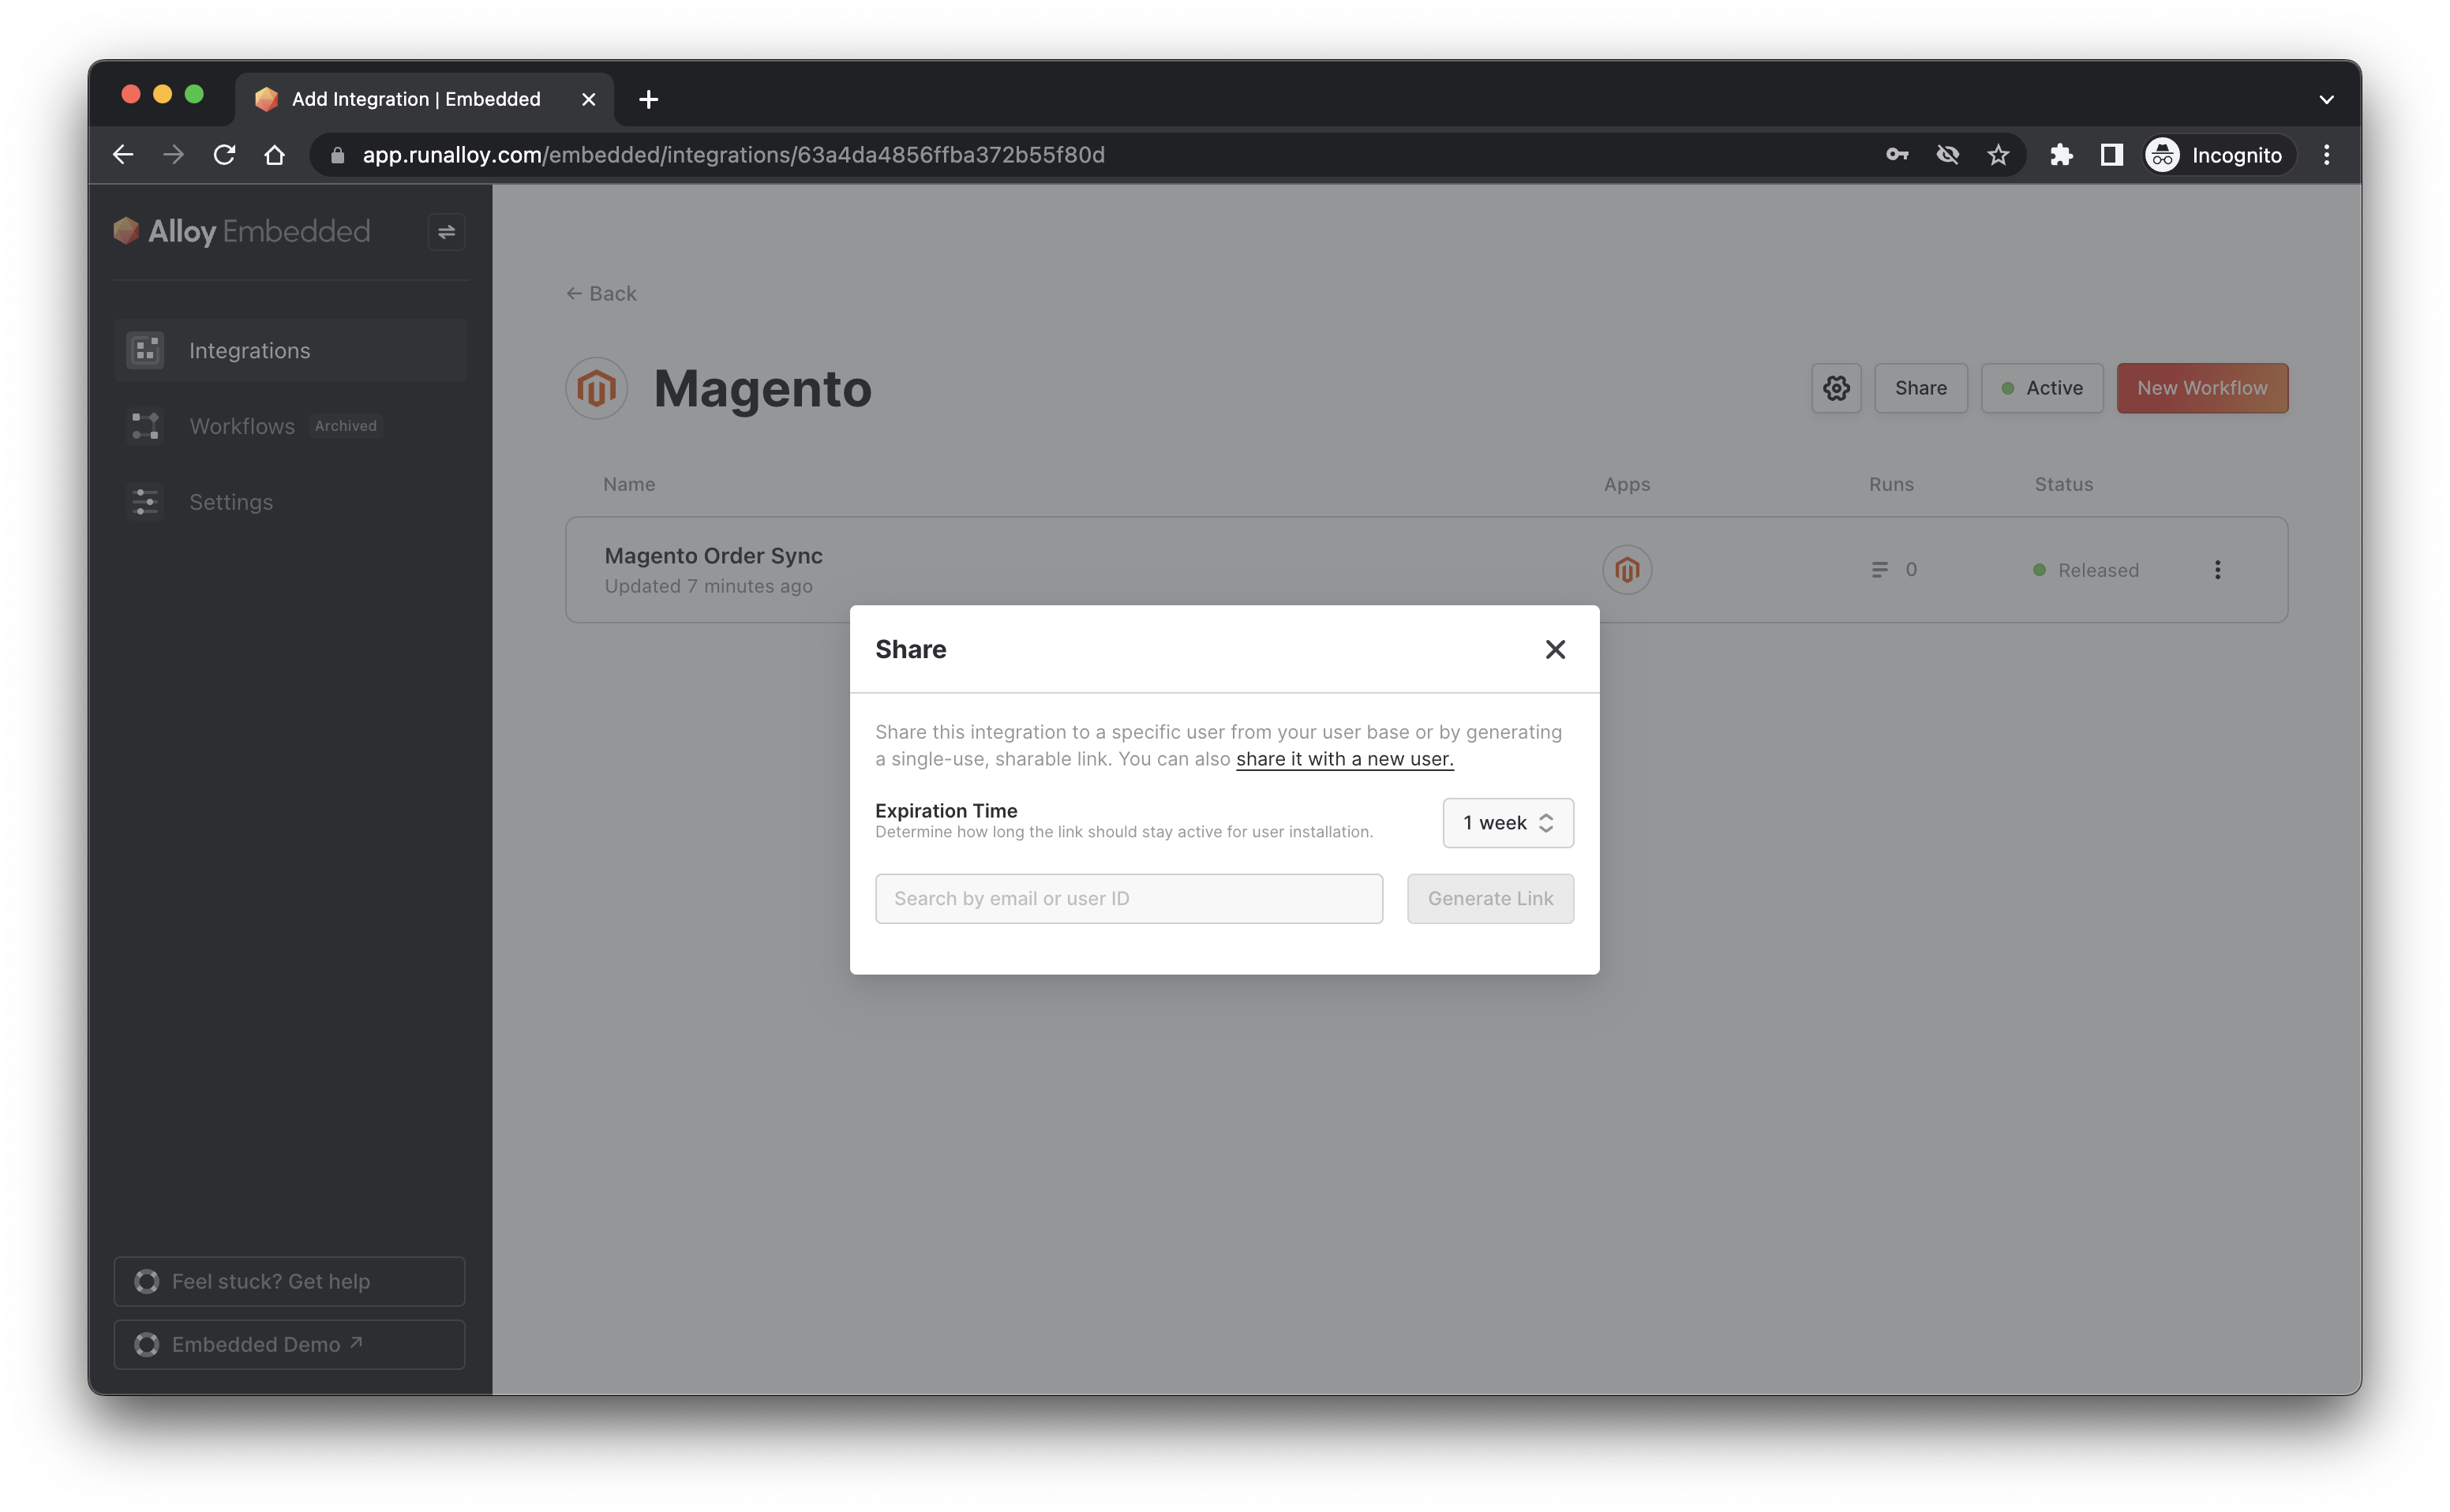
You can choose to generate the link for one of your existing users or create a new user. To create a new user, select share it with a new user. Here, input the user's email address. Note that Alloy Embedded does not send an email alerting the user that this link is created – it's your responsibility to do so. The email you enter here creates a new Embedded user account on the backend.
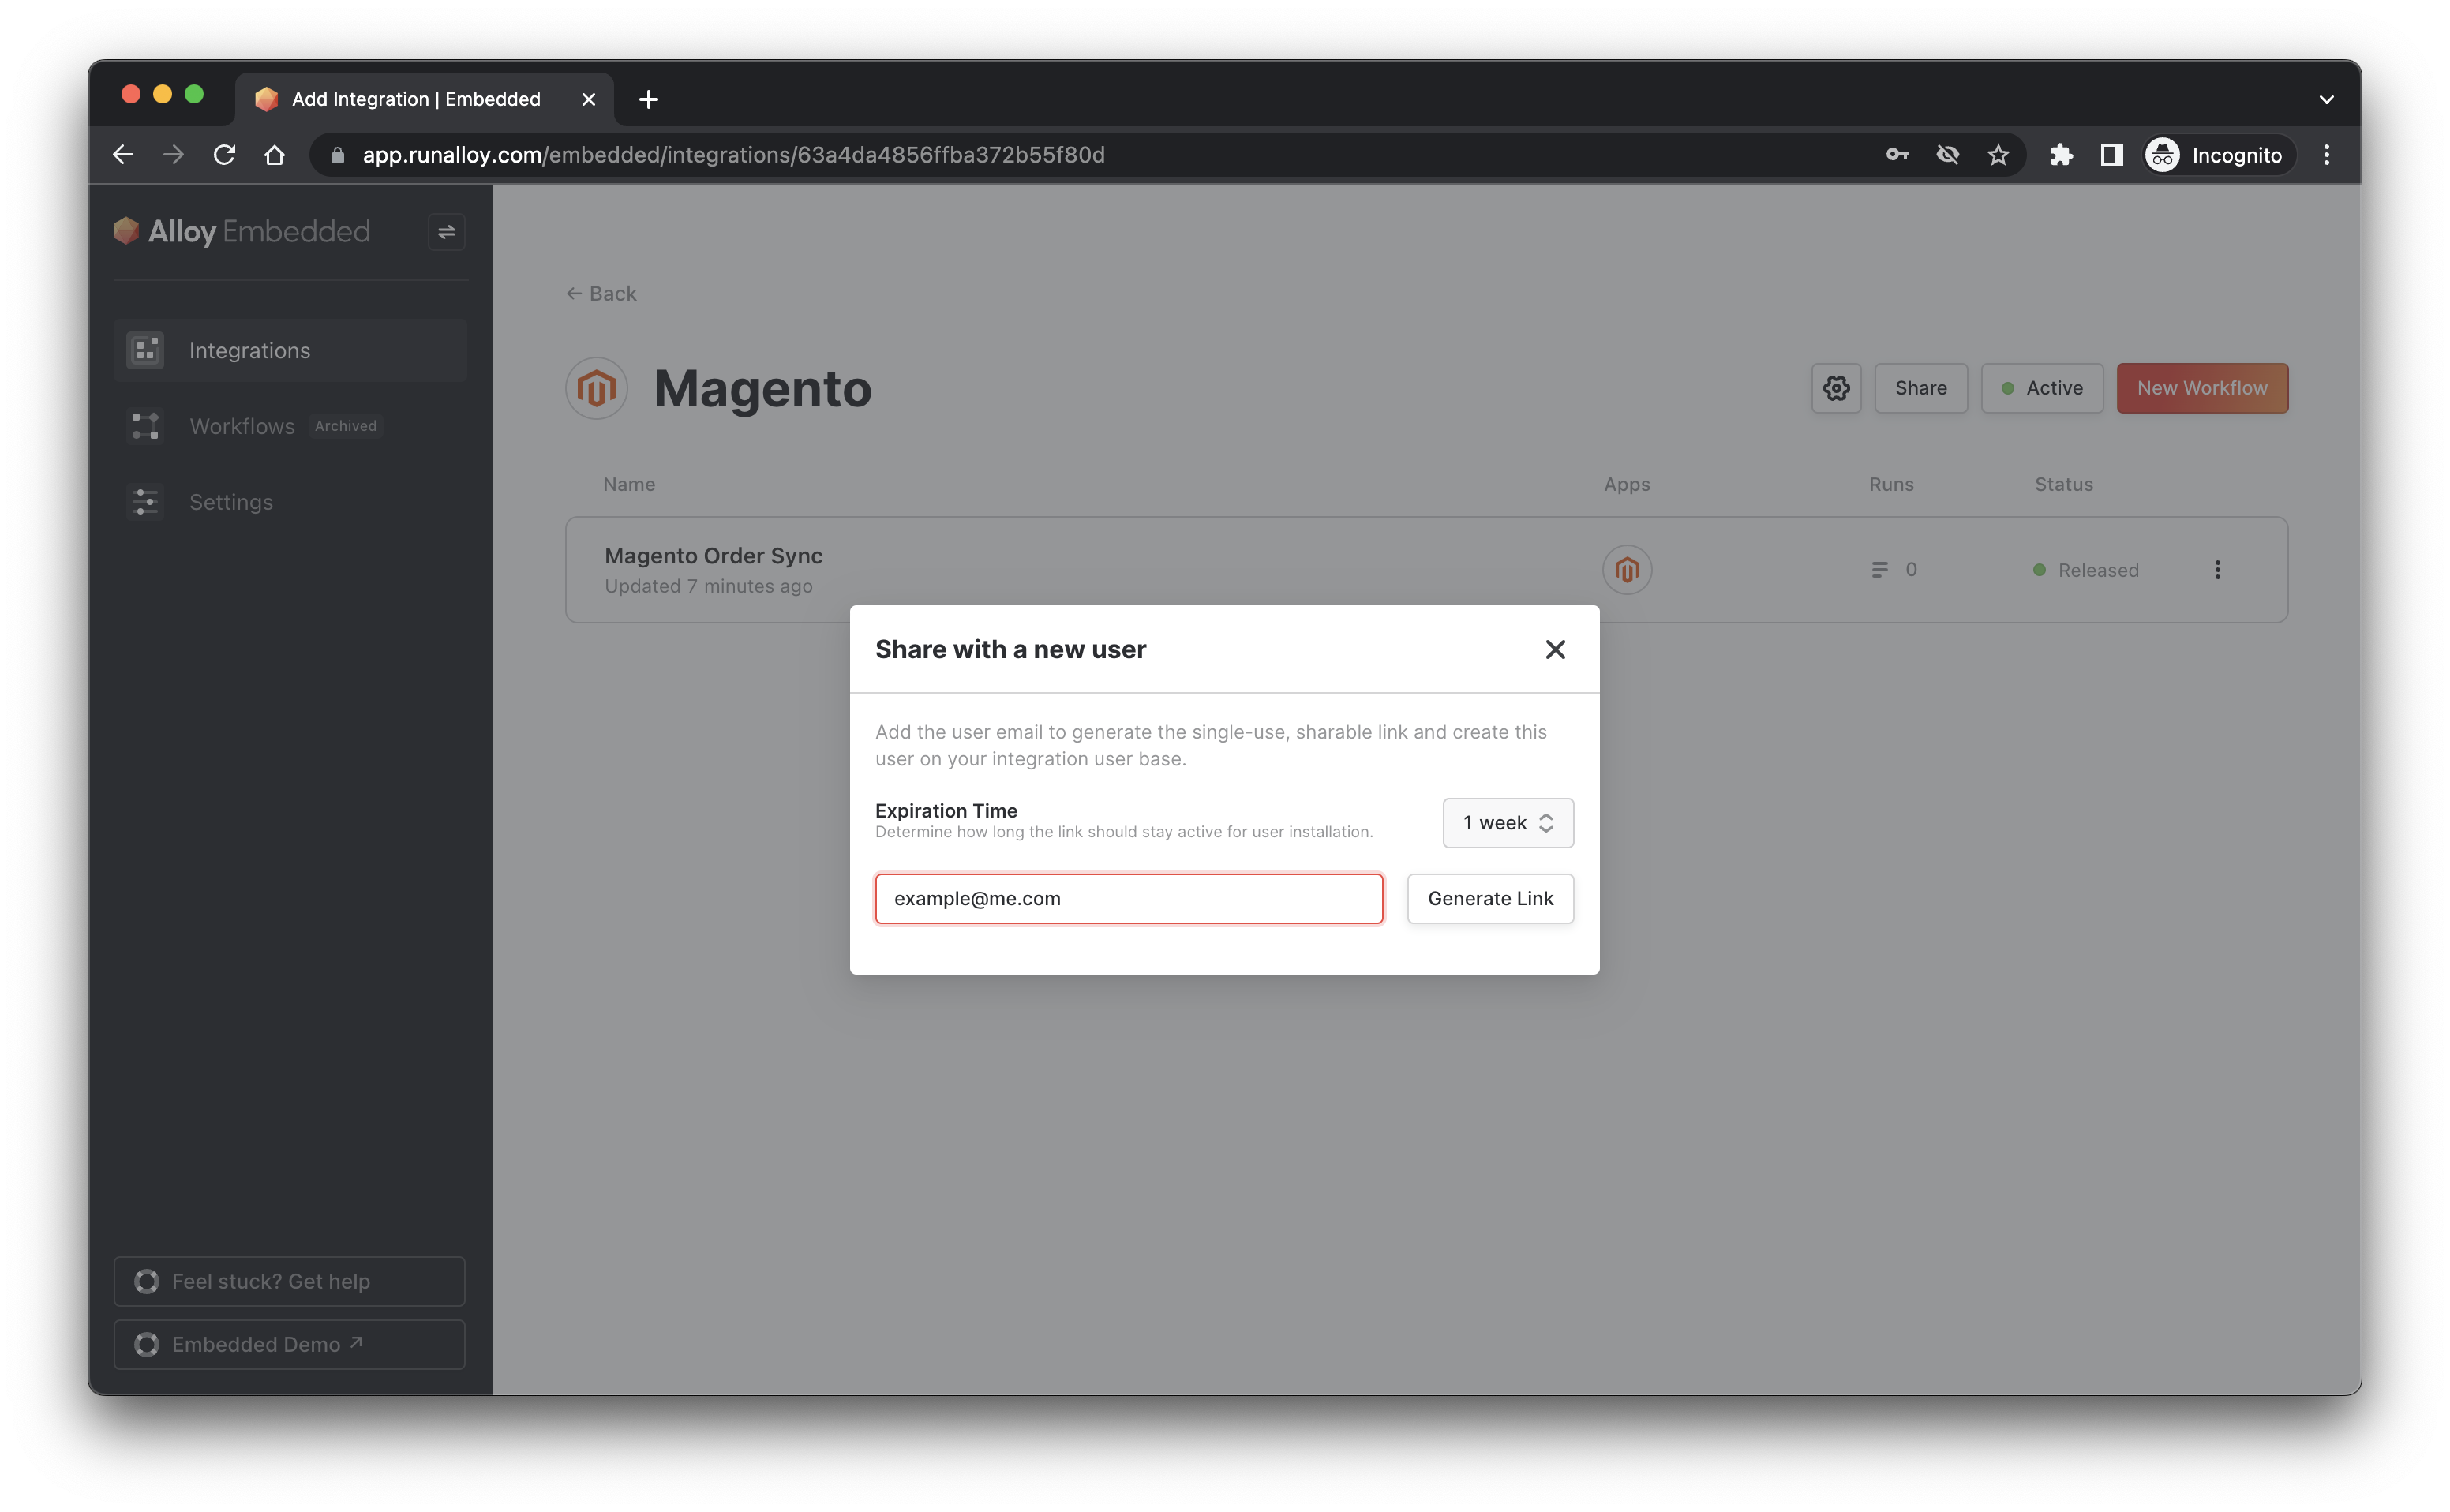
Select Generate Link. You can specify how long you want the link to last for by entering an Expiration Time. By default, Embedded Links last for 7 days (1 week) but you can specify other durations. Note that once a link is used, it becomes invalid after the integration is activated.
You should now see a link generated, it should look something like the below:
https://app.runalloy.com/embedded-install?integrationId=XXXXXXX&token=YYYYYYYY.ZZZZZZZZZZZZZ.WWWWWWWWWWWWWW-VVVVVVVVV&forgeMode=engaged&alwaysShowCredentials=true
Open this in a new (incognito) browser window. You should see something like the below.
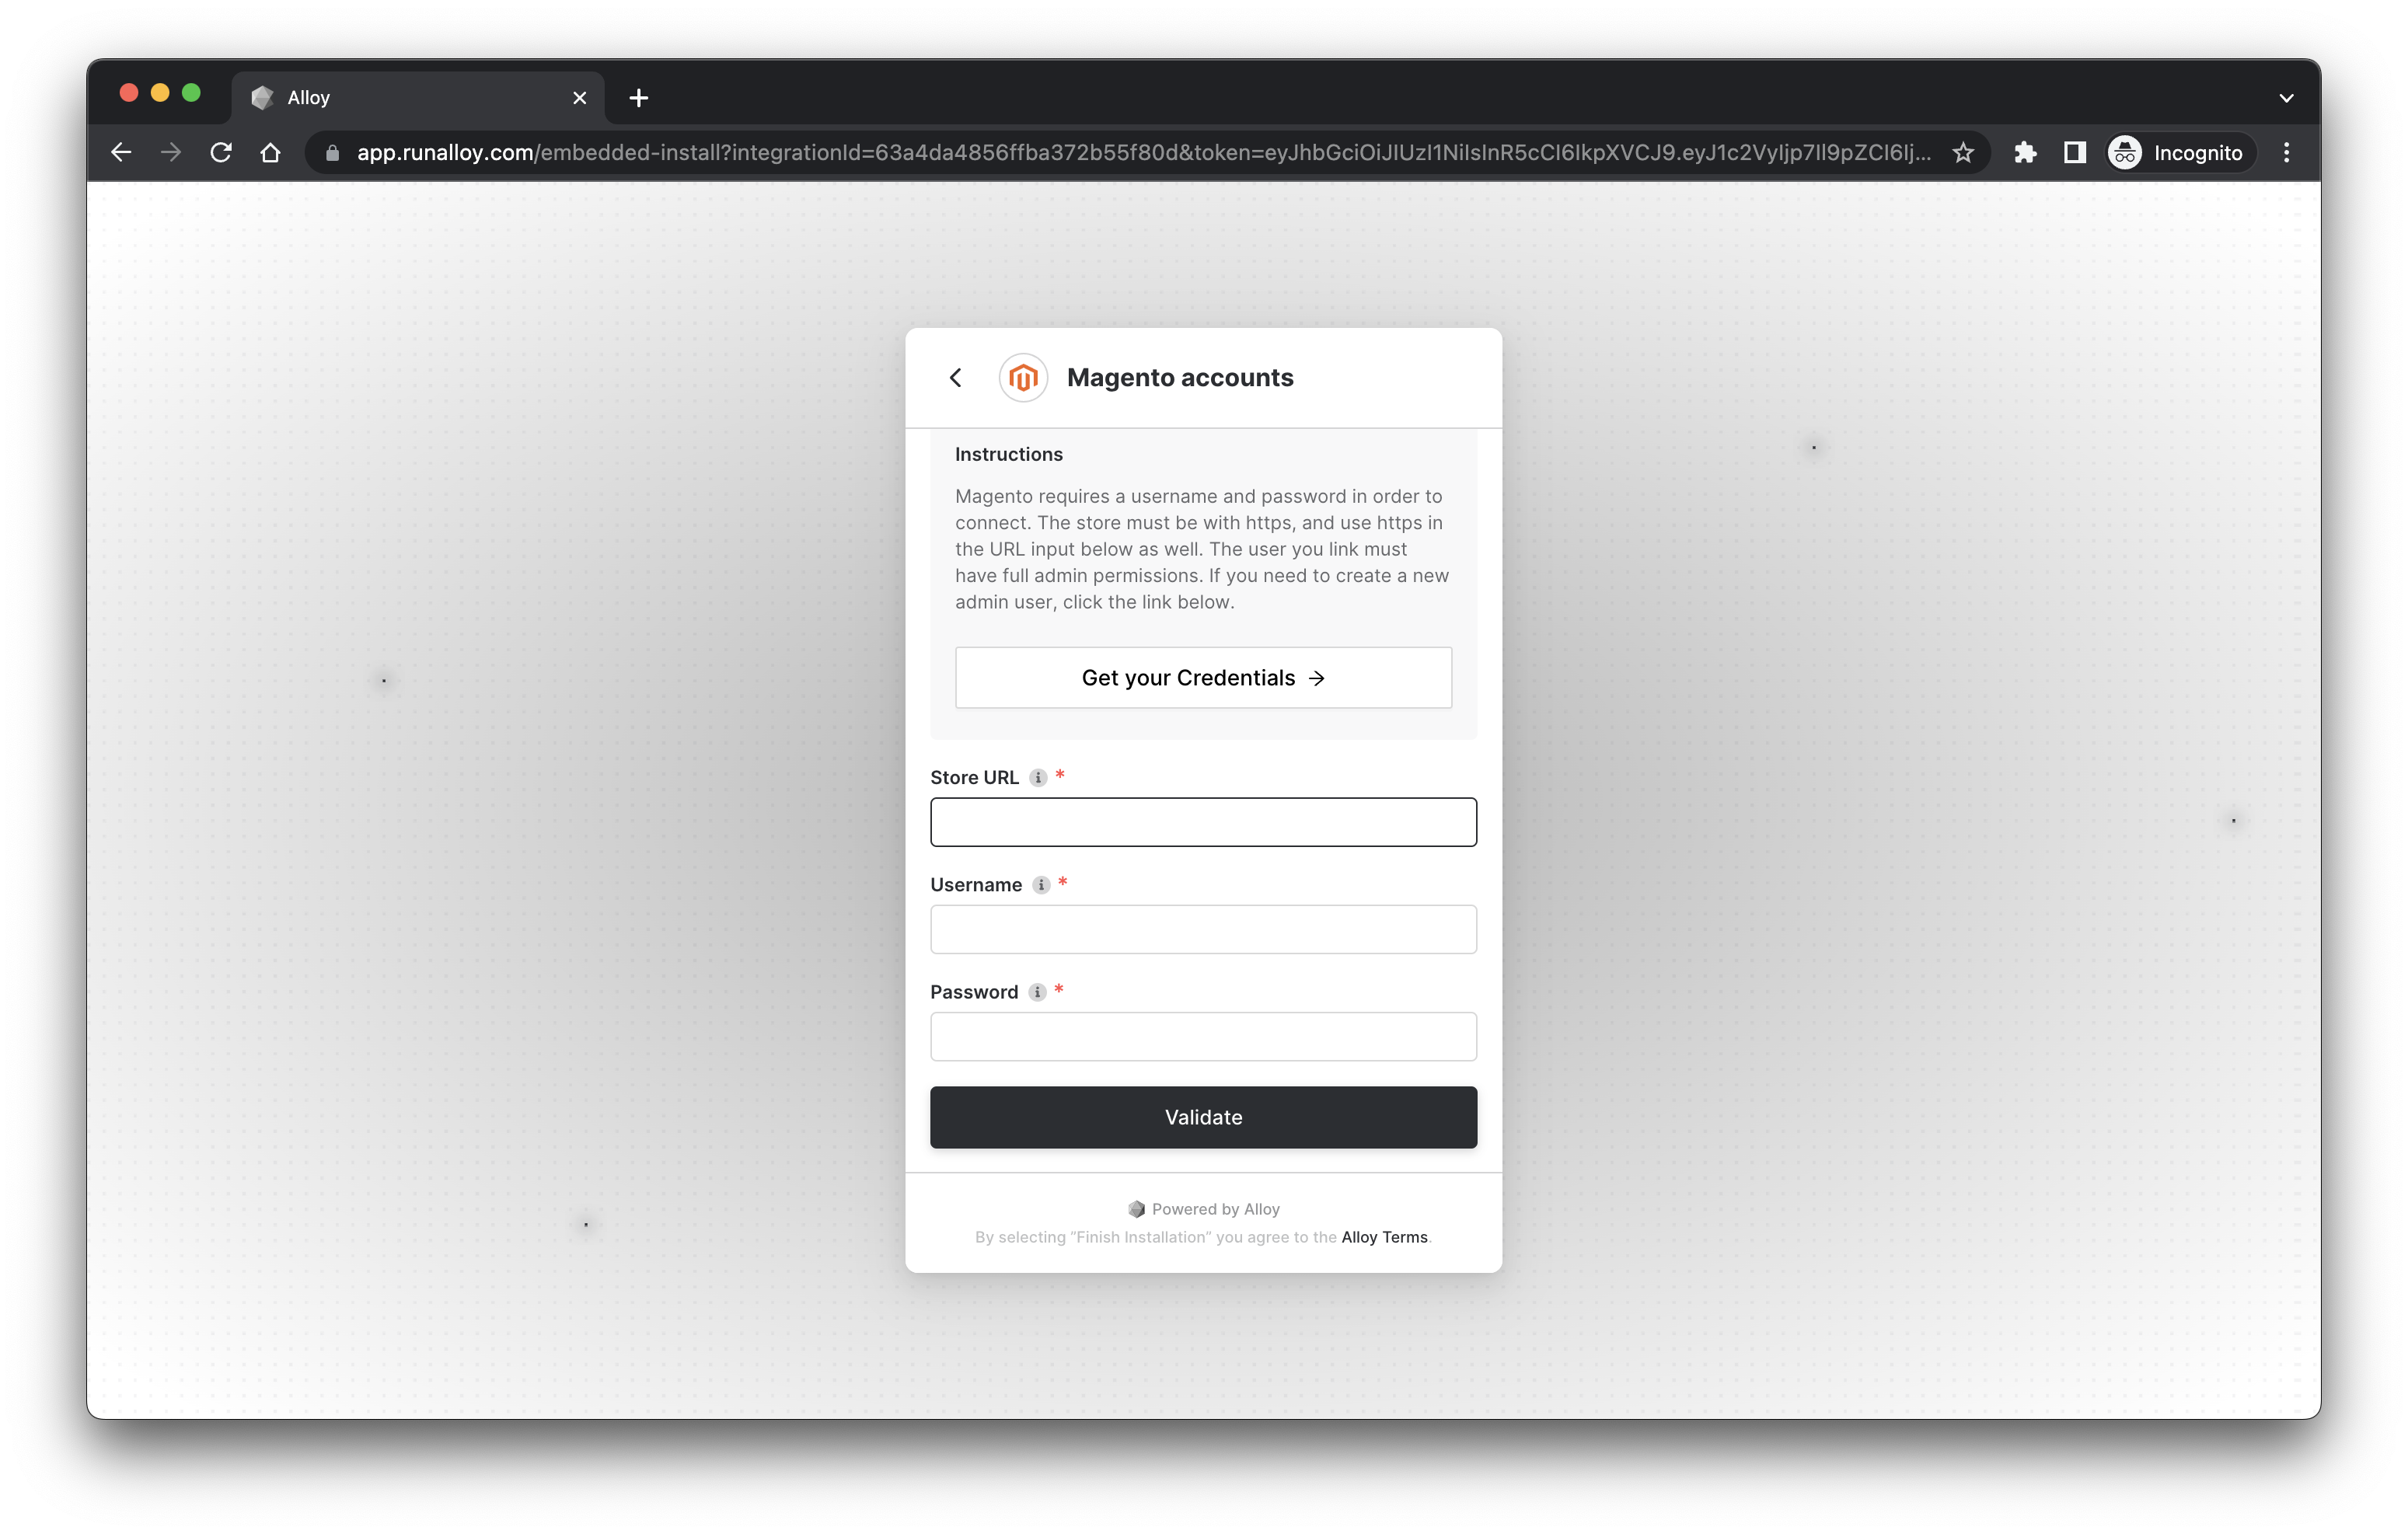
Here, you'll see the Embedded Modal (the same interface you'd see if you implemented the SDK but presented on the runalloy.com domain). The experience remains the same – enter your credentials and hit Finish Installation when you're done.
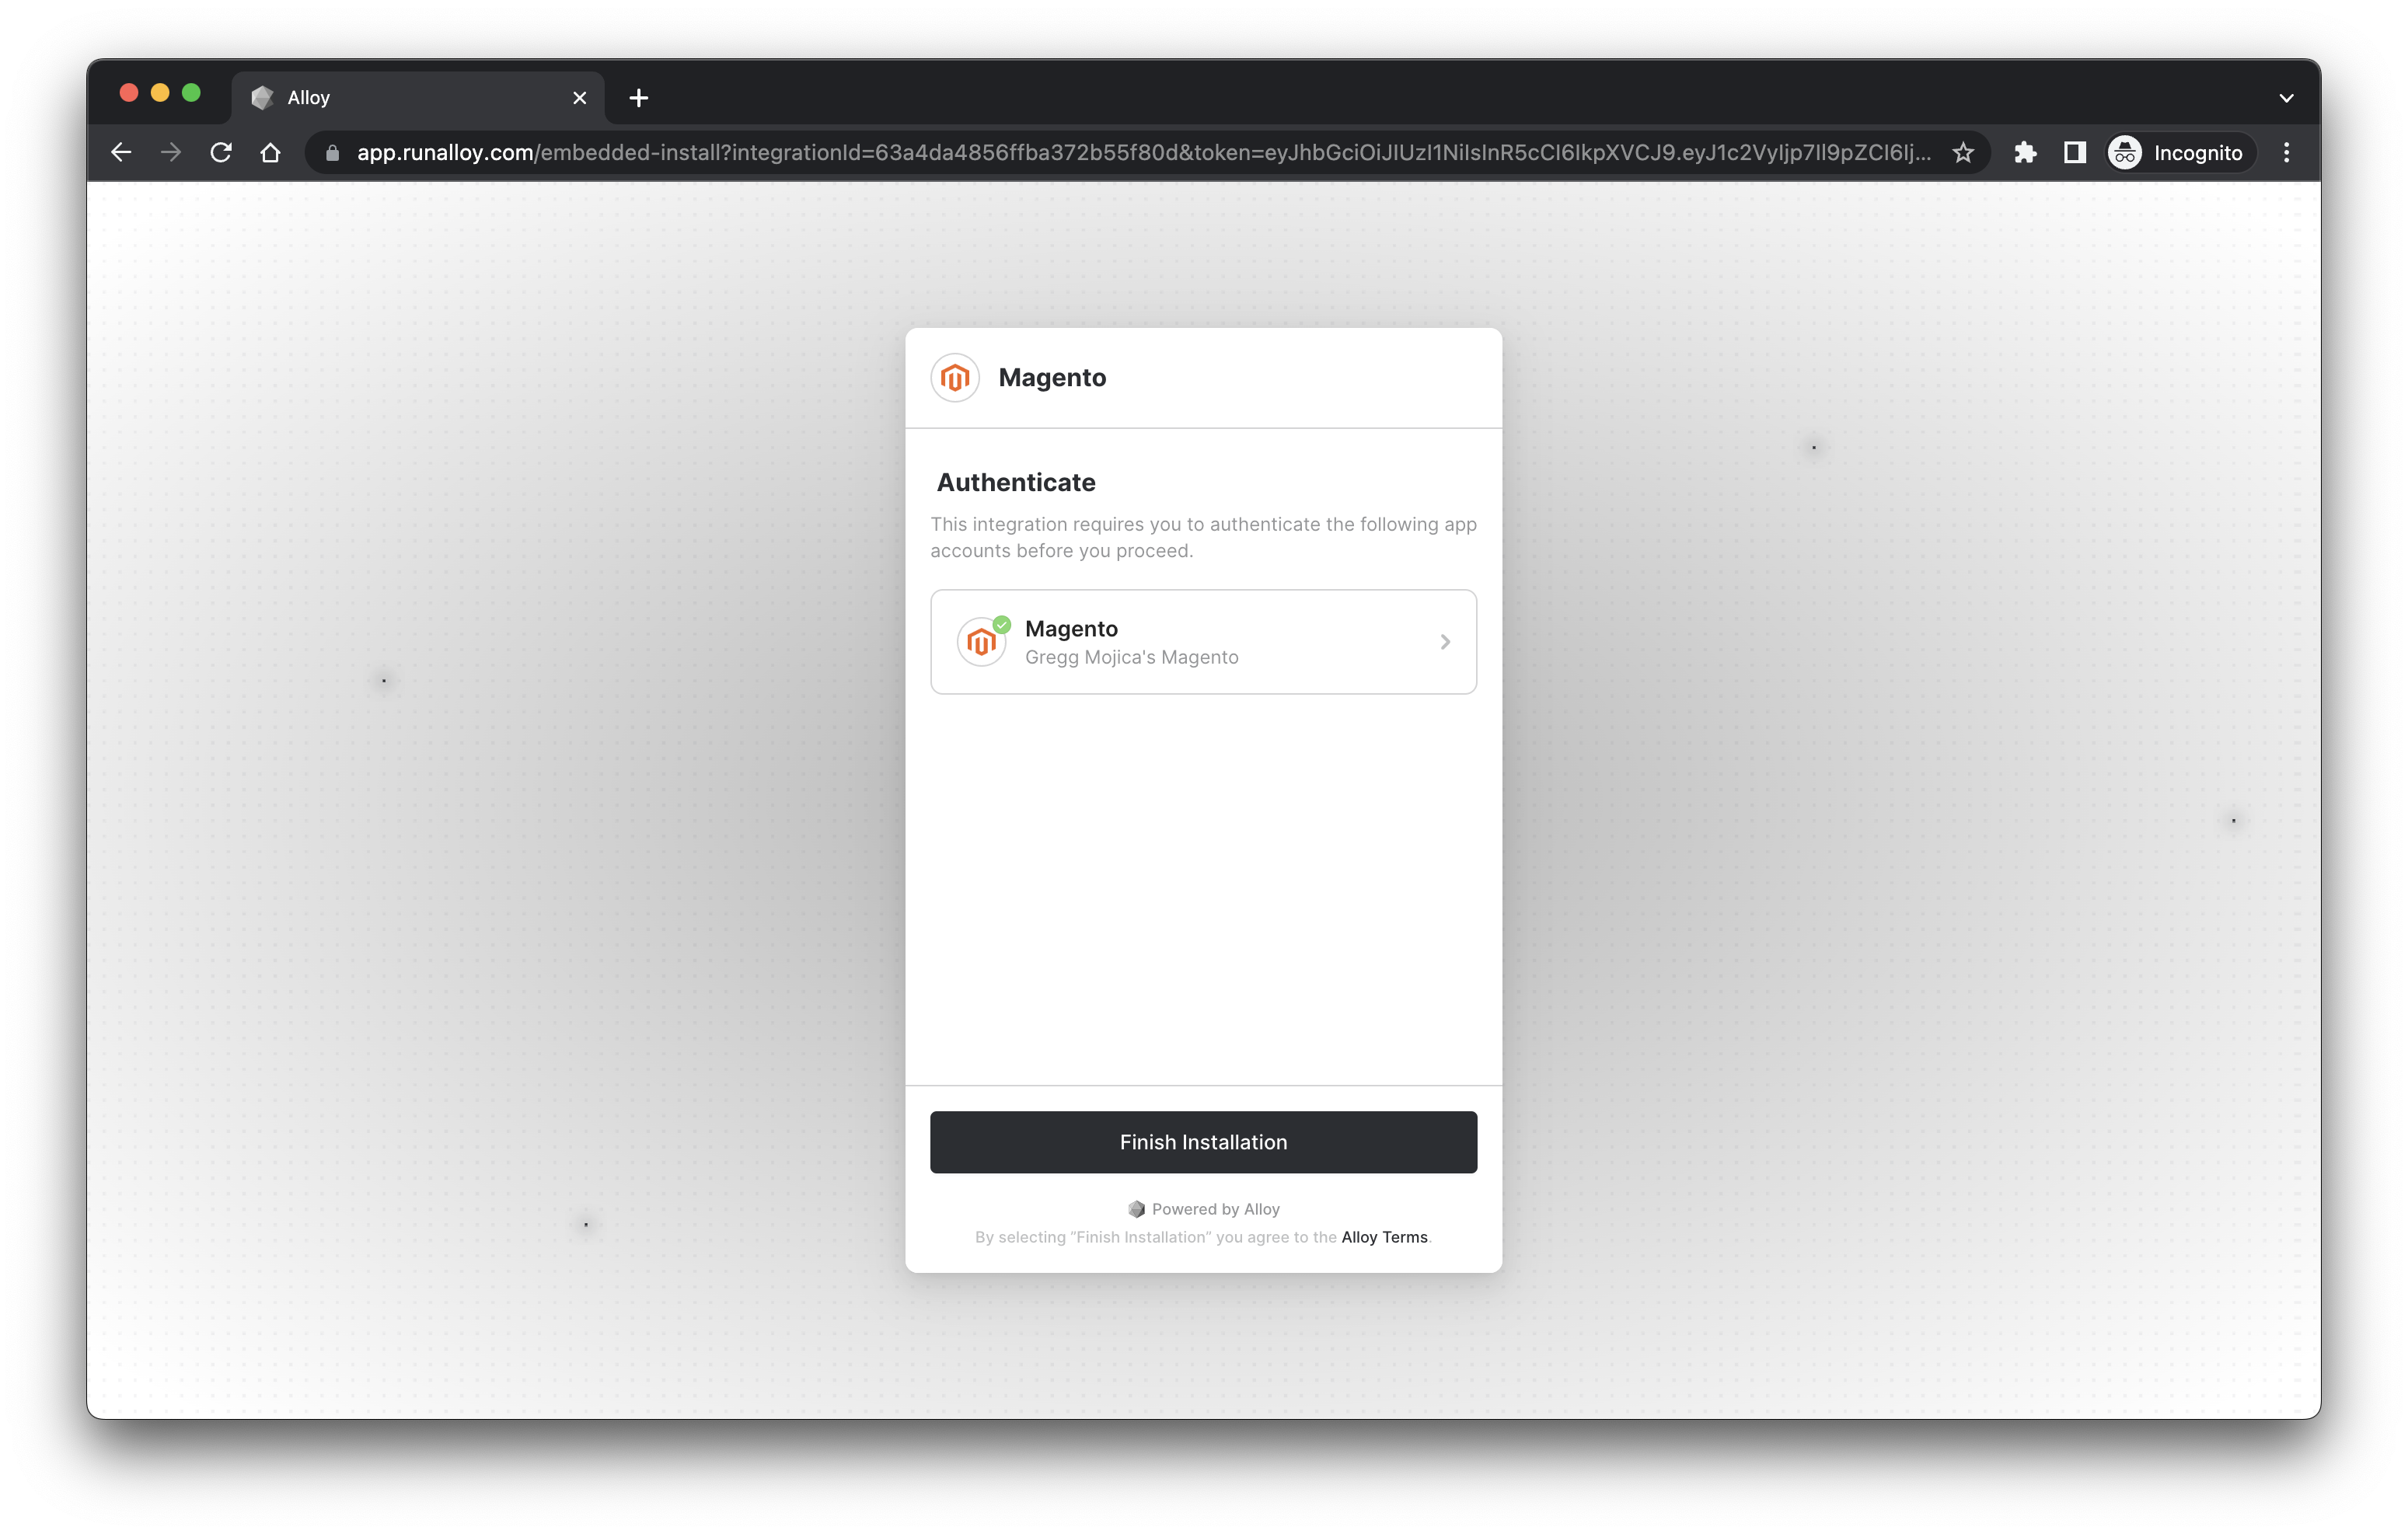
Boom! Just like that you're all done.
Embedded Link via the API
In the previous section, we looked at how to generate an Embedded Link via the Alloy Dashboard. Now, let's take a look at how to do so programmatically.
To generate a link programmatically, invoke the GET /install-url link as detailed here. This endpoint expects a userId and integrationId. You can generate a user or list all existing users via our Create a User and List all Users endpoints. Contact your account rep to setup this callback URL.
Once you've made a request to this endpoint, it'll generate the Embedded Link, similar to the above section. Note that this link must be generated on the backend because this endpoint requires your API key.
Notifying your app upon completion
If you've familiar with the our frontend SDK, you'll likely be aware that it returns a callback which is oftentimes used to take action (like updating an integrations page) when a user has completed authentication. With Embedded Link, no such callback exists because Embedded Link lives on Alloy's servers. That being said, it's still quite useful (and oftentimes required) to know when a user has successfully installed an integration so your application can react accordingly.
To remedy this, we've created the Installation callback URL which is invoked upon each successful integration install. You may supply us with a POST webhook URL where Alloy Embedded will notify you each time a user successfully installs an integration. We'll send you the following each time:
userId(string)workflowIds(array)integrationId(string)success(boolean)
Additionally, each request includes an X-Alloy-Signature header to validate the validity of the incoming webhooks. You can read more about the signature and how to validate it here.
Wrapping Up
And just like that, you've set up Embedded Link. As you can see, Embedded Link makes it really easy to build integrations. Behind the scenes, Embedded link uses the same technology as Embedded SDK – when a user installs a workflow, the link generates a child workflow (aka a copy) of the parent workflow.
You can any other existing Embedded APIs in conjunction with Embedded Link. For example, you can easily leverage our logging and compliance APIs.
Happy building!
Updated 11 months ago