Integration Structure
In this section, we'll explore how to create our first integration in Alloy Embedded. For our example, we'll build a Shopify Integration, but you can swap out Shopify for another supported app.
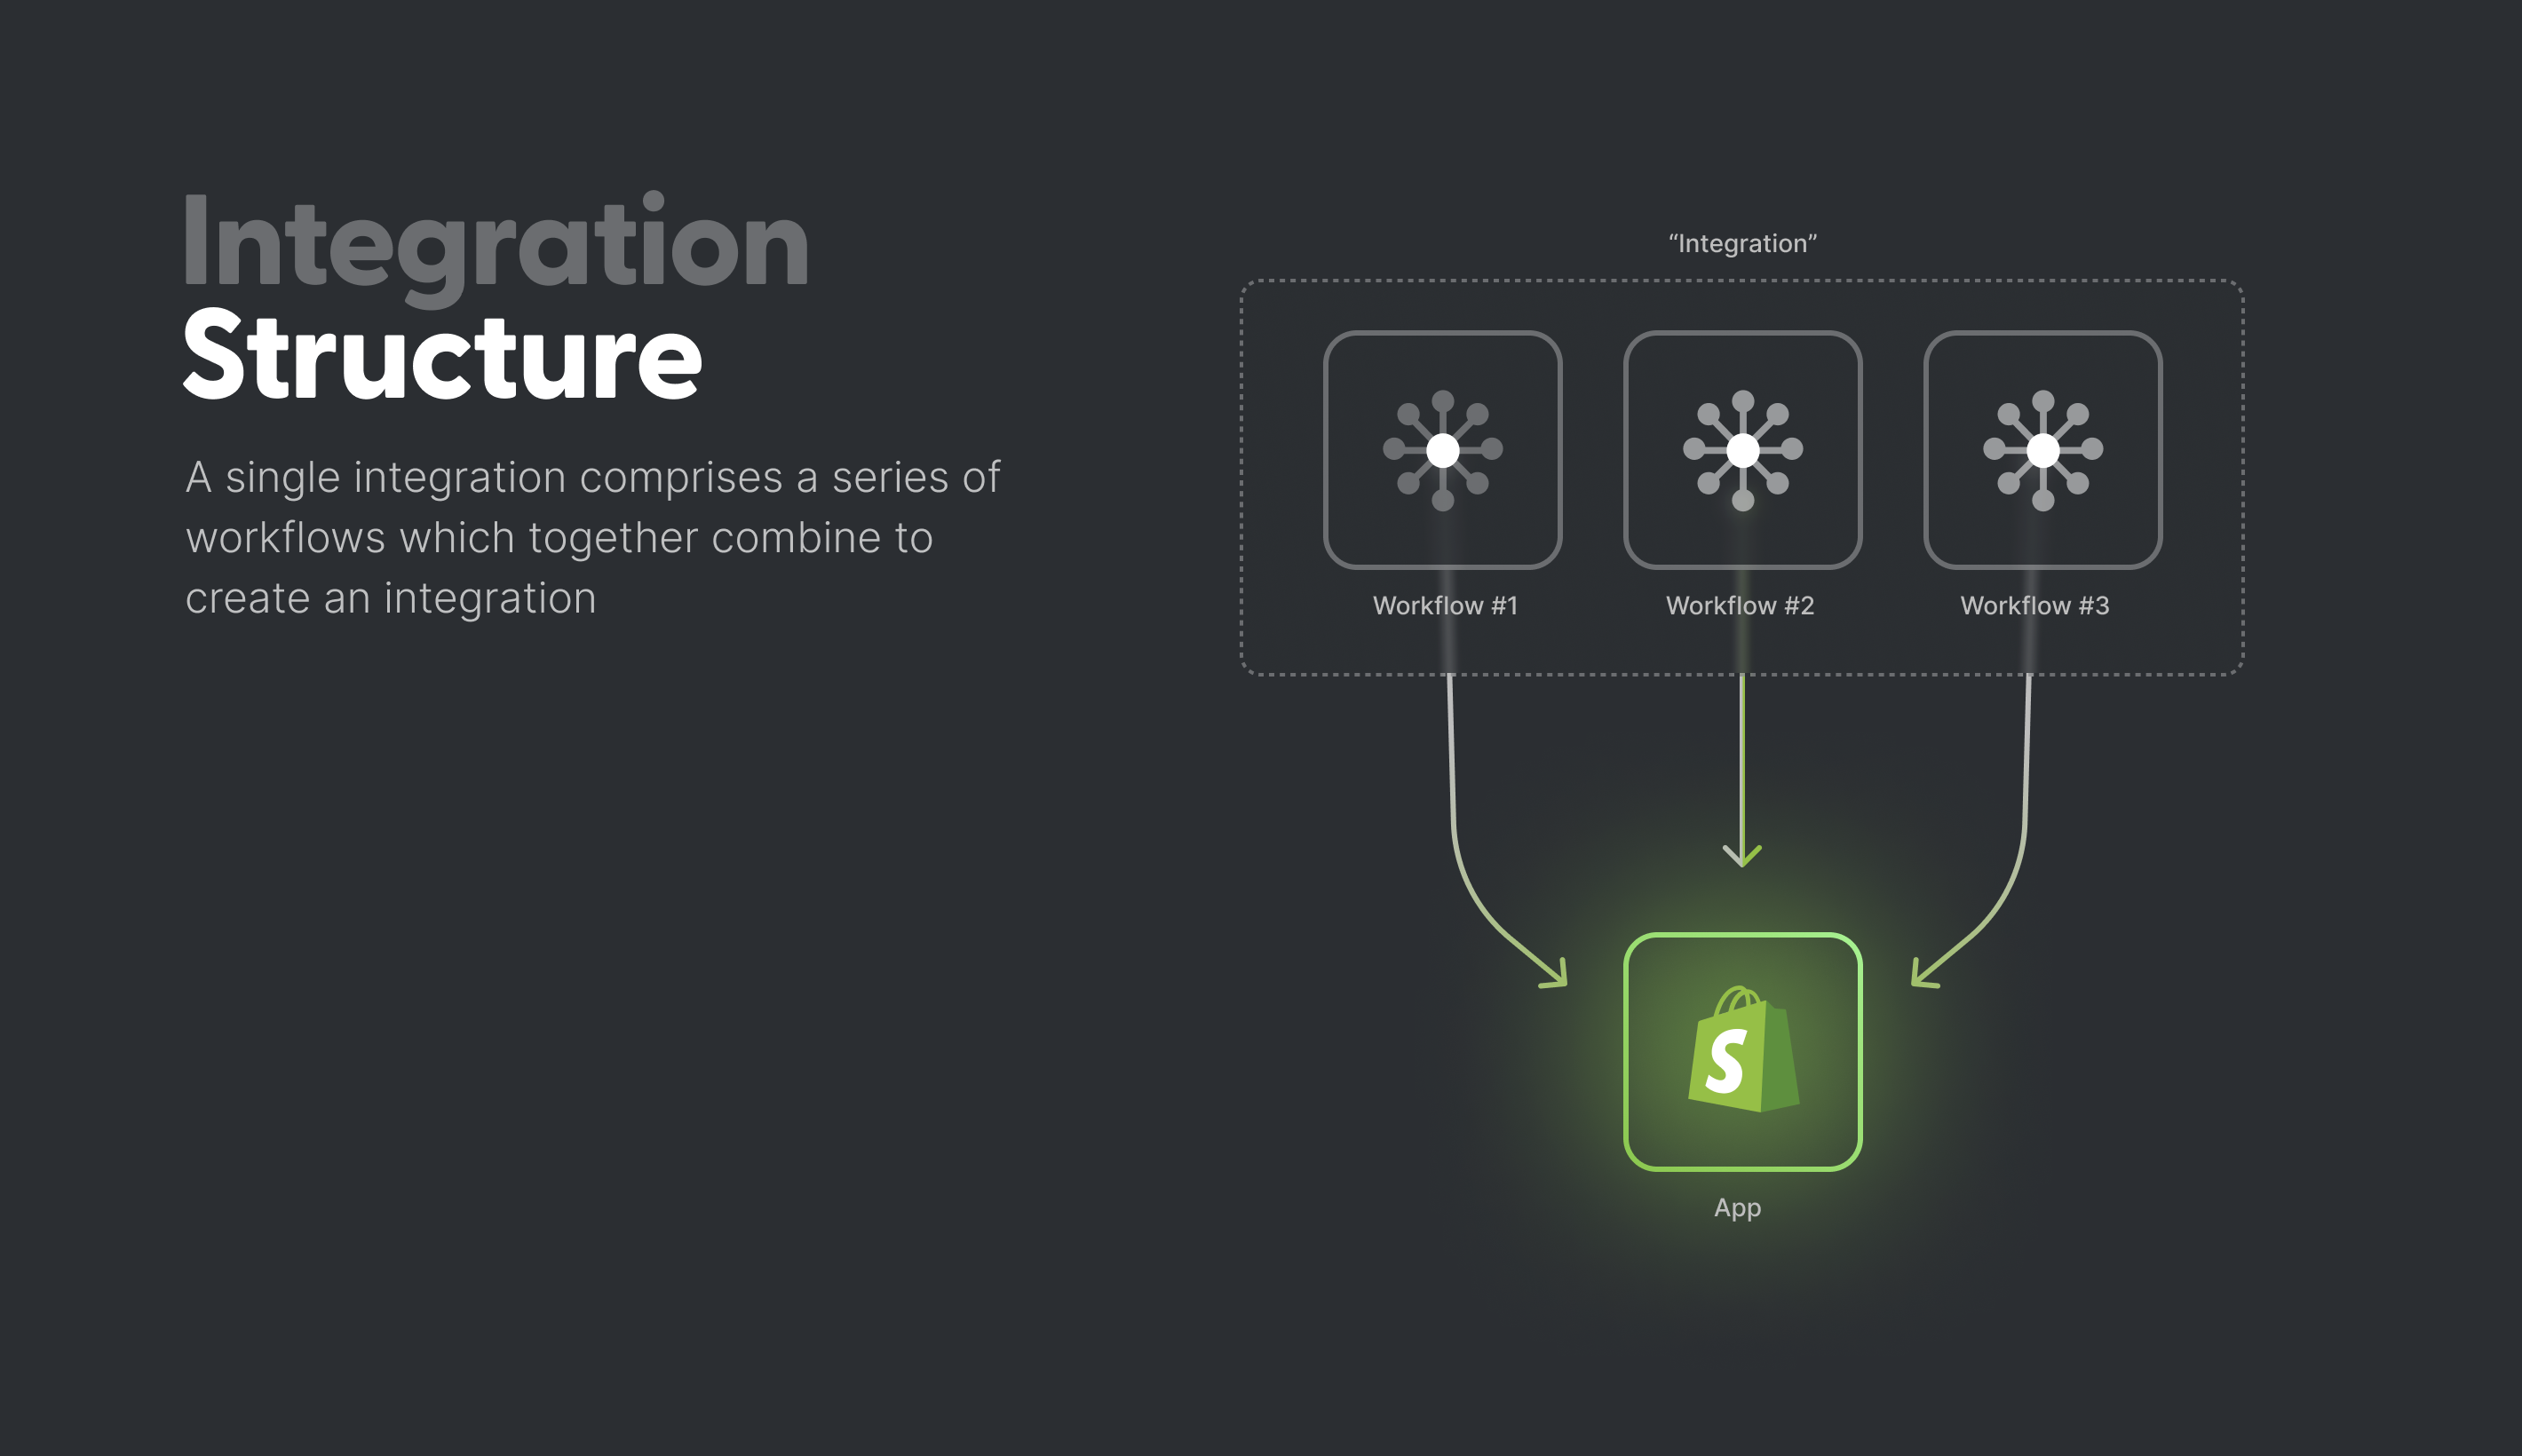
Recall from the terminology section that integrations are made up of individual workflows centered around a single app (i.e. Shopify). When combined, a series of workflows constitutes an integration.
The graphic below illustrates this relationship.
Integration Structure
Integration Structure
What is an Integration?
An integration is a combination of workflows centered around a shared block. For example, you could build a Shopify integration that has 3 workflows: the first workflow sends order data every time a Shopify order is placed to your data warehouse, the second workflow sends customer data every time a new customer signs up in a Shopify store to your data warehouse and the third workflow tags a customer when a user clicks a button on your site.
Let's assume we wanted to build a Shopify integration that makes outgoing requests to Shopify and another that listens for incoming data from Shopify. If we break this down, we have two workflows:
- Workflow #1 is triggered by our platform and sends data to Shopify
- Workflow #2 listens for data coming from Shopify and sends it to our platform
The below illustration details the flow of data within these two workflows.
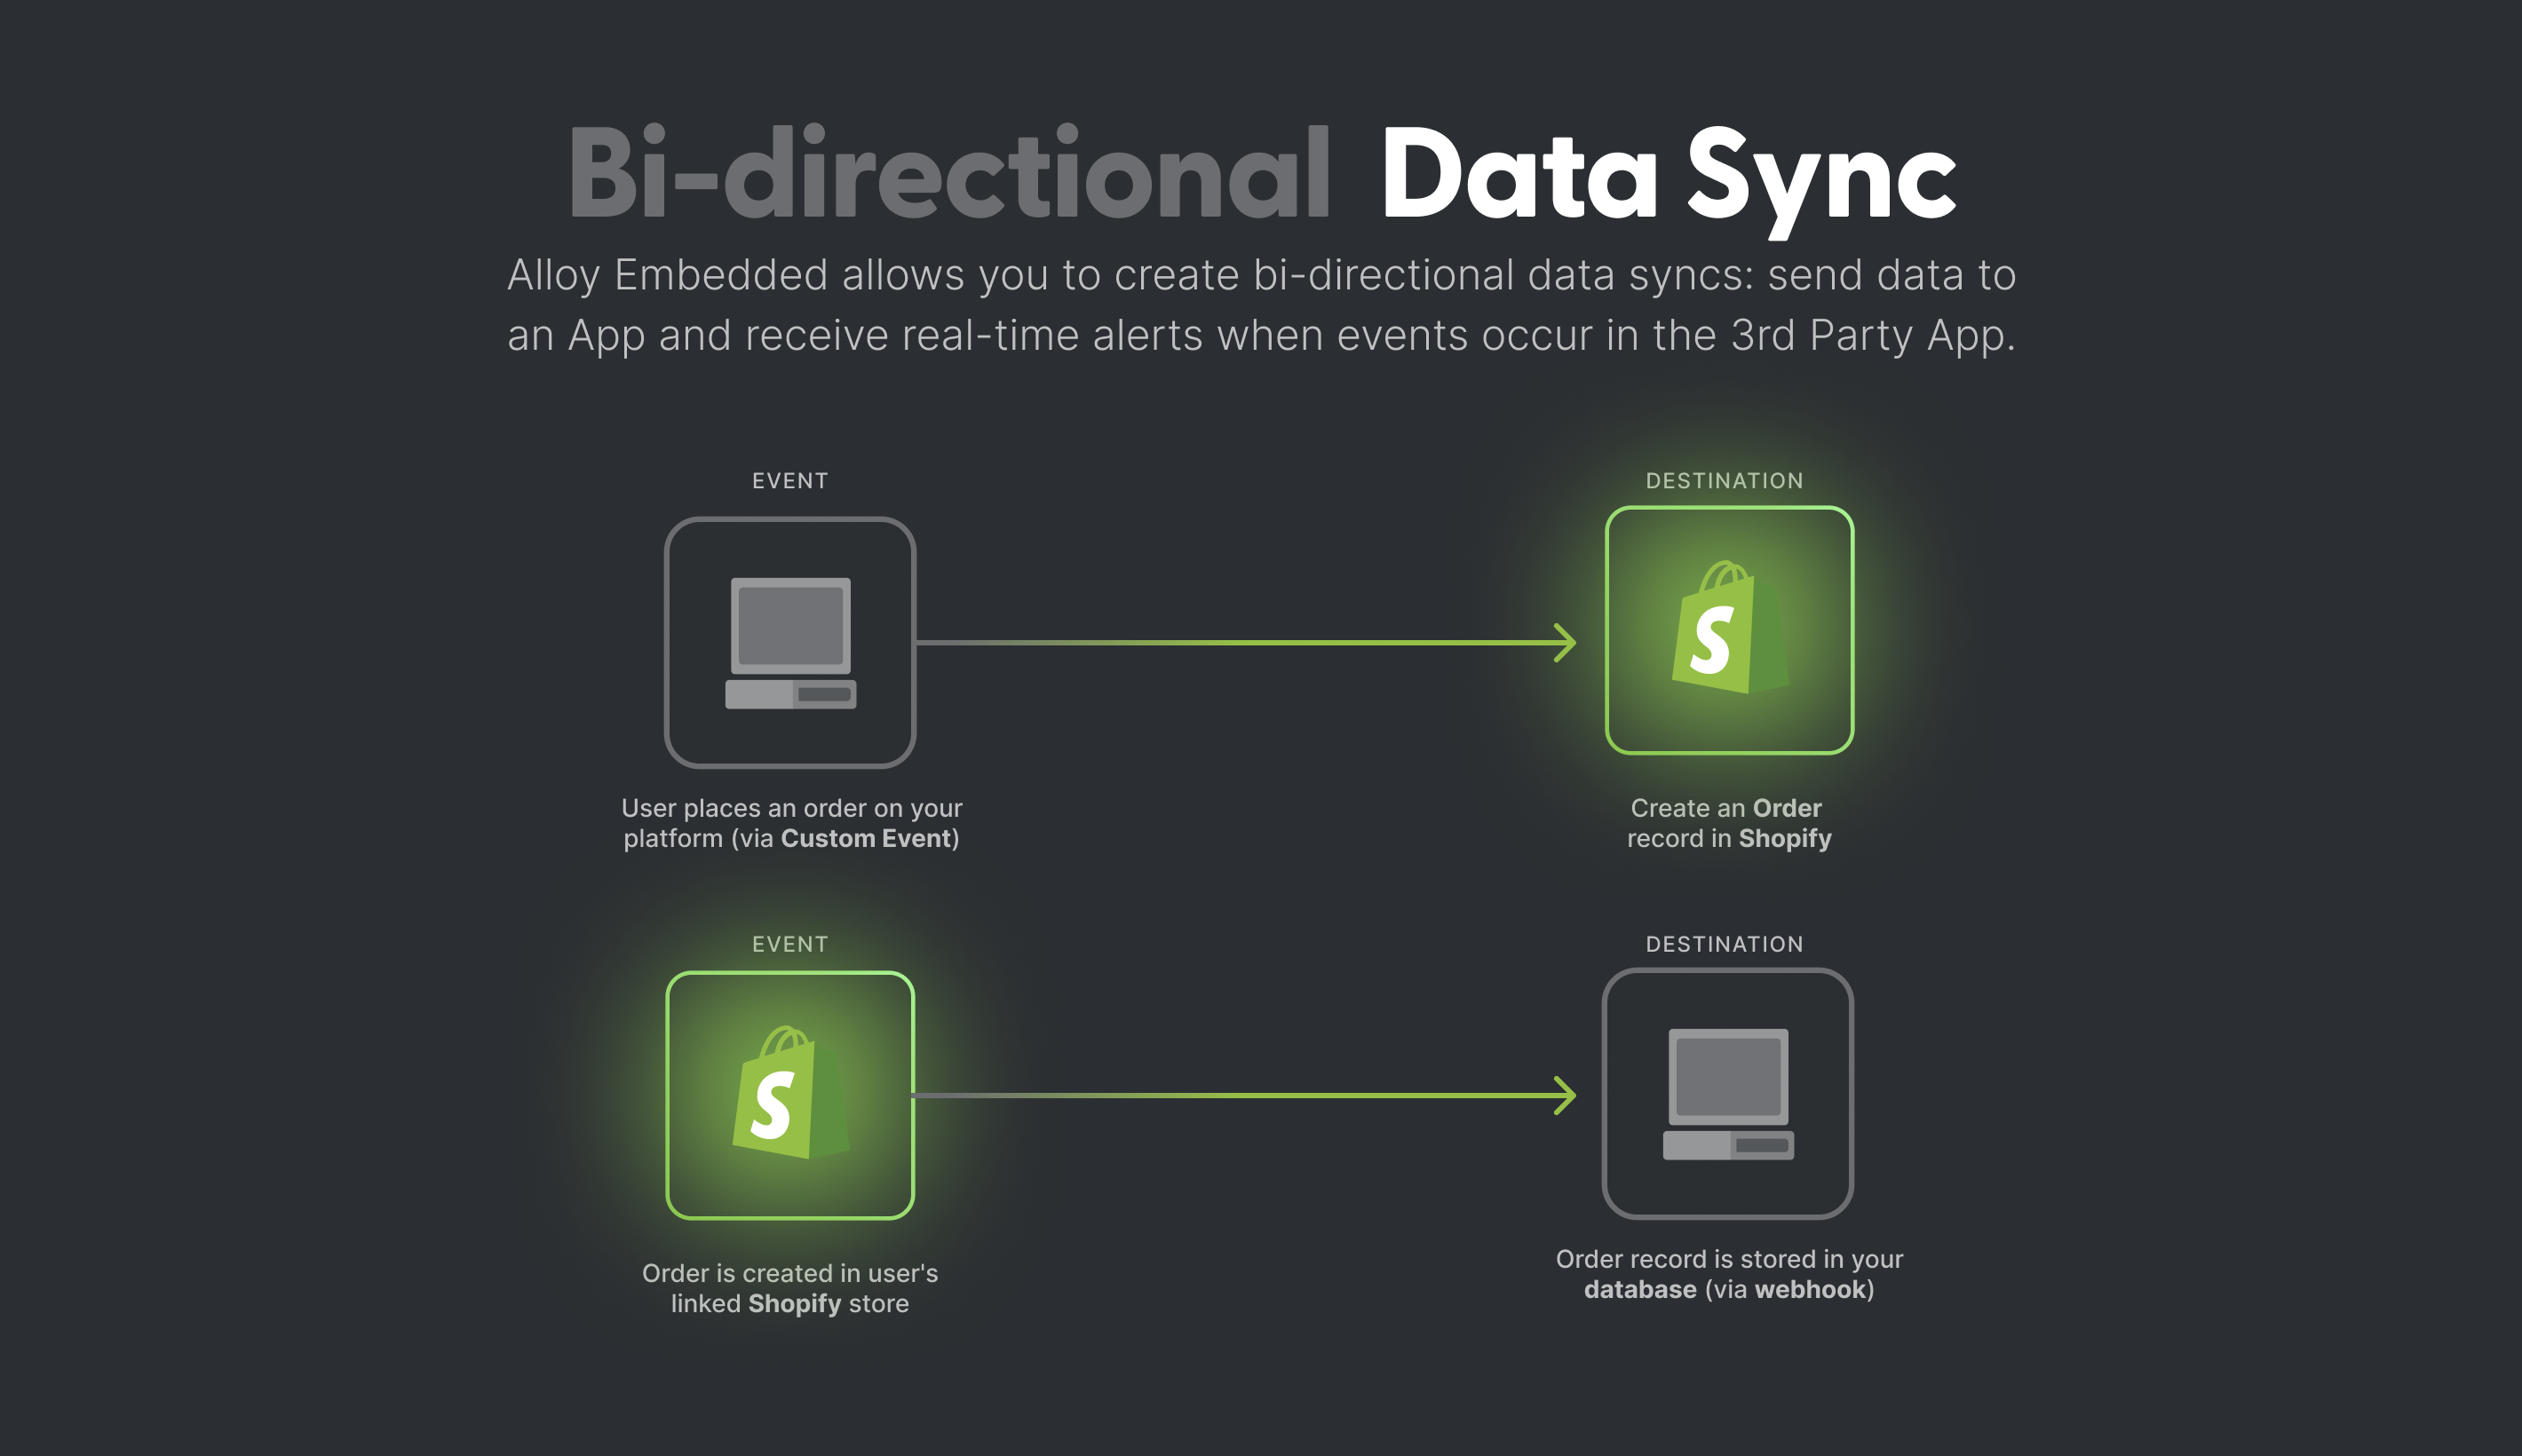
As you can see, this integration sends data to your server and also receives data from your server. In the first workflow, your server is the Event and Shopify is the Destination. Meanwhile, in the second workflow, Shopify is the Event and your server is the Destination.
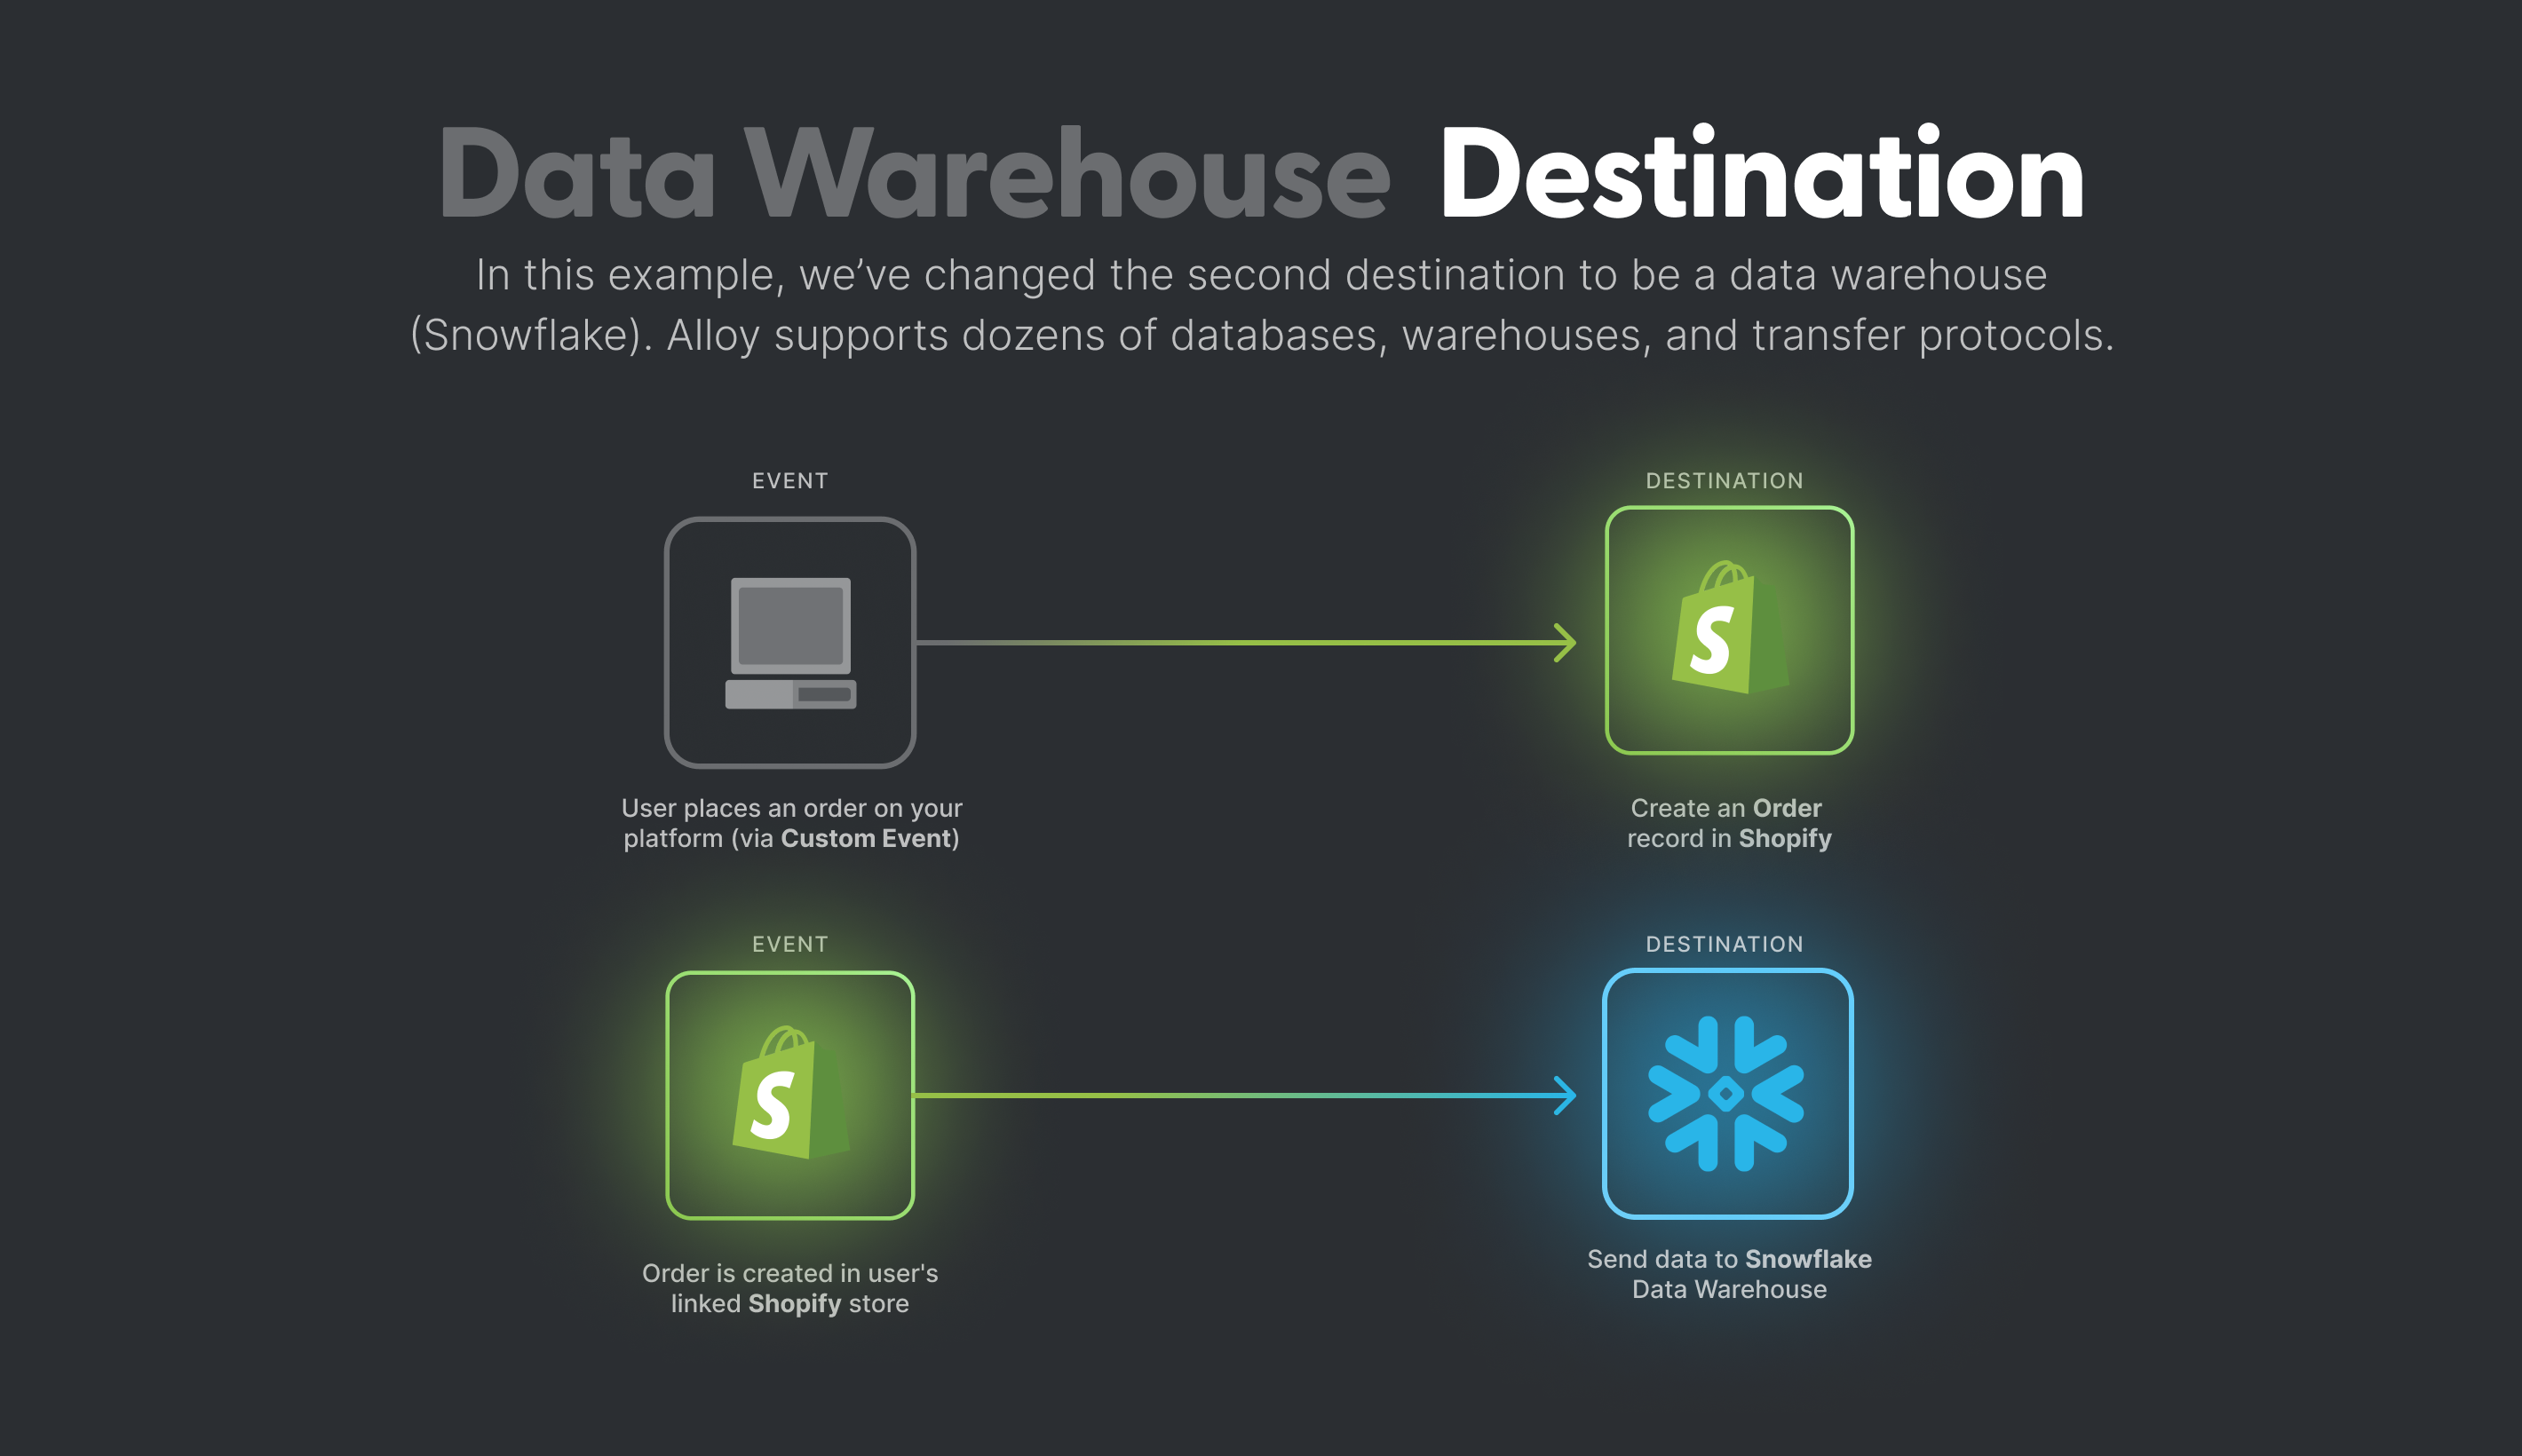
This sort of flow works in many scenarios but you might not always want to ingest data to your server. In many instances, it makes more sense to send incoming data directly to a data warehouse (such as Snowflake, BigQuery, etc). The below illustration shows how you could configure such a flow.
Creating an Integration
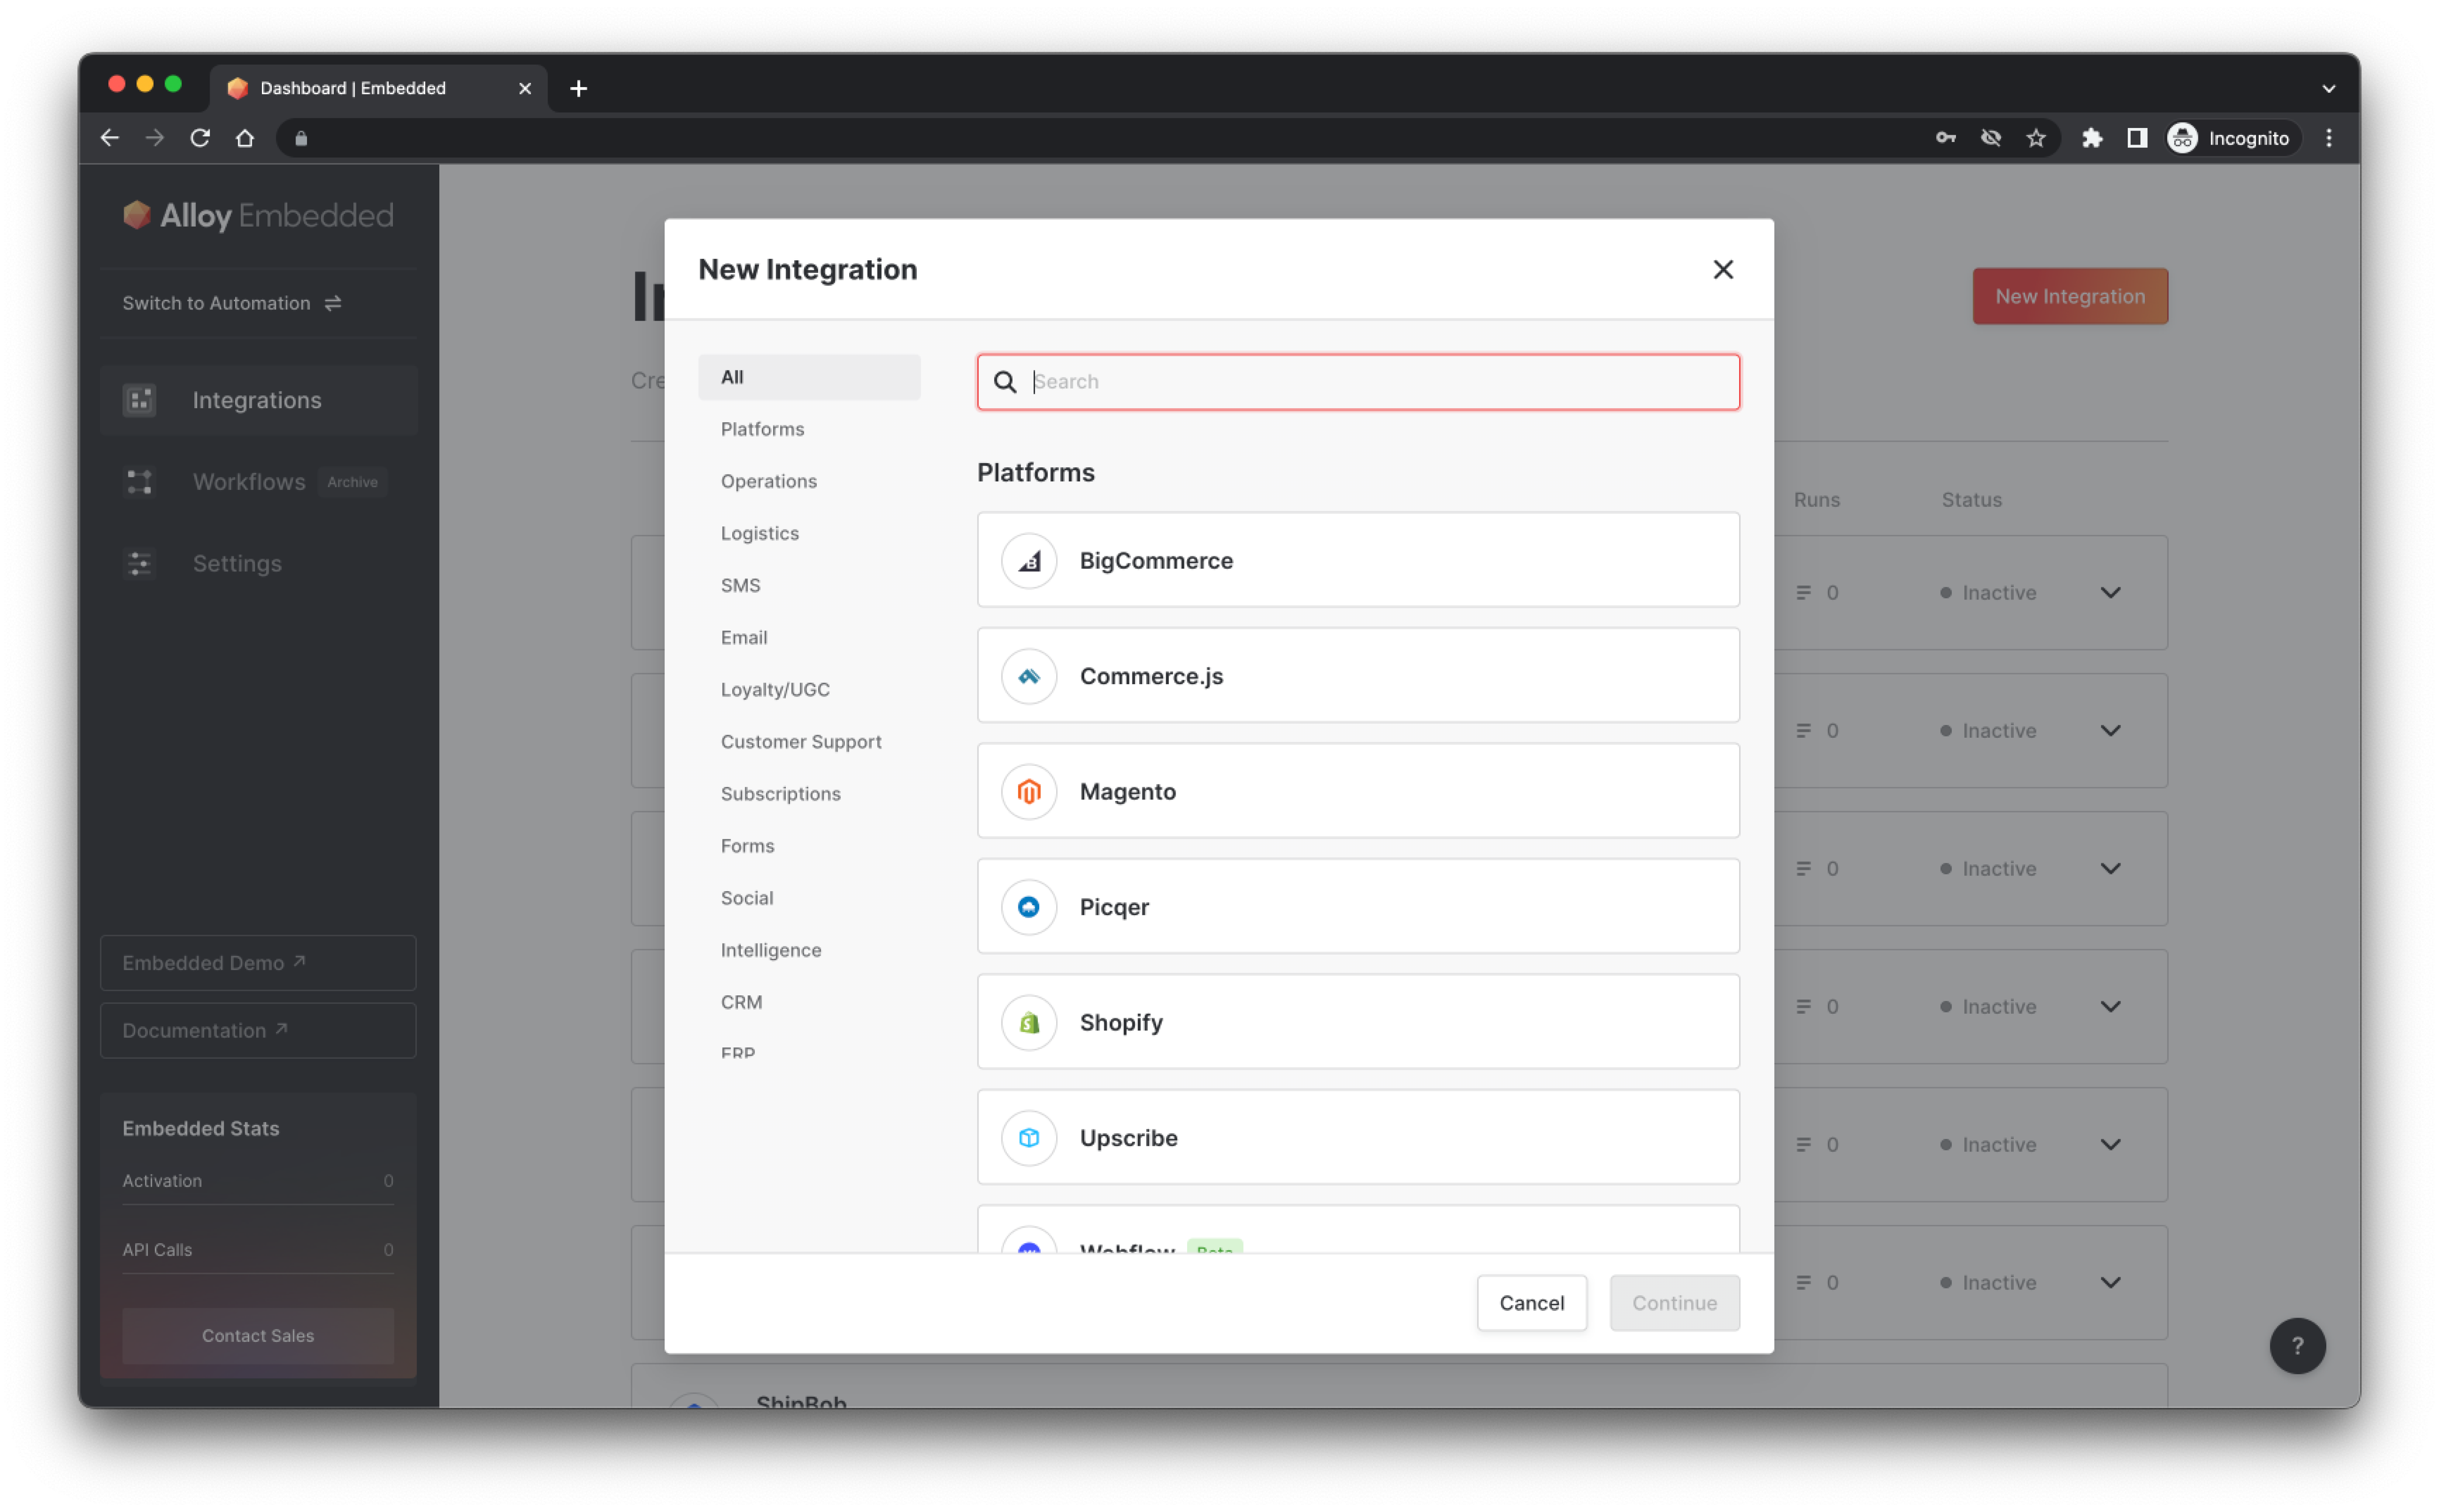
To begin, let's create our first integration. Navigate to the Embedded Integrations tab and select the New Integration button as seen in the screenshot below.You'll be prompted to select which integration you want. For our example, we'll search for Shopify. When you're done, click Continue.
From here, you can create your individual workflows. Recall that each workflow grouped within an integration serves a single function. We will want to setup a bi-directional sync for Shopify, meaning that we want to not only be able to push data to Shopify but also receive information when events occur in Shopify.
To do this, we will define two workflows (similar to our example above):
- When an event happens in Acme Co's app, create a new order in Shopify**
- When a order is created in Shopify, send a message to Acme Co's server (you)
Workflow #1
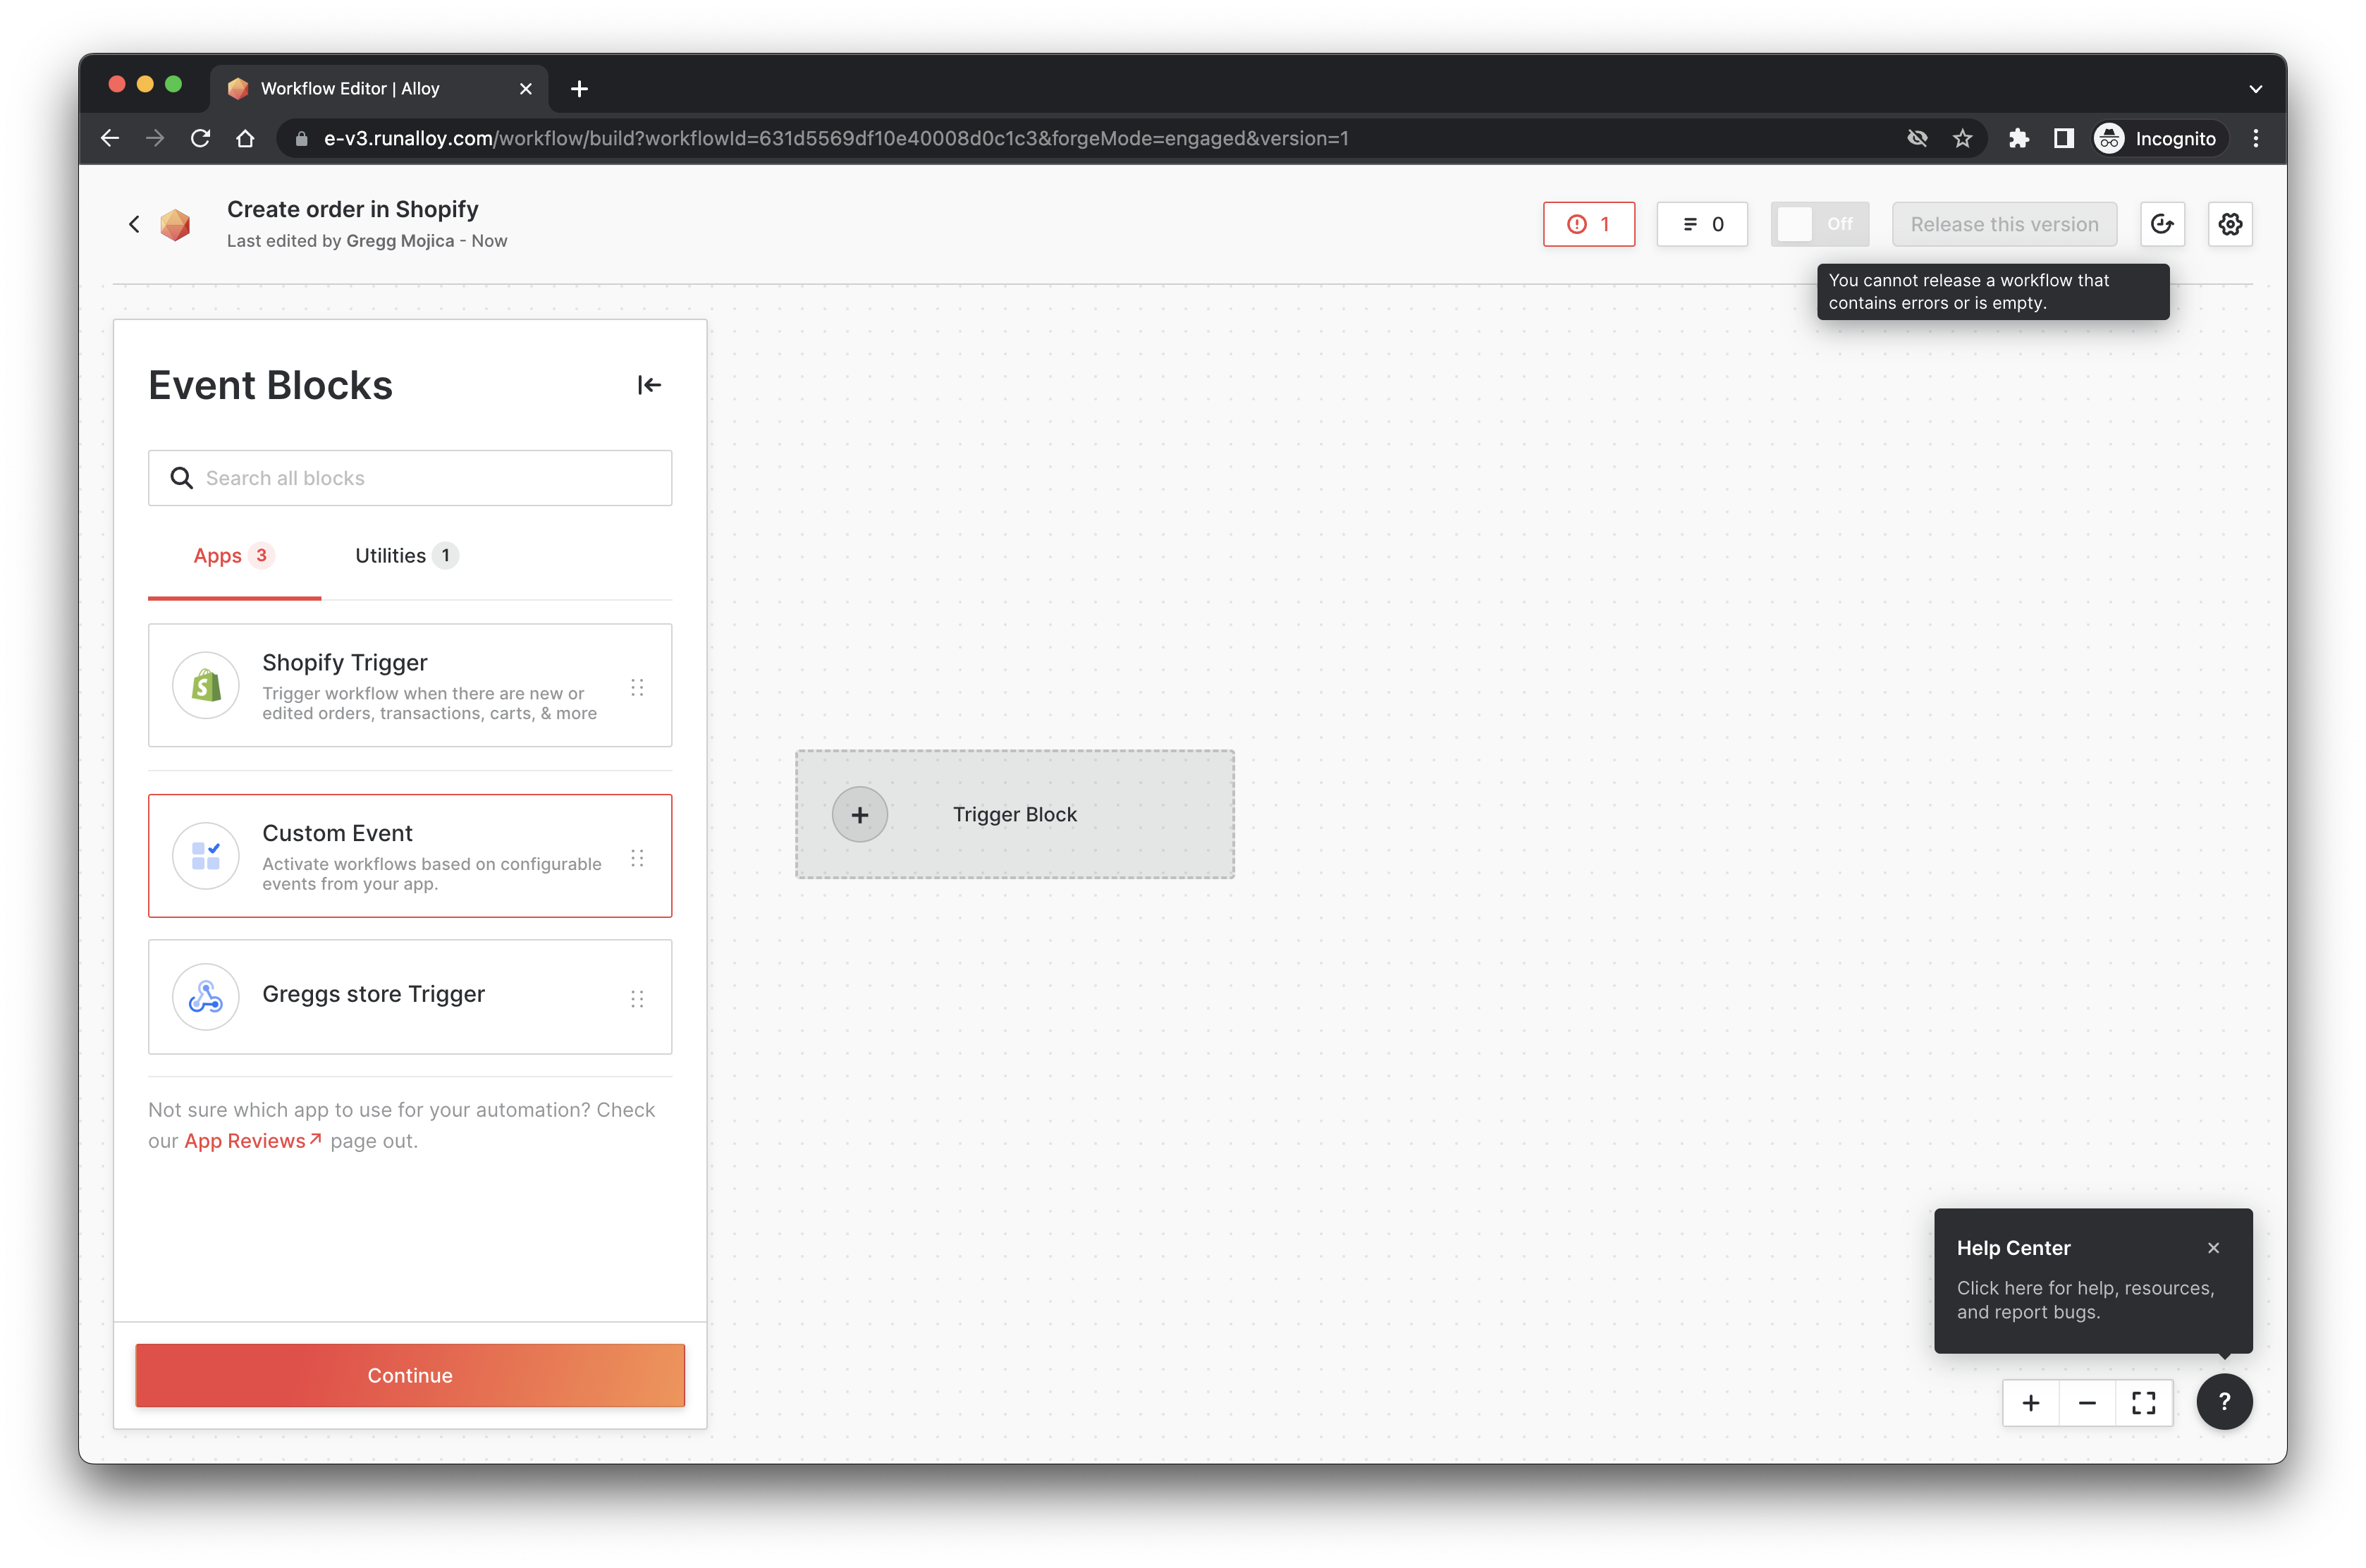
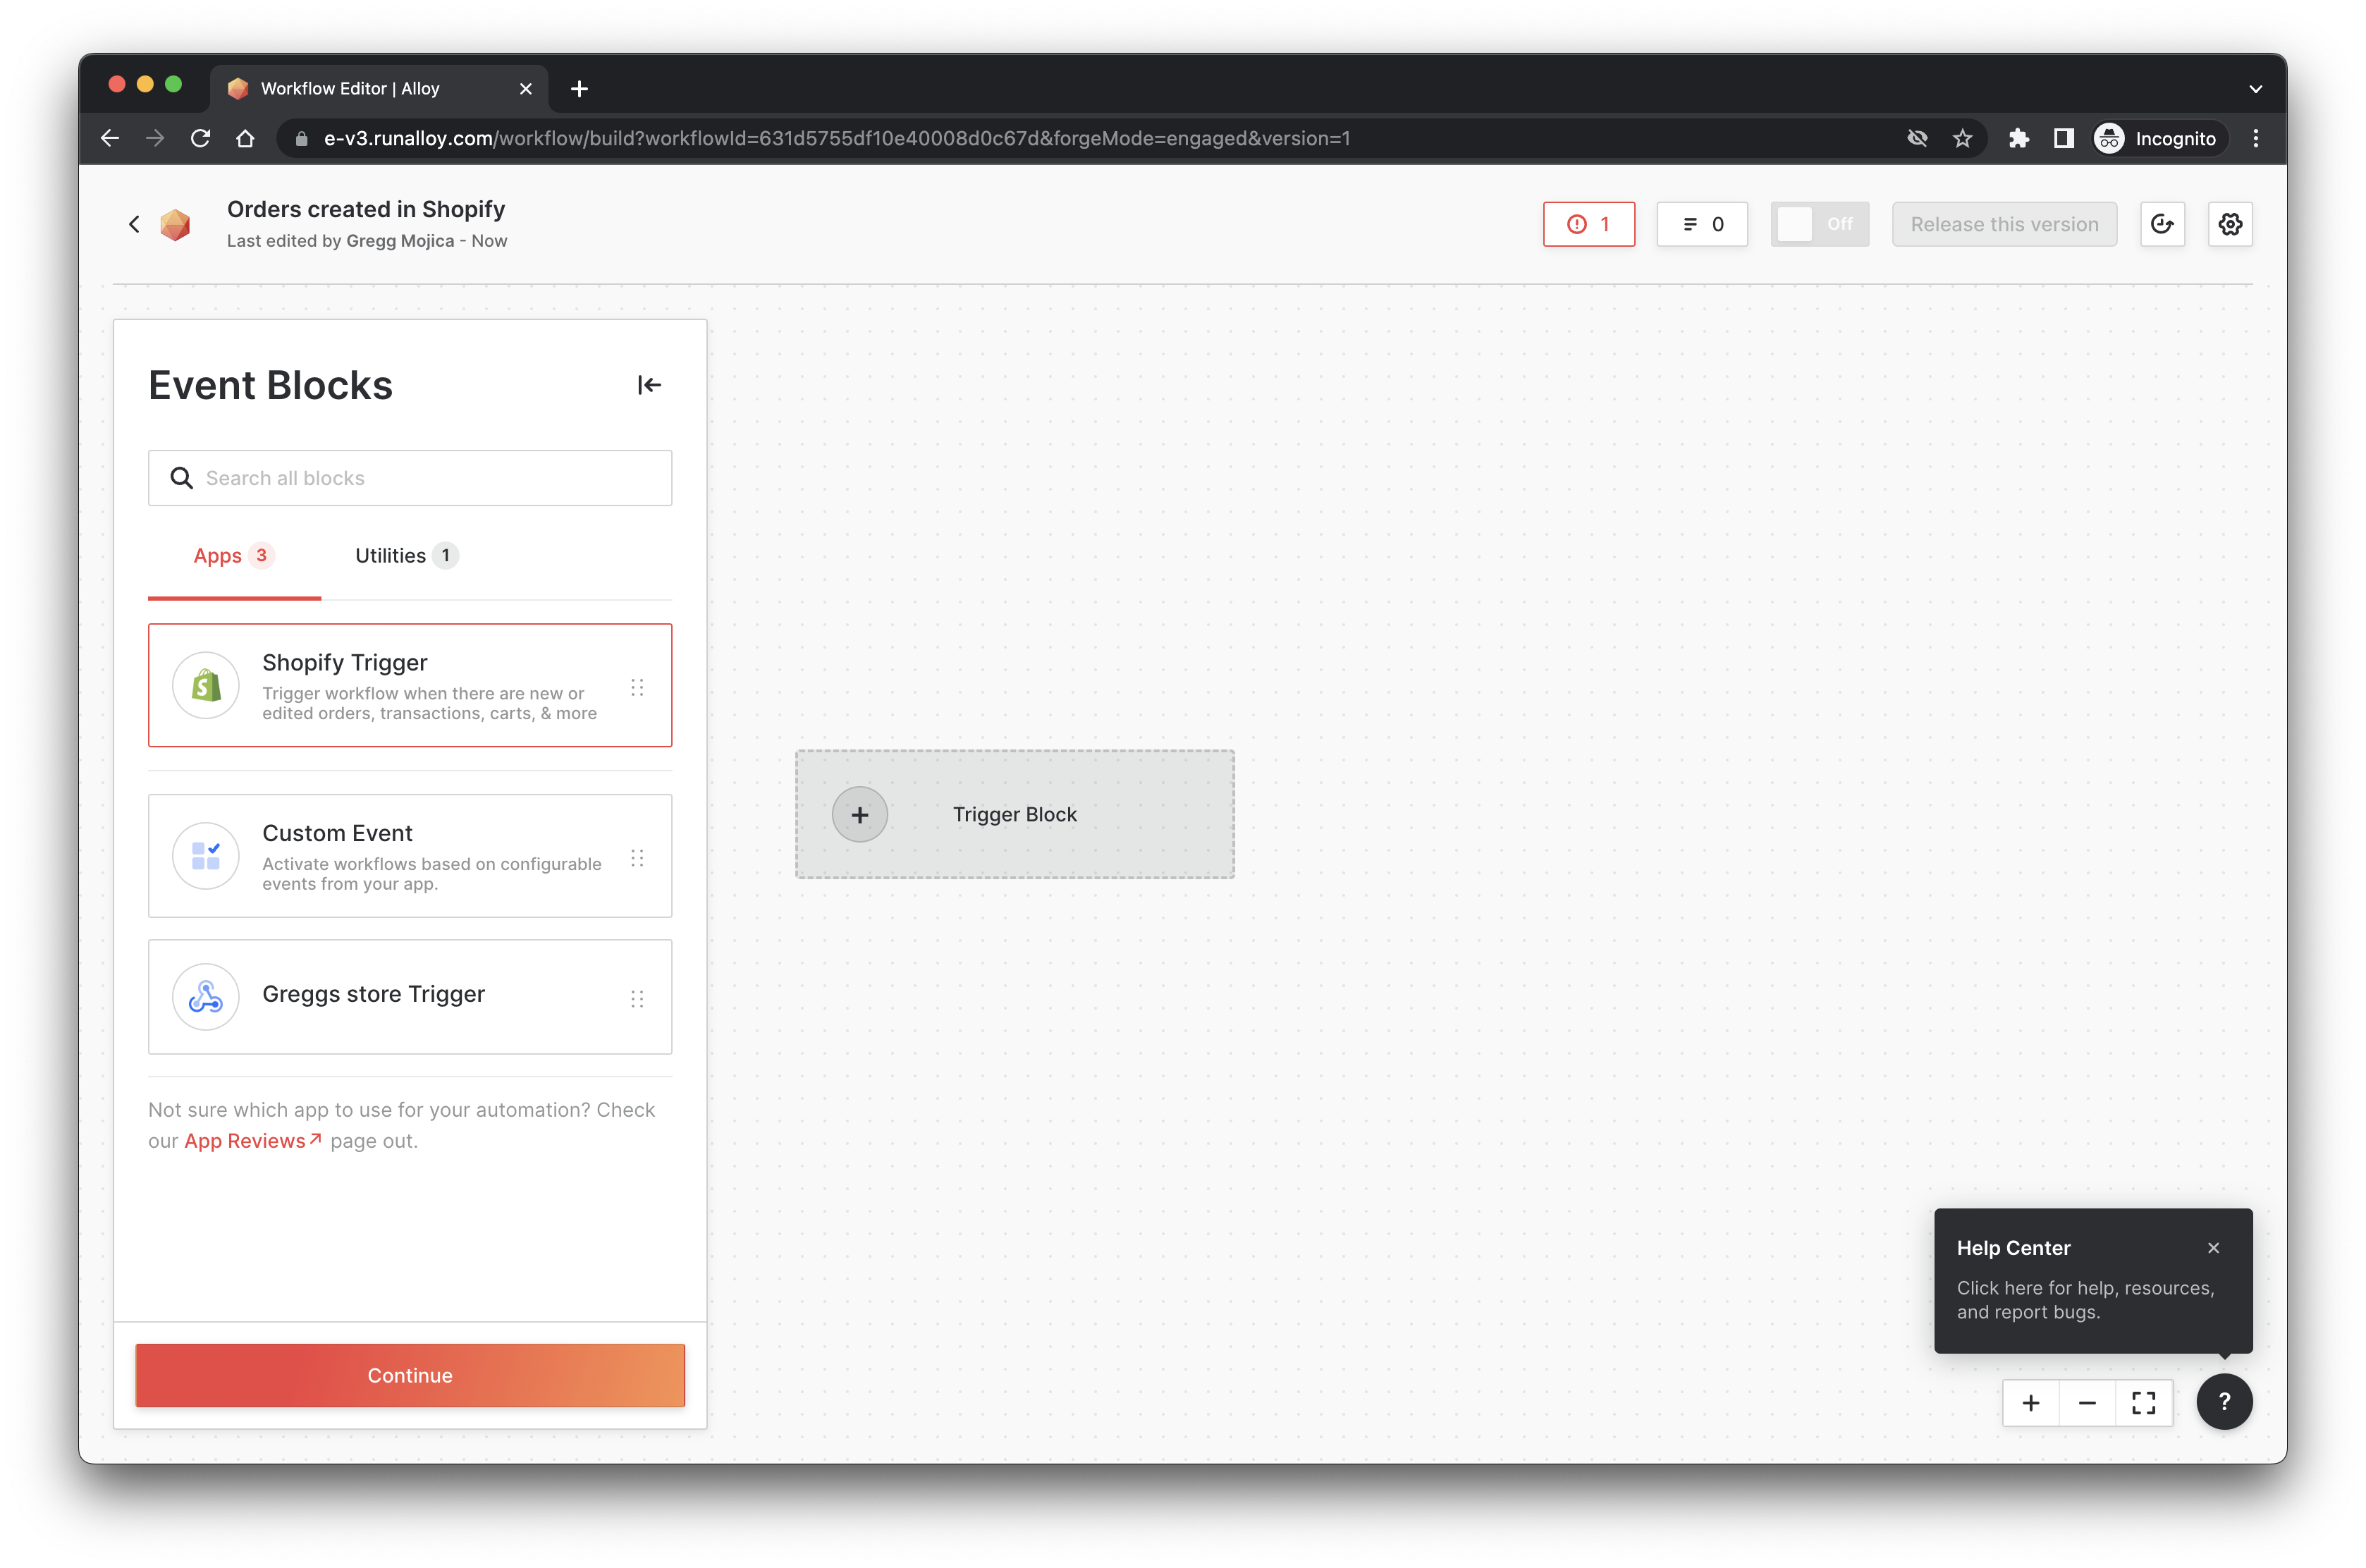
Once you've selected Shopify, create your first workflow.
Since our first workflow involves sending data to Shopify, we'll choose the Custom Event block
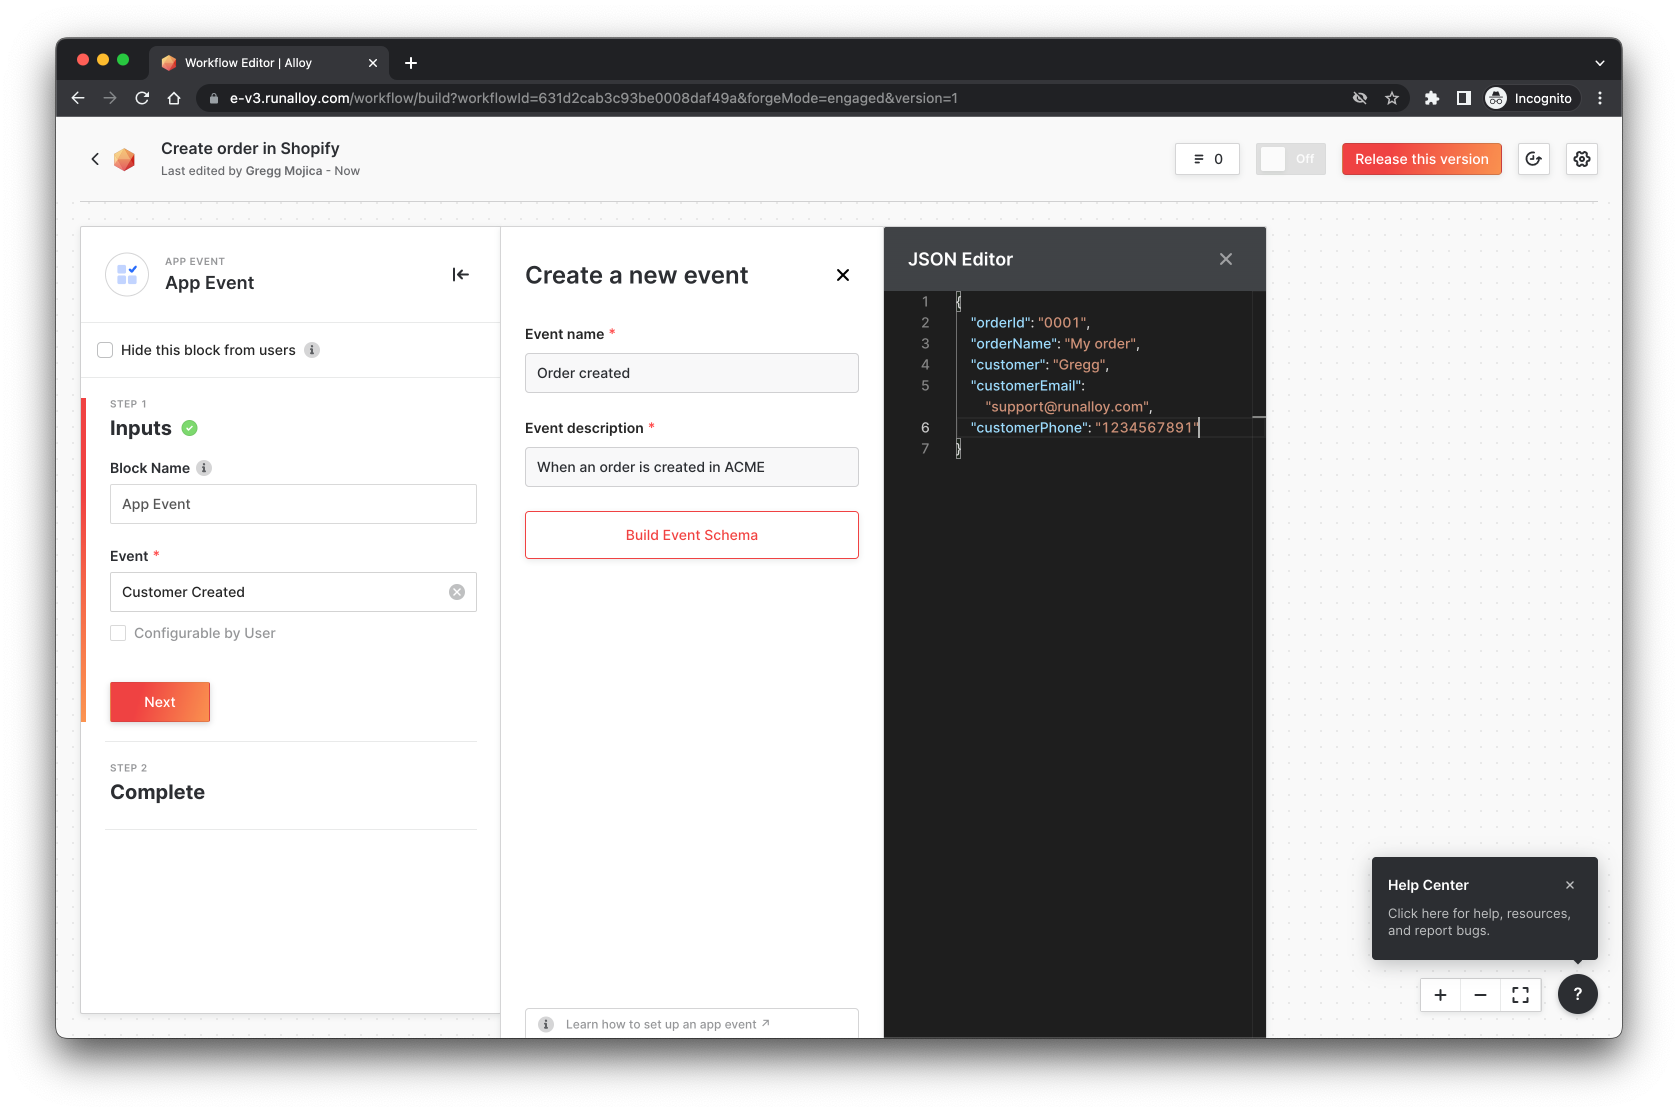
Then, define the schema you want to pass over to Shopify. This schema allows you to map the values you specify here to the Shopify block. For example, if you want to create a new customer in Shopify, you'll probably want to pass over an email for the order, order Id, name, etc.
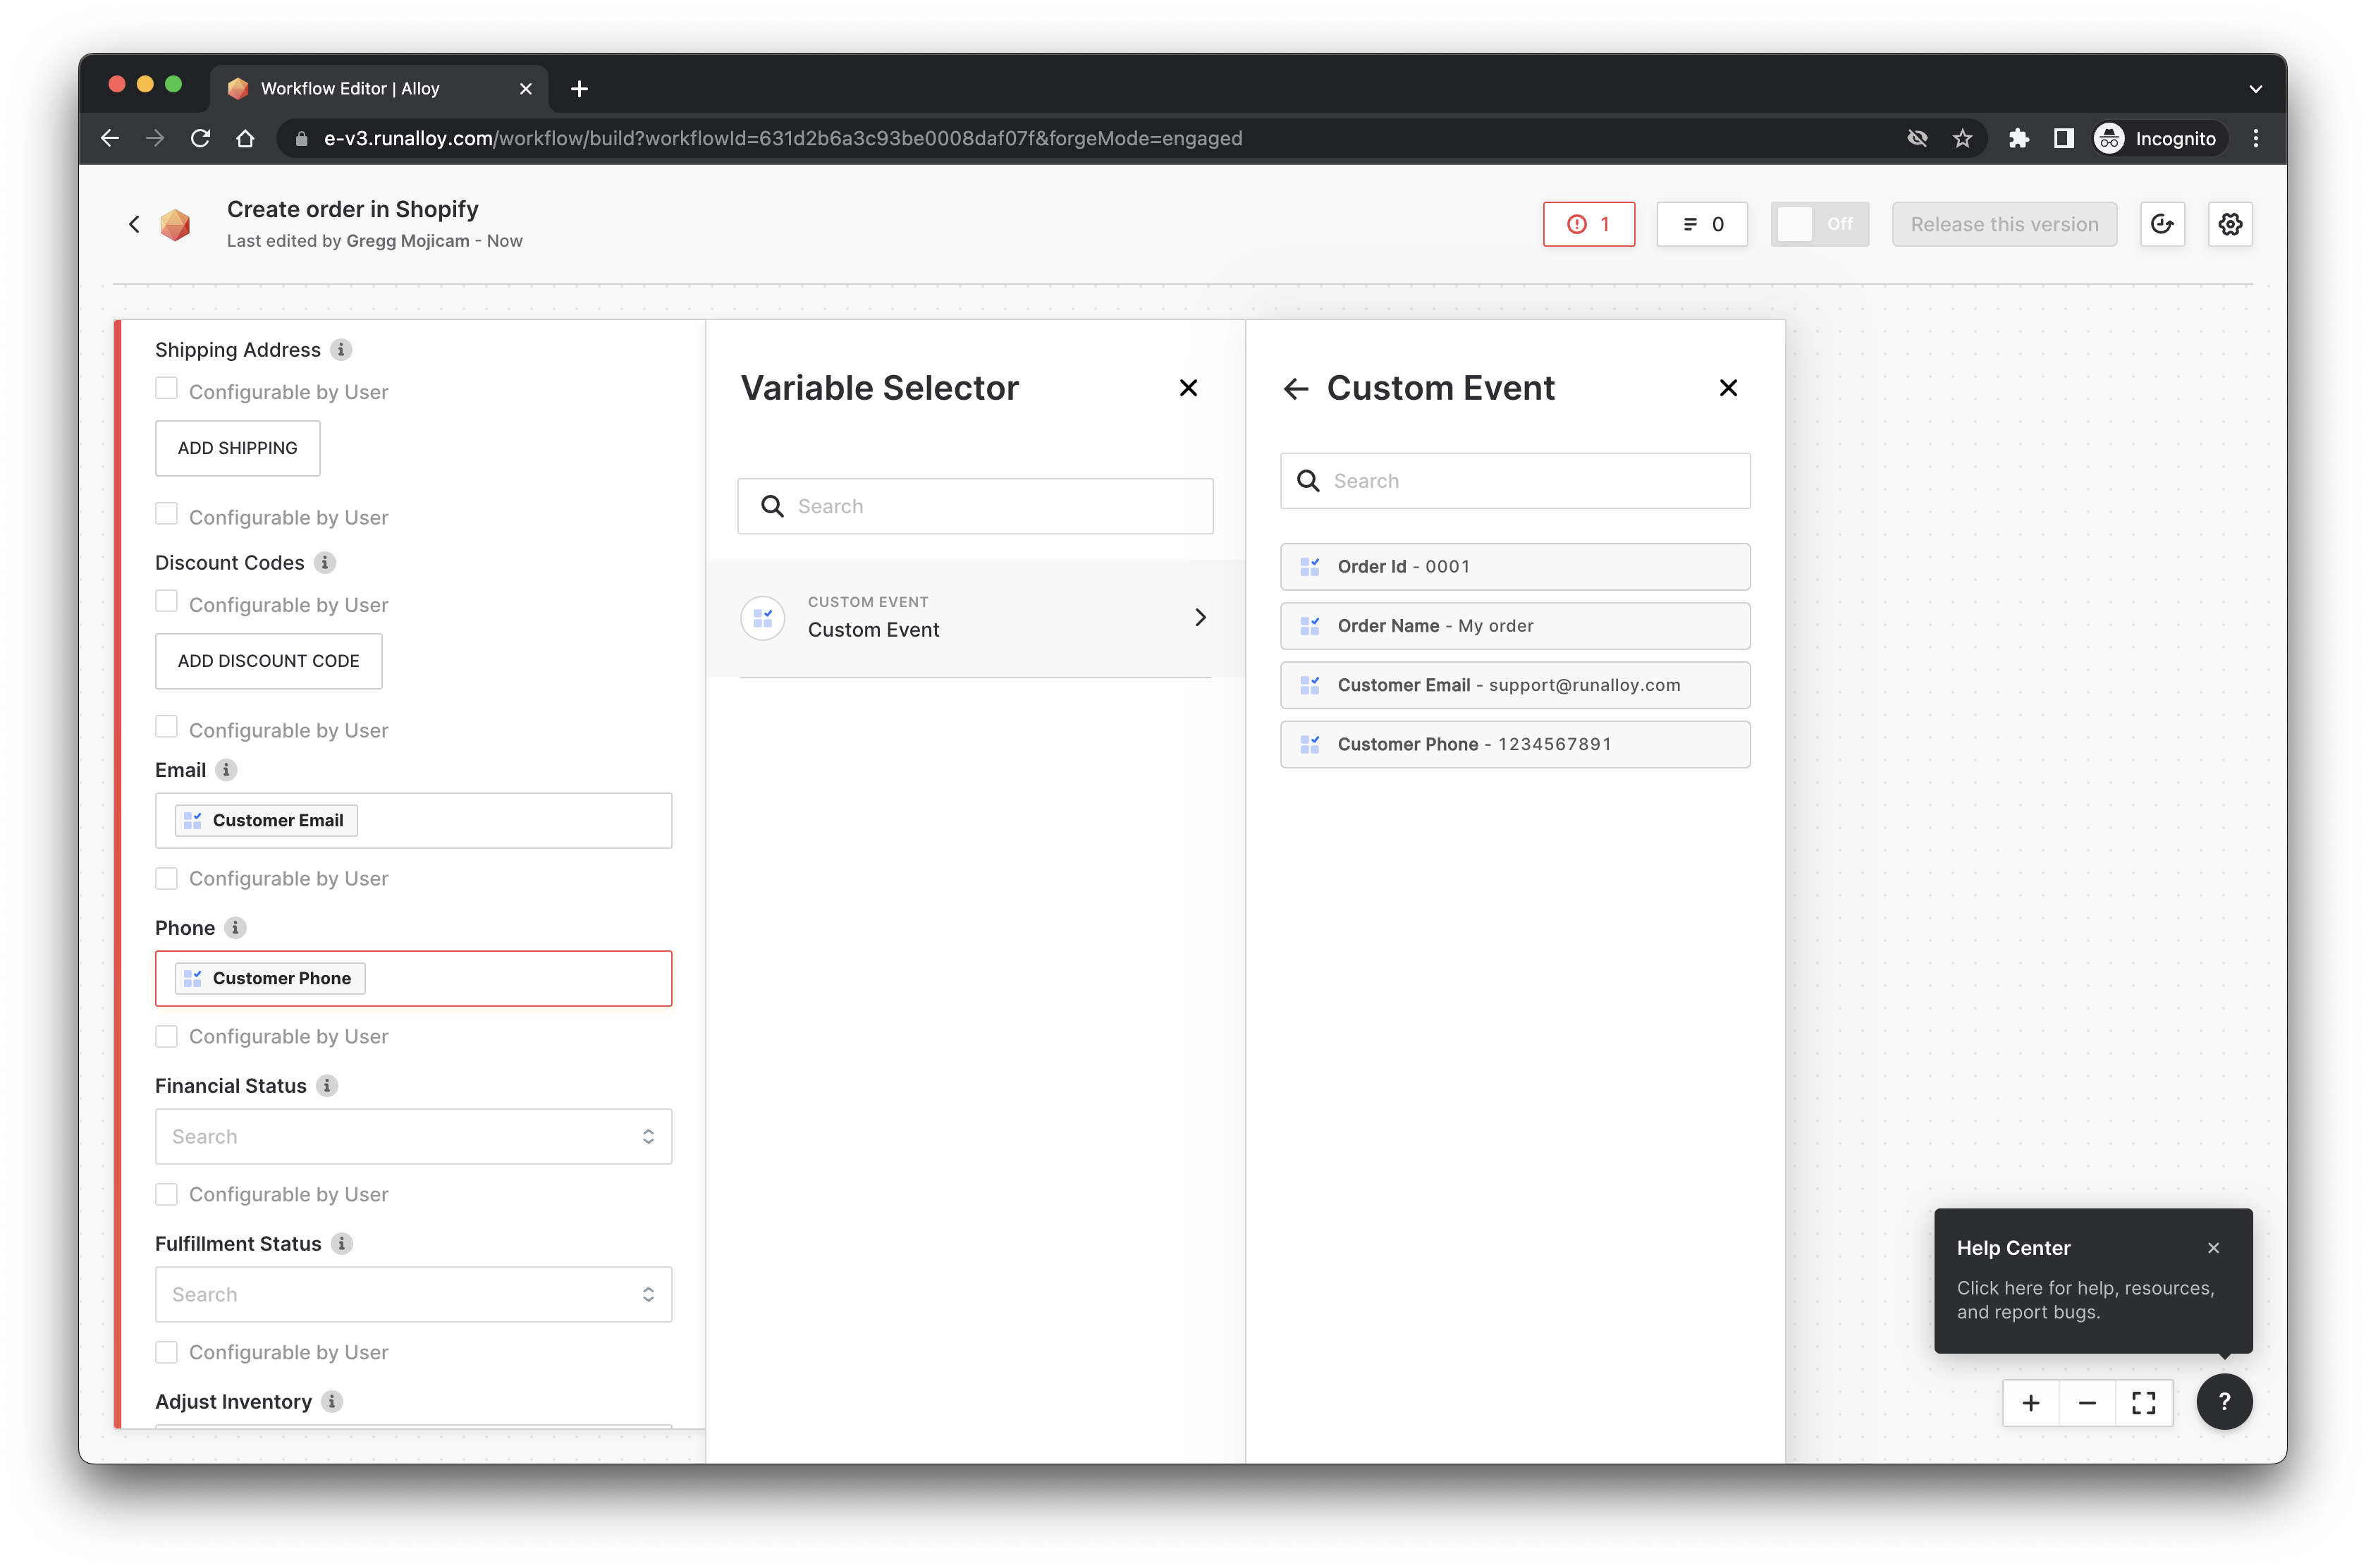
Then, select the Shopify block and find the "Create Order" action. Here, we'll do a little field mapping. Field mapping refers to pointing values from our event block to the destination.

As you can see in the example below, we've mapped the Email and Phone values to their respective places in Shopify. When you're all done field mapping, click "Release this version".
Releasing this version creates a production-ready version. Note that once you've released a version, you cannot make modifications to it. To change a version, you must create a new version and then publish the new version.
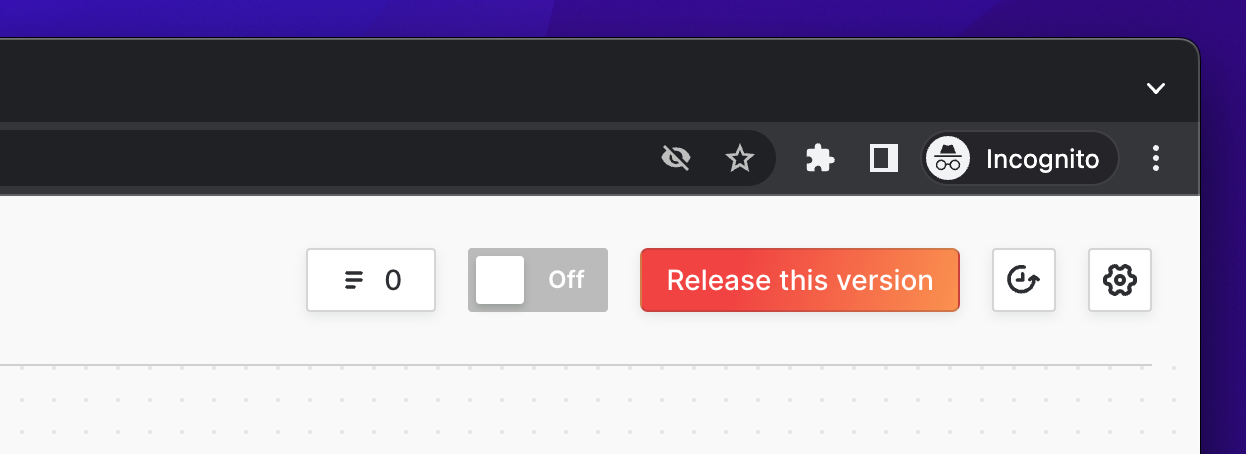
Once you've released the version, you'll see an interface as seen below.
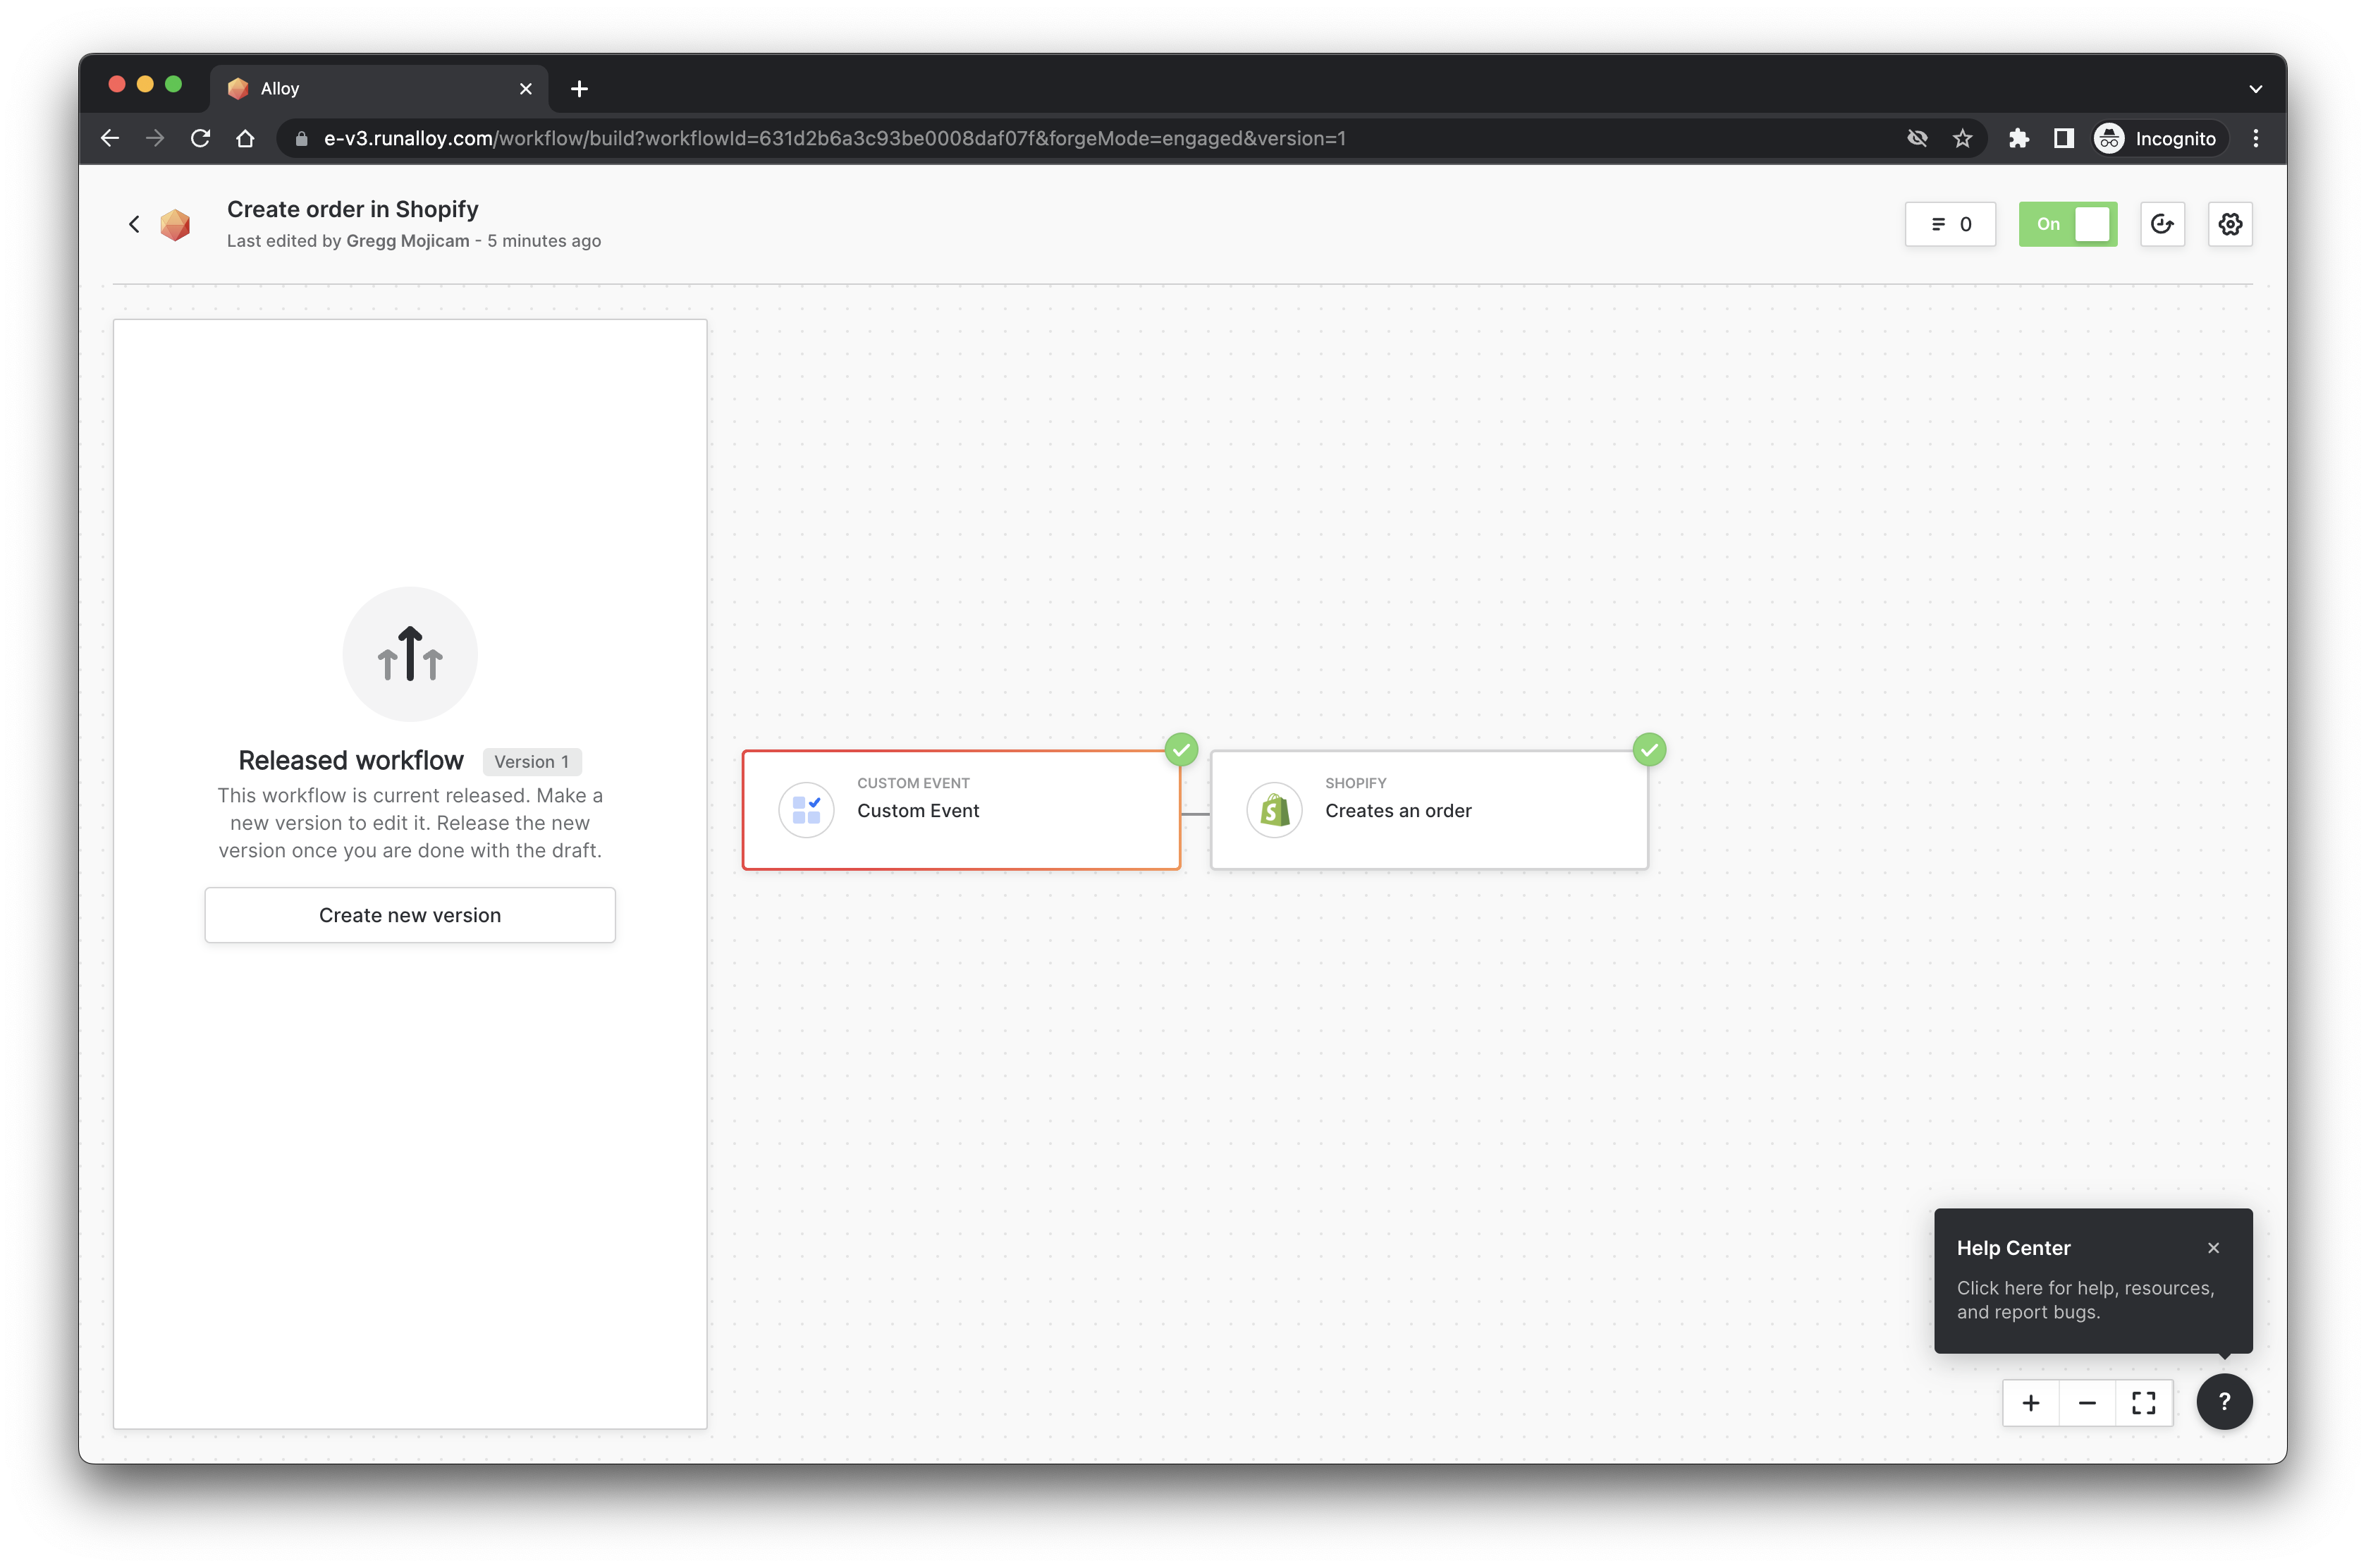
Viola!
Workflow #2
Next, create a second workflow but this time, we'll want to sync new order data to our API. To do so, select the Shopify Event block.
Once you've selected the Shopify event, select the Order Created trigger. You'll then want to set the Stream execution data URL to your API server. This should be a webhook where you can listen in for events coming from Alloy Embedded. You can see an example of this below.

Remember to publish this workflow version too. And that's that! You're all set.
And just like that, you've built an bi-directional sync integration!
Wrapping up
In this tutorial, we learned how to build an integration. Integrations are a collection of workflows that send outgoing data to a 3rd party app and also listen in for incoming data. We call this two way flow a bi-direction data sync. With Alloy Embedded, you can build powerful integrations in minutes.
Updated 11 months ago