Secrets Manager
In this tutorial, we'll look at how to customize the Alloy Embedded user experience. By default, when a user authenticates they will see a prompt saying "Alloy Automation is requesting access to..." as part of the standard OAuth flow.
Generally, this is fine but you may want to have additional customization and control over the Embedded experience. Let's take an example. Assume you want to build a Slack integration. When you user authenticates with Alloy, they'd see something like the below.
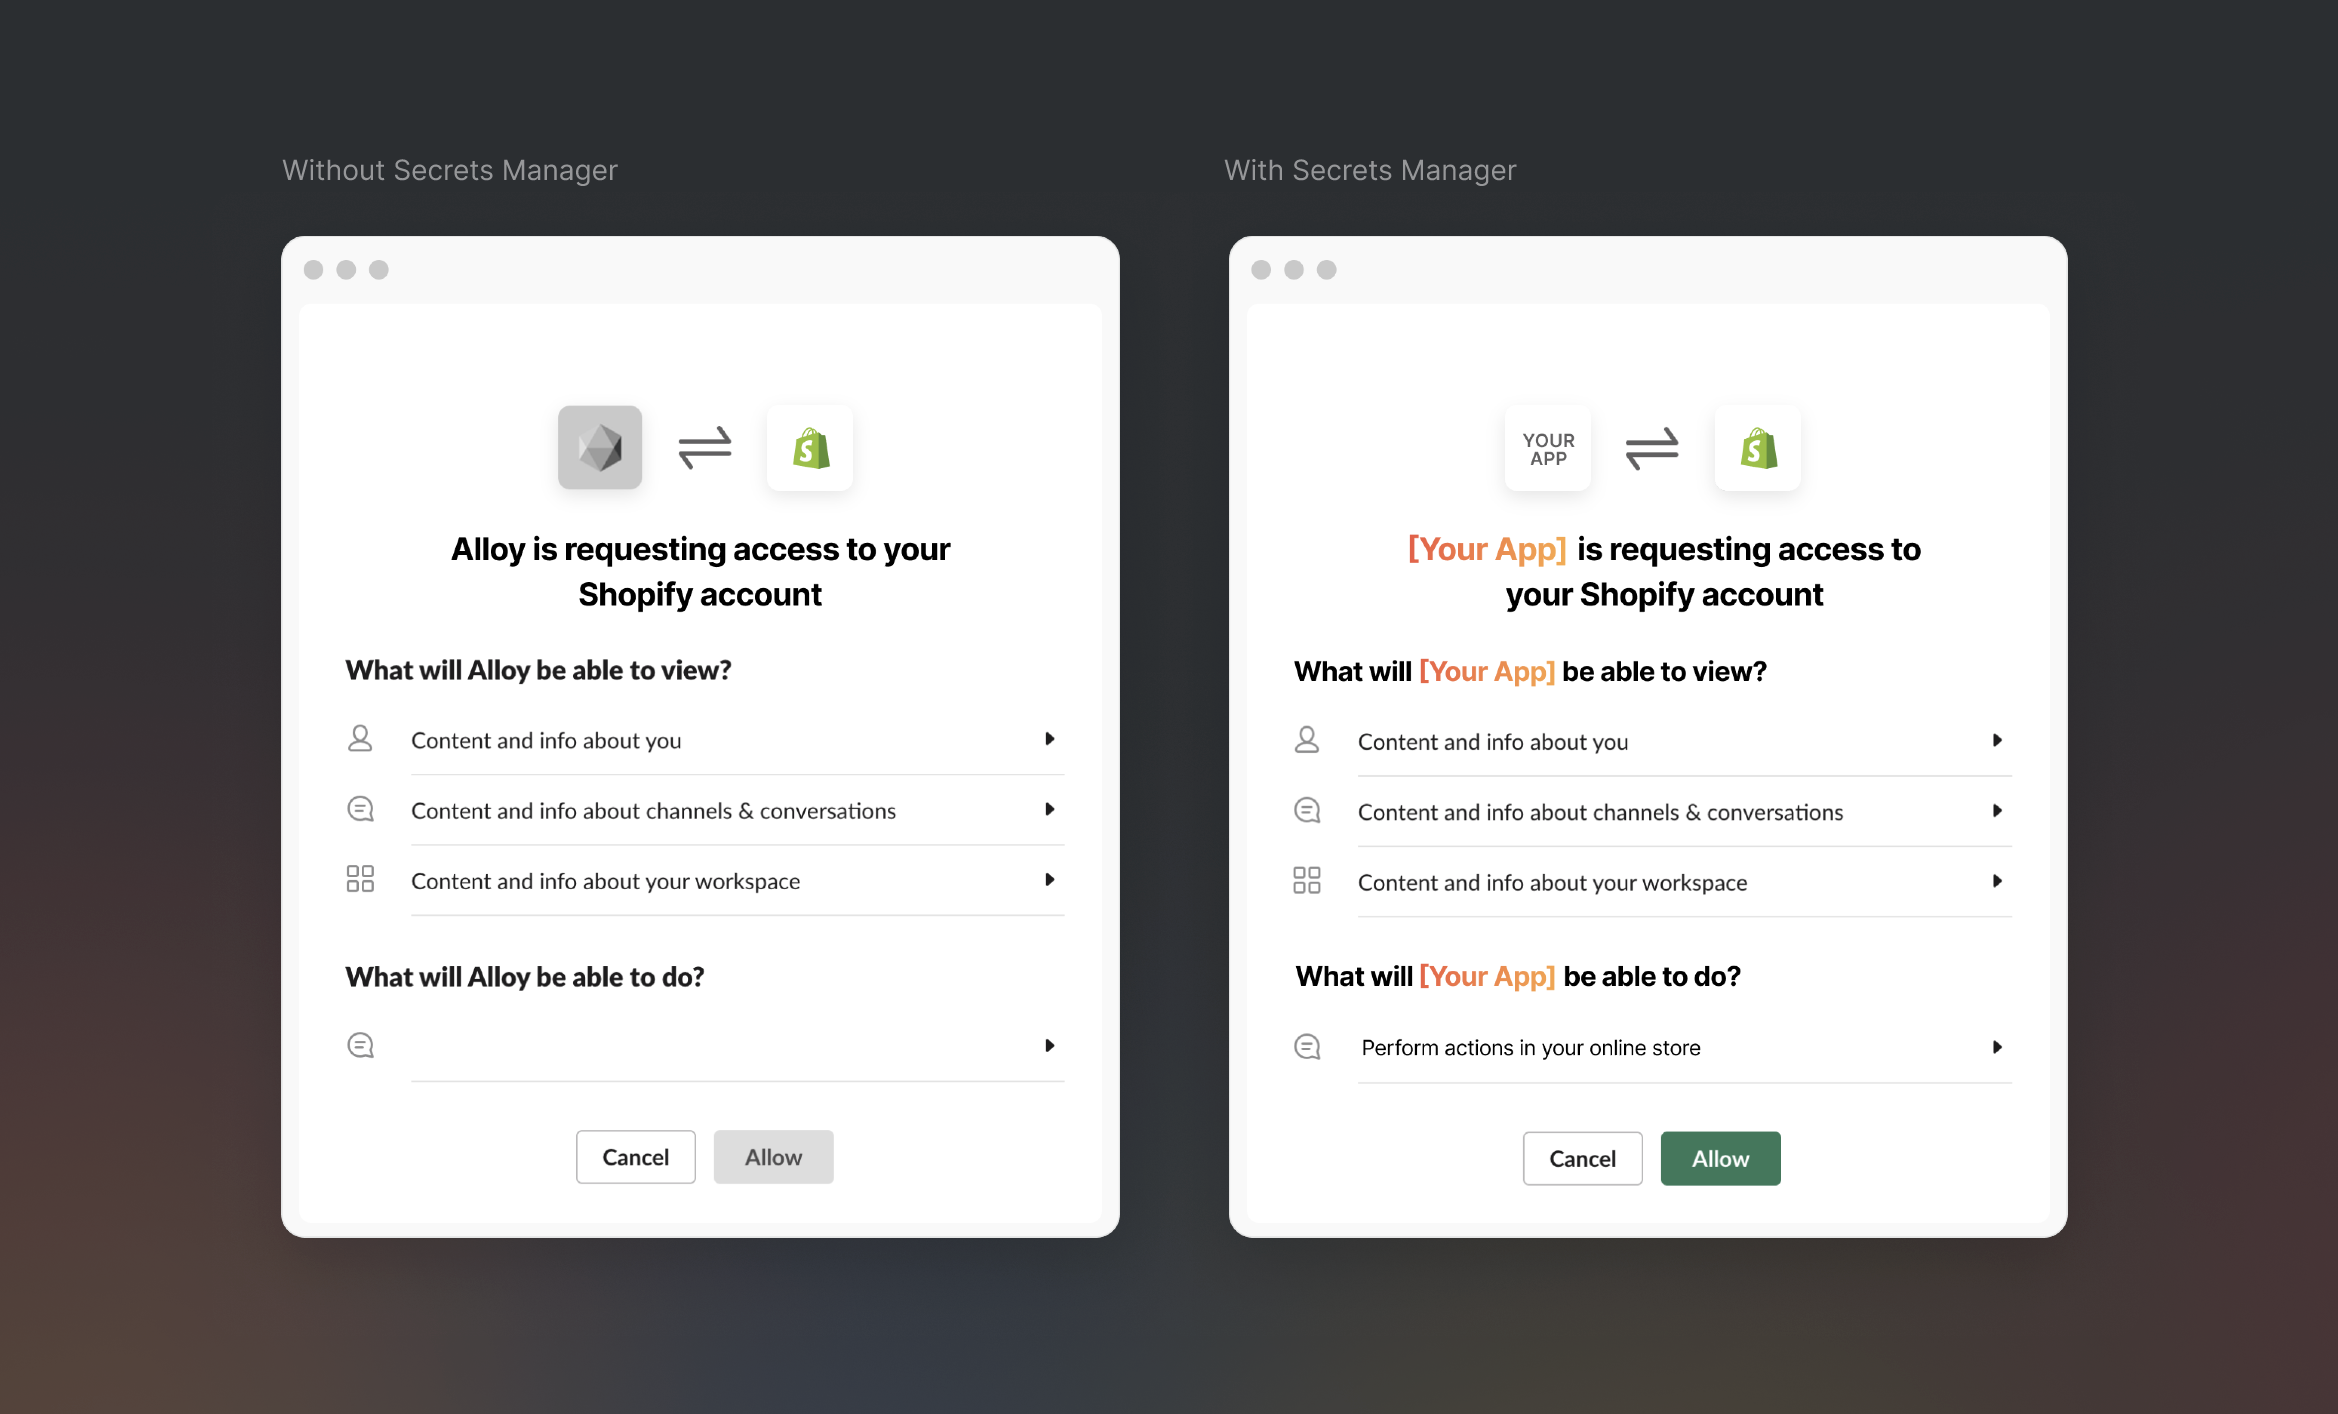
This very clearly shows the Alloy Automation is requesting access to your data. If you wanted additional customization, this is where our secrets manager comes in.
With Secrets Manager, you supply your own Client Id and Client Secretand Alloy uses those credentials to make the appropriate requests on your behalf. The result of this is that when a user authenticates, they see "Your App Name is requesting access...".
The below video shows how an Embedded integration will look when Secrets Manager is enabled.
Getting Started with Secrets Manager
To get started with the Secrets Manager, first contact your account rep. By default, Secrets Manager is not available with the base plan of Embedded.
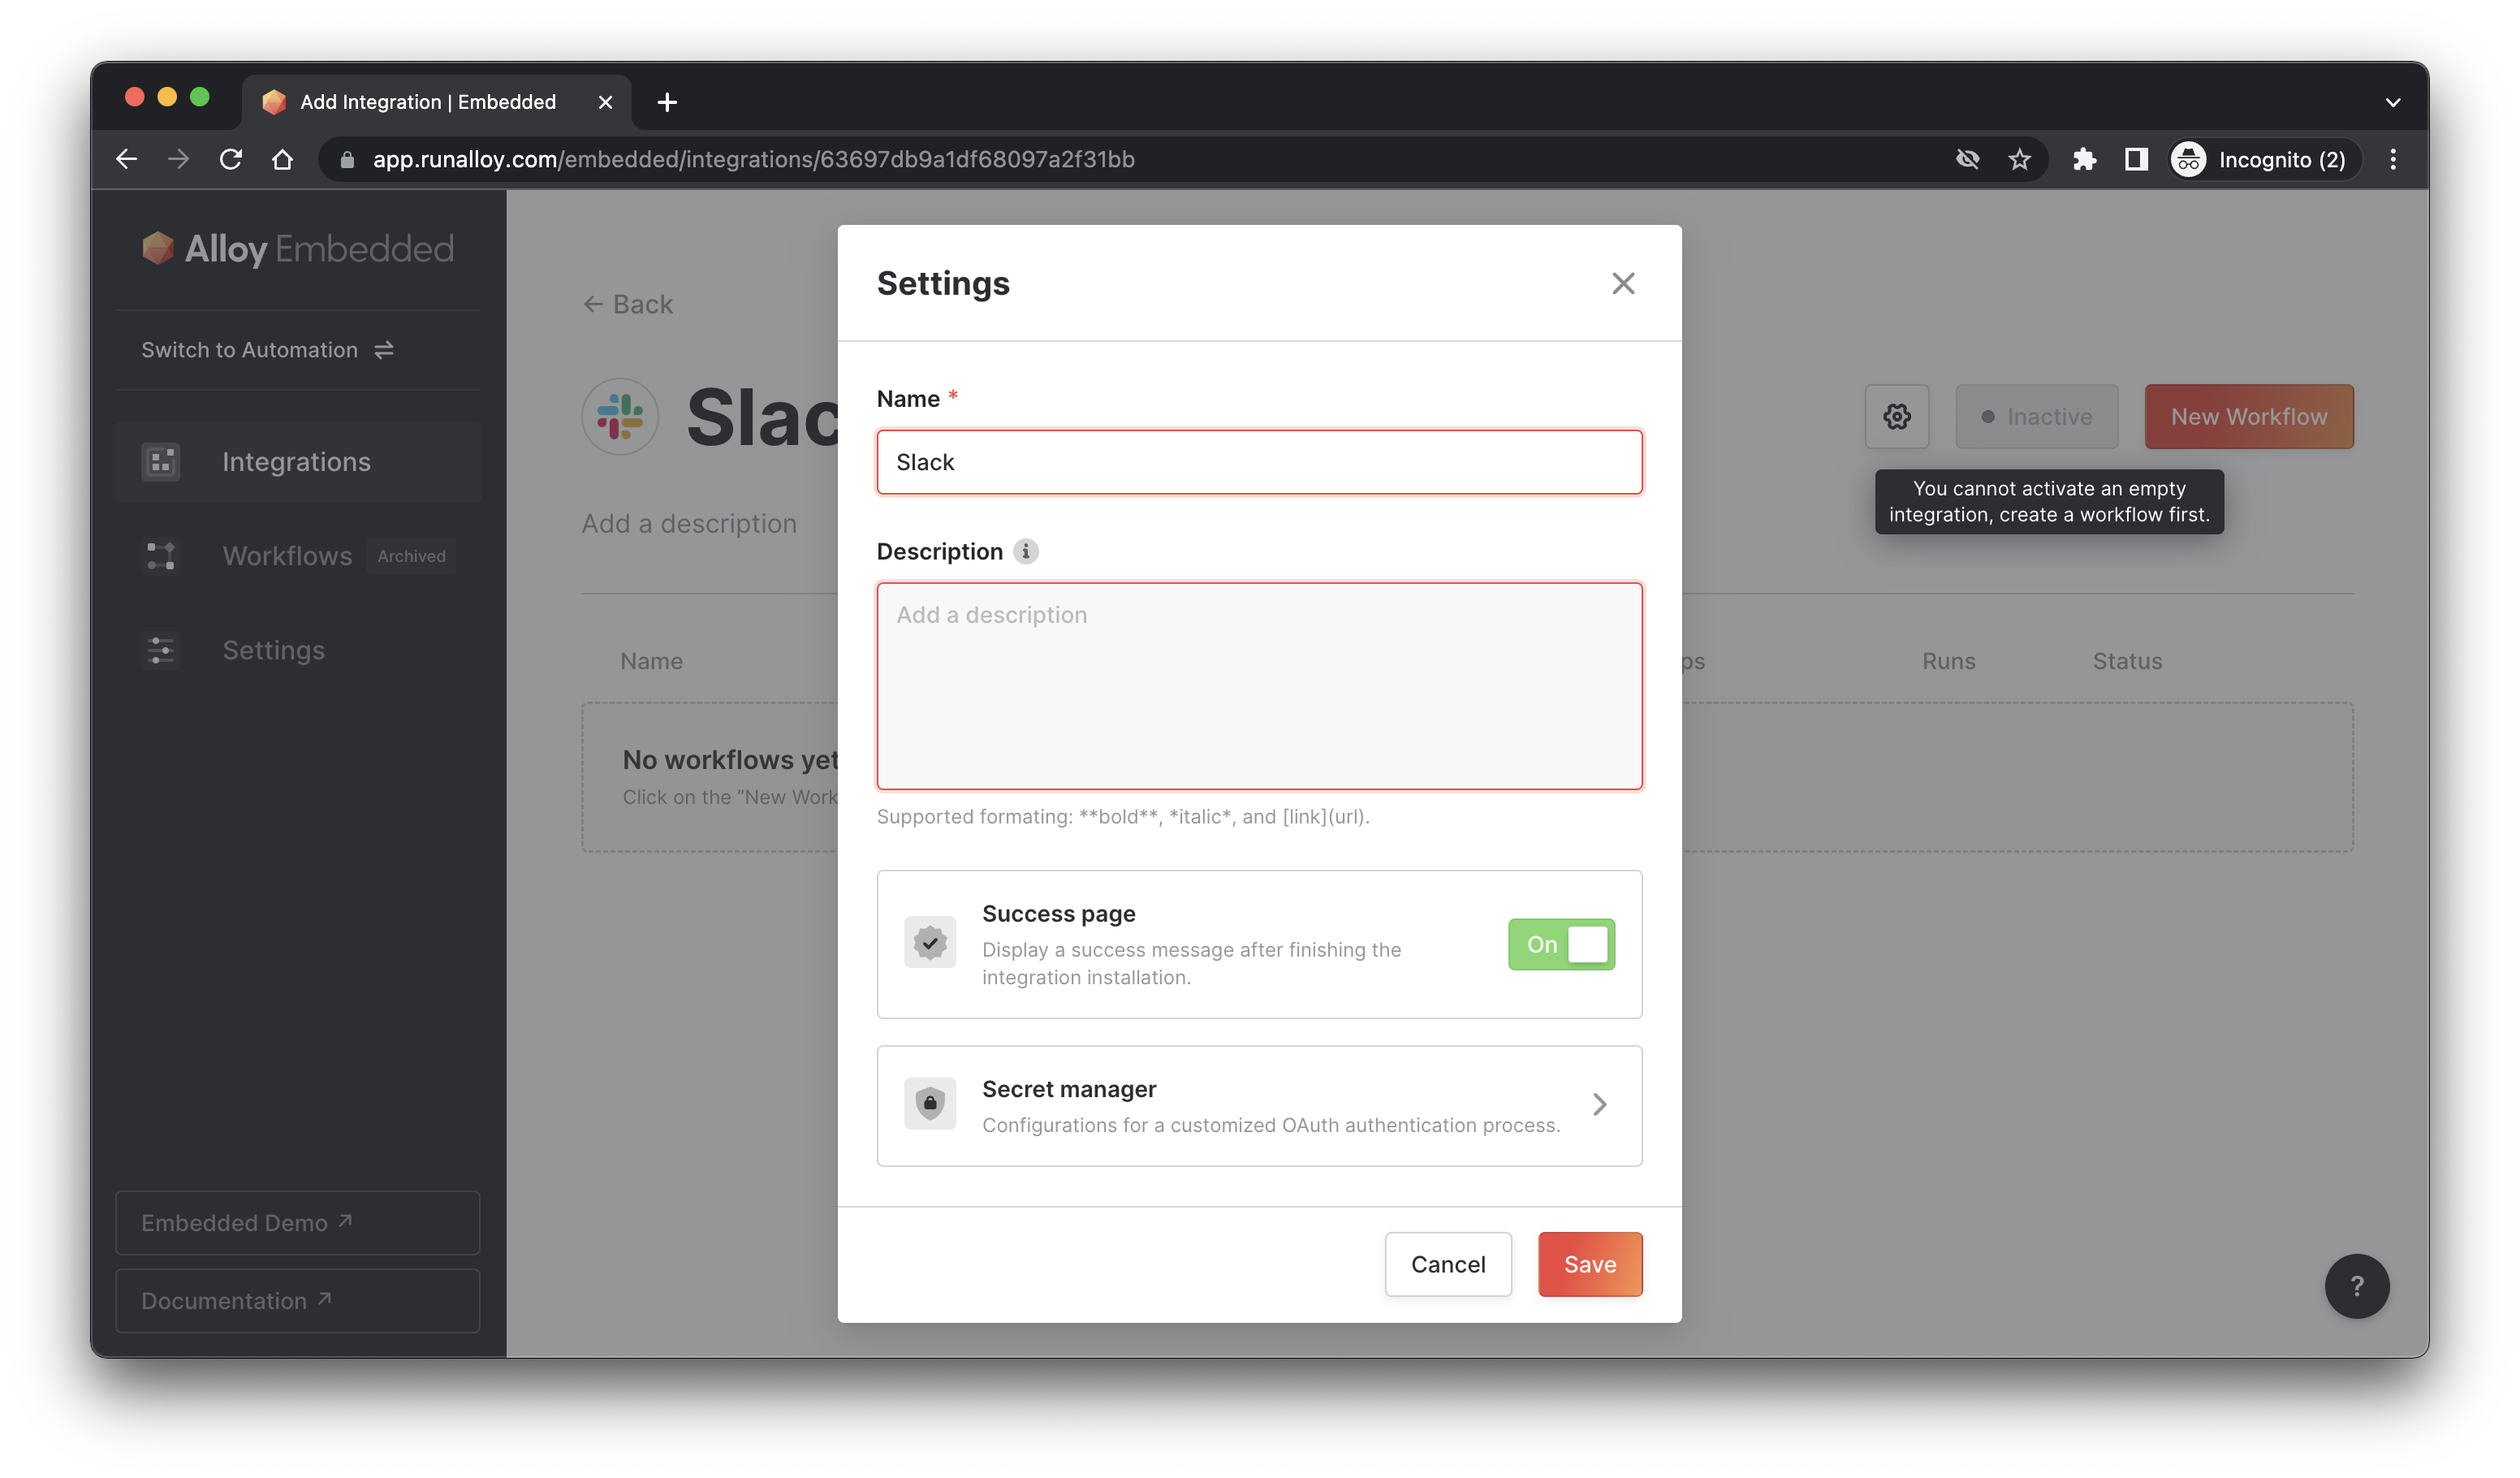
For every OAuth-enabled block (note: Secrets Manager is not available on non-OAuth blocks) you'll see a configuration in the Integration Settings. Clicking that will open the secrets manager as seen below.
To configure Secrets Manager, you'll need to provide Alloy with the necessary information. In our example, Slack, we need to provide Alloy with a Client Id and Client Secrets (generally this is enough but it may vary from app to app).
As you can see below, you'll need to provide these keys. In the Slack developer portal, make sure to copy/paste in the Alloy Redirect URL seen in the first input field. You must enter this exact redirect URL in your OAuth app settings. This tells Slack how to properly handle the redirection request after the OAuth handshake is completed and customers will be routed back to your site upon redirection.
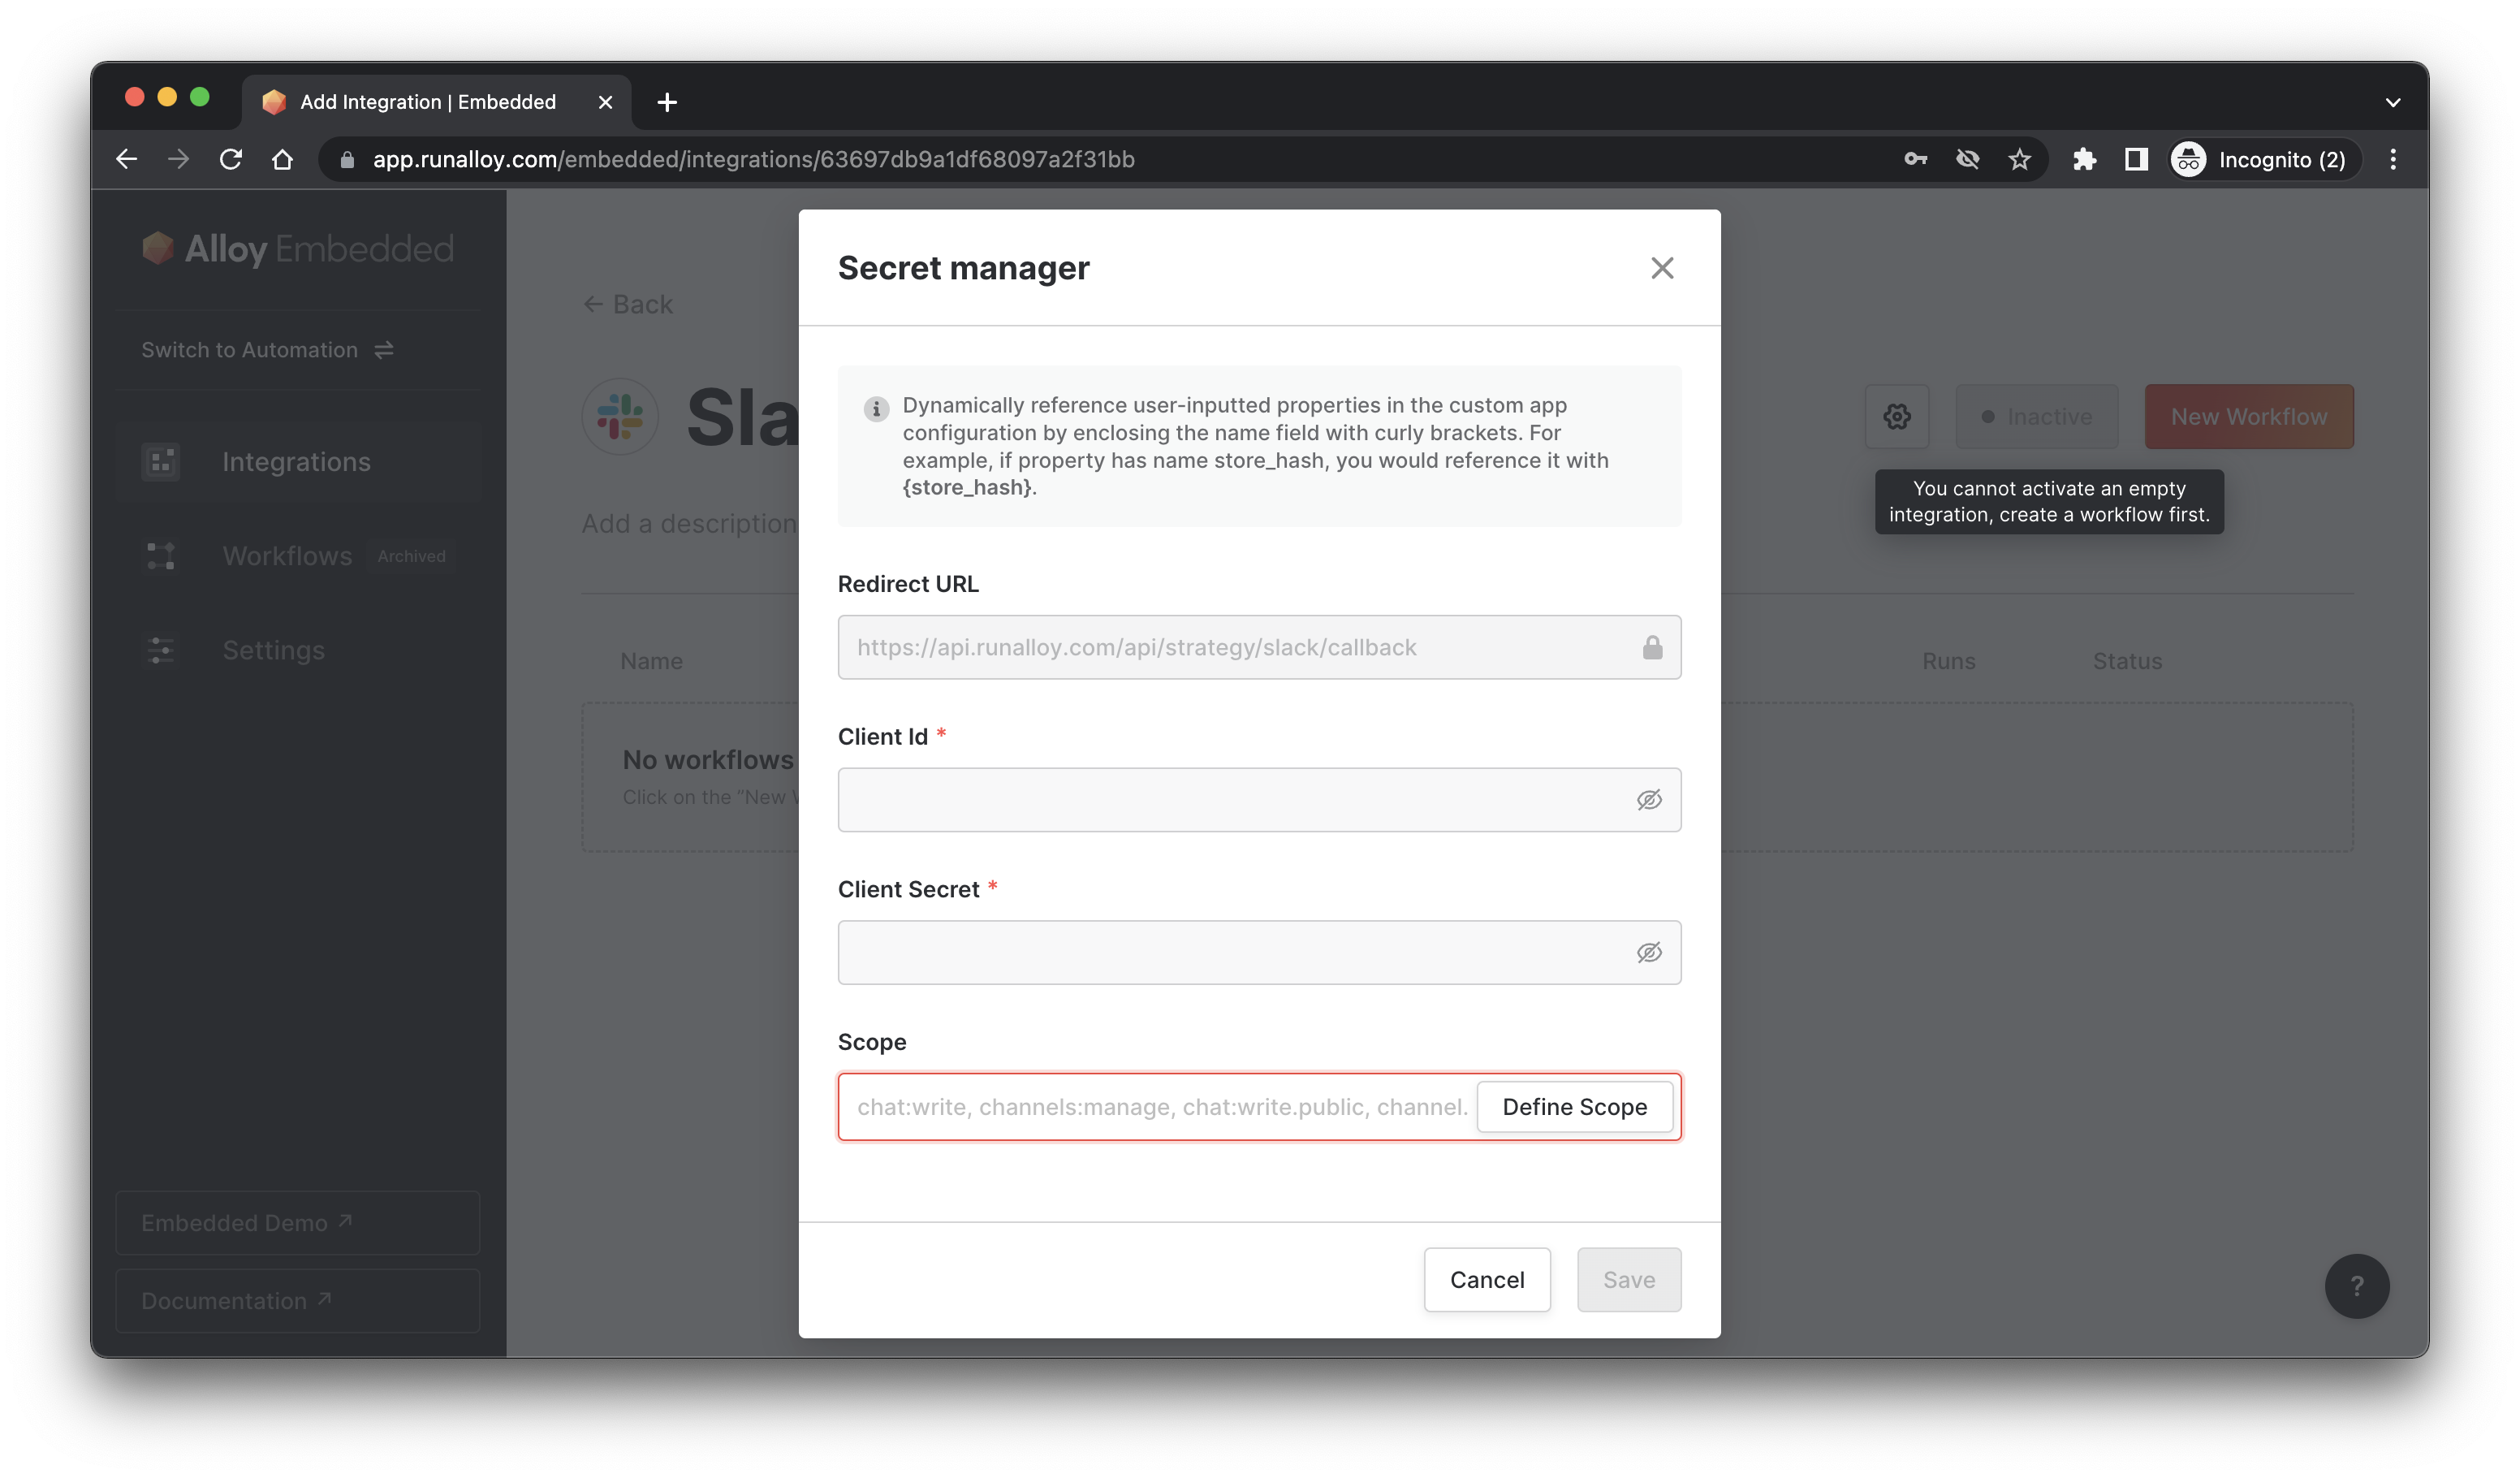
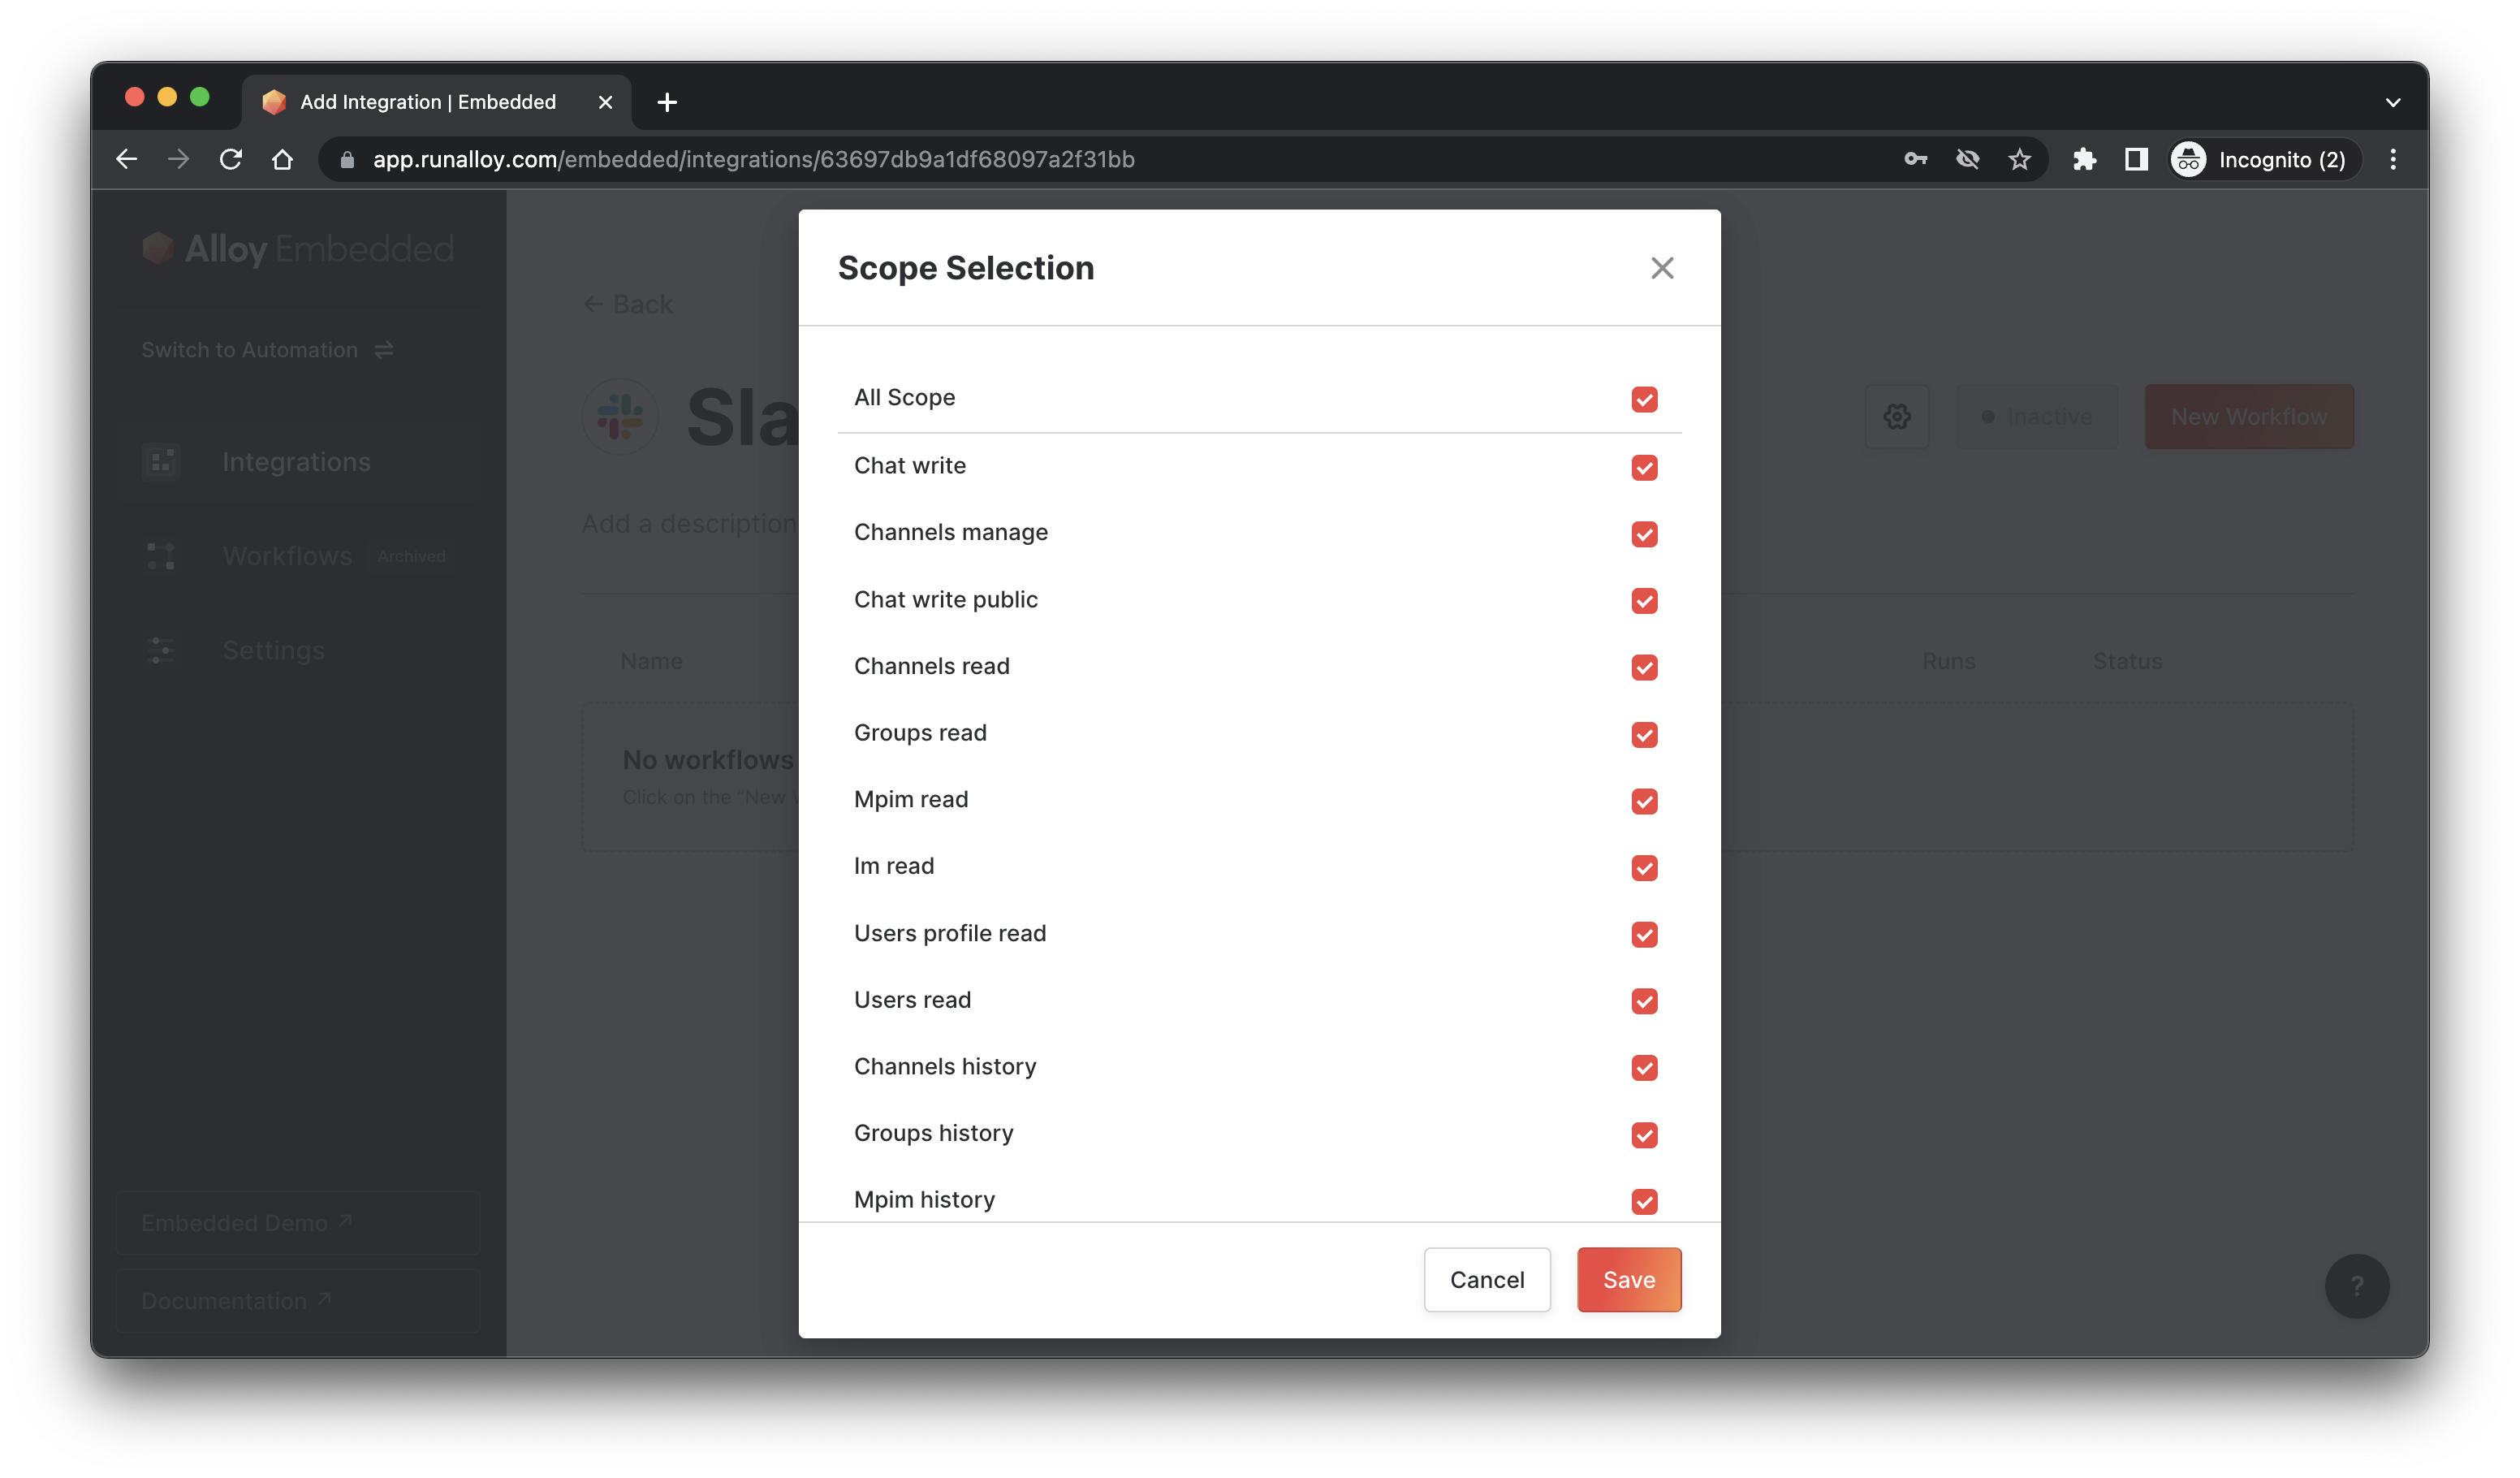
Lastly, you'll want to configure the Scopes. This step is extremely important because failure to provide the right scopes may result in errors during workflow executions.
By default, Alloy requests all the scopes we need to support every API endpoint on the Alloy Platform. If you want to limit that or only need access to a select few, you can configure that via the scope checkboxes as seen below. Note that failure to supply the right scopes may result in workflows erroring. Generally, we recommend ensuring your app has full access to all the scopes.
Wrapping Up
In this tutorial, we looked at how to set up our own client Id and client secrets for OAuth apps via the Secrets Manager. Using Secrets Manager, users will see your company's branding on OAuth-enabled apps.
Updated over 1 year ago