Overview
It’s rare that one size fits all — so naturally, it’s hard to expect your integrations to do the same. In other words, while you might be able to build an integration that solves the vast majority of your users’ needs, every once in a while an important customer will come around who requires customization. Fortunately, we’ve built our Installation Manager to solve this very problem. Using Installation Manager, ISVs can craft one-off, user-specific configurations that adapt to bespoke, user-specific requests.Real world example
Let’s assume you’ve built and launched five integrations with Alloy Embedded (i.e. SAP, NetSuite, Magento, Sage, and Salesforce CommerceCloud). You have 100 customers using your NetSuite order to cash integration. Of those 100 customers, EnterpriseCo, a Fortune500 recently requested a custom configurations to your NetSuite integration. They won’t onboard to your platform without this. Since this deal could become your single largest client, you’re likely to want to support their requirements. At the same time, you don’t want to rebuild your integrations from scratch or make changes that would disrupt other users. To solve this, you can use Alloy’s Installation Manager.Building a User-specific Configuration
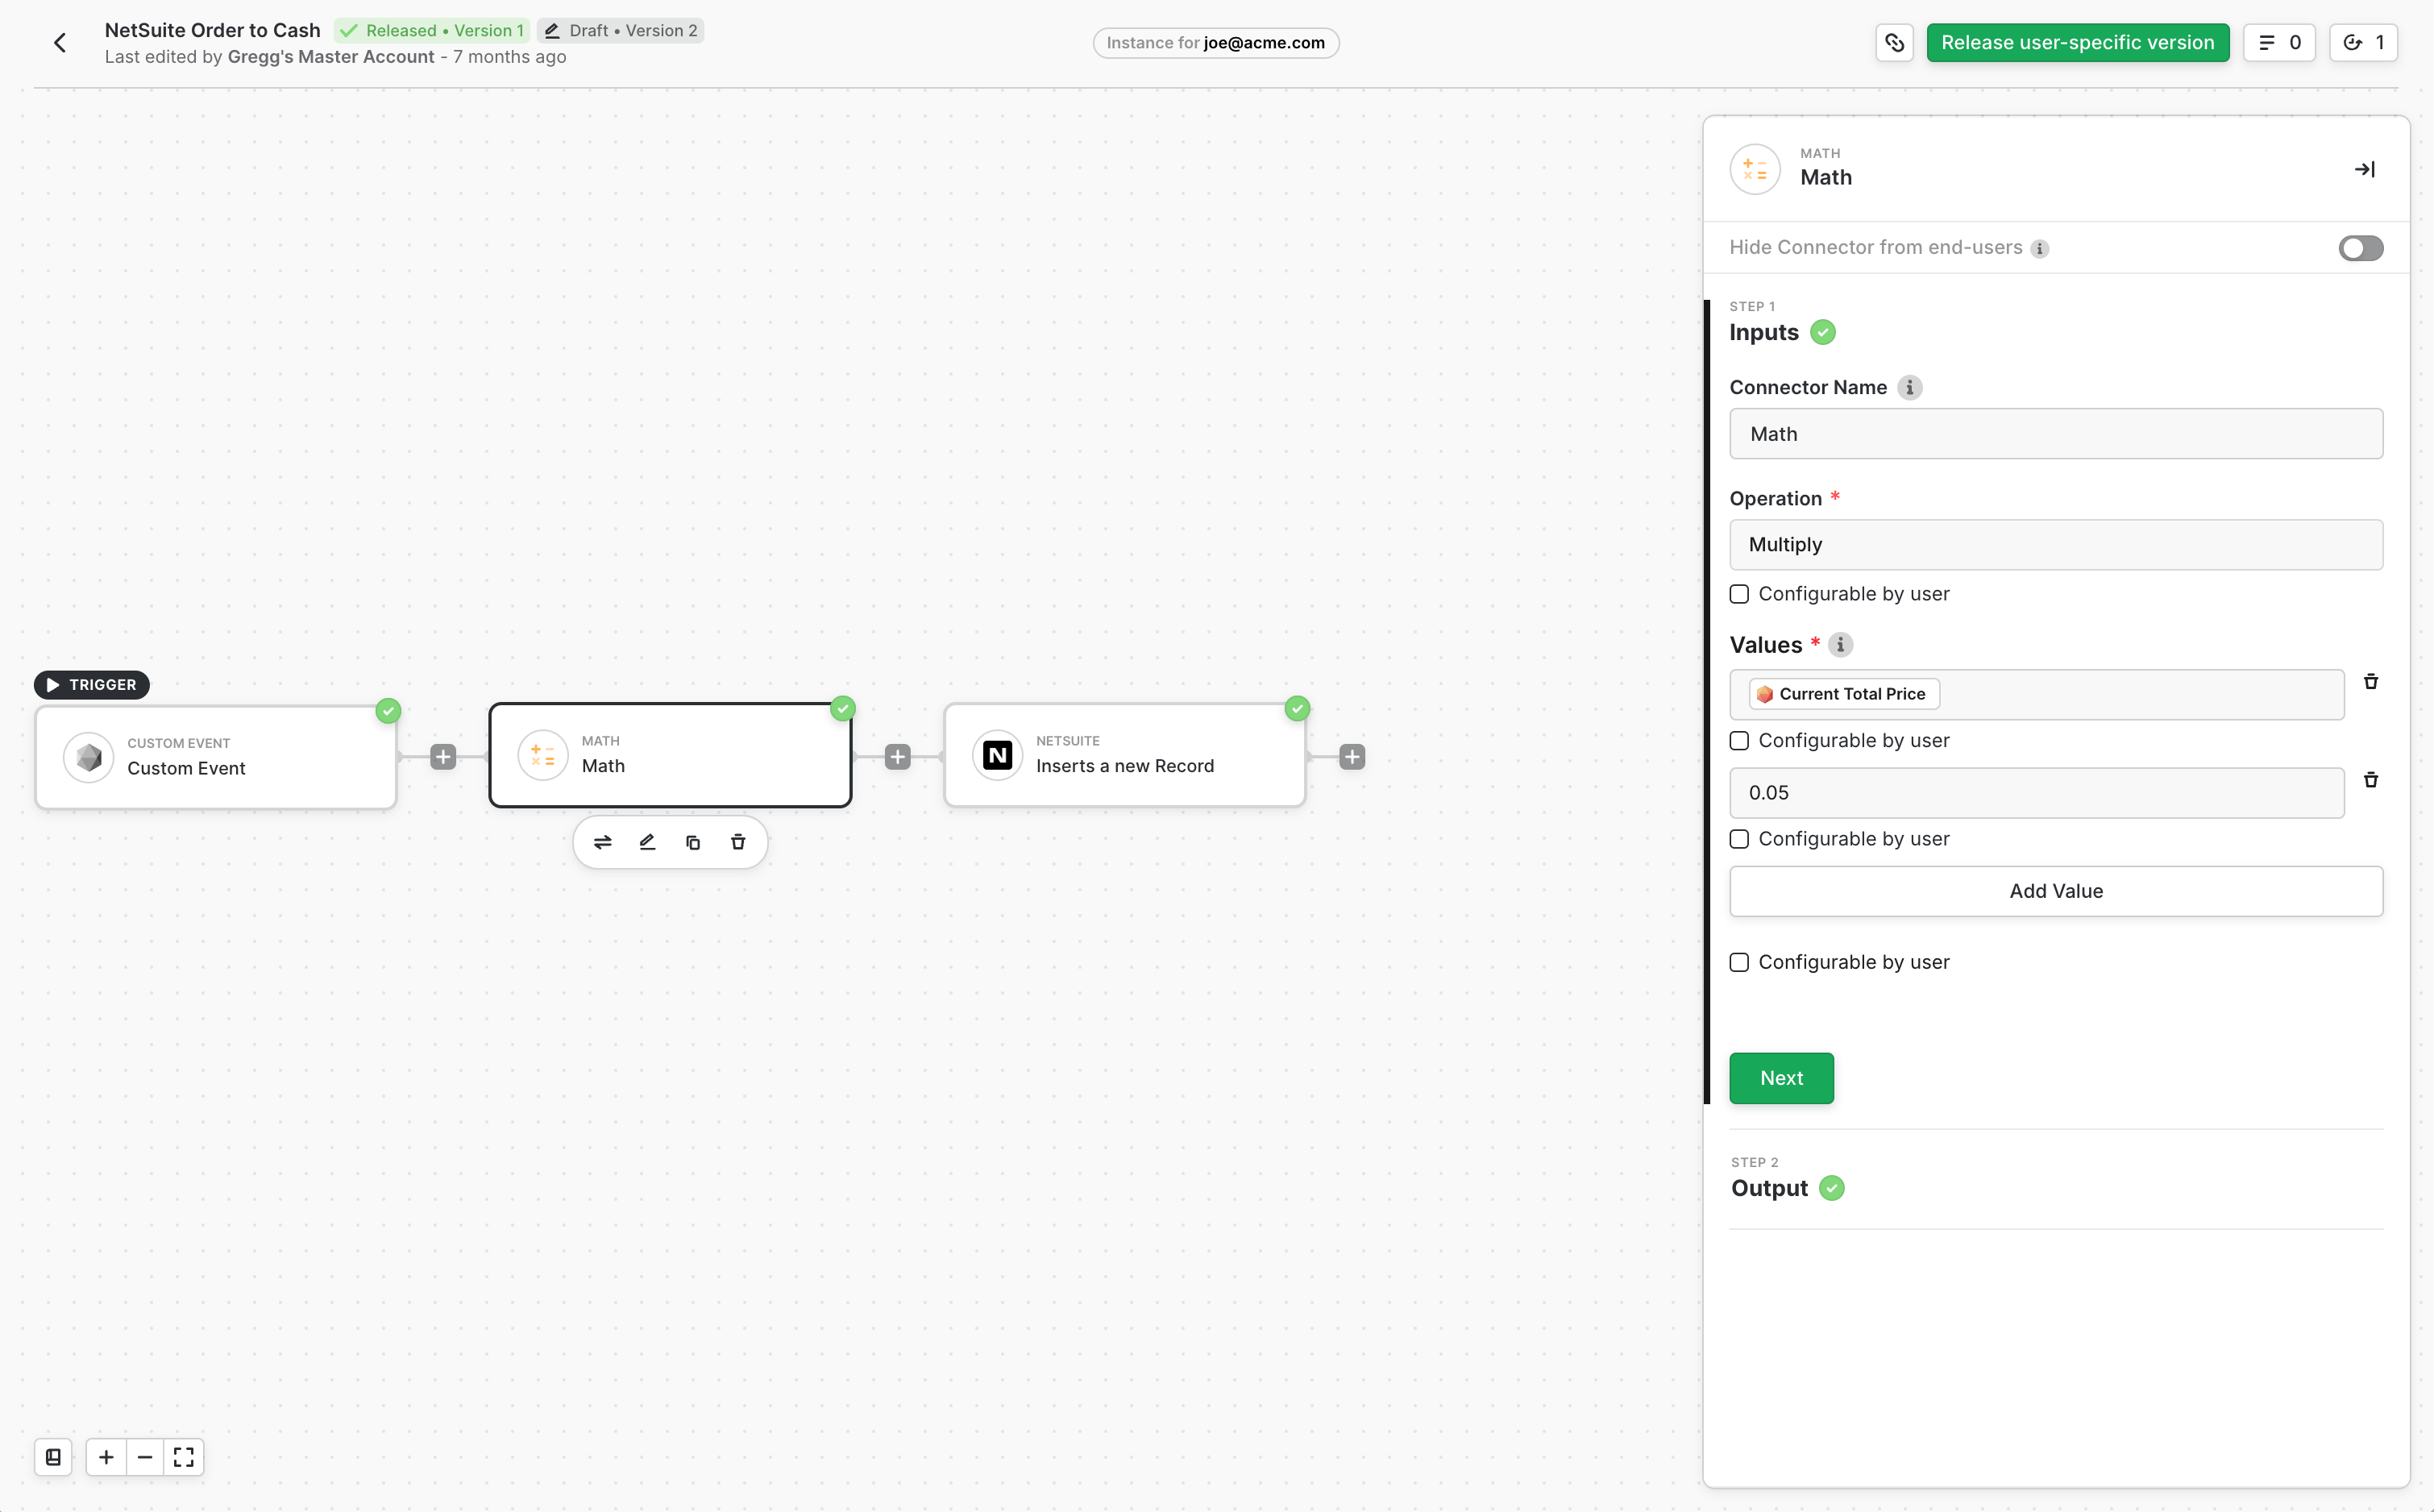
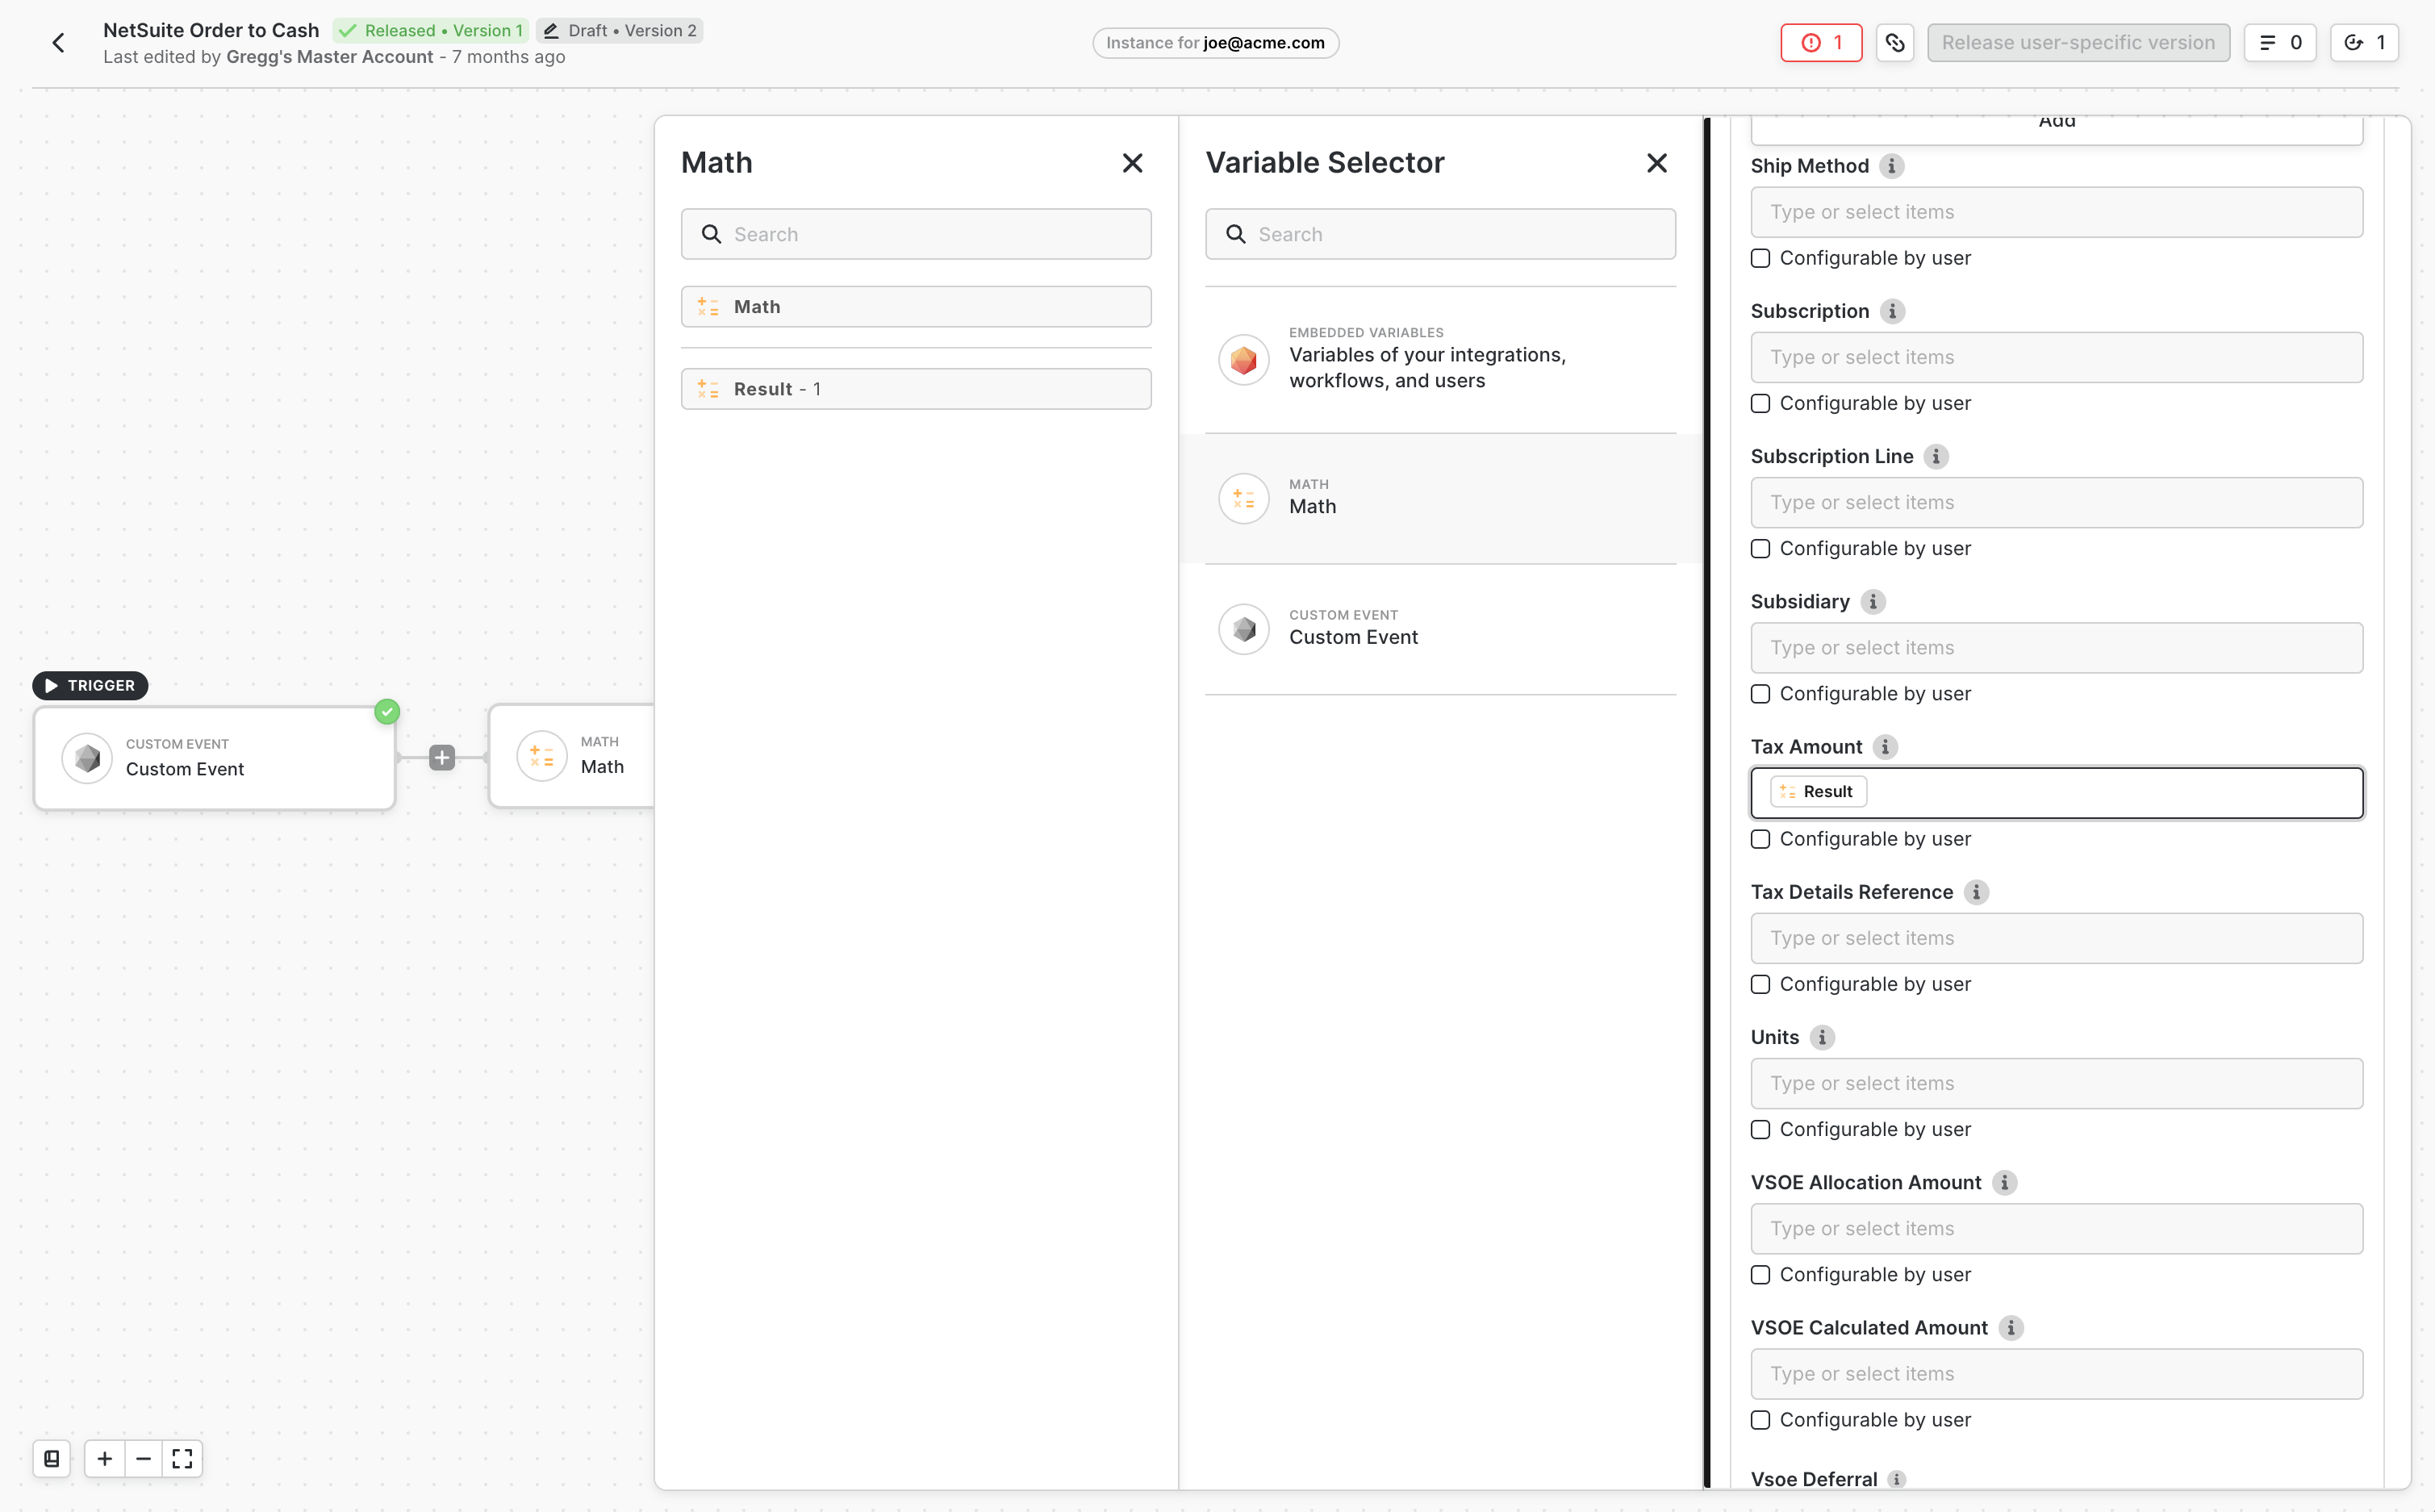
Installation Manager makes crafting user-specific configurations easy. In this tutorial, we’ll take a look at how to quickly modify a workflow and publish it to production in under 5 minutes.Getting Started
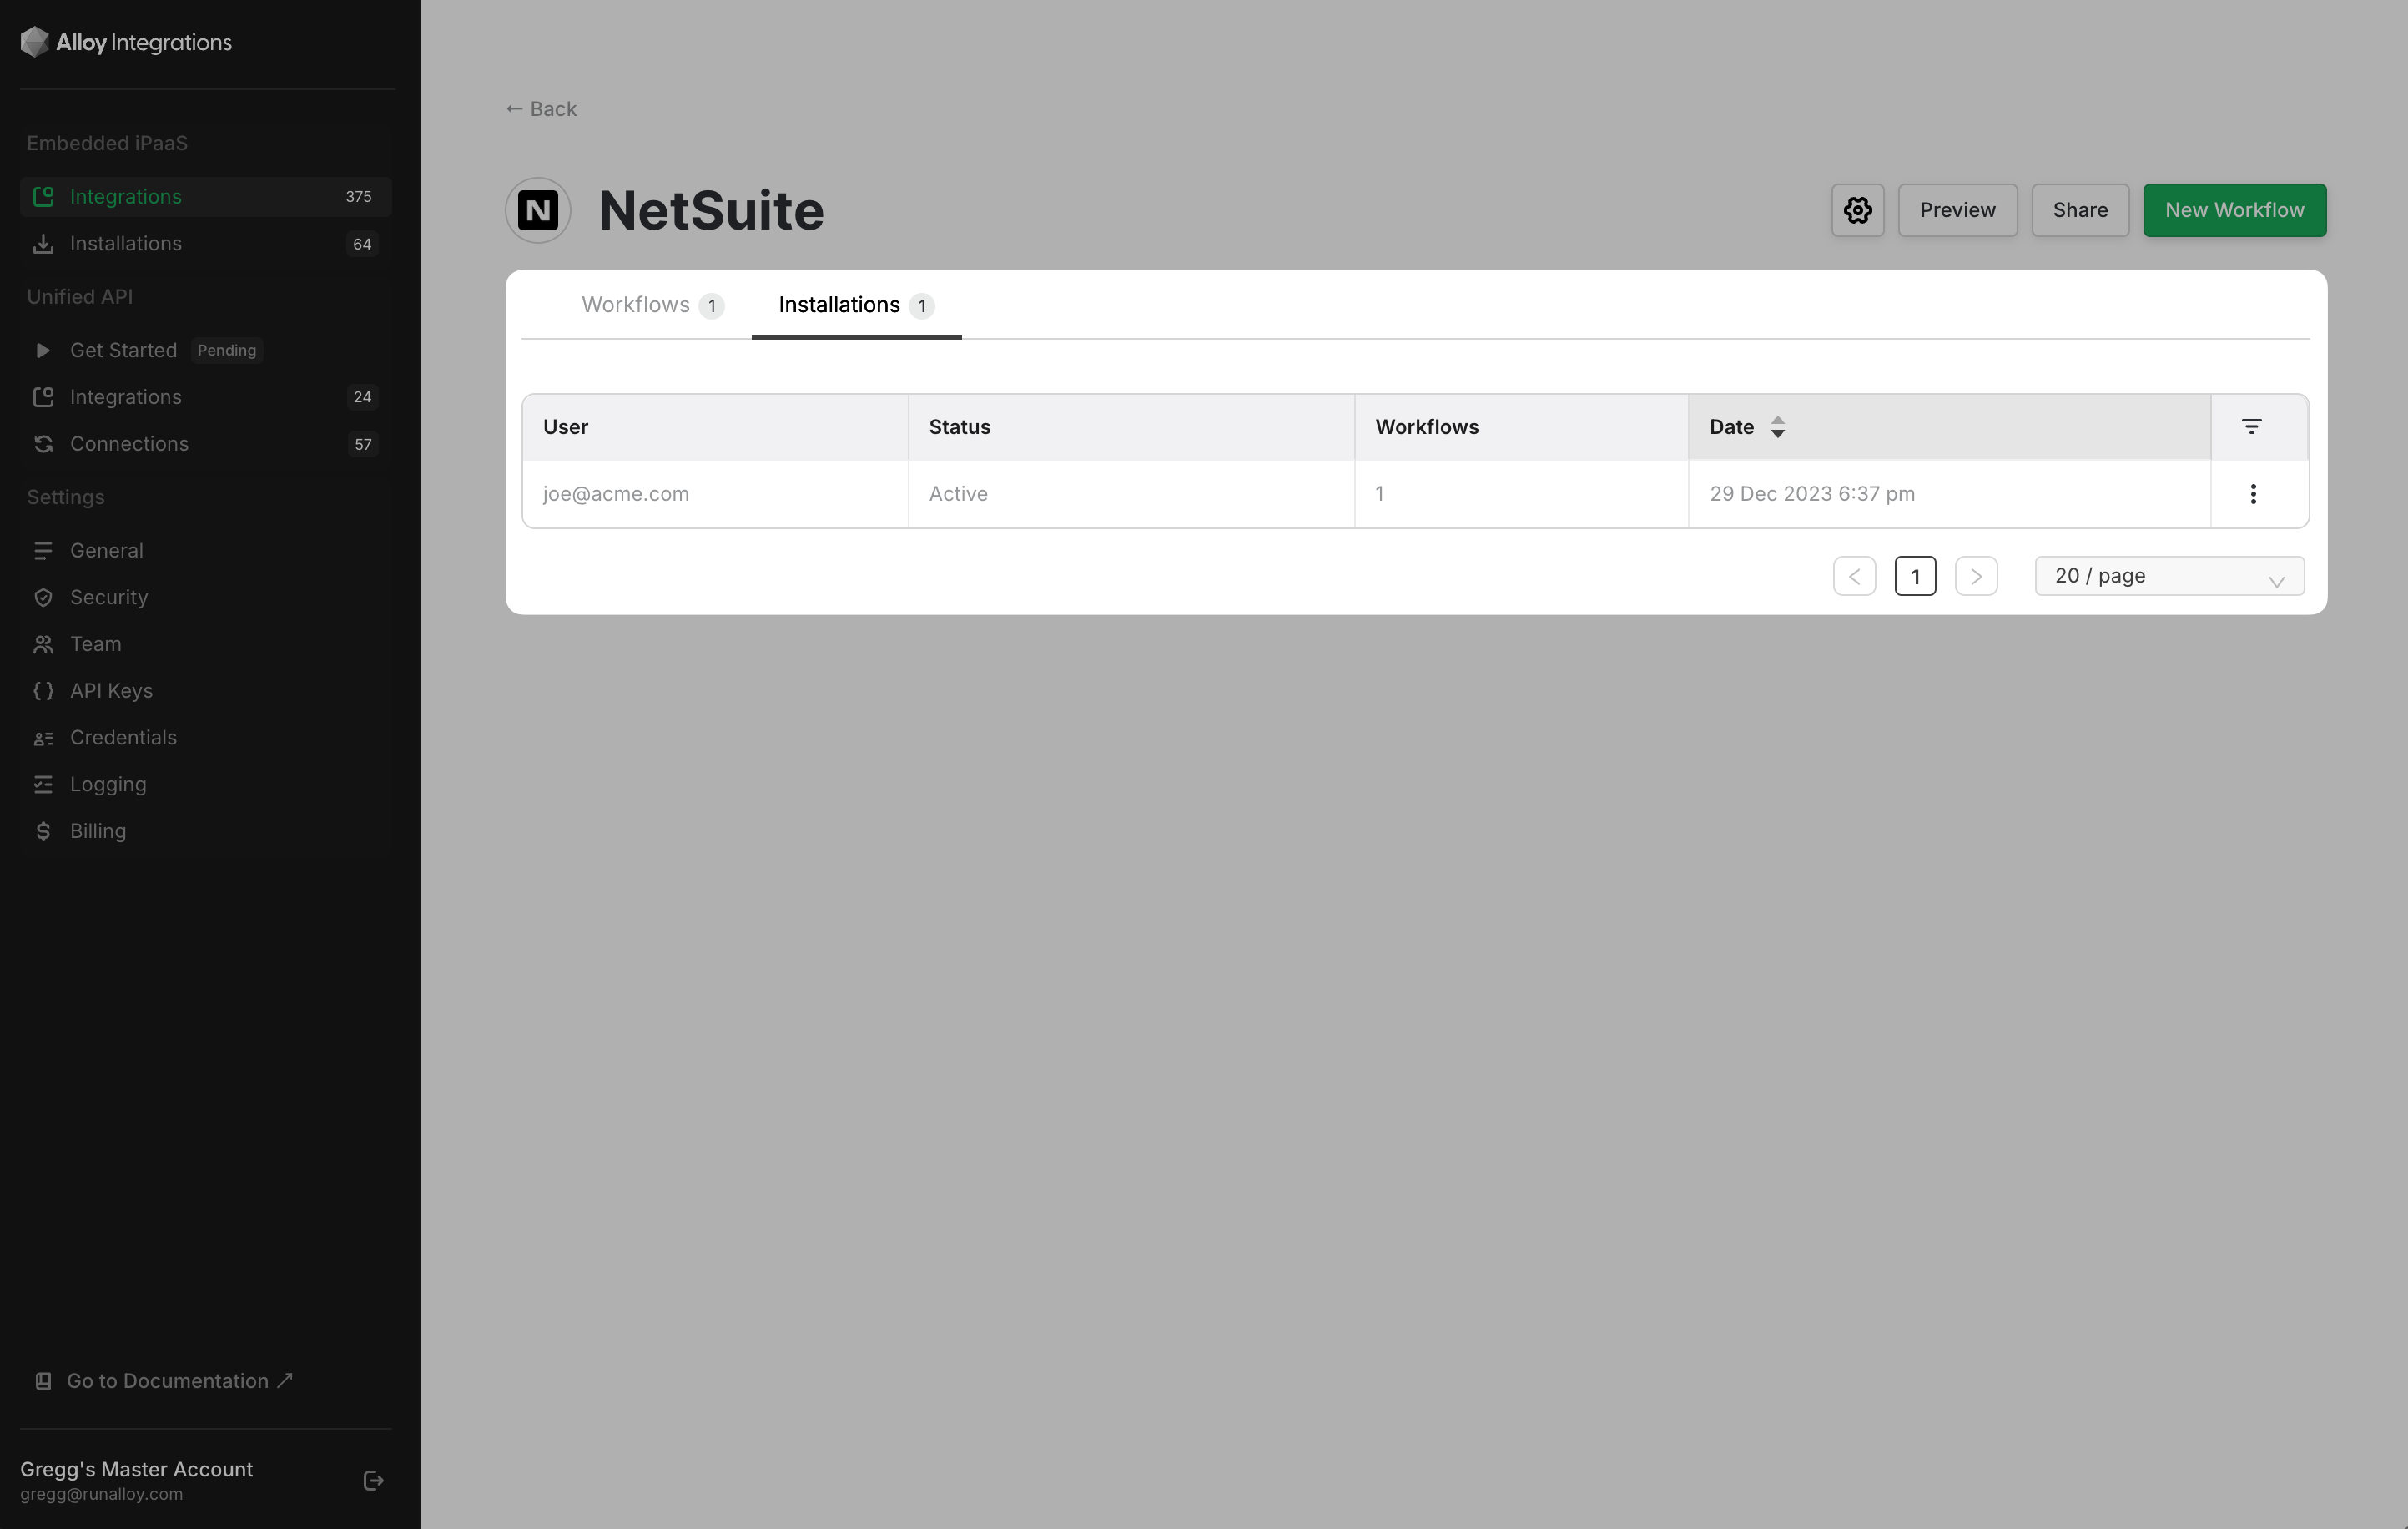
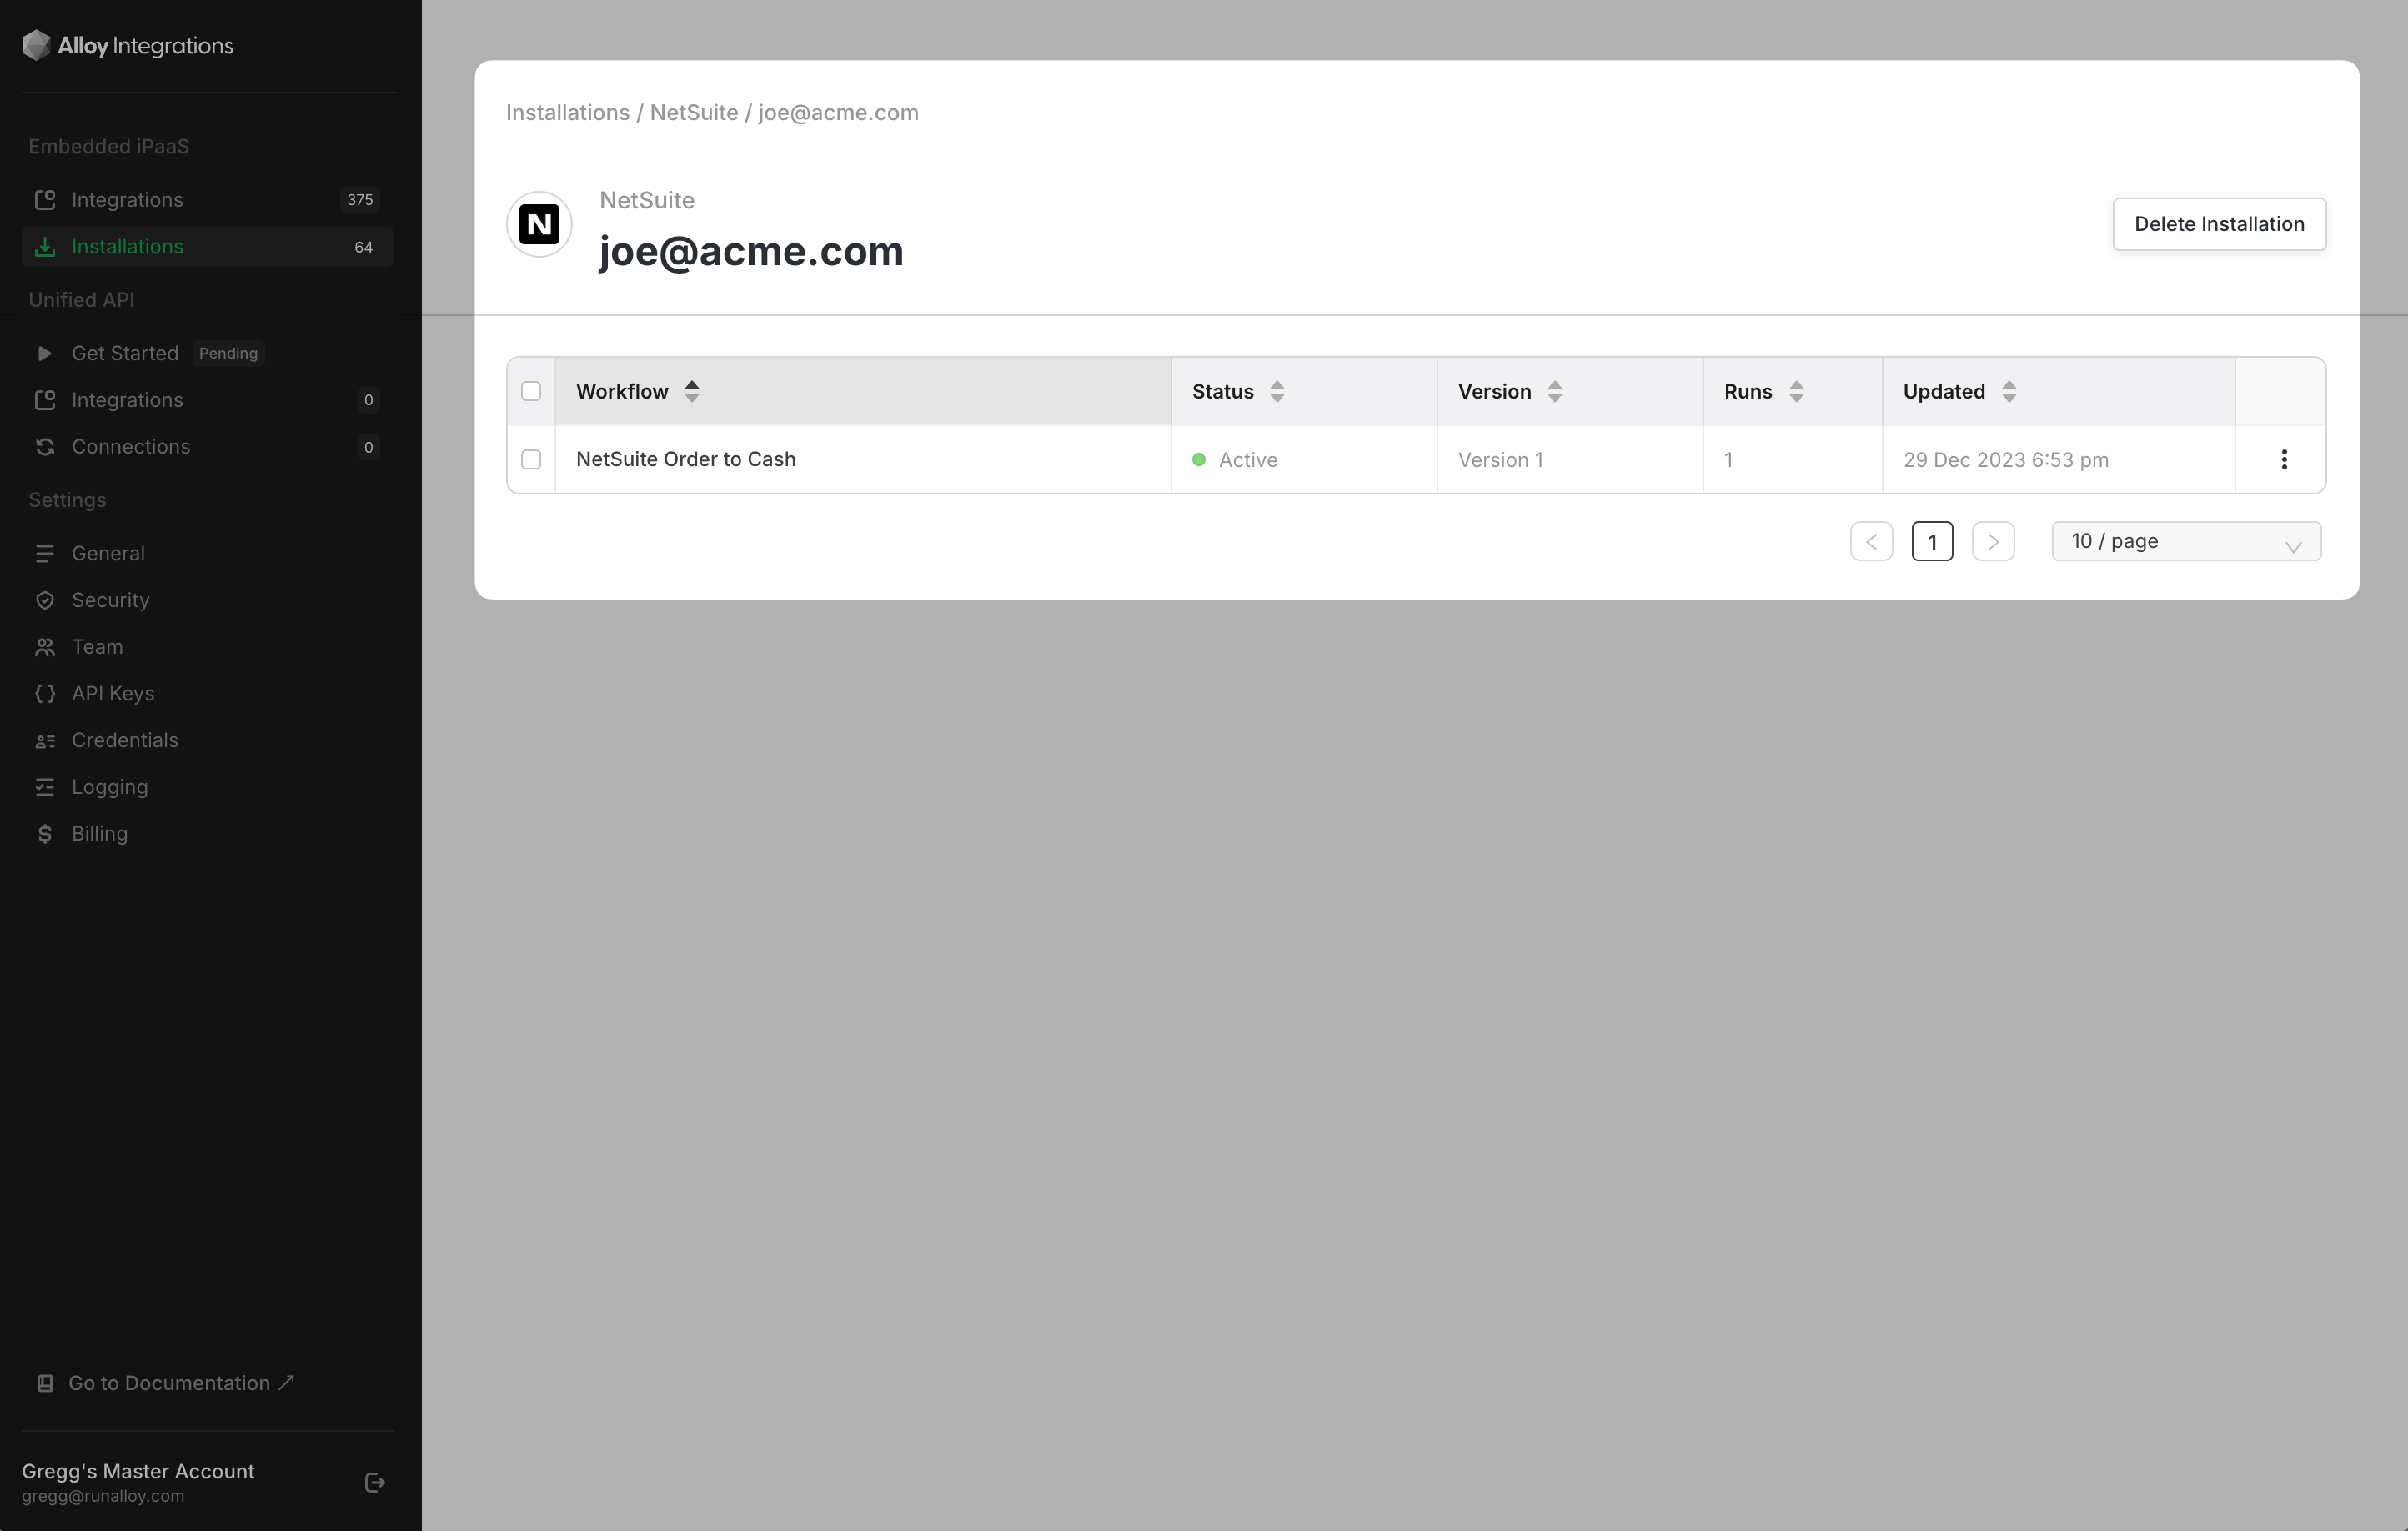
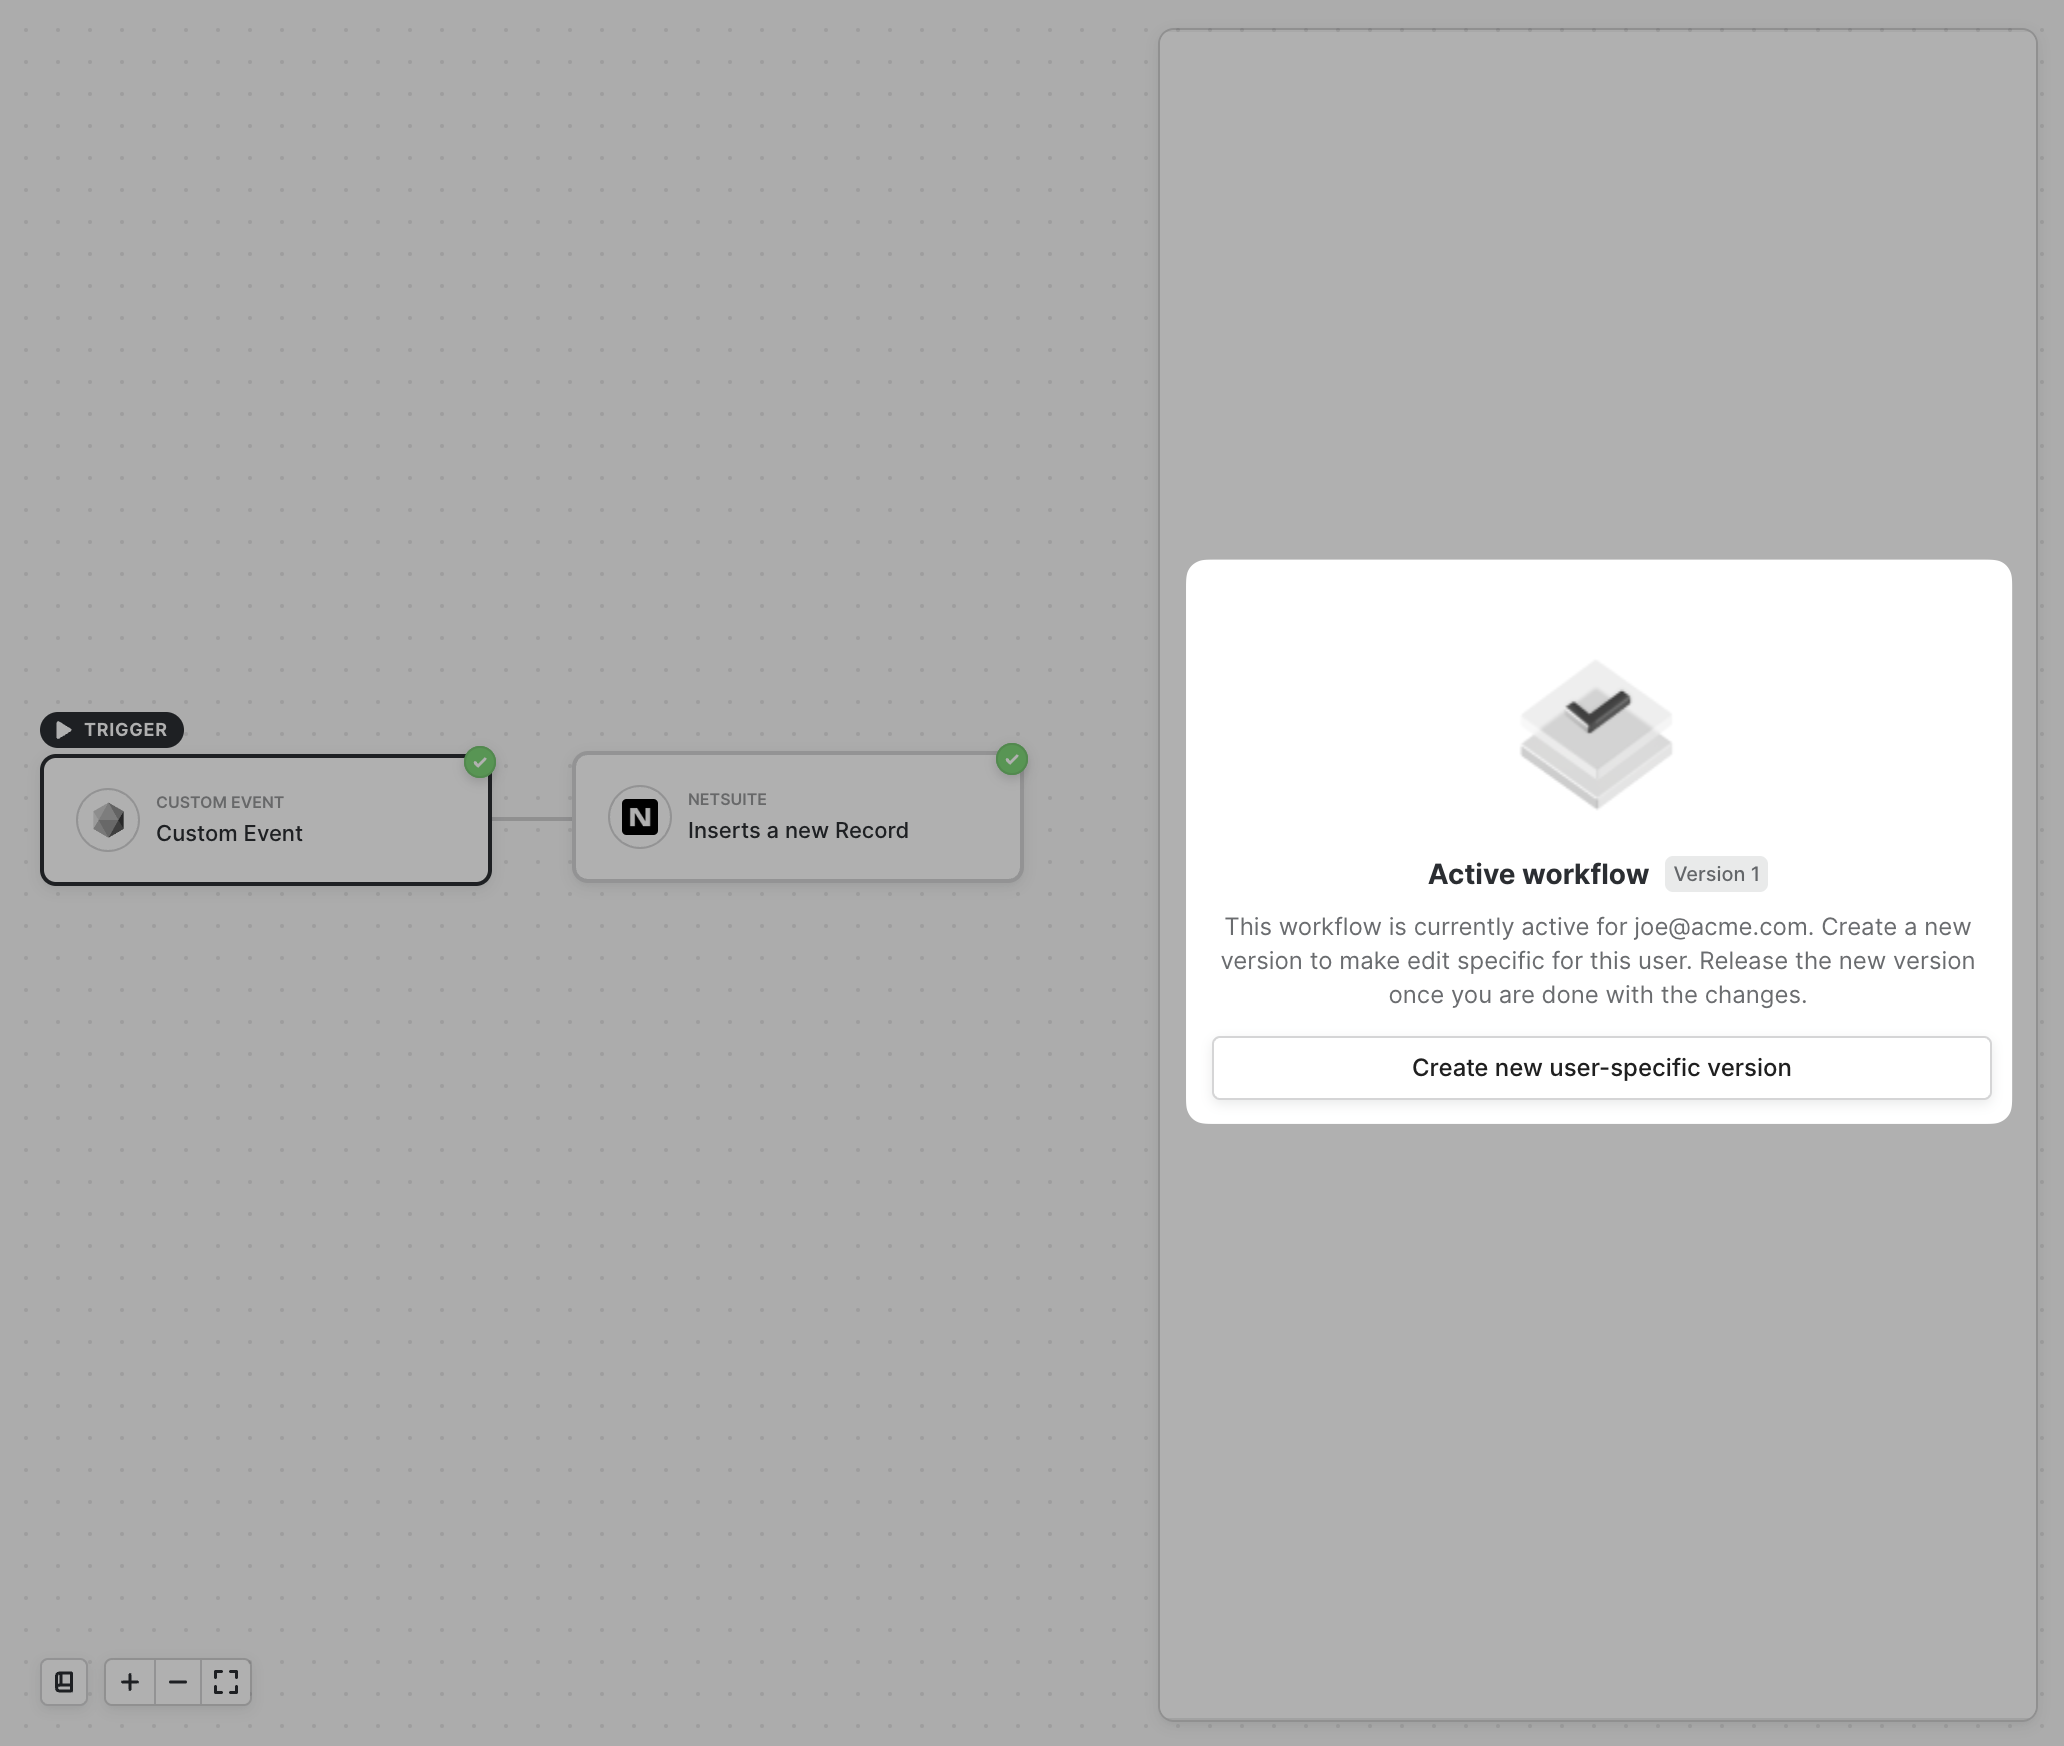
To make a user-specific configuration, navigate to the integration you want to edit. Select the Installations tab. Once your users have installed the integration, you should see them appear in a table here. Click the user you want to make changes for.Info:An “installation” is created each time a user installs an integration. For example, let’s say you’ve built a NetSuite Integration and have 100 users actively using it. This means you have 100 installations. Each installation has an associated user and workflows.
Info:If you have already started previously working on a new user-specific version of the workflow, you will be prompted to either finish your currently existing draft or to create another new version.
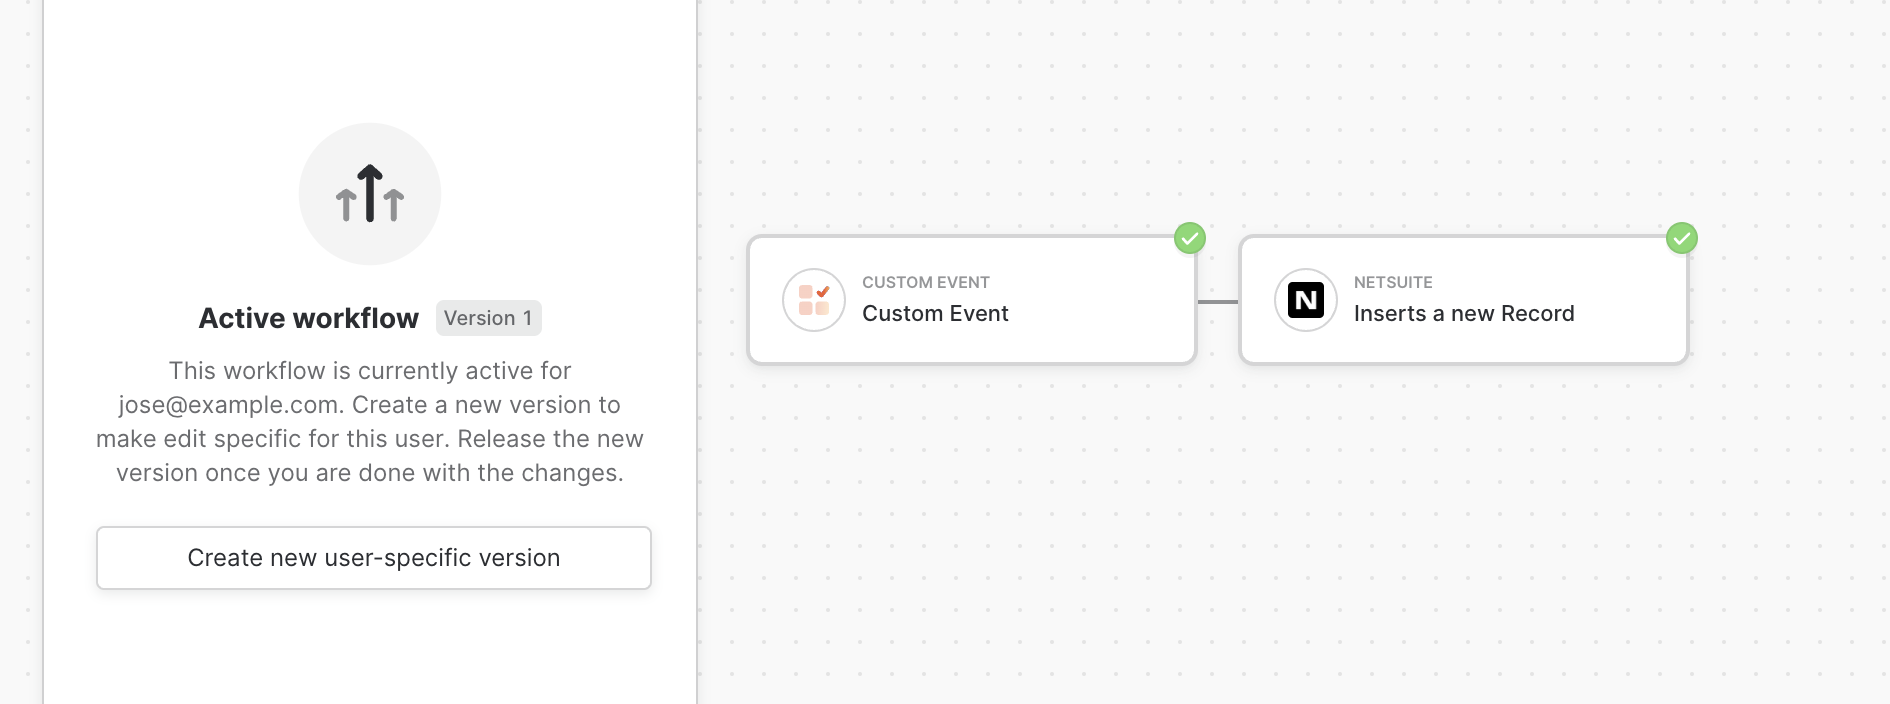
Info:Behind the scenes, when you click the “Create a new user-specific version” button, Alloy Embedded creates a new version, or copy, of the workflow you’ve selected. This ensures that when you make changes, your user-specific edits won’t affect other users.
Going Live
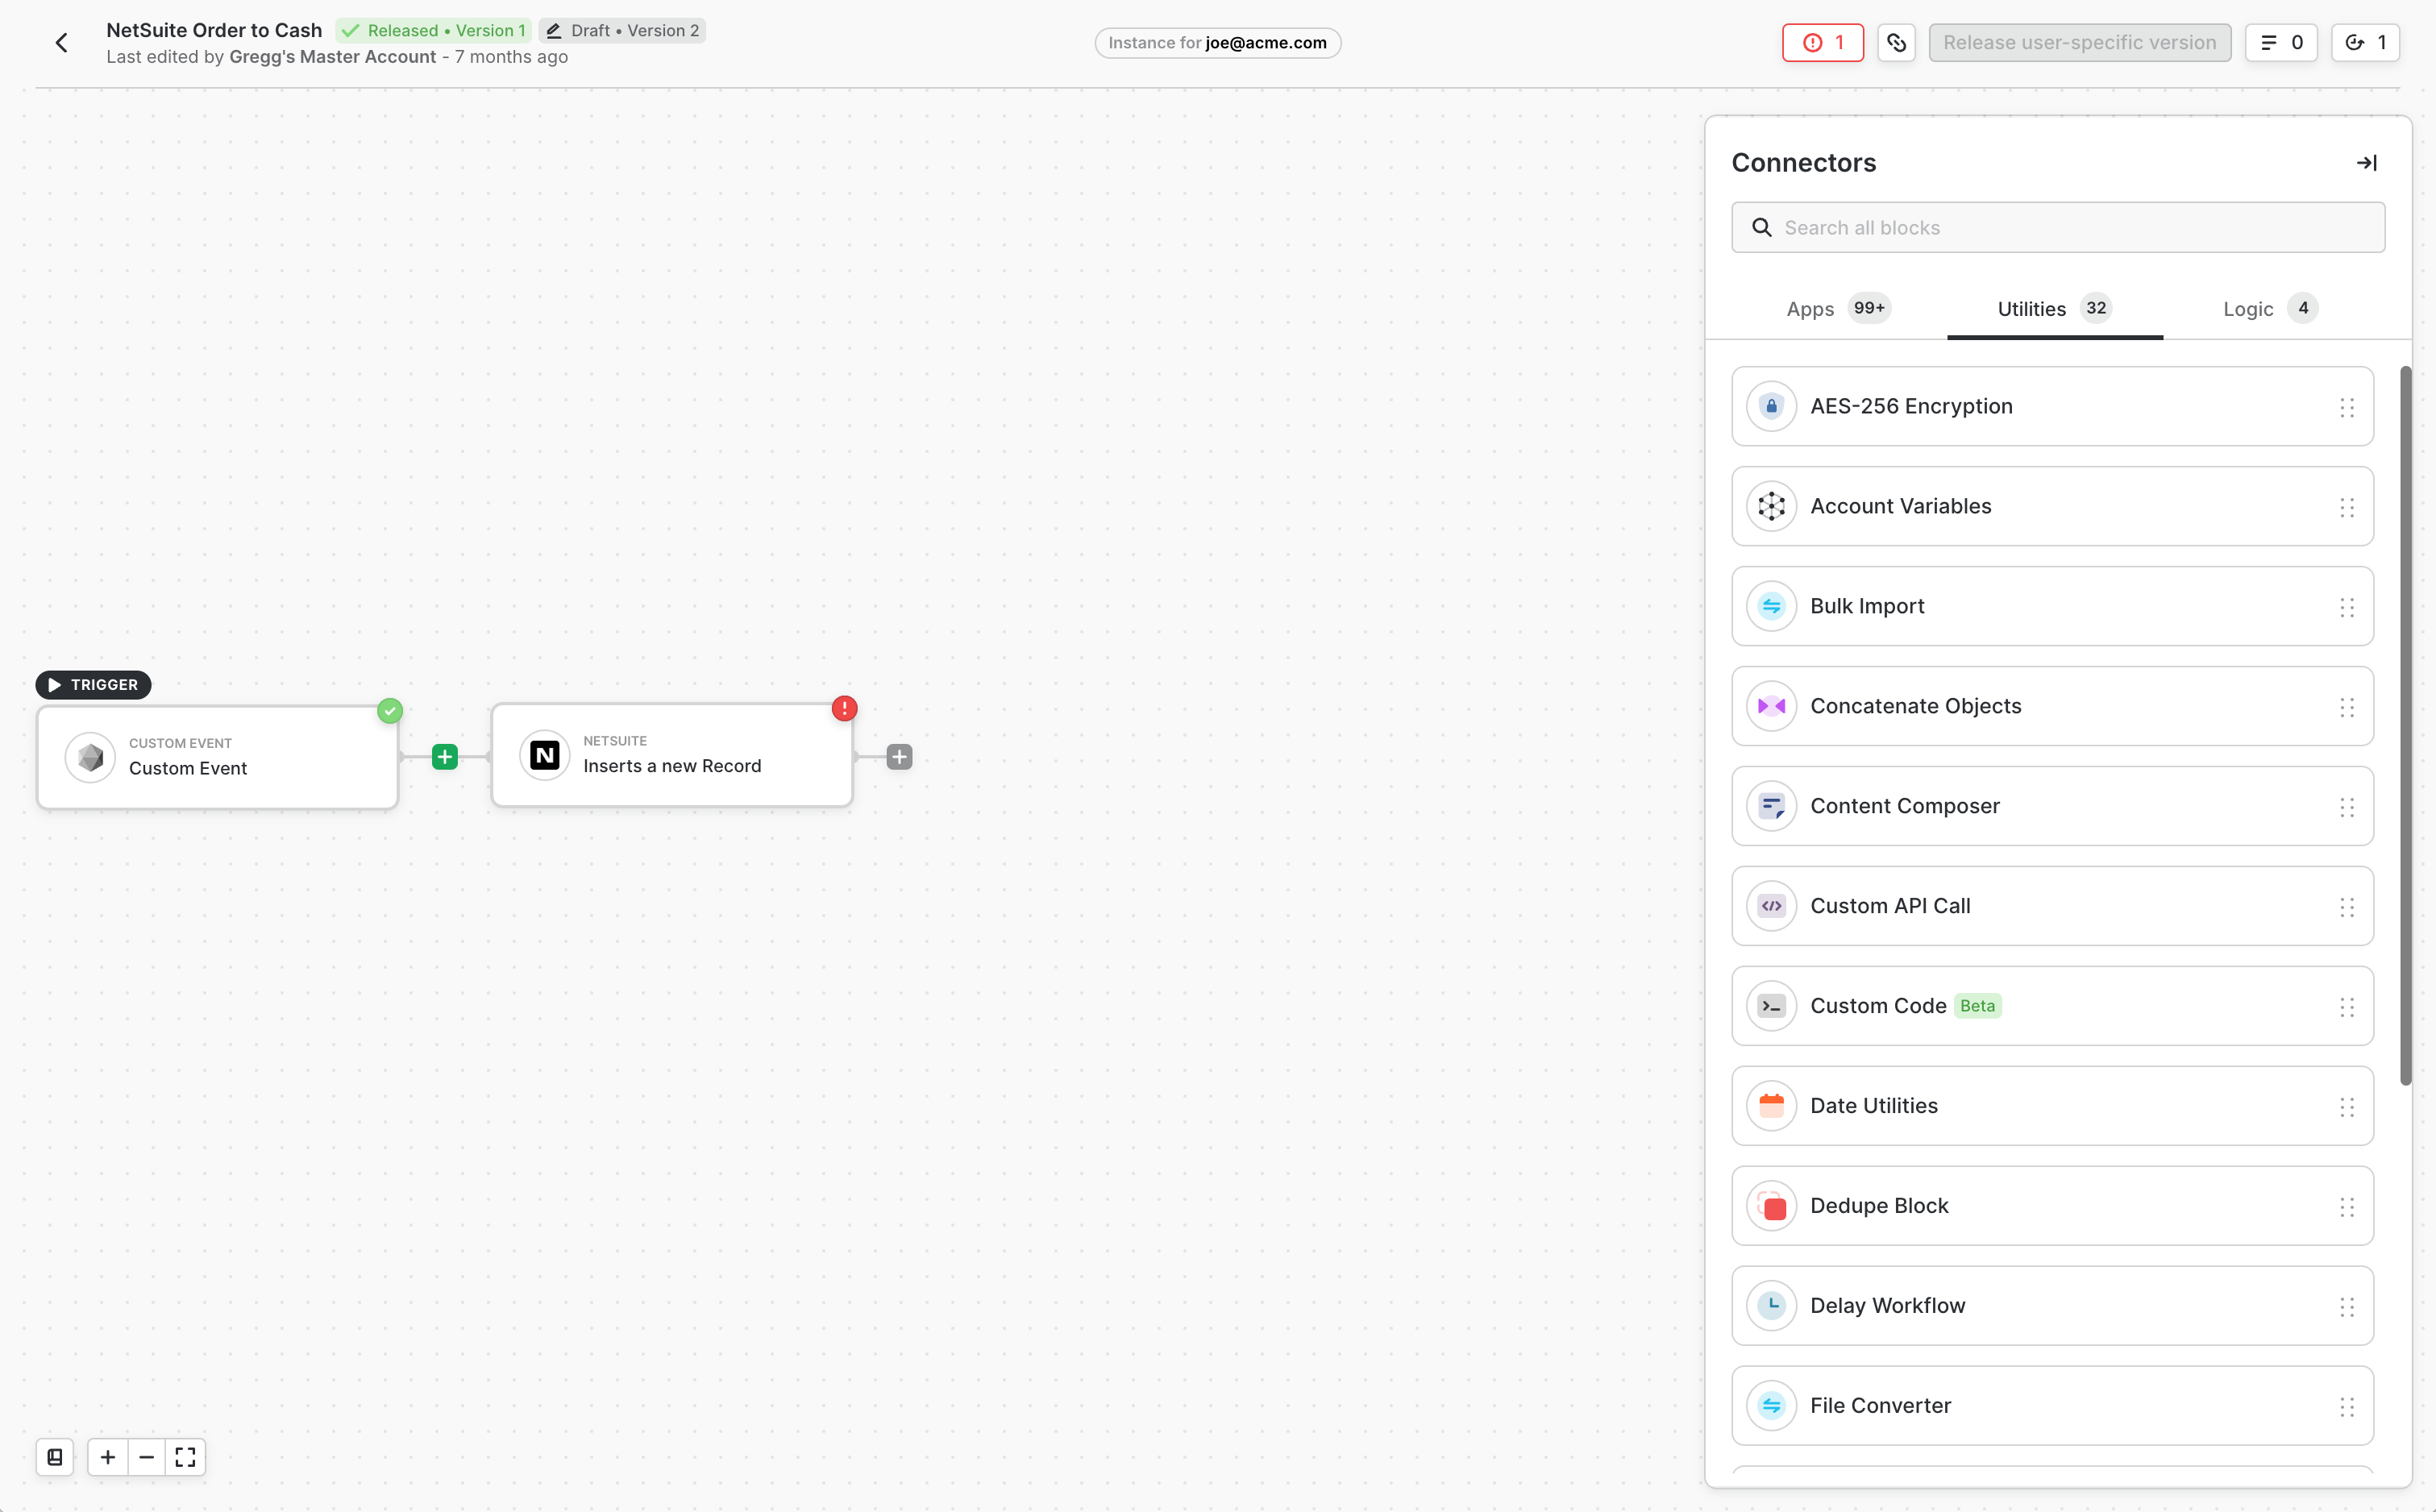
When you’re ready to go live, simply press the Release user-specific version button. This workflow will automatically be updated for the specific installation you’ve selected. Note that other users will not be impacted by this one-off change.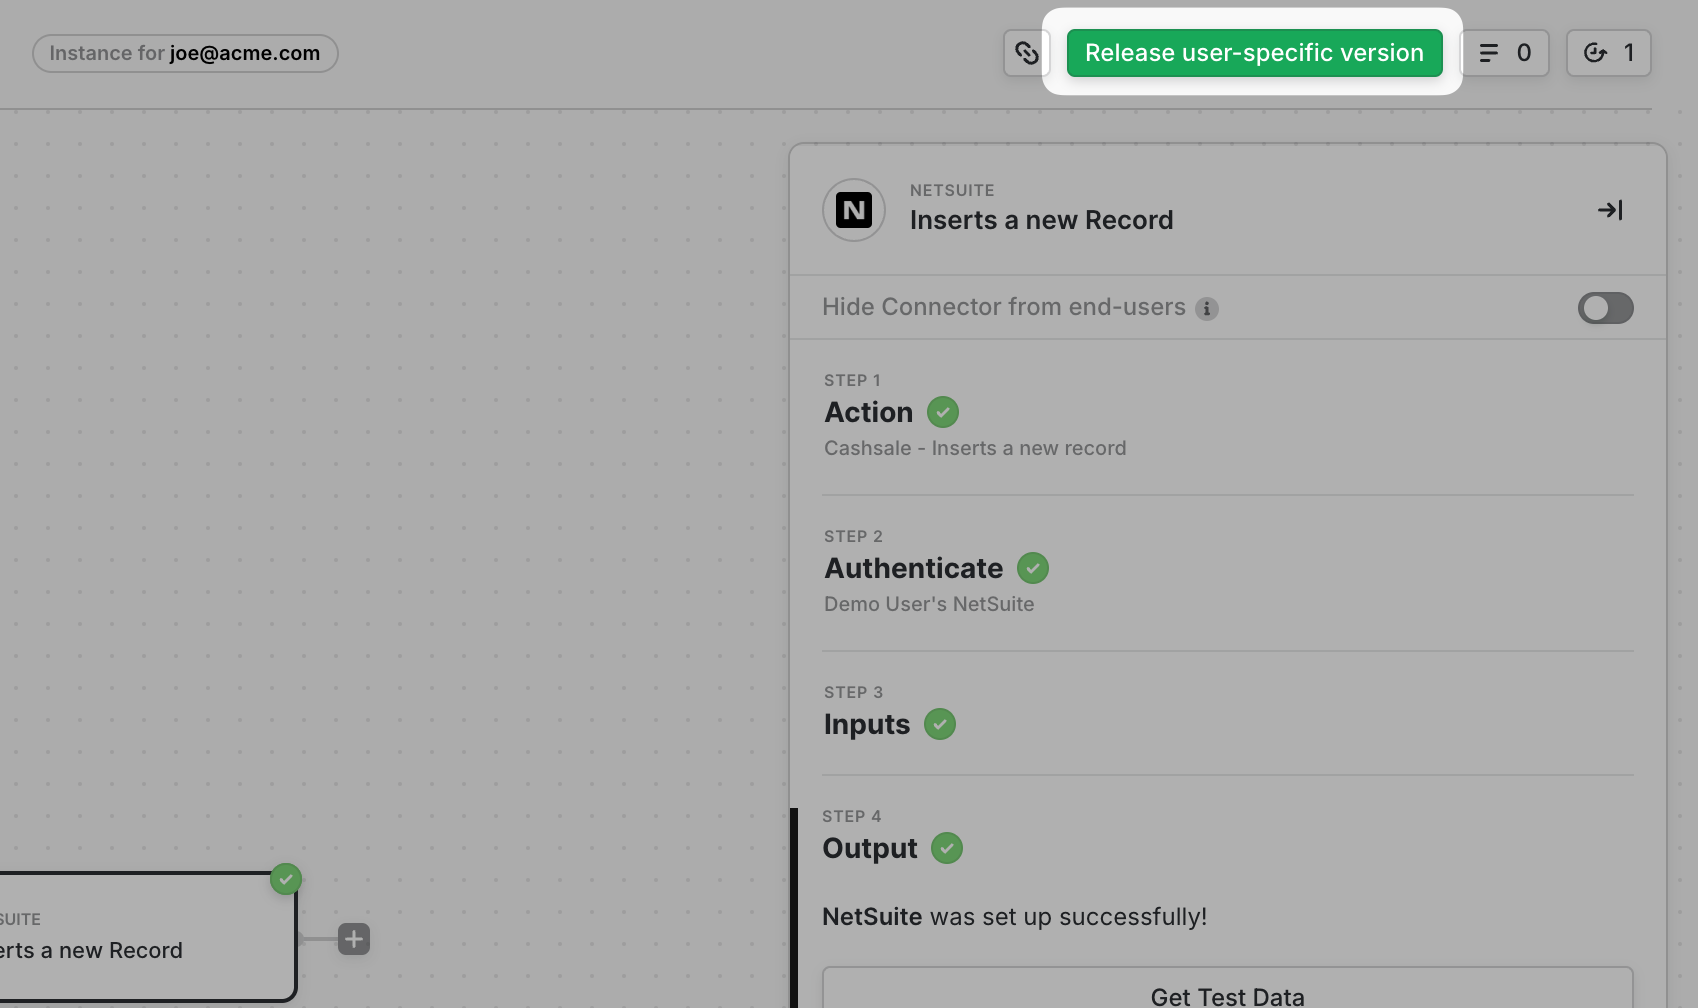
Info:Assuming your workflow changes don’t add any new blocks which might require the end user’s configuration, changes you make will immediately go live upon releasing the new workflow version. If you made a change that is dependent on a user configuration (i.e. added a new block to the canvas that the user had not previously connected to), you’ll need to use our SDK to prompt the user to reconnect.
Frontend SDK
For workflows that do not require user input (i.e. if you just changed a configuration of a workflow but don’t require the user to re-authenticate or configure anything such as the example above), then the workflow will automatically update once you’ve released the version.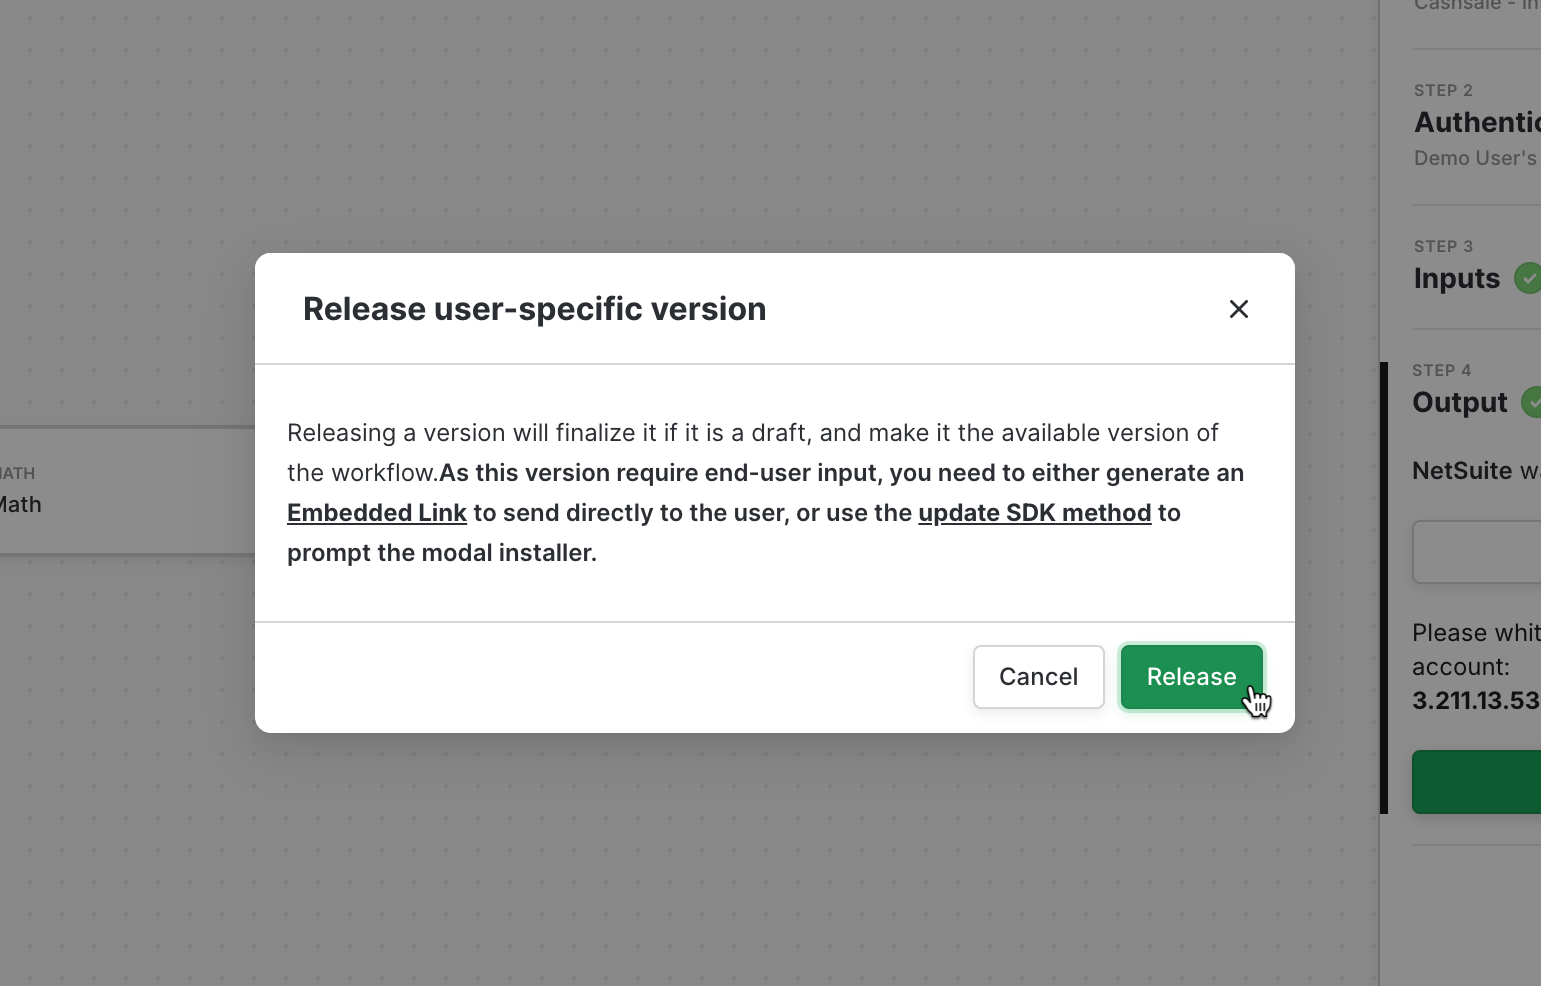
.update() method.
JavaScript
update()method takes an array of workflowIds you want to update the versions for.
To pull a list of versionIds for a given workflow, call the GET List Workflow Versions endpoint. This endpoint returns the list of workflows for a given workflow along with a status parameter.