Overview
The Workflow Builder is your primary interface for designing, configuring, and managing integration workflows. This guide covers the key components and features you’ll use when building workflows.Workflow Builder Interface
The Workflow Builder interface consists of several key components: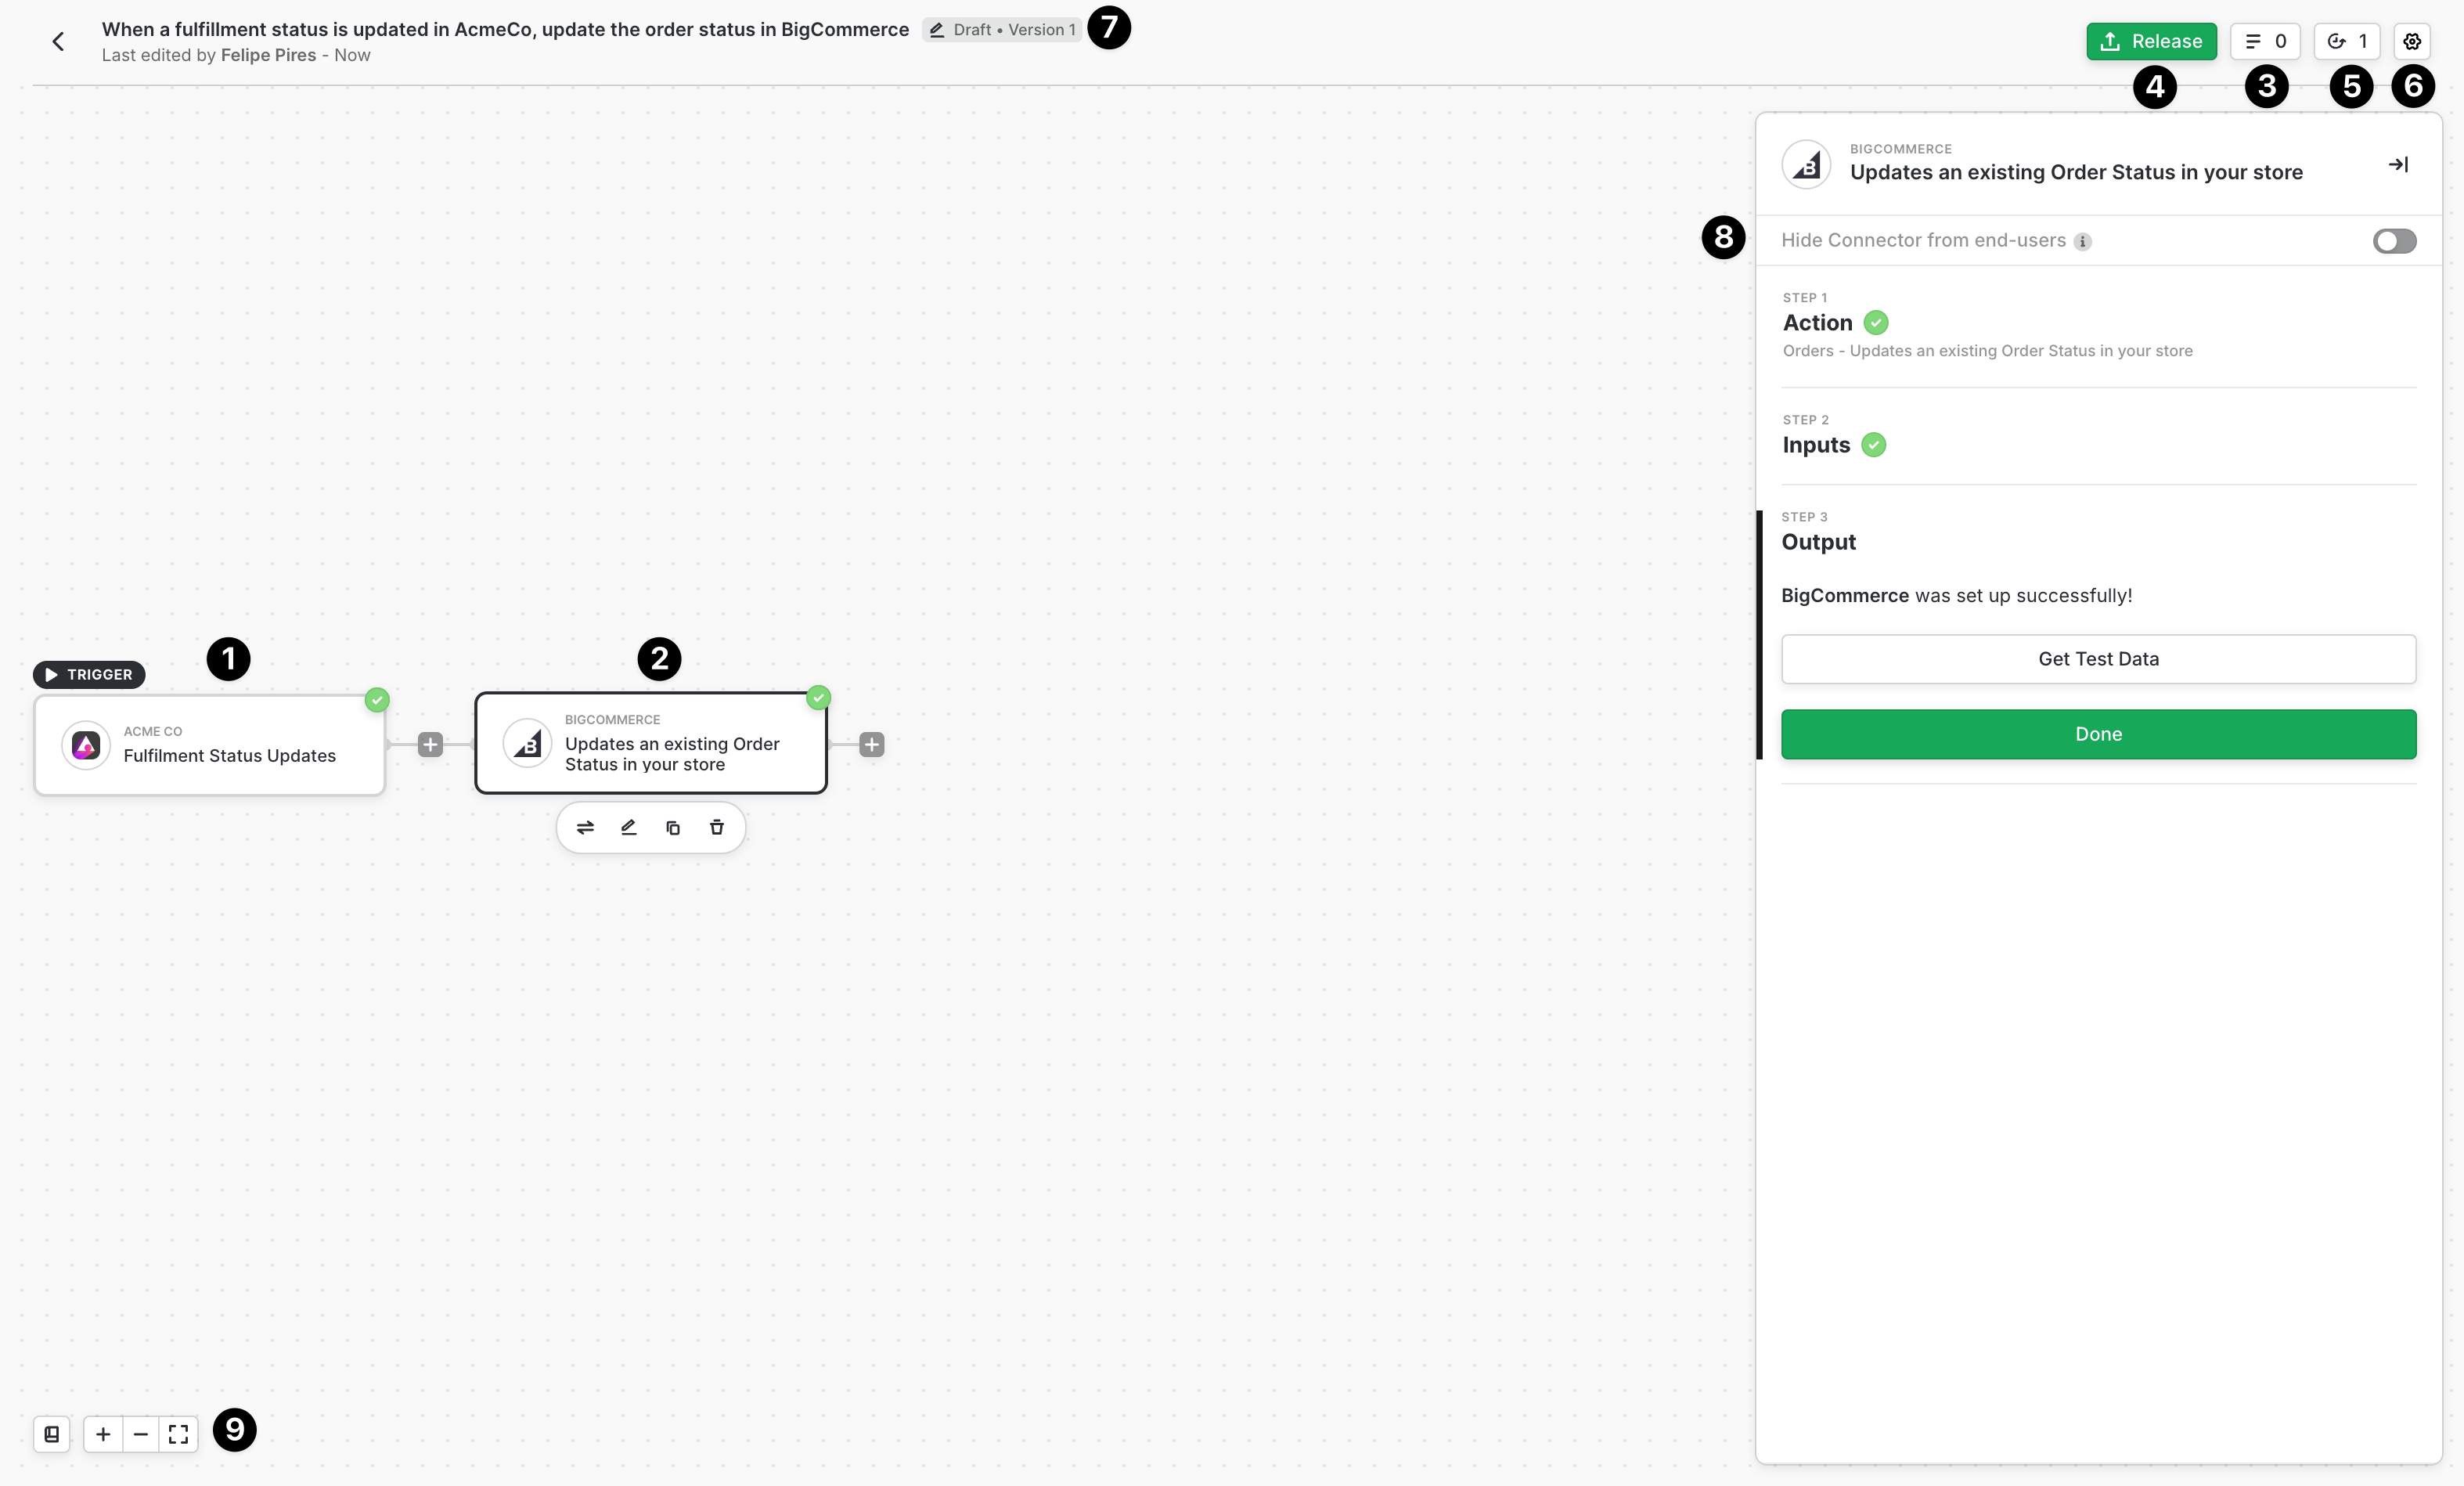
- Event: The rightmost connector in every workflow serves as the event trigger. This connector initiates the workflow based on specific criteria. In the example above, the event is a Custom Event that fires when your application invokes it programmatically.
- Destination: Destination connectors specify where data should be sent after processing. Unlike event connectors (which are limited to one per workflow), you can add multiple destination connectors to send data to different systems or perform multiple actions.
- Workflow Logs: Opens a panel displaying all workflow execution logs, including both successful runs and failures. Use this tool to debug errors and monitor workflow performance.
- Release this Version: Publishes workflow changes to your users. This button only becomes enabled when the workflow has no validation errors, ensuring you can’t accidentally deploy broken workflows.
- Version History: Shows all versions associated with the workflow. New workflows start at Version 1 as a draft until you publish the first version. Version history helps you track changes and roll back if needed.
- Settings: Opens a configuration window where you can modify workflow-specific settings such as the workflow description, timeout values, and other advanced options.
- Title: The workflow title provides a unique identifier for each workflow. The badge next to the title indicates the workflow’s current state (Draft or Released), helping you quickly identify which workflows are live.
- Hide connector from end-users: This toggle allows you to hide specific connectors from end users during installation. This is commonly used when sending data to your own data warehouse or internal systems, where end users don’t need to authenticate or configure anything.
- Workflow Navigation & Help Center: The navigation buttons allow you to zoom in and out of the workflow canvas. This is particularly useful for large, complex workflows where you need a bird’s eye view of the entire flow. The help center icon provides quick access to documentation and support resources.
Workflow Canvas
The workflow canvas is where you build your integration logic by connecting event and destination connectors. As you add connectors:- Connectors automatically arrange themselves in a logical flow from right to left
- Connection lines show how data flows between connectors
- You can click any connector to configure its settings and data mappings
- The canvas automatically adjusts to accommodate new connectors