This feature only applies to Embedded iPaaS
Overview
Custom Events provide a secure, programmatic way to trigger workflows from your application. Unlike traditional webhook triggers that respond to external events, Custom Events give you precise control over when and how workflows execute, allowing you to integrate workflow automation directly into your application’s business logic.Understanding Custom Events
Custom Events act as bridges between your application and your integration workflows. When specific actions occur in your application, such as a user completing a purchase, submitting a form, or reaching a milestone, you can trigger workflows that automate downstream processes across your integrated systems. The power of Custom Events lies in their flexibility. You define both the trigger conditions and the data structure, ensuring workflows receive exactly the information they need to execute properly.Defining a Custom Event Schema
Every Custom Event requires a schema that defines the structure of data you’ll send when triggering the workflow. This schema acts as a contract between your application and the workflow, ensuring data consistency and enabling you to reference specific fields throughout your workflow configuration. Let’s walk through a practical example. Suppose you’re building an accounting feature where users can automatically log invoices to be created in your ERP, NetSuite, by filling out a form within your internal admin panel. First, you’ll create a Custom Event calledcreate_invoice and define its schema with the data points you need to pass:
JSON
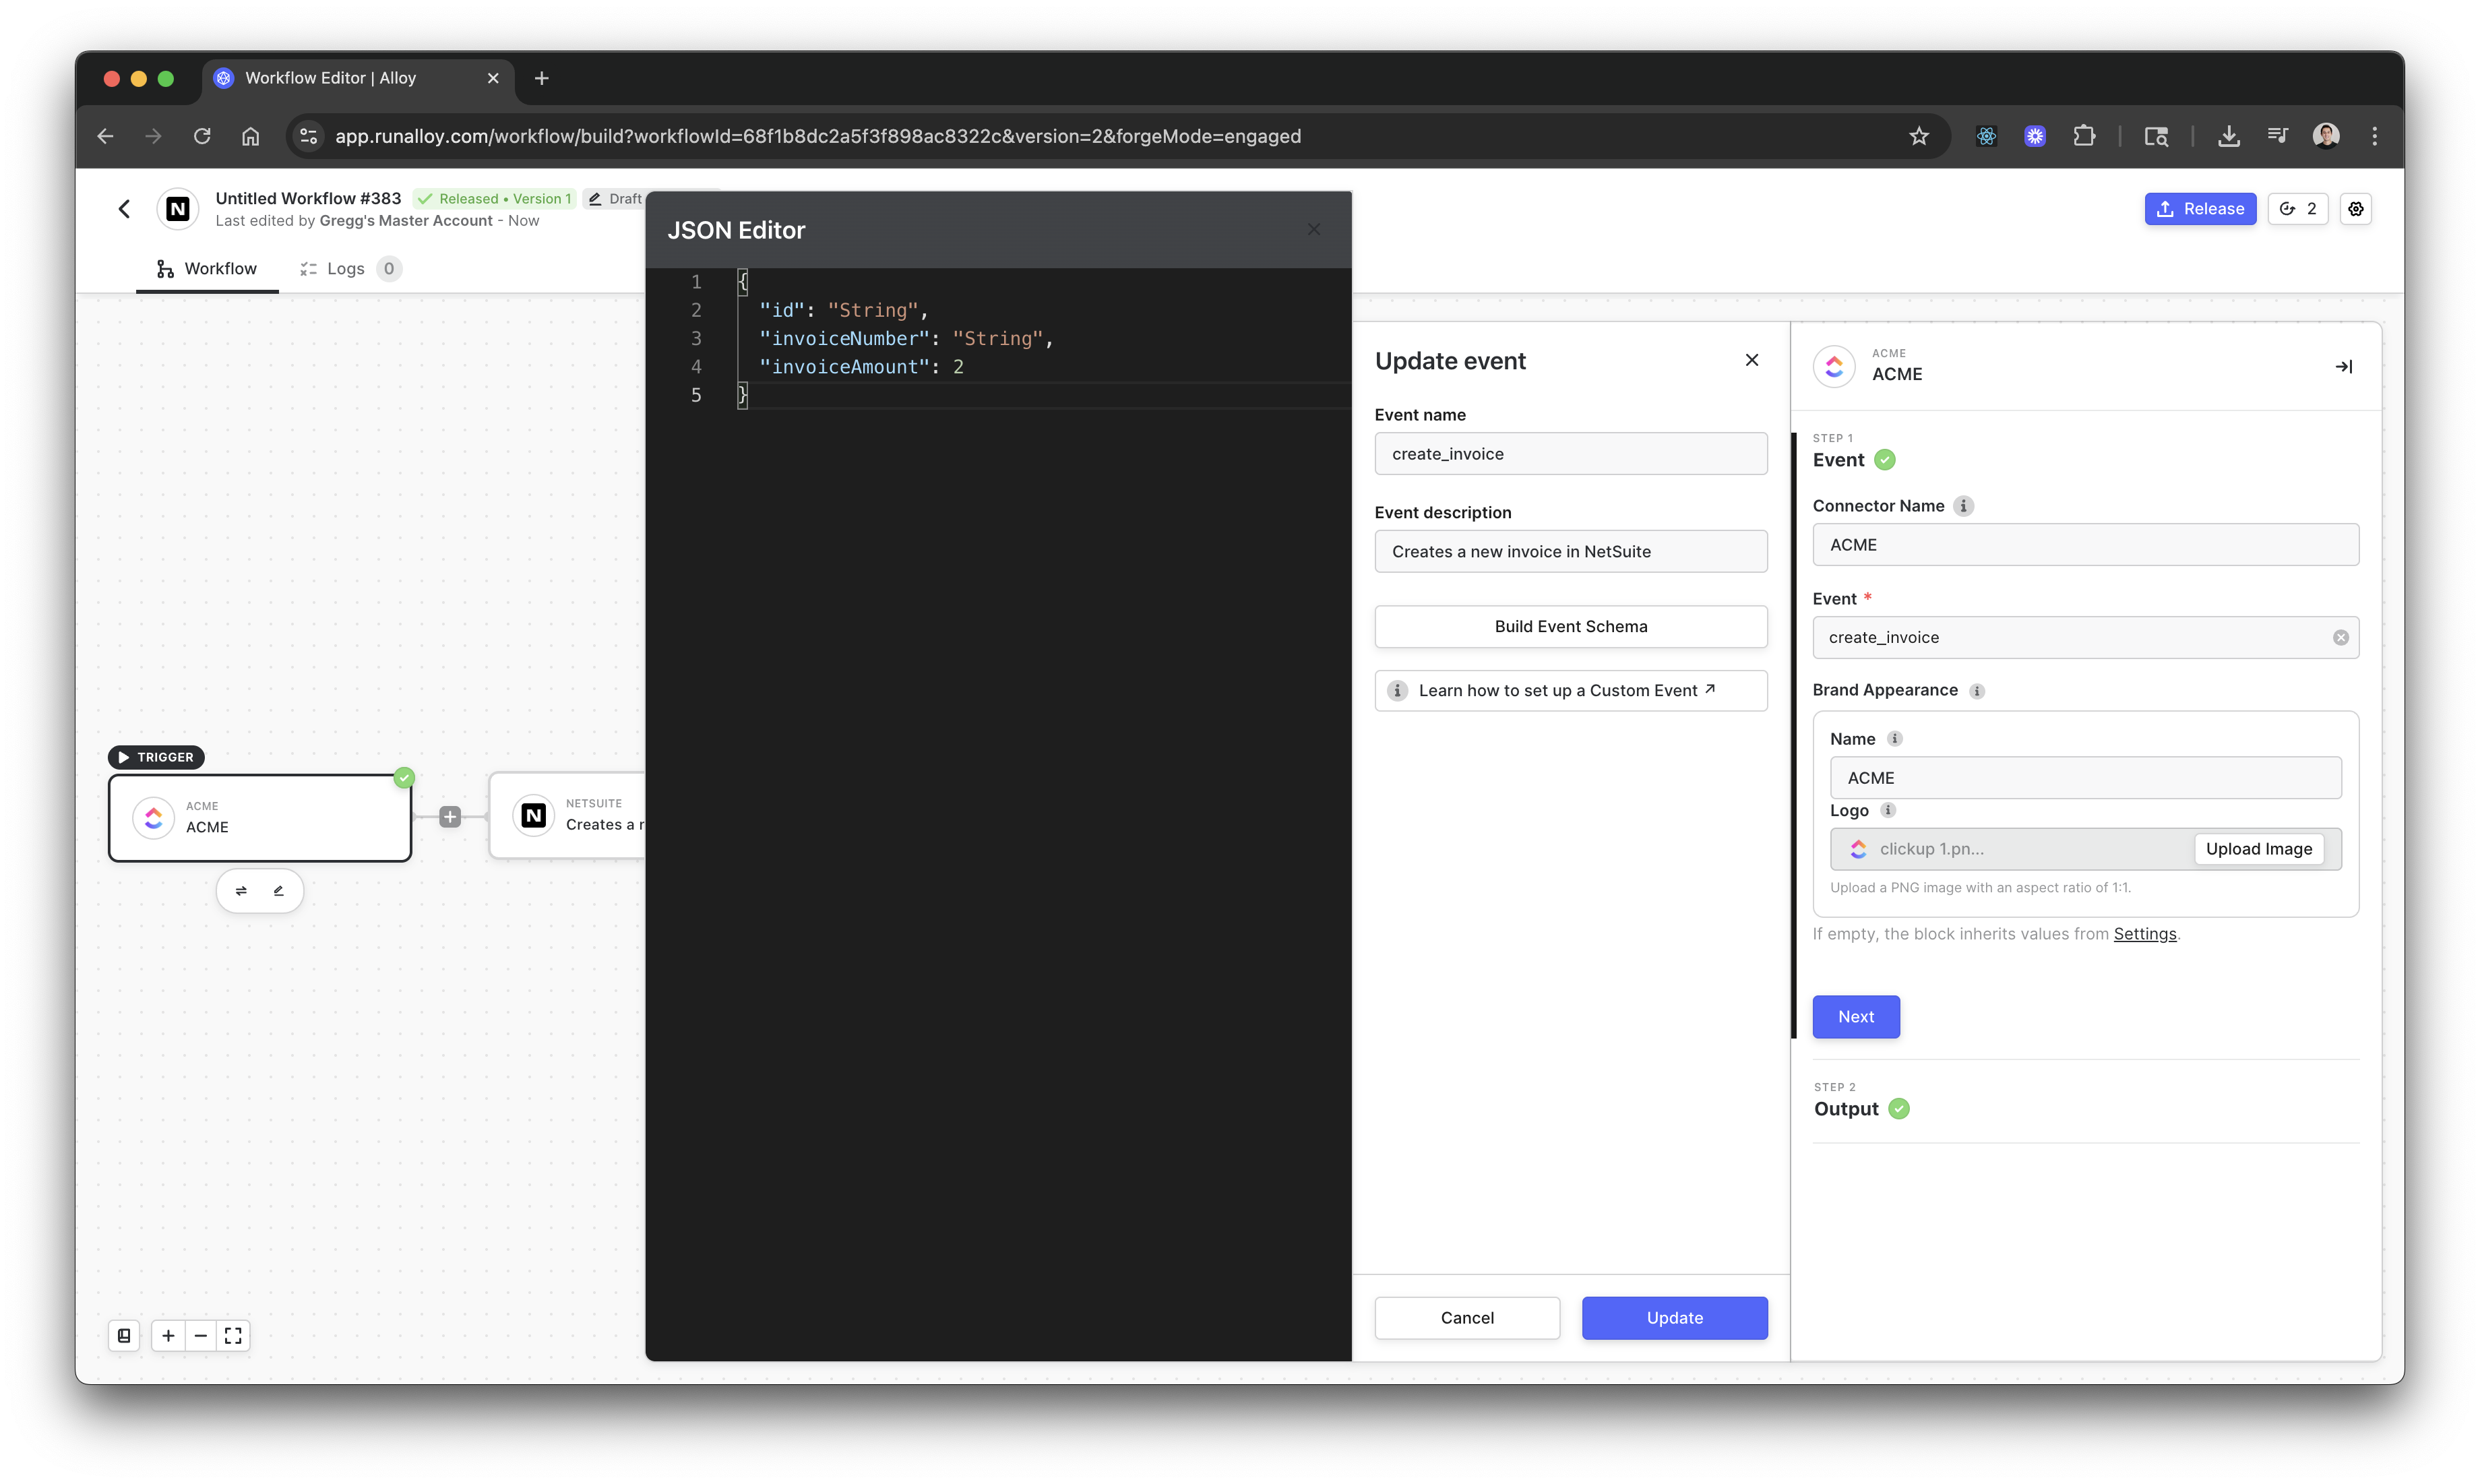
id, invoiceNumber, and invoiceAmount. When you invoke this Custom Event from your application, you’ll need to include values for each of these fields.
Building Workflows with Custom Event Data
Once you’ve defined your Custom Event schema, you can reference those fields throughout your workflow. In our example, we’ve configured the NetSuite connector to create an invoice using the data from our Custom Event: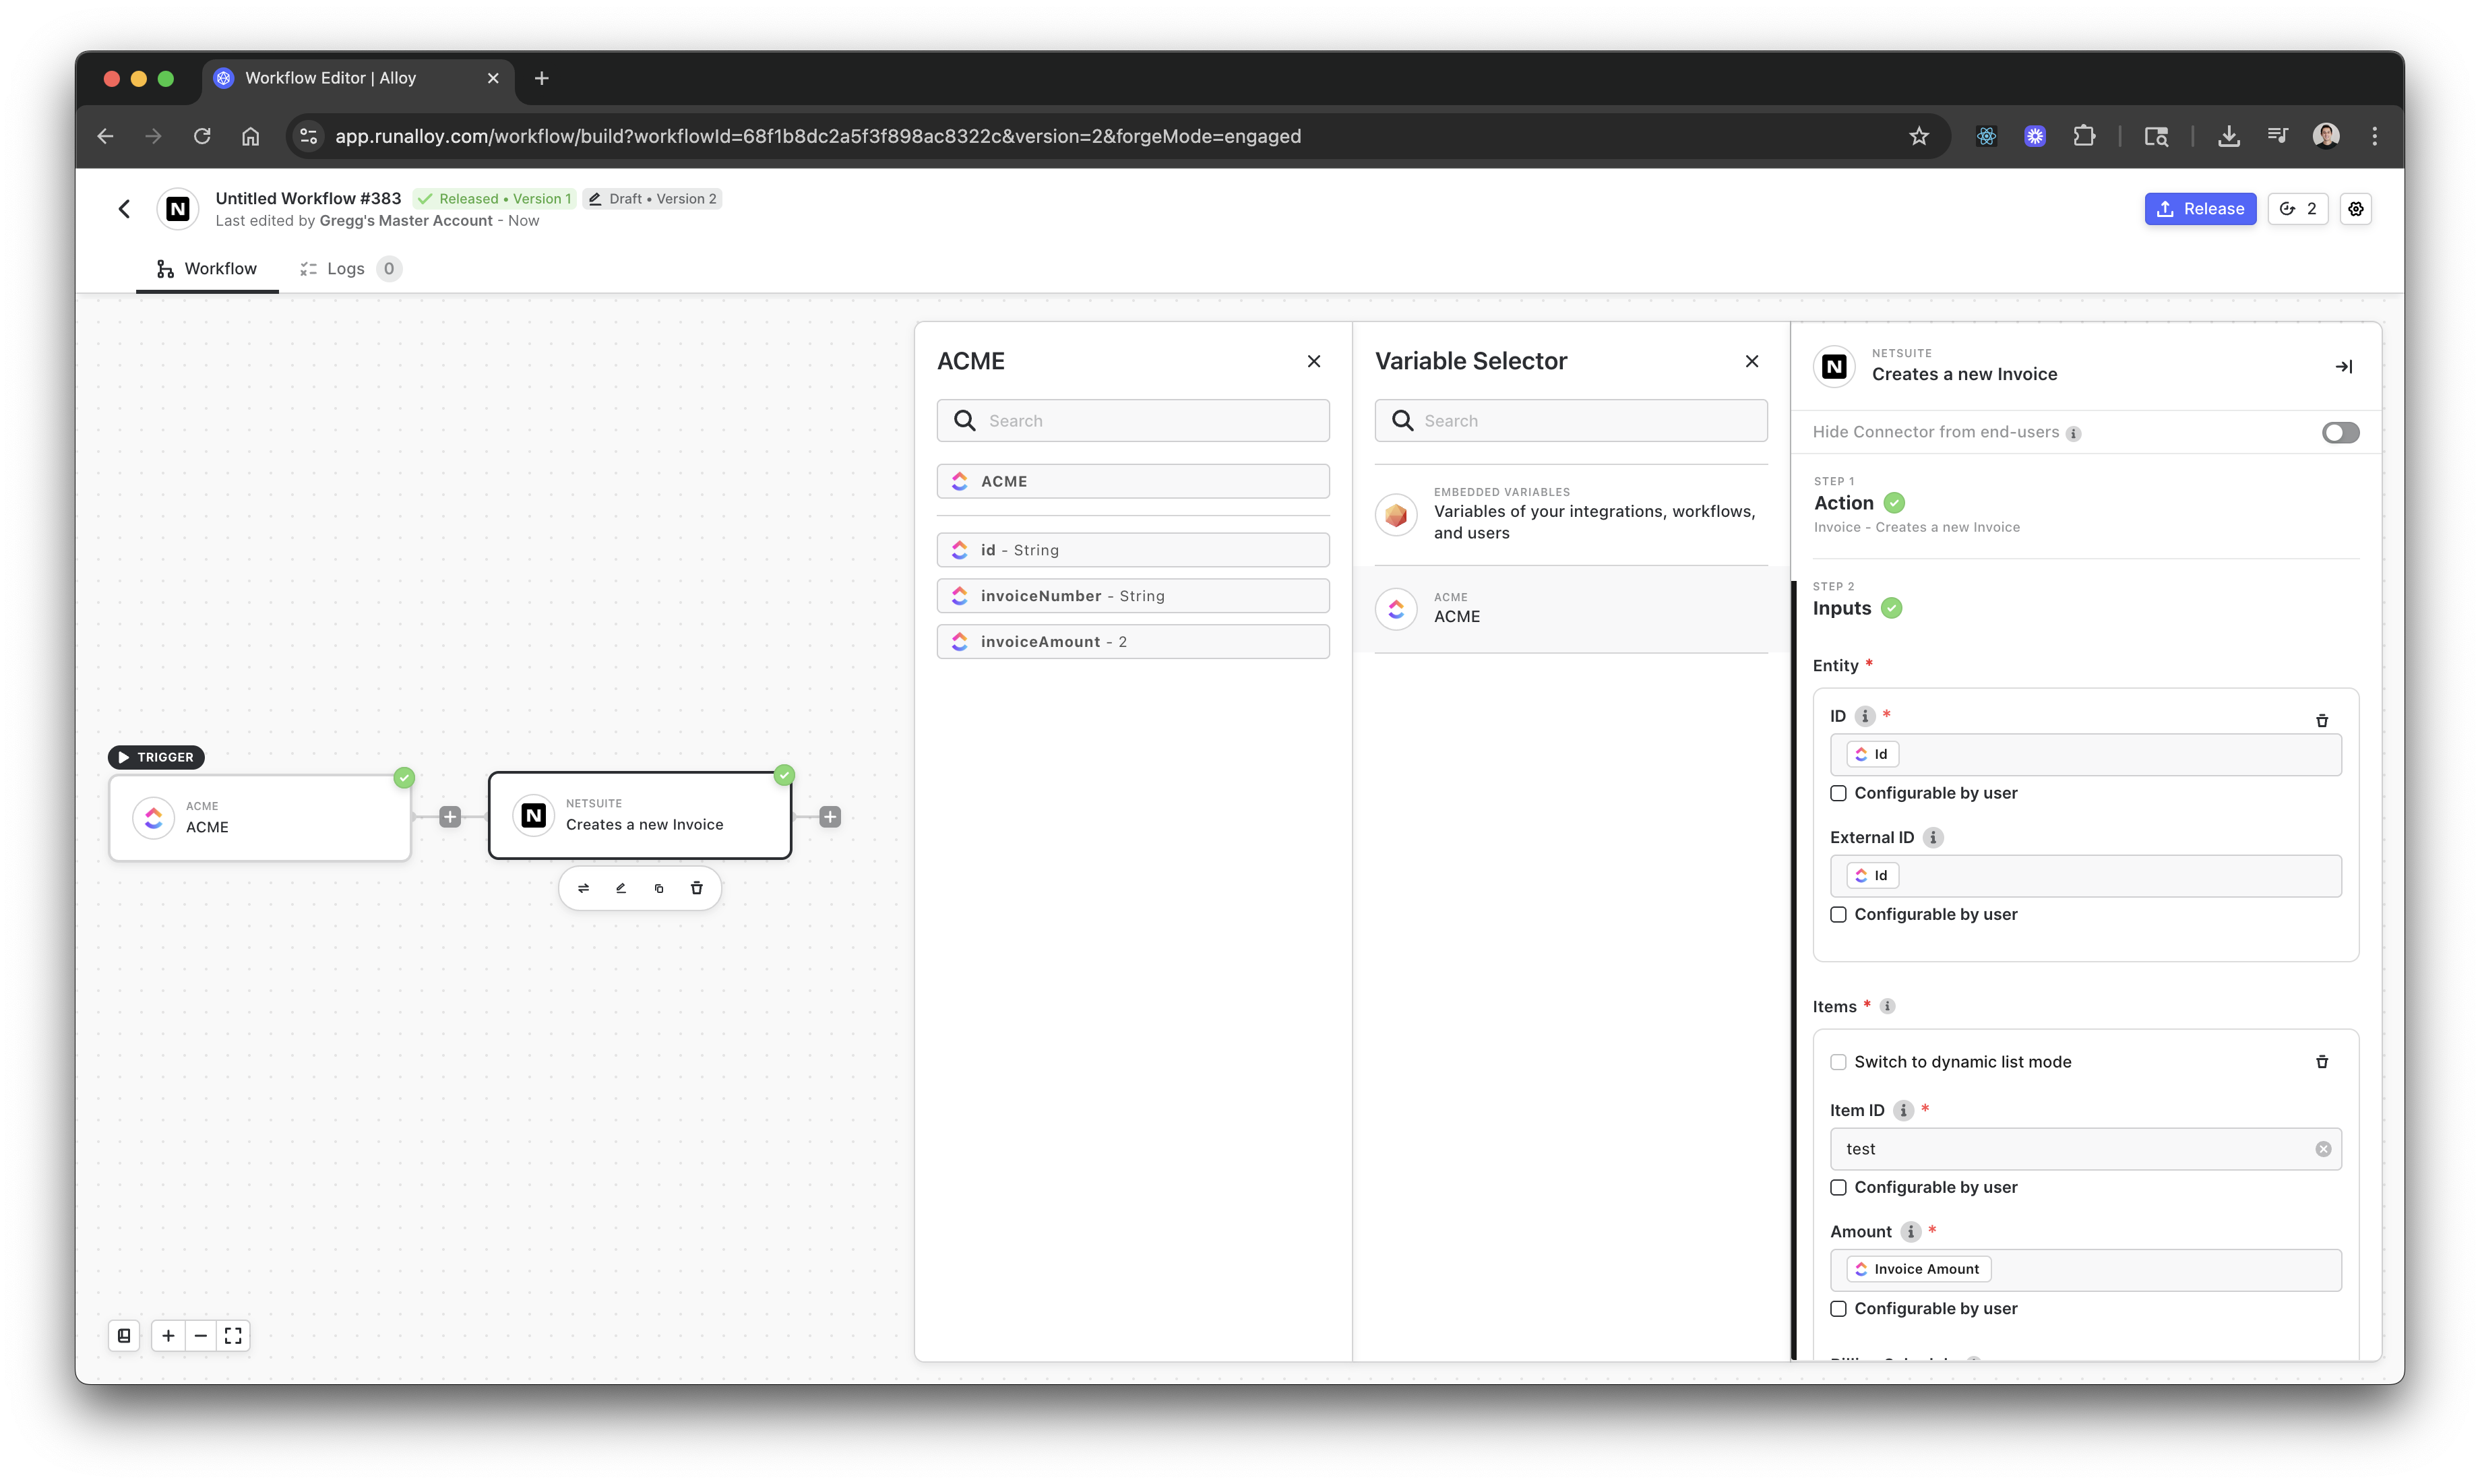
Invoking a Custom Event
To trigger your Custom Event from your application, make a request to the POST /run/event endpoint. You’ll need to specify three key pieces of information:- event: The name of your Custom Event (e.g.,
invoice_created) - userId: The unique identifier for the user triggering this workflow
- data: An object containing the values for each field in your schema
invoice_created Custom Event:
Sample Request
Best Practices
When working with Custom Events, keep these guidelines in mind: Choose descriptive event names: Use clear, action-based names likeinvoice_created, order_completed, or user_onboarded that immediately communicate what triggered the workflow.
Keep schemas focused: Include only the data points your workflow actually needs. Smaller, focused schemas are easier to maintain and less prone to errors.
Validate data before sending: Ensure the data you’re passing matches your schema structure. Missing or incorrectly typed fields can cause workflow failures.
Use consistent naming conventions: Stick to a naming pattern across your Custom Events (e.g., Title Case for event names, camelCase for field names) to maintain consistency as you scale.
Handle errors gracefully: Implement error handling when invoking Custom Events to catch and log failures for debugging.