Scheduled Sync: 3rd Party App to Your App
How to Efficiently Retrieve Data on a Schedule
Overview
In this guide, you will learn how to use Alloy's Schedule Trigger to Sync data between a 3rd party and your application on a set interval you determine. The Alloy Schedule Trigger allows different settings to run workflows on set intervals. Workflows can be run as frequently as every 1 minute.
To Sync Data on a Schedule from a 3rd party to your app efficiently, it's important to only fetch new records each time the workflow runs. Let's take this example flow

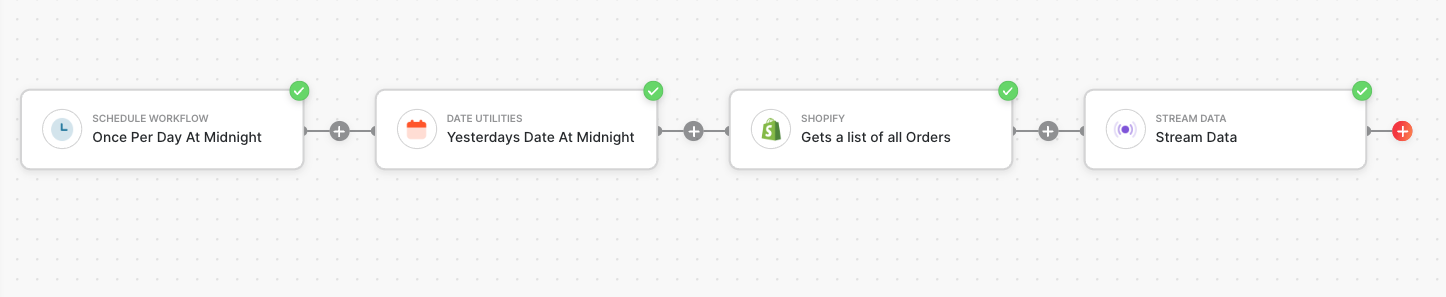
As constructed, this workflow will fetch All Orders every 1 day.
To refine the workflows further and only fetch New Orders every 1 day, there are two architectures depending on your sync frequency
Low Frequency Data Sync (1hr +)
Here we refine the workflow and only fetch orders created in the last 24 hours (since the last check). Using the Date Utilities Block, we calculate the timestamp for 1 day ago at Midnight.
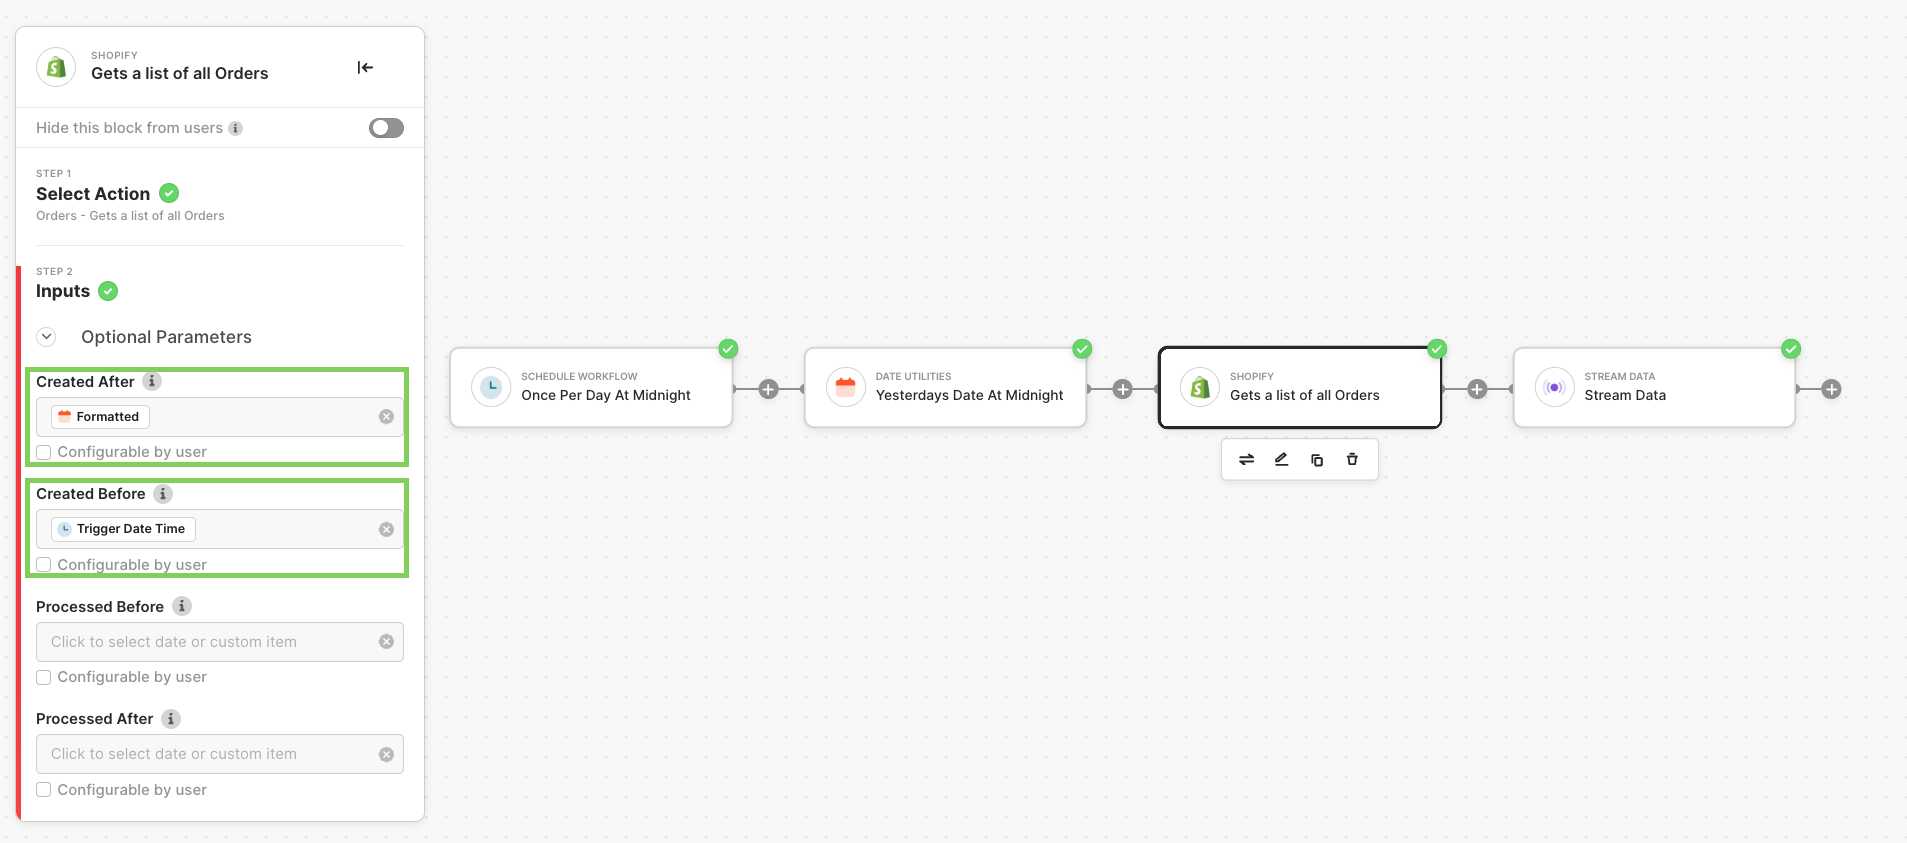
In the Shopify Block, we can now pass these parameters as filters so we only capture orders for a single full day upon each execution
Similar logic can be used to do scheduled syncs as frequently as every 1 Hour.
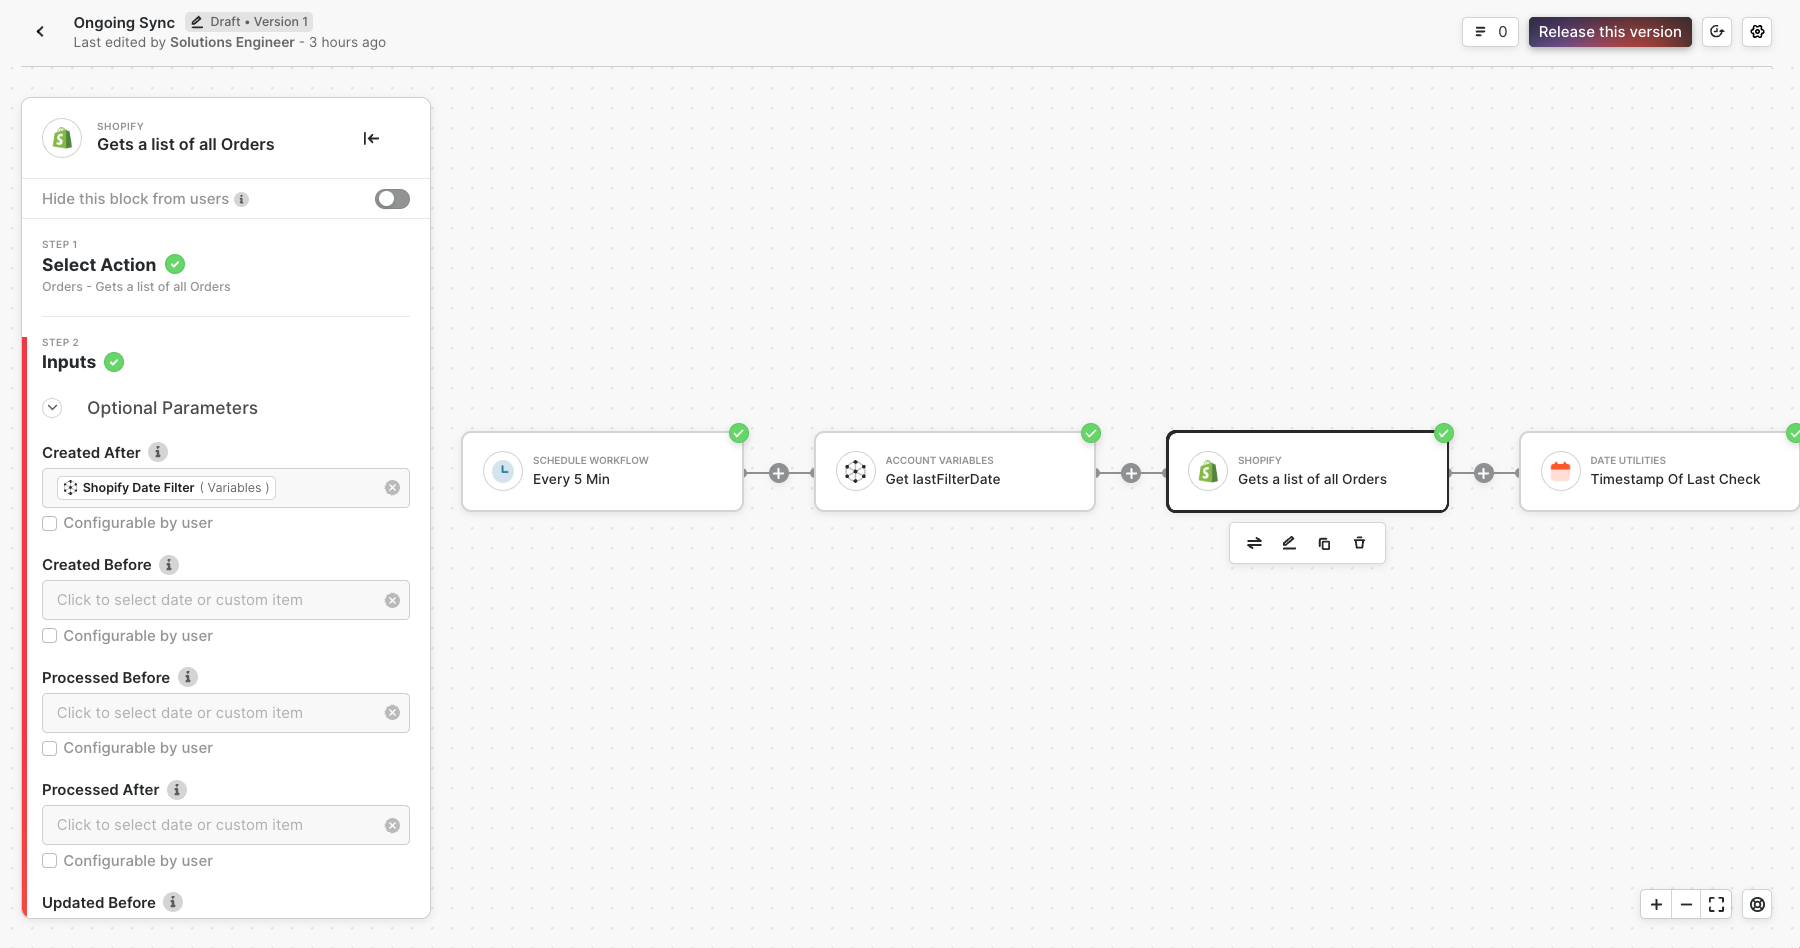
High Frequency Data Sync (< 1 Hr)
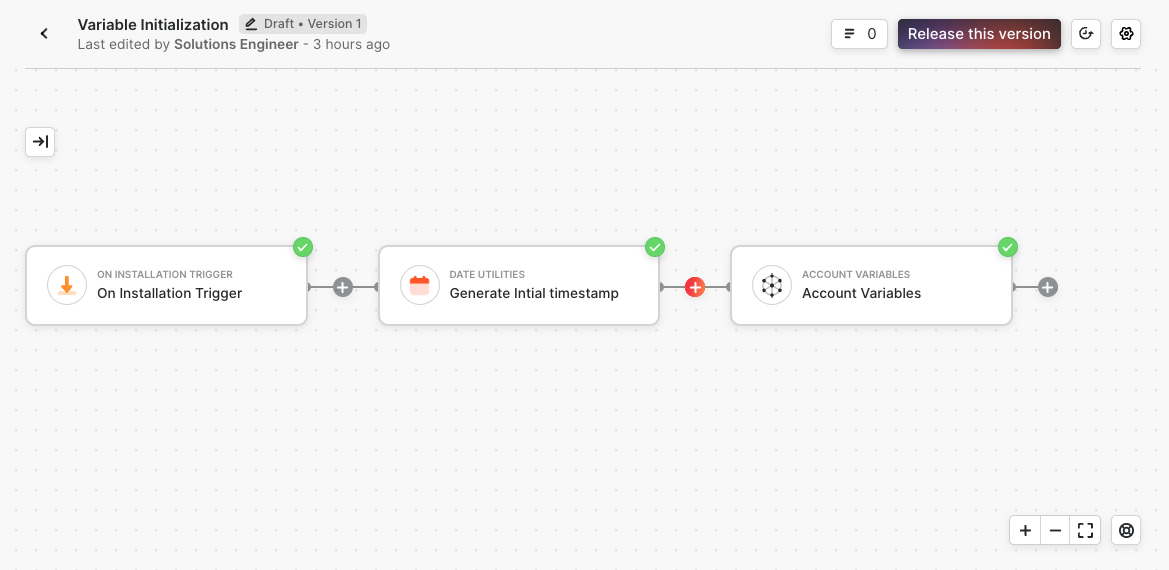
To sync data on an interval lower than 1 hour, there is a bit more setup. We'll make use of Account Variables to store the lastFilterDate across executions to only fetch the records changed since the last run.
Account Variables persist at the Alloy-User level. Each Installation has it's own instance of this variable tied to that specific Alloy user. They are not global across all installs.
To build a sync every 5 minutes we need two workflows
- Initialize the variable with a value (5 minutes ago, or can be 6 months ago to do a historical sync on first run)
- Use the
Set Variablesaction to create thelastFilterDategenerated by theDate Utility
- Use the
- Scheduled workflow, using variable from workflow 1, and updating the value of
lastFilterDatewhen complete- Fetch
lastFilterDatefrom workflow 1 - Pass
lastFilterDateinto thecreatedAfterShopify Query Parameters - Set
lastFilterDateto the currenttimestampfrom theDate Utilitywhen complete
- Fetch
Workflow 1
Workflow 2
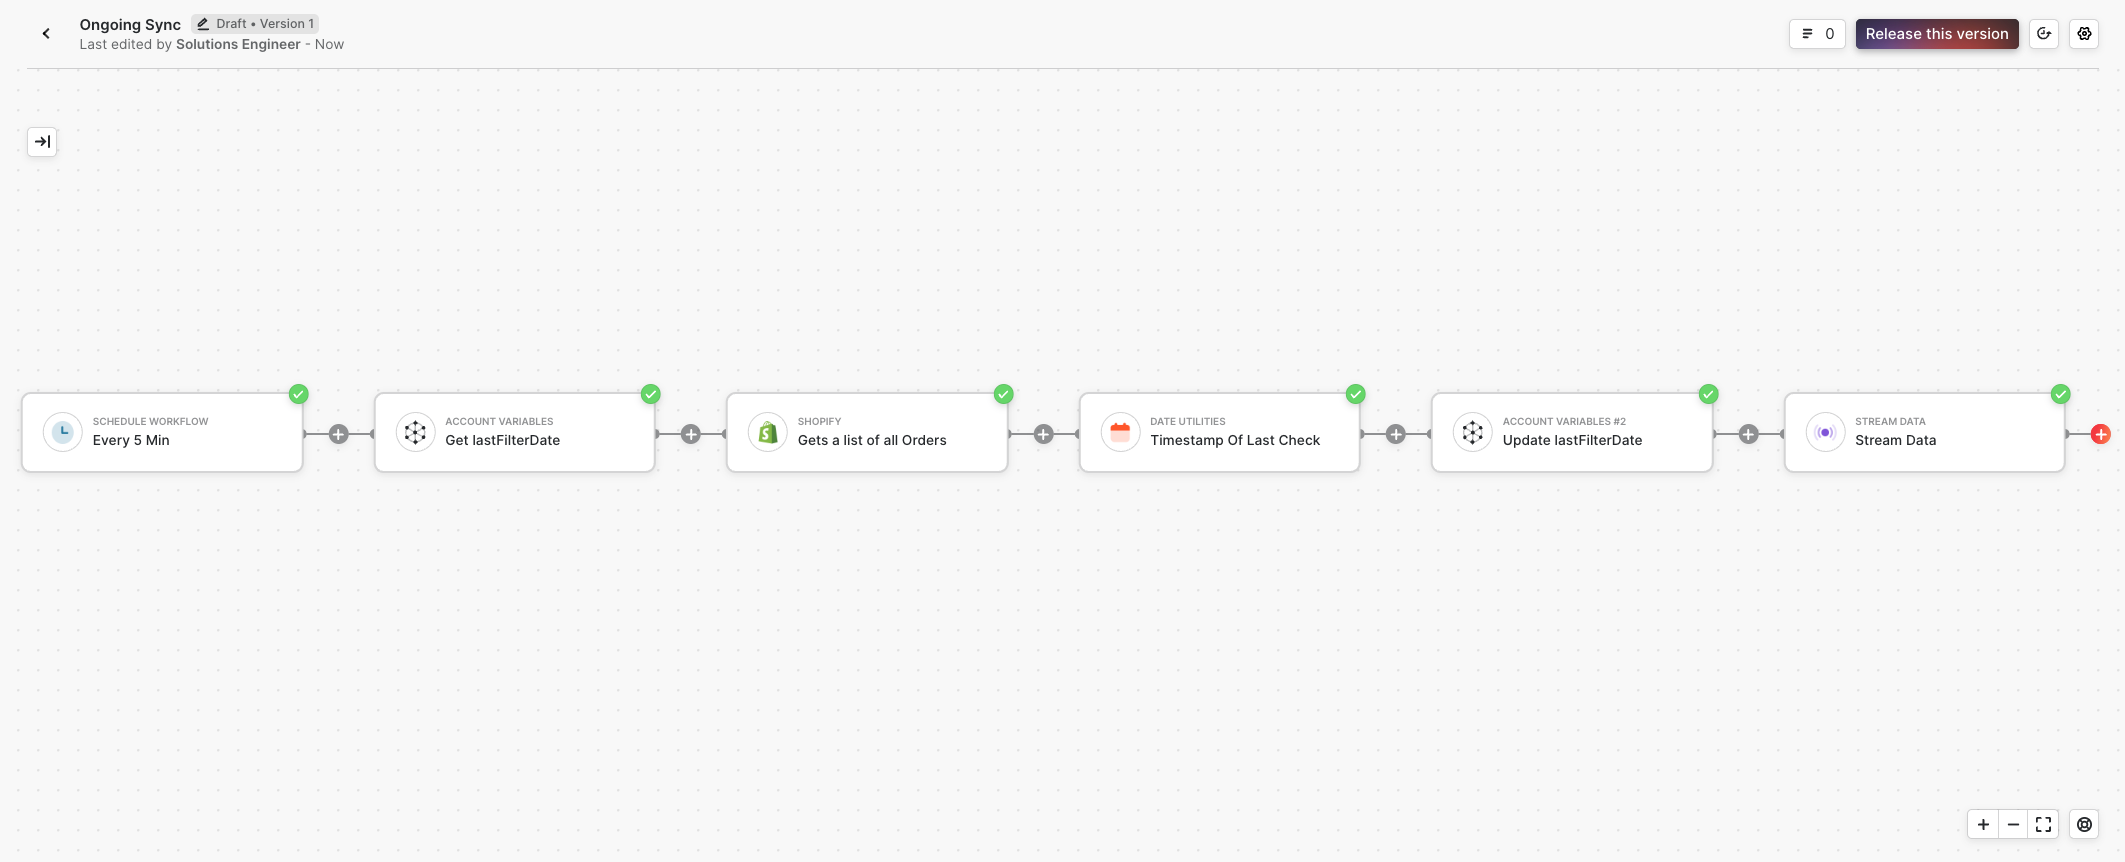
Note the filters inside the Shopify List Orders Block
Workflow Summary
On the first run, we collect historical records from the variable initialization date chose. On the second run, we use the variable to query from that lastFilterDate. Once we've completed pagination through new orders, the lastFilterDate is updated with the timestamp generated after the List All Orders Block has finished.
Updated 4 months ago