Webhooks + API Request Blocks
Incoming API Requests
Making requests to Alloy
To make requests to Alloy, use our Webhooks block. Once you define a workflow, you can set up a webhook as a trigger to send incoming data to the workflow
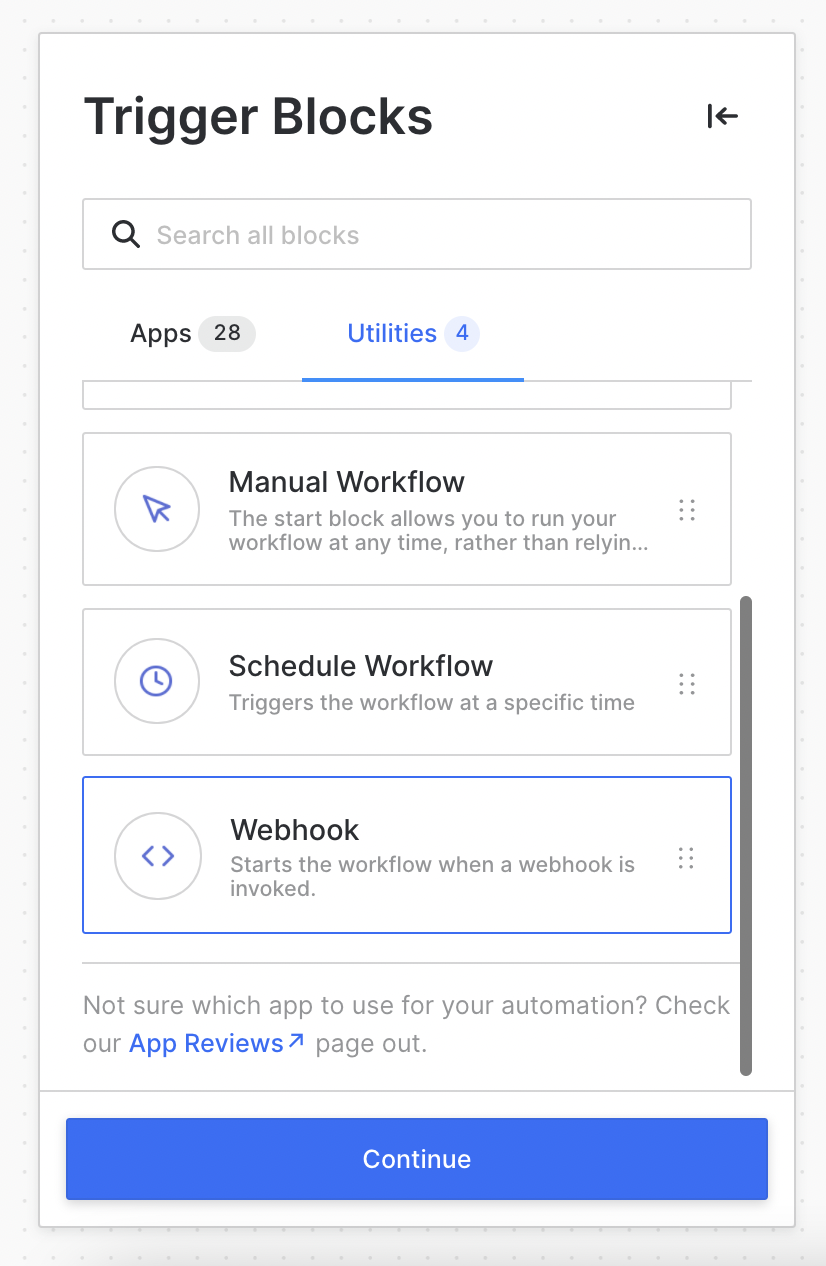
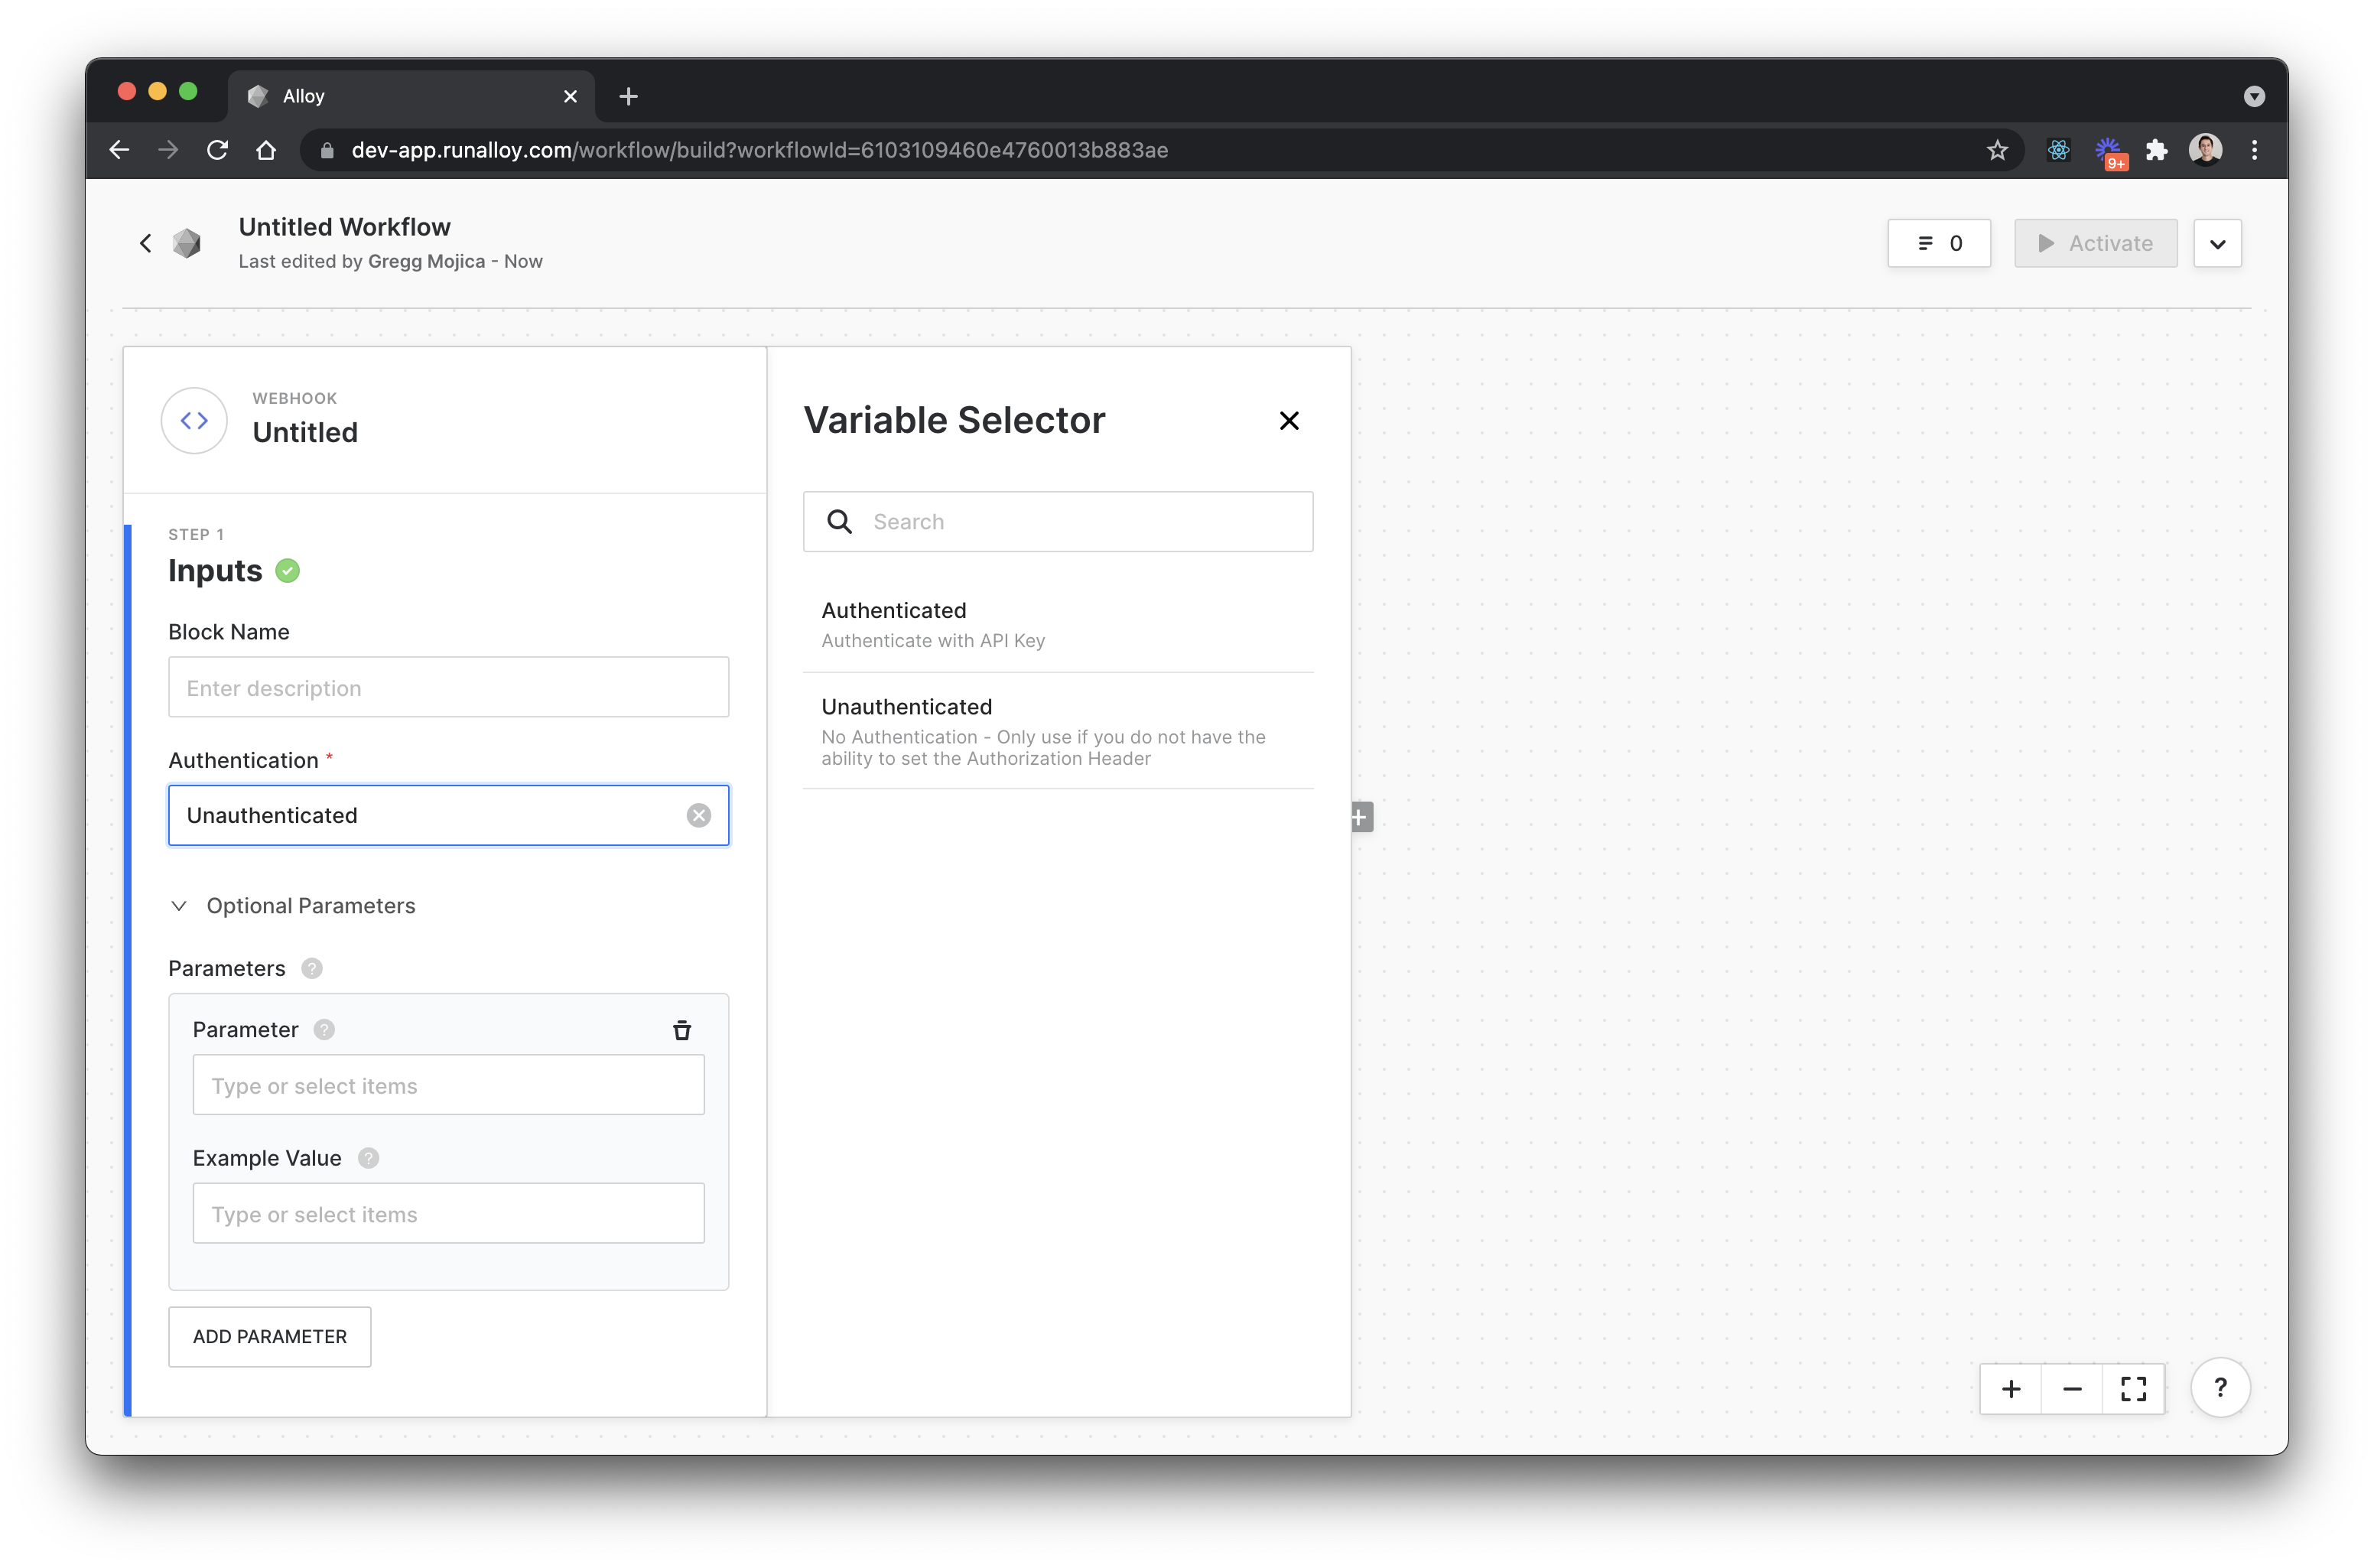
You’ll be prompted to select a form of authentication: Alloy supports API Key authentication and you also have the option to have no authentication.
Note: For security reasons, you should have some form of authentication if you’re planning on accessing sensitive information in your workflow.
For the purposes of our tutorial, we’ll select Unauthenticated.
Next, you’ll want to define the HTTP method. Alloy supports both GET and POST requests. Lastly, select the Response Model which is typically “On received”.
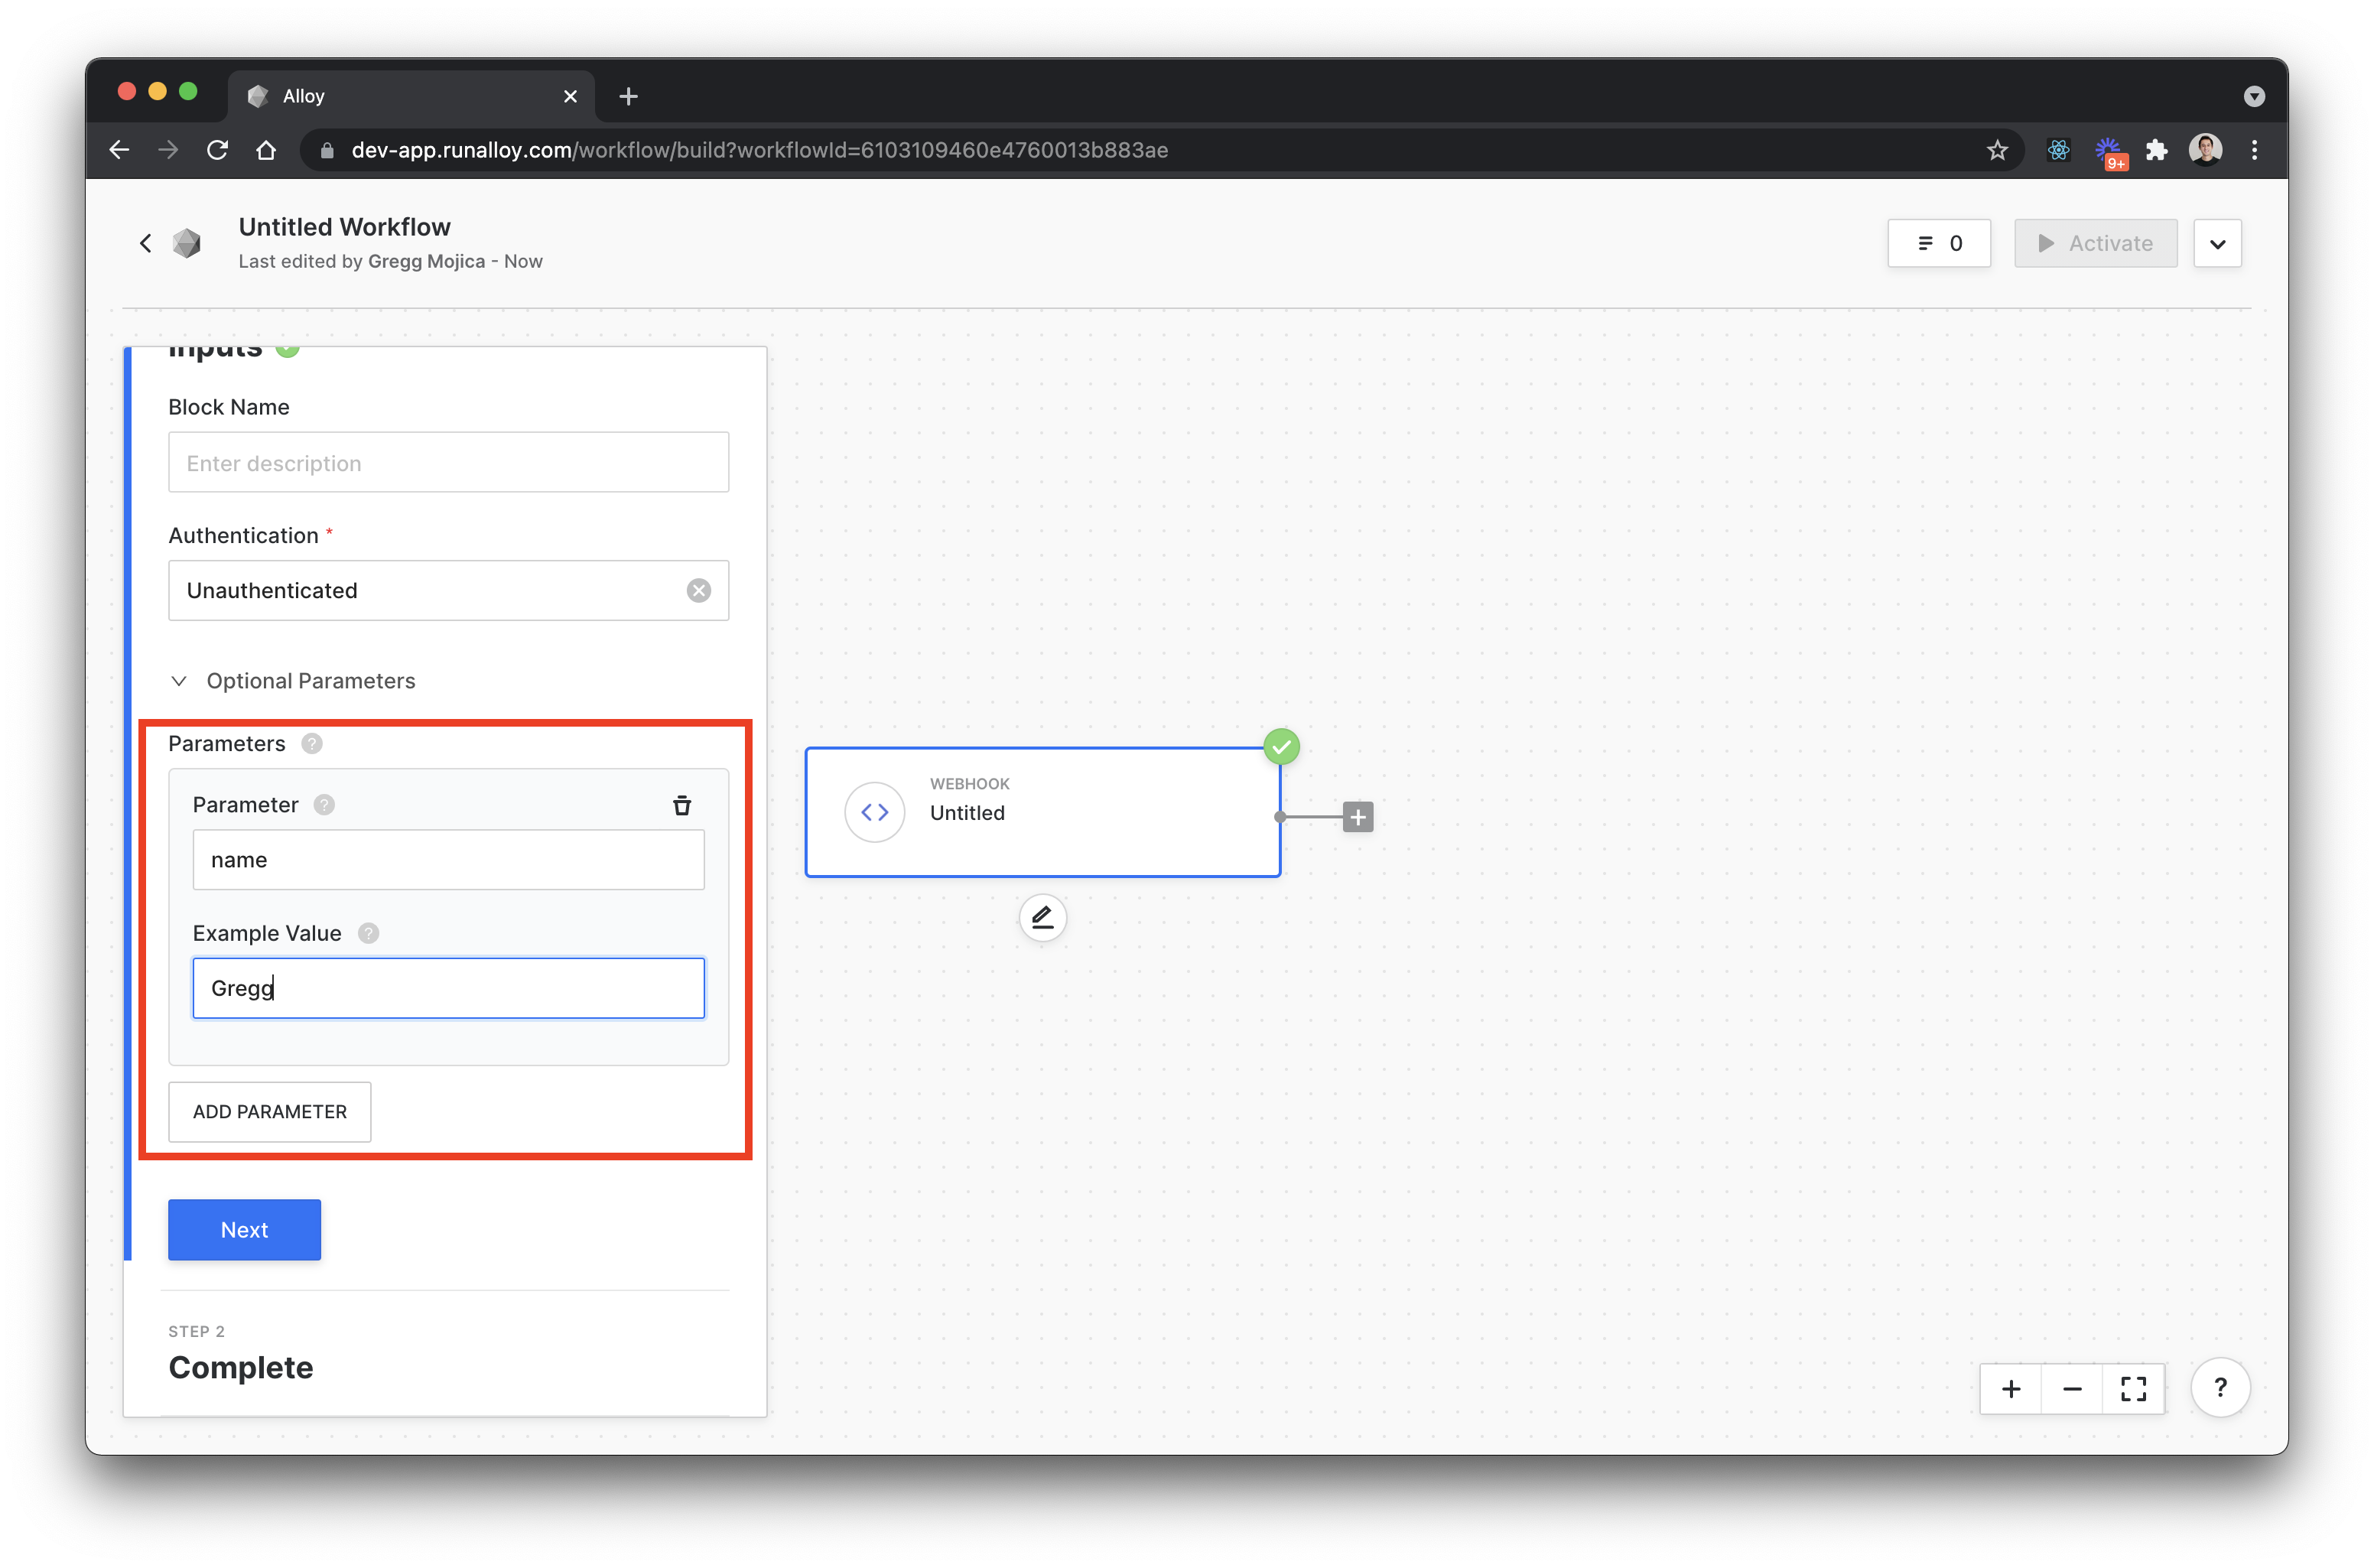
If you want to send over custom data to Alloy, chances are you’ll want to send over body data which can subsequently be passed over to other parts of the workflow. Similar to how response data from other triggers (think the Shopify trigger) works, you can use any parameters you define in the webhook in future blocks in the workflow as variables.
Let’s create a parameter called name and give it a sample value of Gregg as seen below
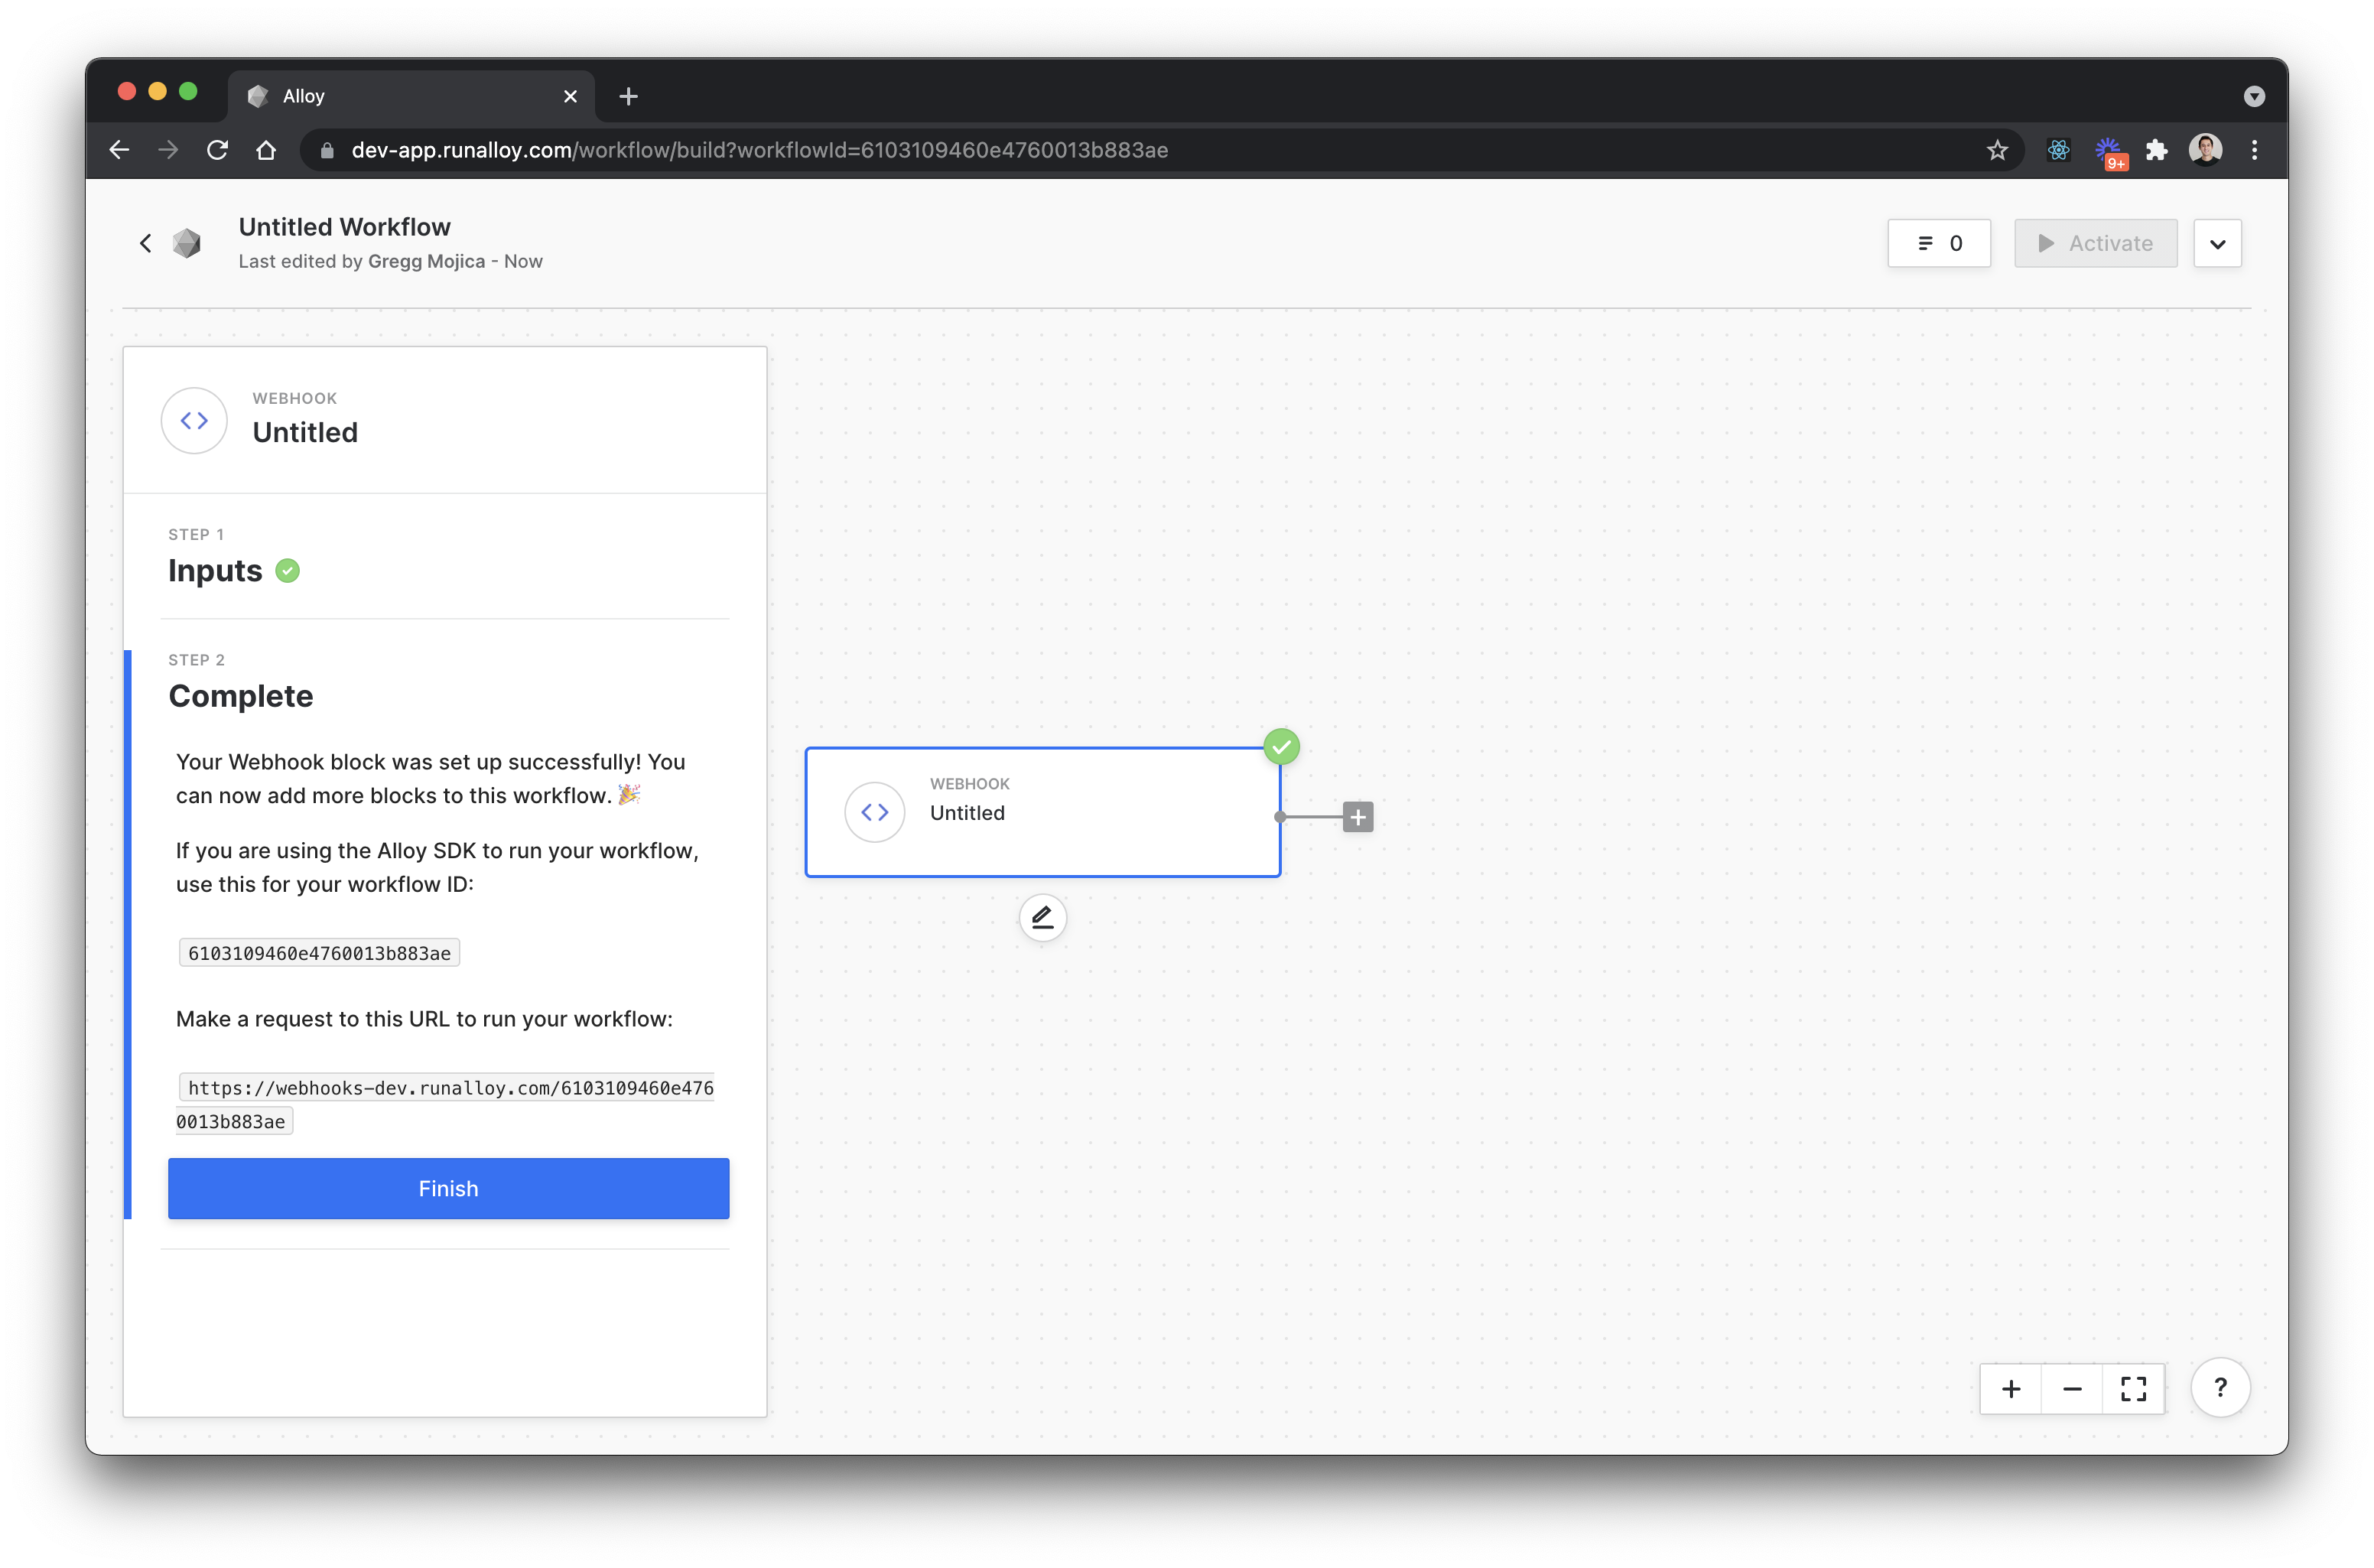
With that, you’ve successfully configured your webhook. You’ll be prompted with a URL below to make requests to and from your webhook.
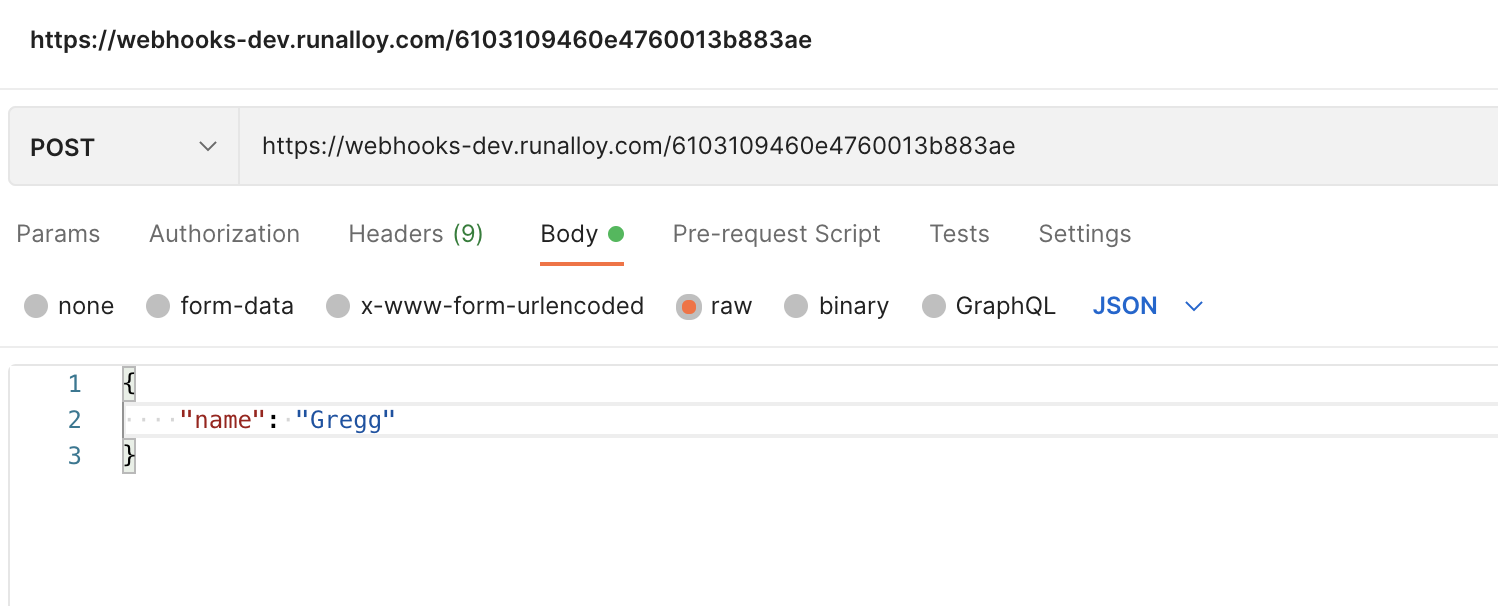
With your webhook trigger configured, you can make POST requests to it.
You can use an API tool like Postman to send outgoing data as seen below.
Outgoing API Requests
Making requests from Alloy to an external API
So far, we’ve looked at how to make requests to Alloy for triggering a workflow using the customer webhook block. While this is oftentimes useful for sending data to Alloy, many times you’ll want to take specific actions outside of Alloy (aka send data from Alloy to an external API).
Sending data from Alloy is a perfect solution for an API we don’t currently support. For example, let’s assume you have a custom form on your website that you want to update every time an Alloy workflow is submitted. Let’s take a look at an example below:
To get started, we’ll need to use the Custom API Call block.
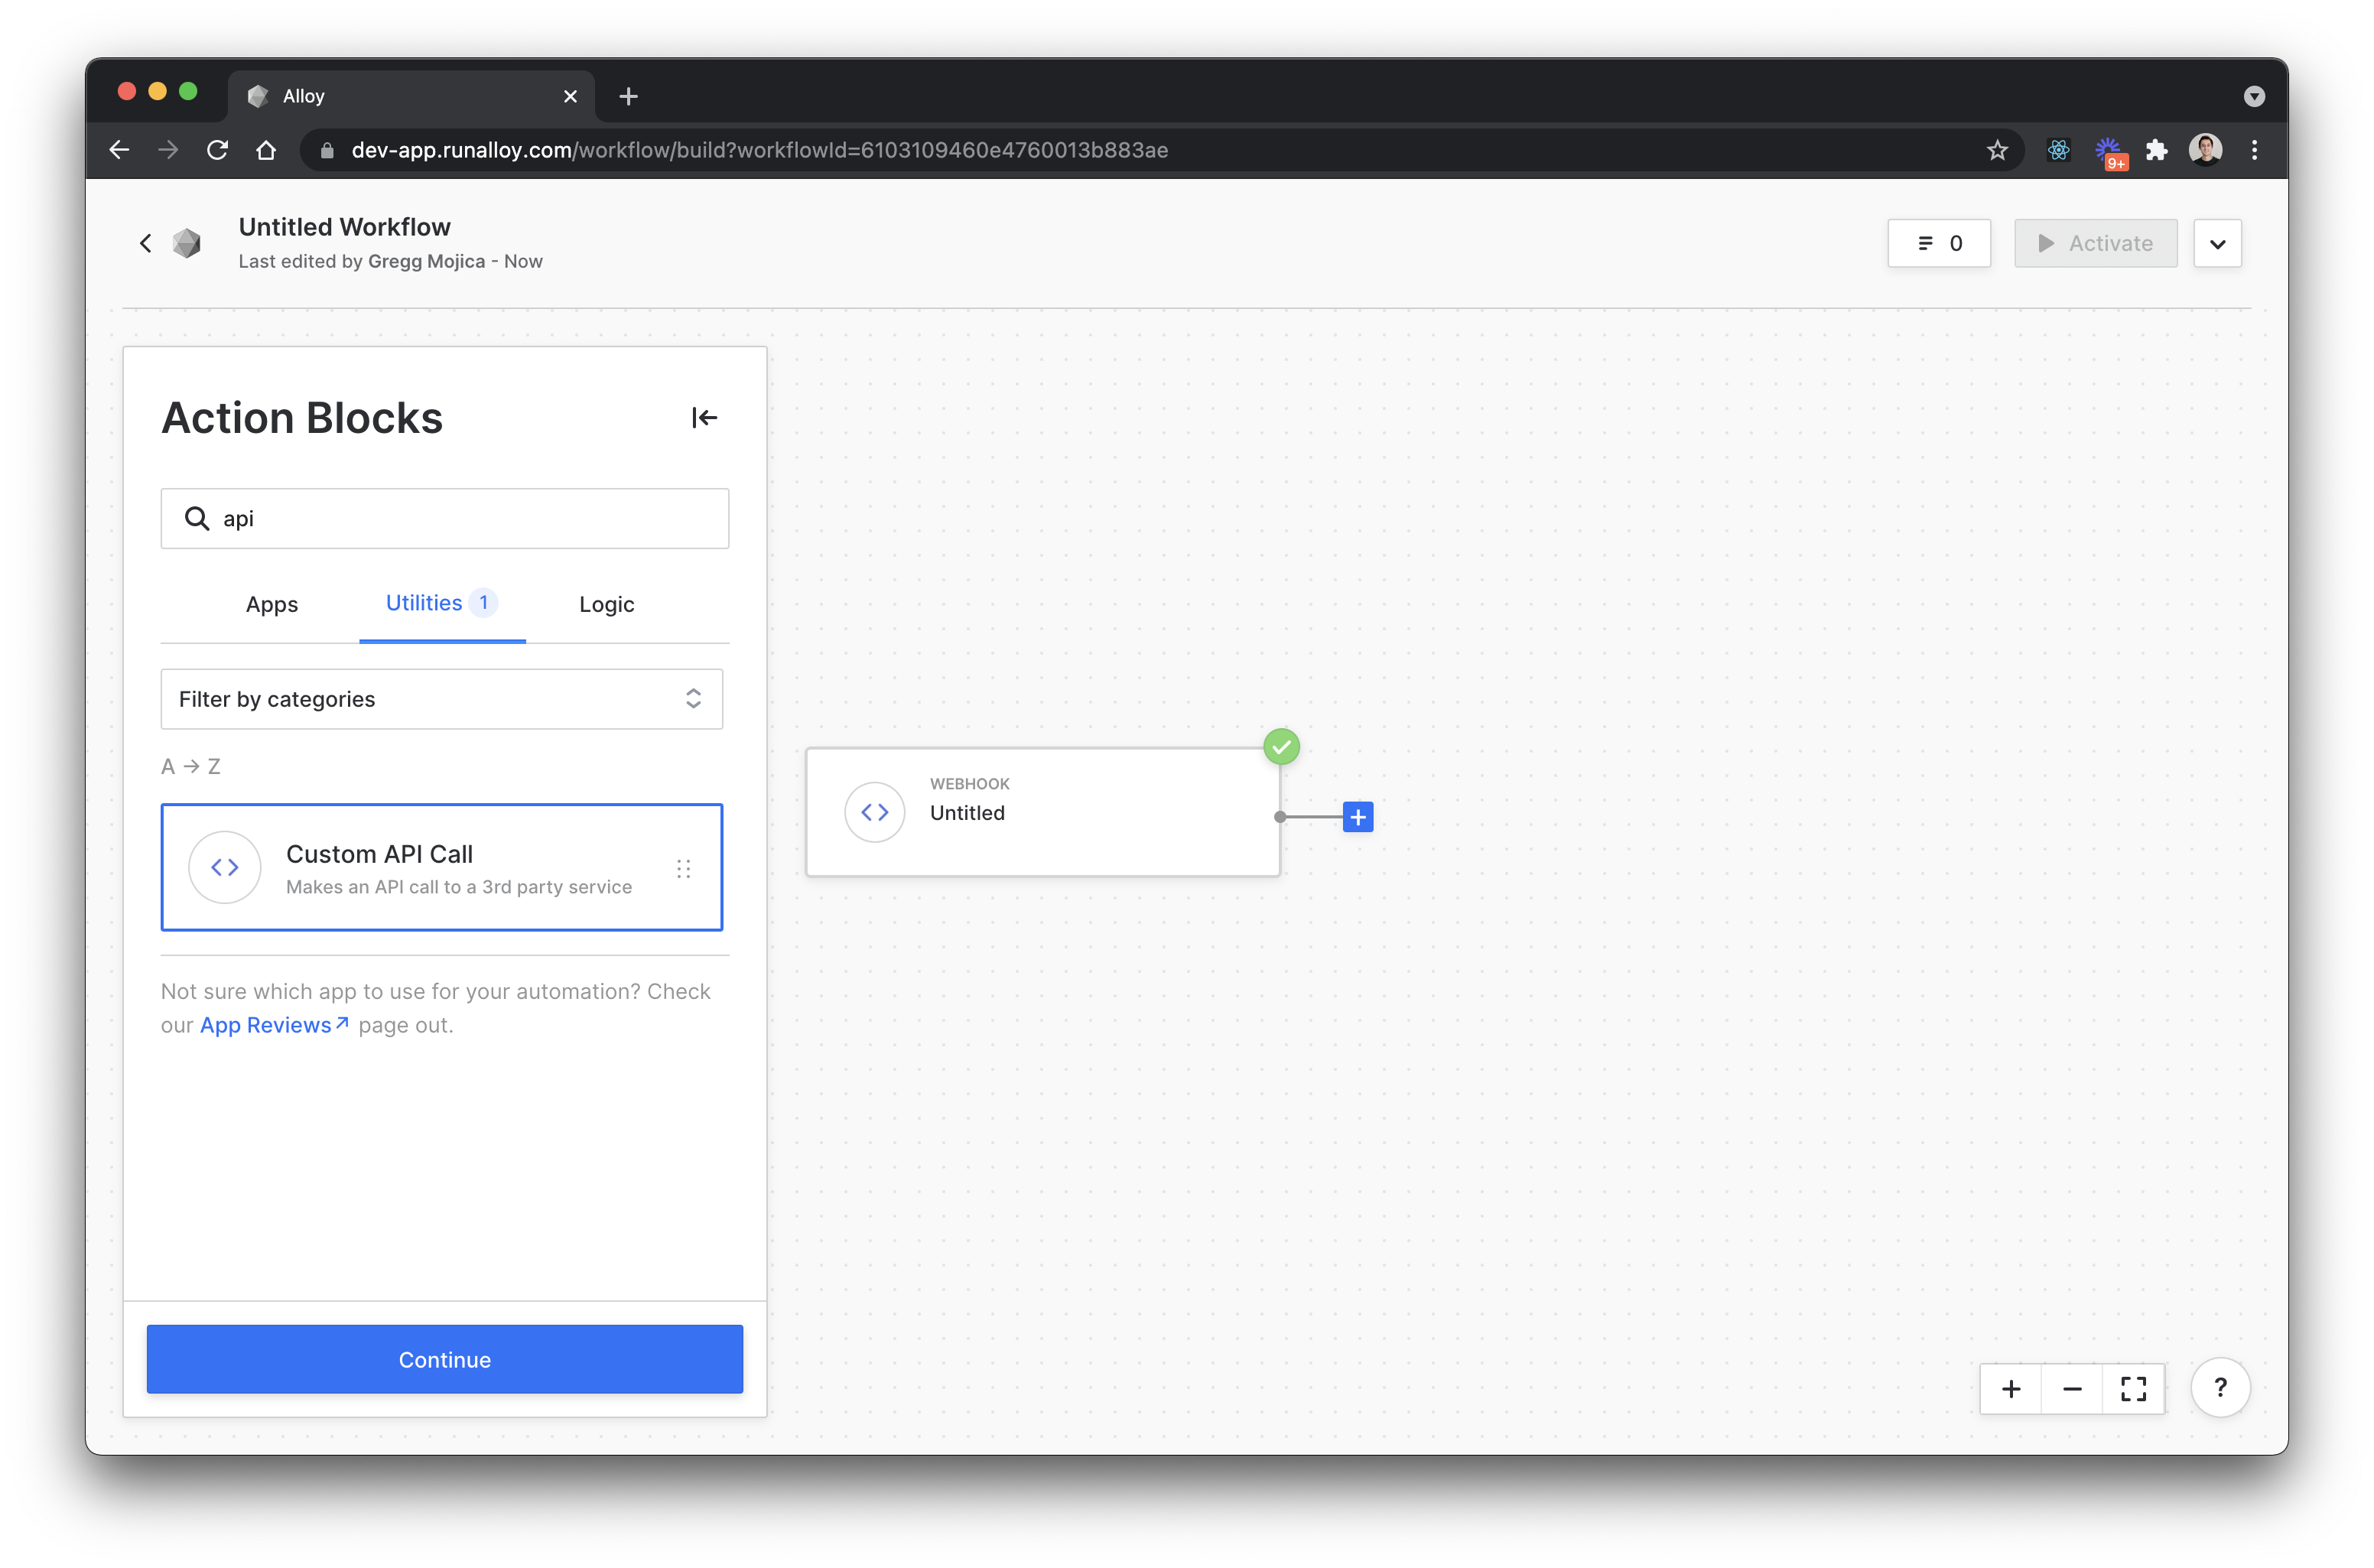
In the below example, you can customize the data sent to the Custom API Call block. For instance, you would put the API URL in the URL field.
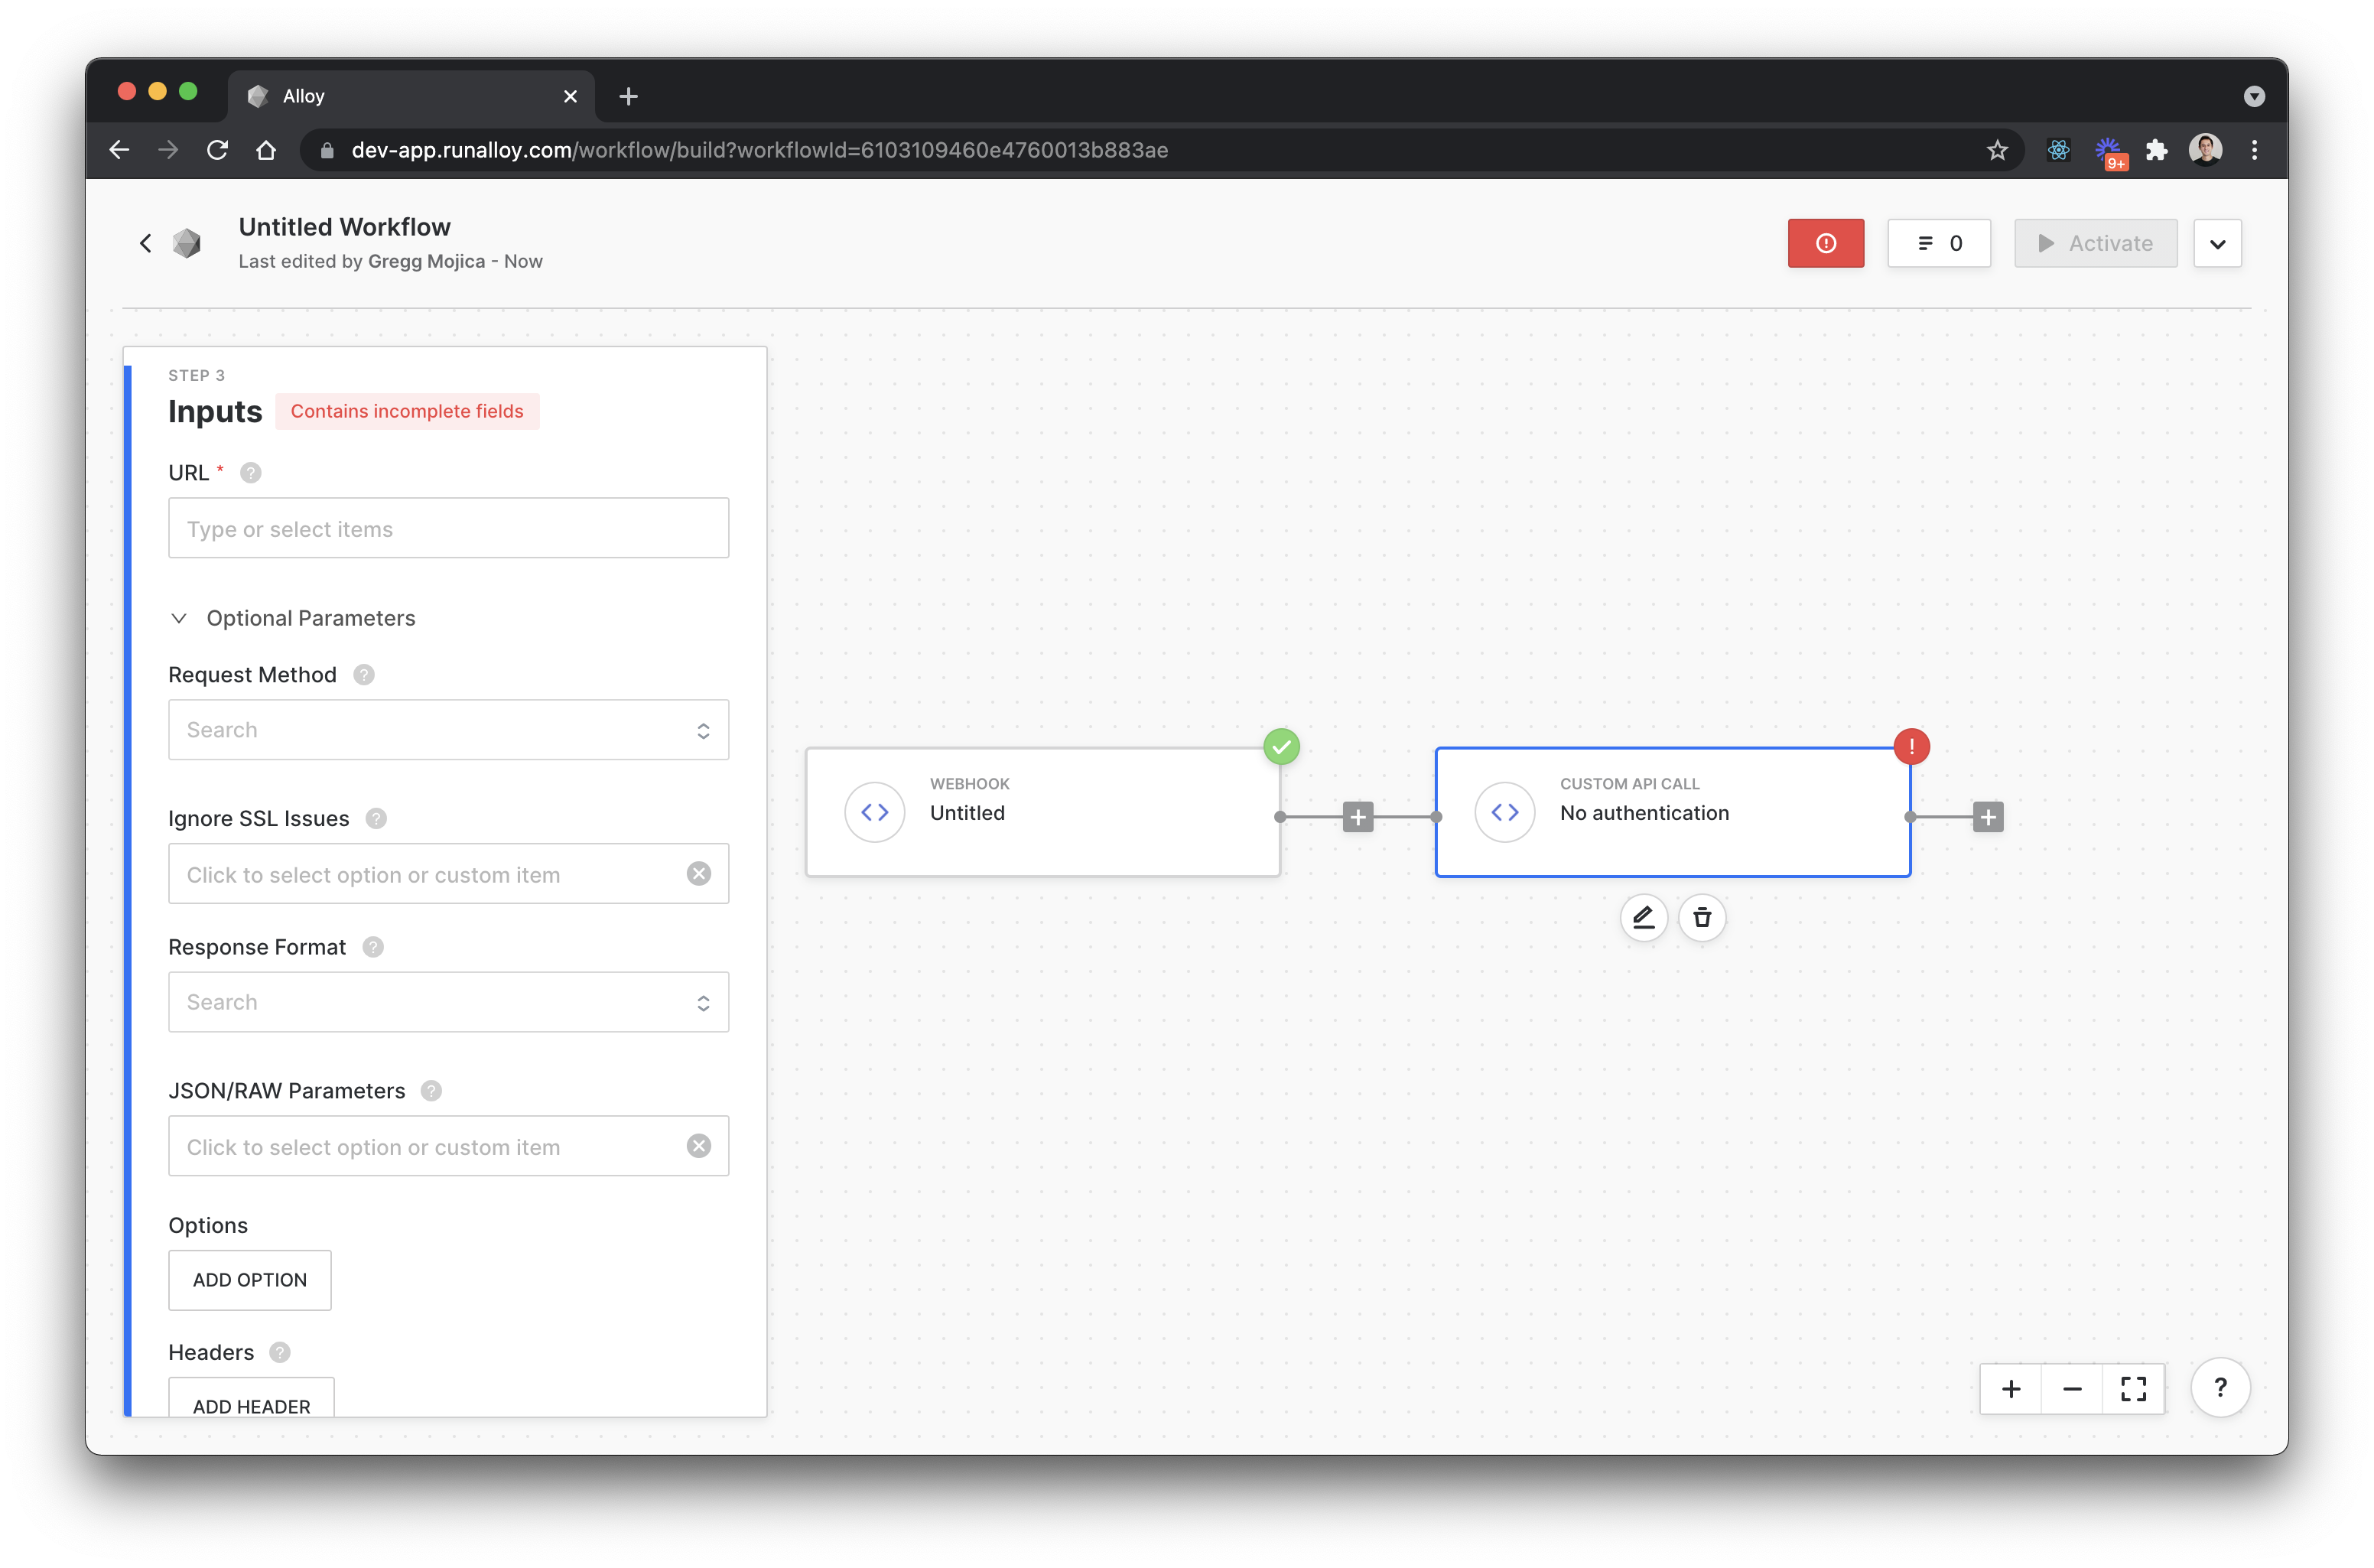
Make sure to specify the authentication type if there is one.
This block also supports all forms of API requests including DELETE, GET, PATCH, POST, PUT, etc as seen below. You can also build your request to include any header or body parameters.
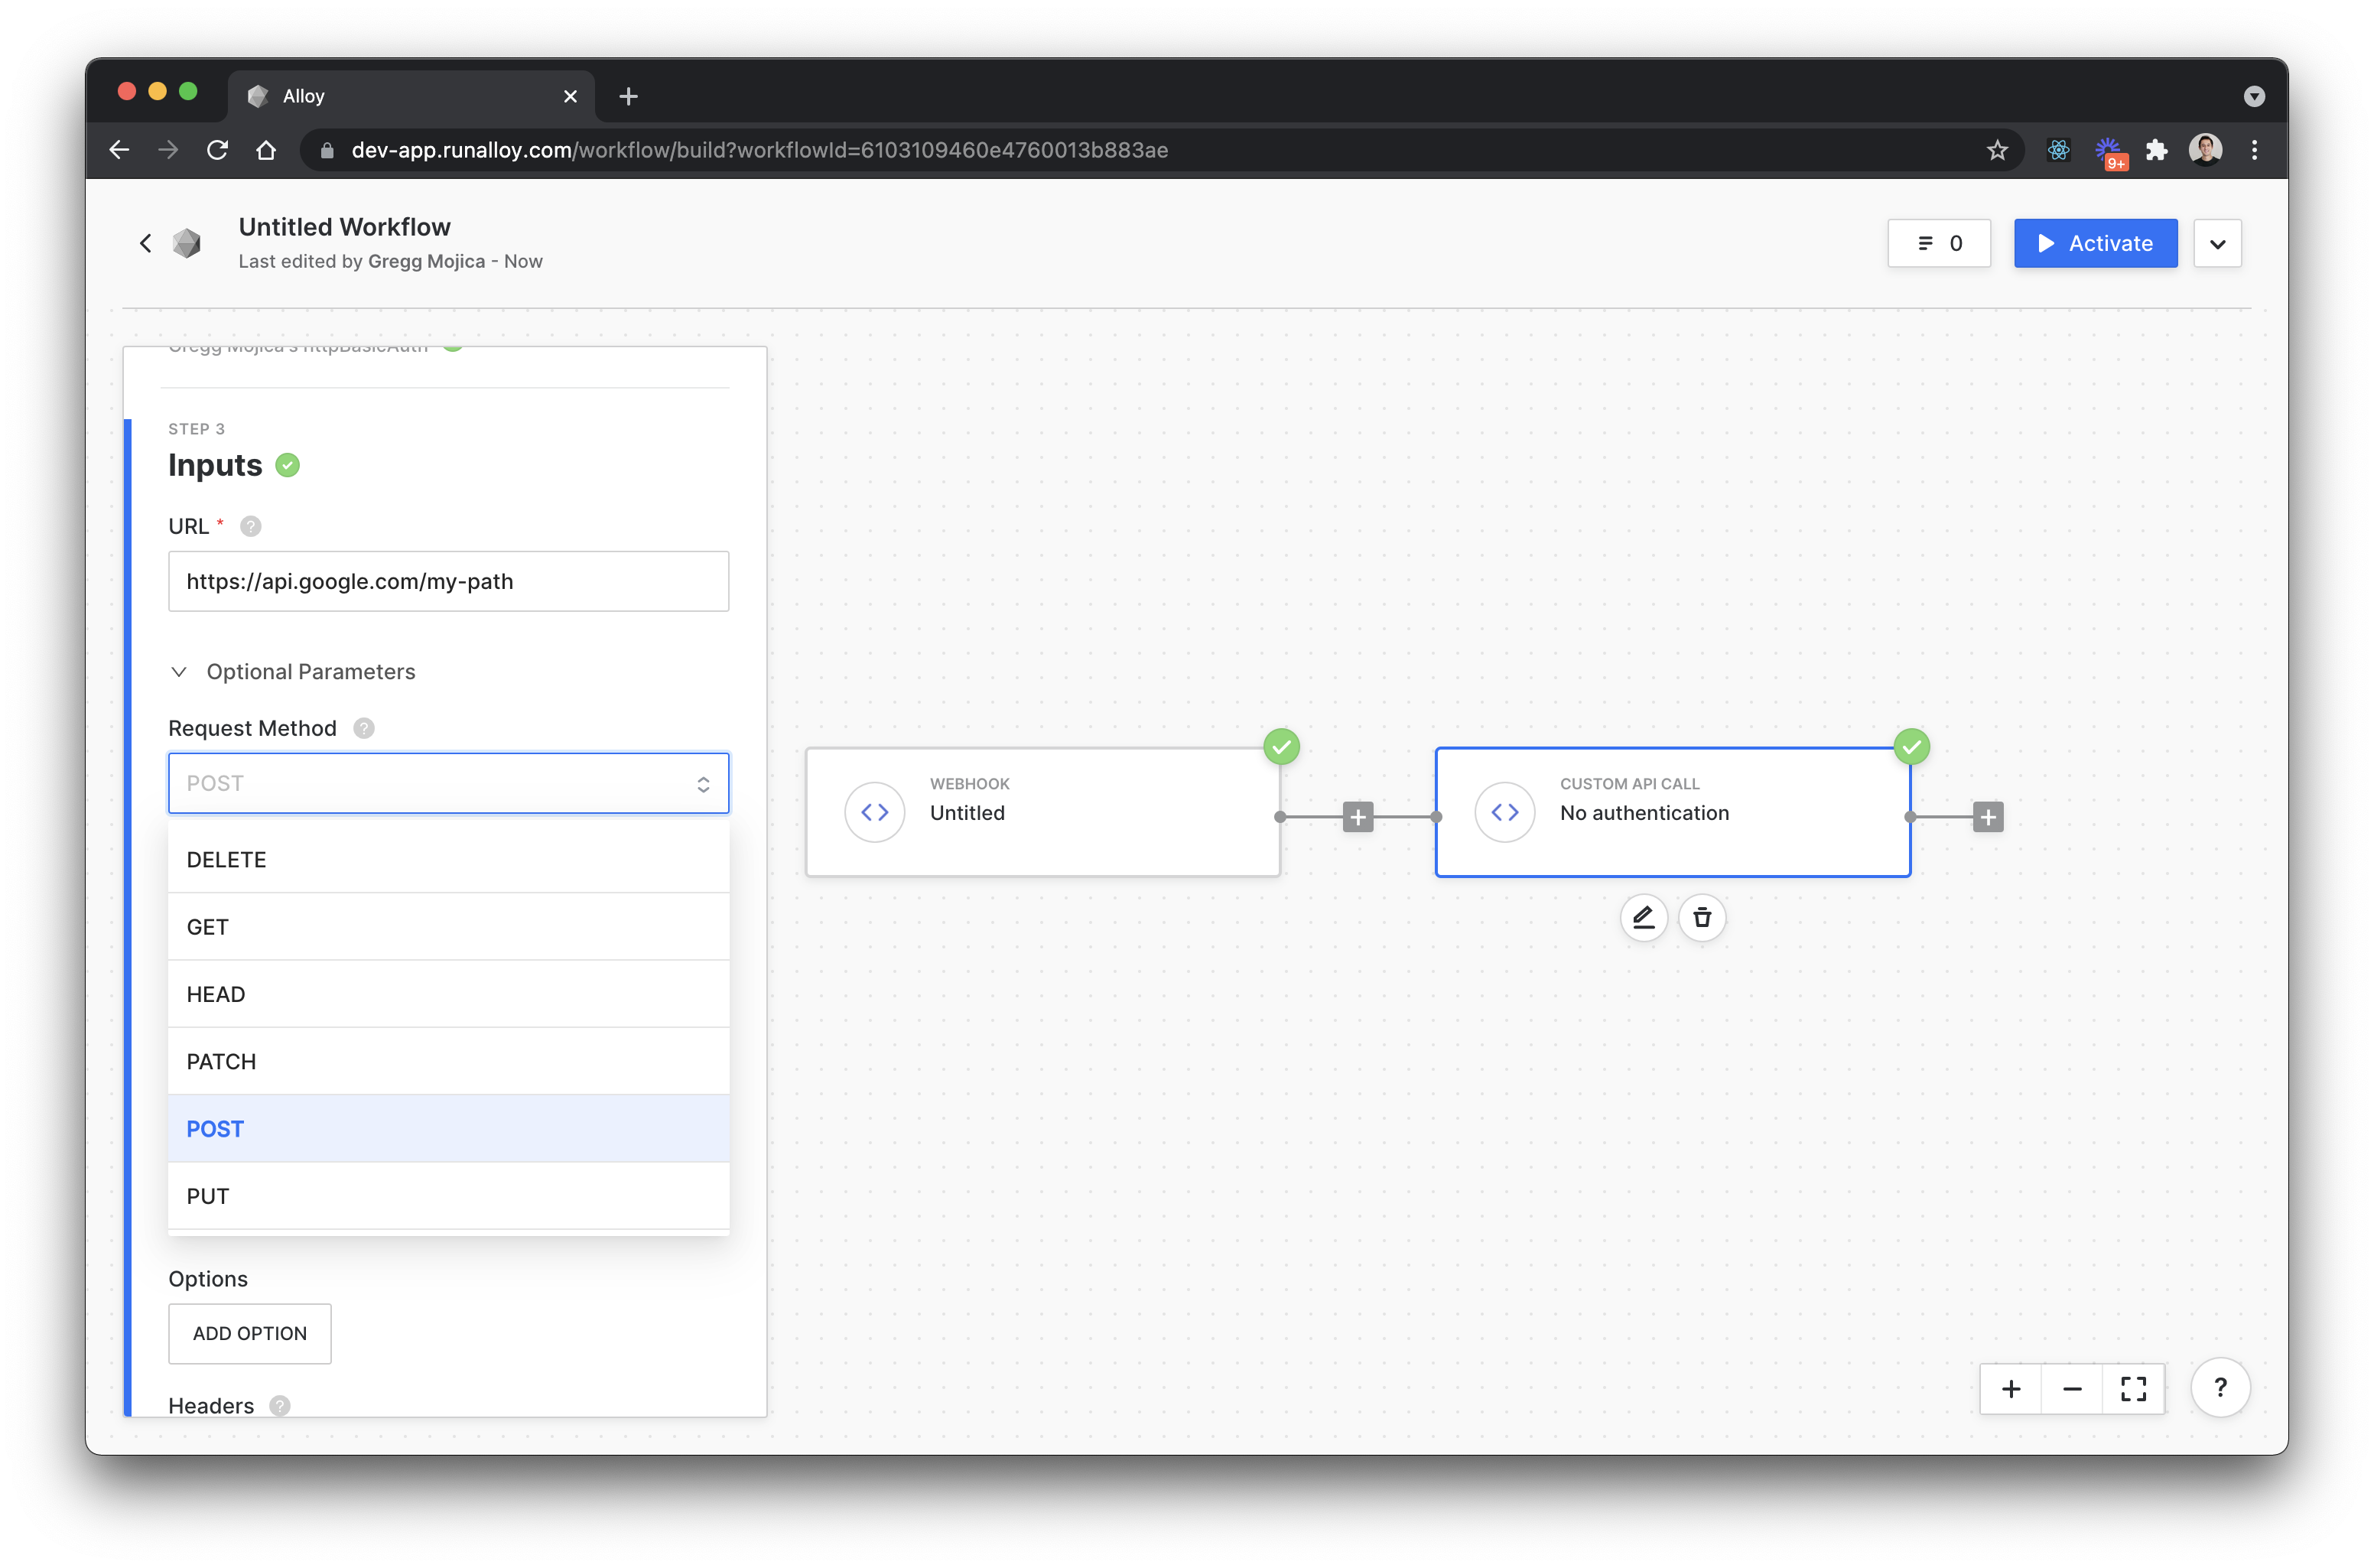
Finally, remember that you can use any variable data from previous blocks in this block as well. As usual, when you’re ready, hit the Activate button to turn on the workflow. And viola, you’re off to the races!
Updated 7 months ago
