This feature only applies to Embedded iPaaS
Overview
The Custom Code connector is designed for simple data transformations within workflows. It executes vanilla JavaScript in a Promise environment, allowing you to manipulate data between workflow steps.Use Cases
Custom Code is ideal for:- Data transformations (formatting, filtering, mapping)
- Conditional logic beyond standard blocks
- Array/object manipulations
- Data validation and cleanup
Note:Axios requests are not supported in Custom Code. To make requests to third party APIs not directly supported via a dedicated connector, please use Custom API.
Accessing Workflow Data
Example Usage of Custom Code
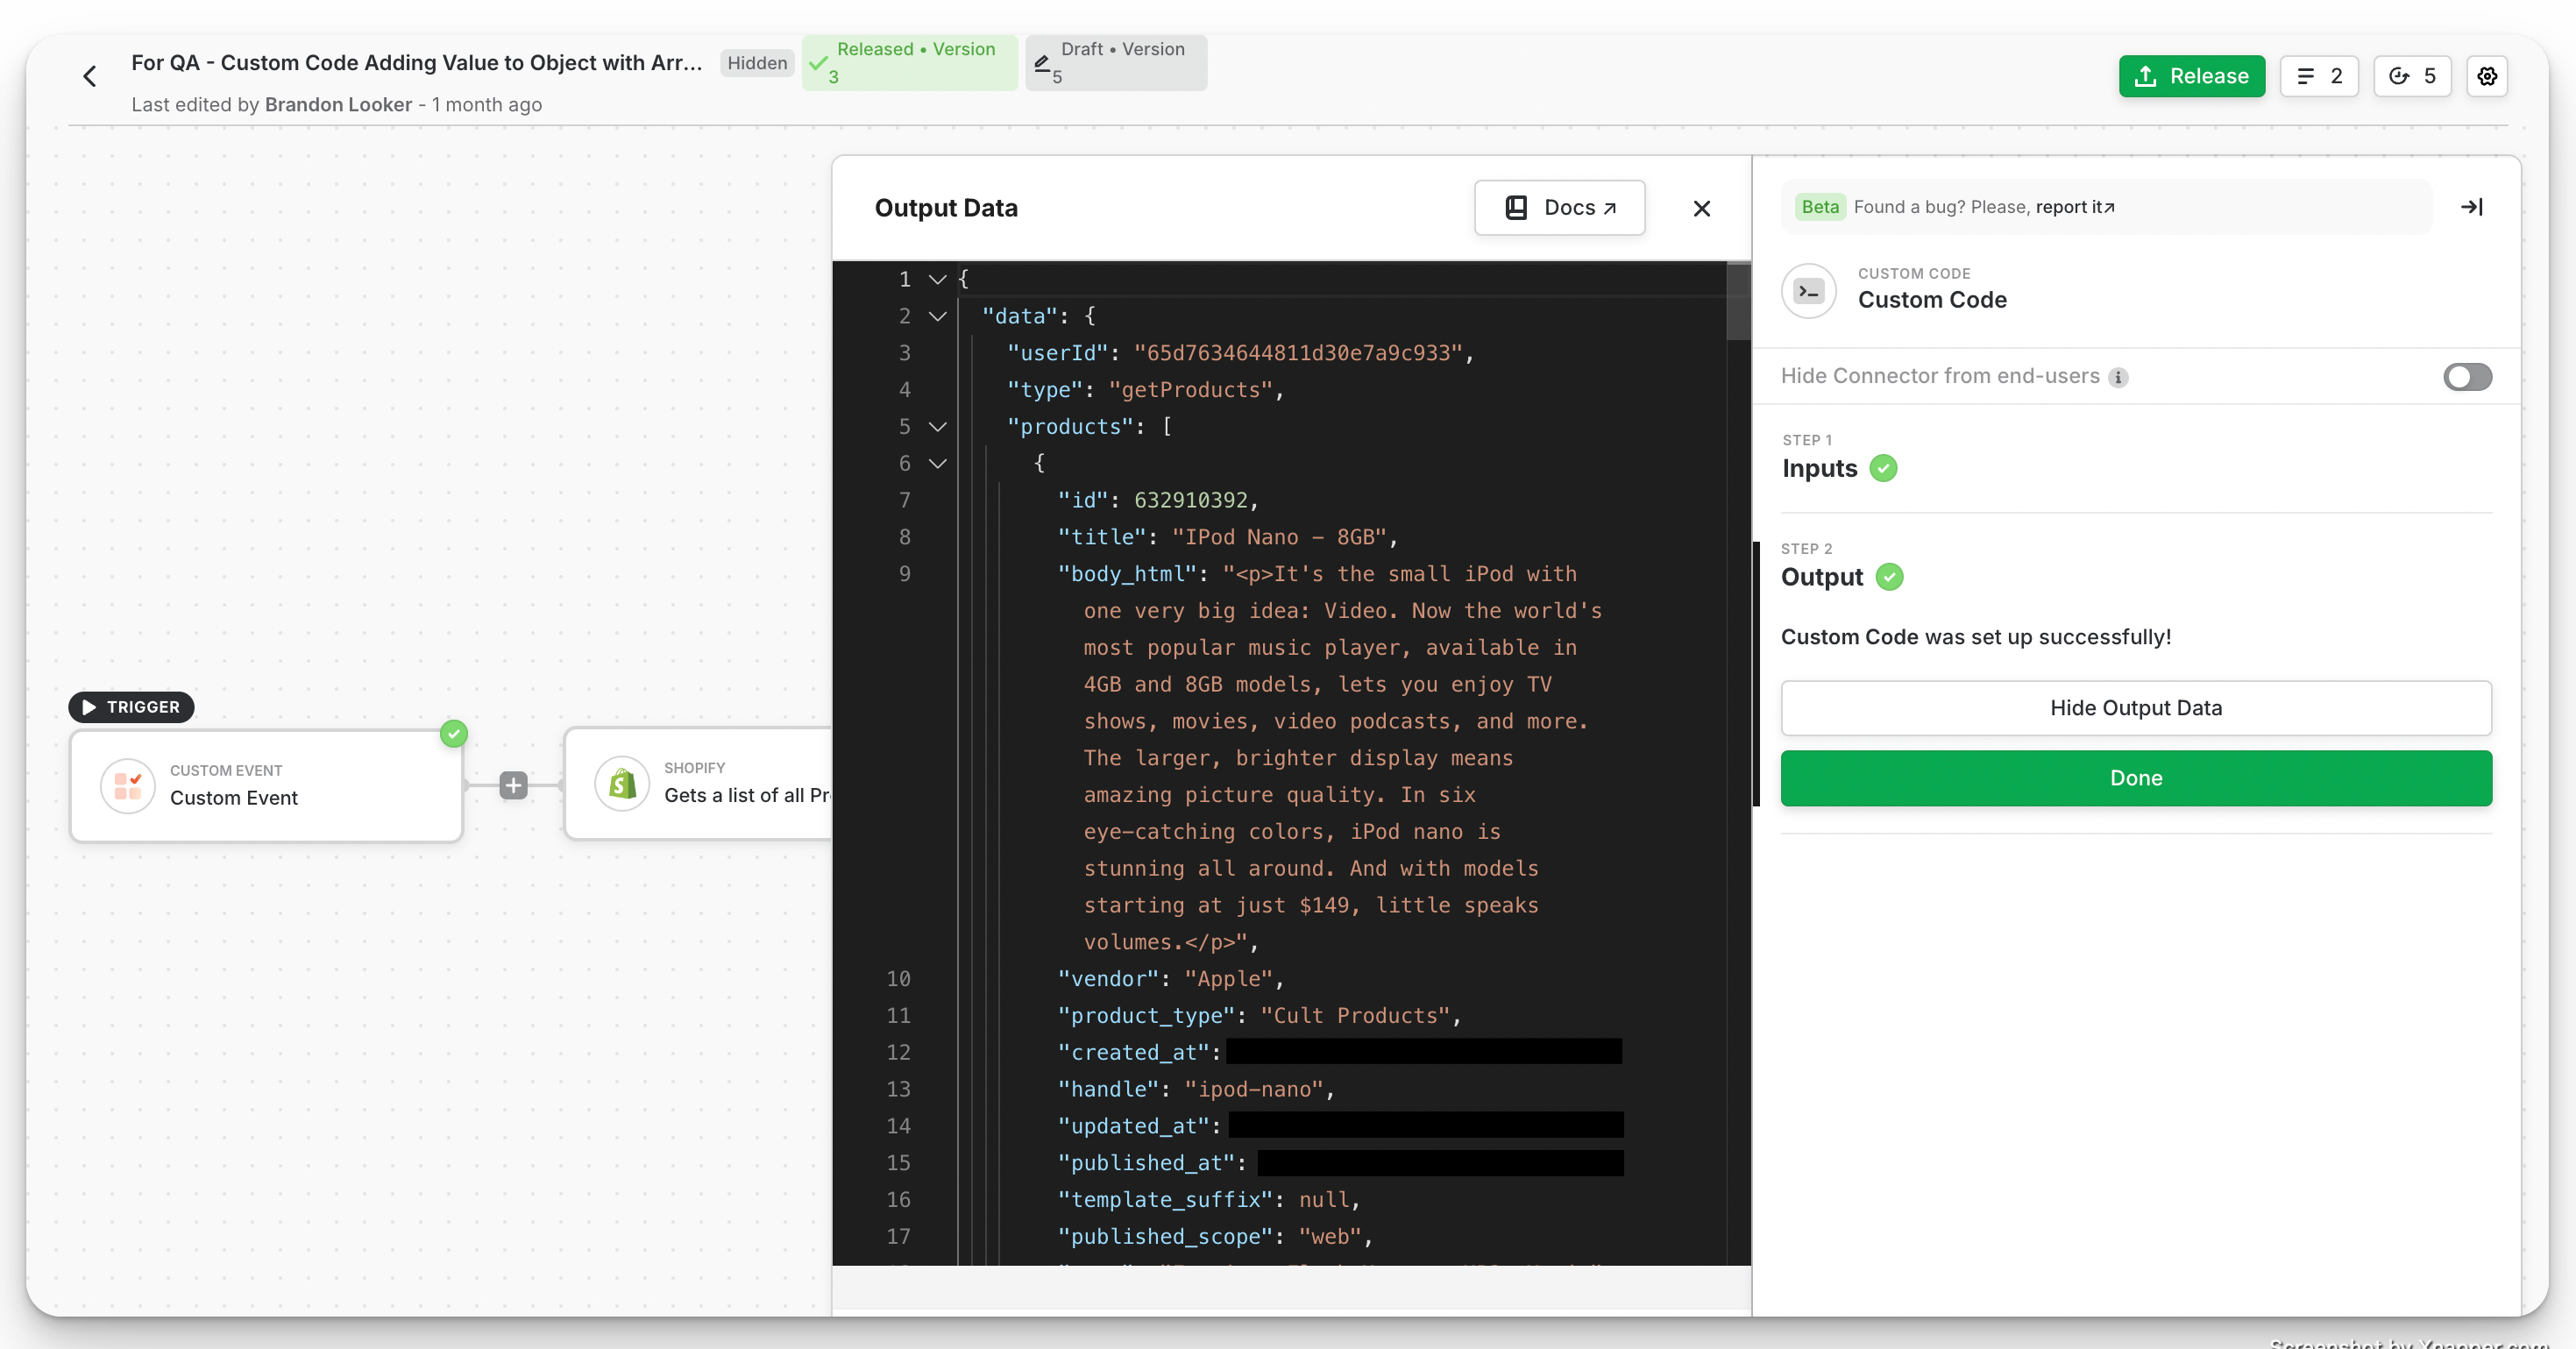
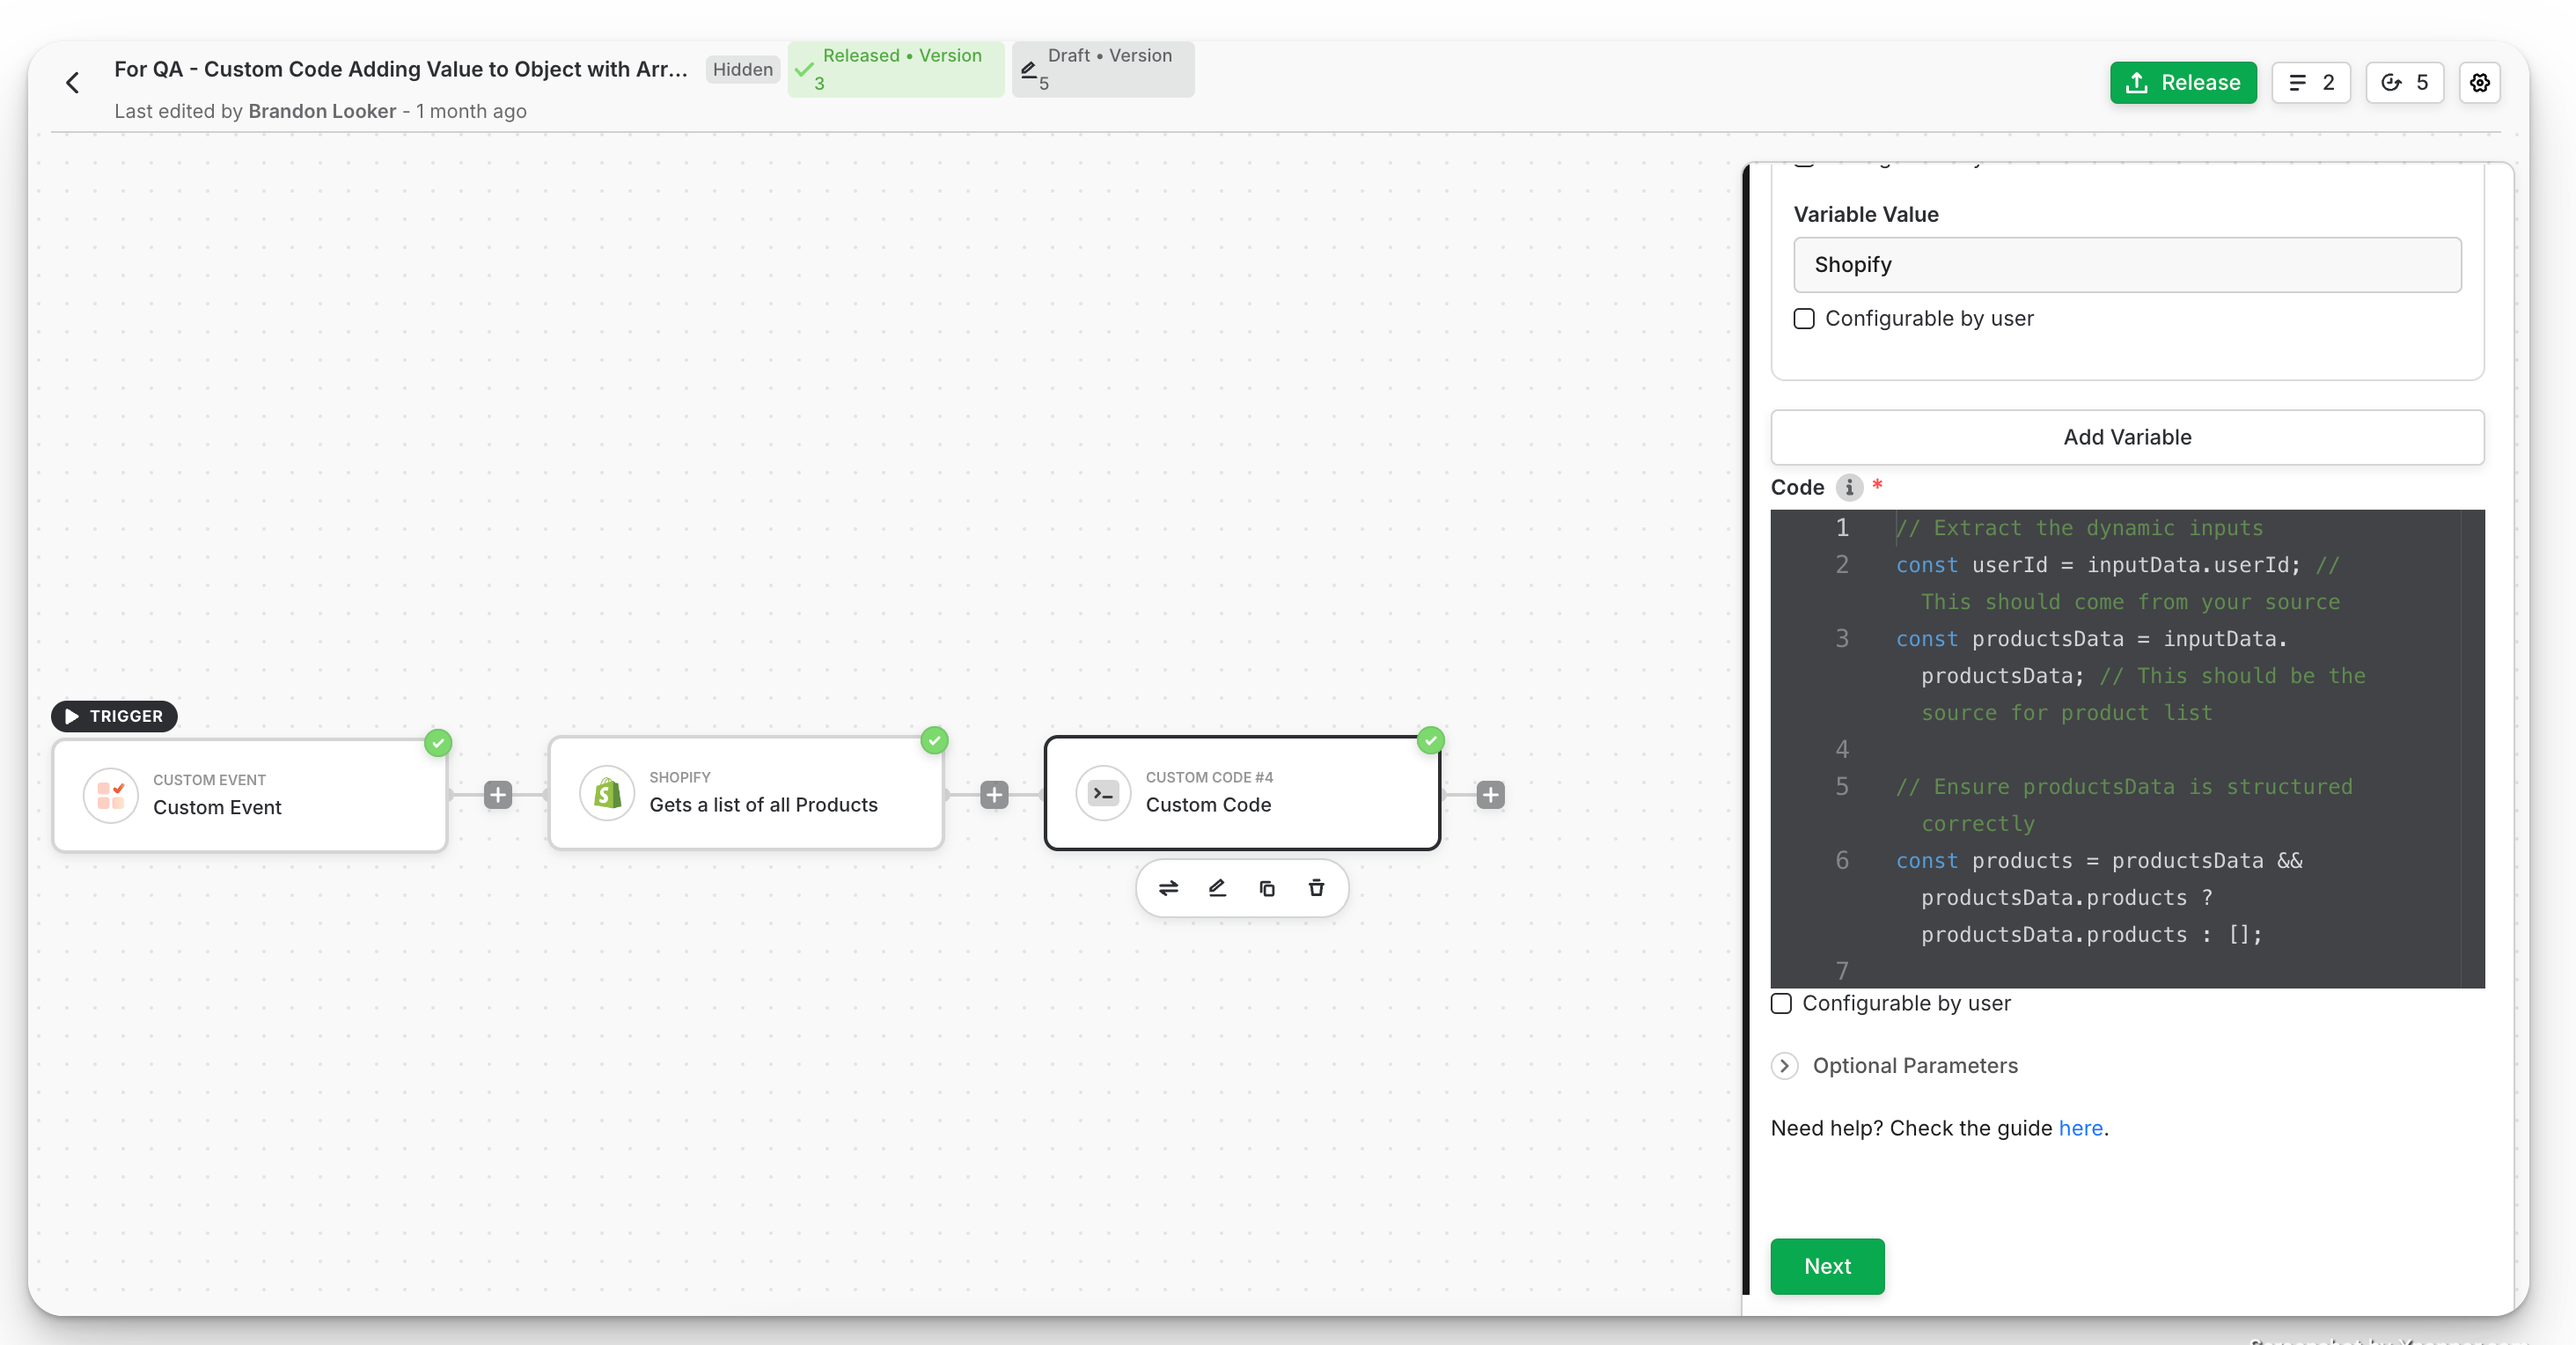
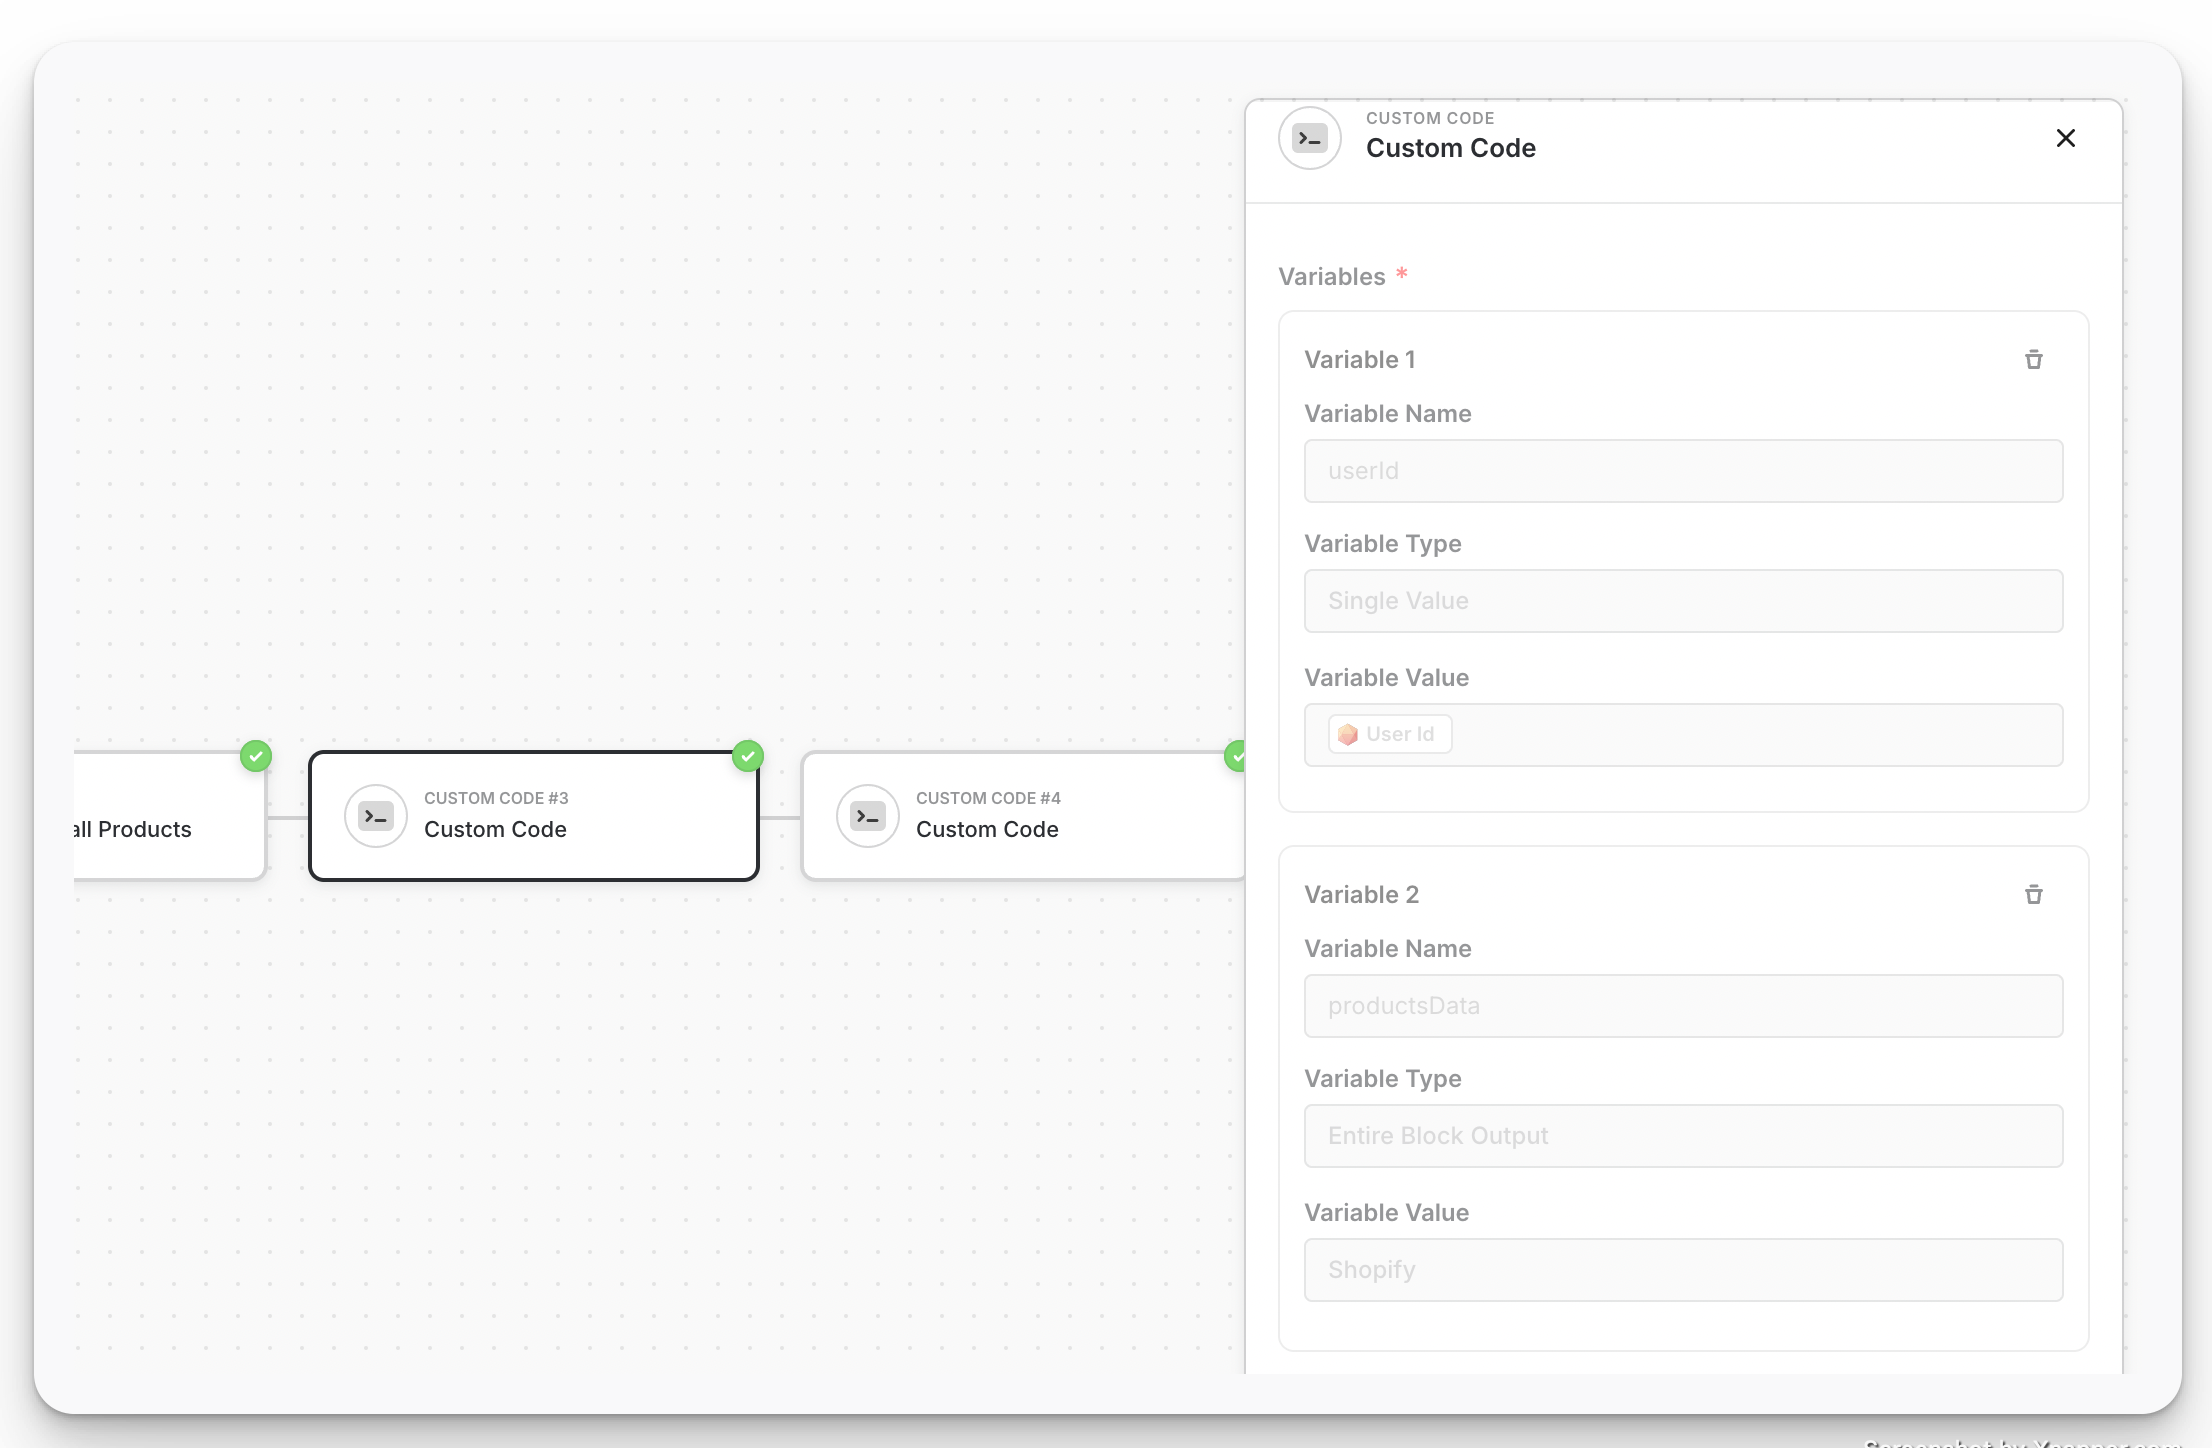
To start, create a workflow with Custom Event as your trigger. You can use any trigger, but we recommend using Custom Event to quickly test functionality and understand how Custom Code works. For the next connector, we’ll add a Shopify action. Select Get a list of all products as the action to pull all products from your Shopify catalogue. Now add the Custom Code connector. Select the variables output by the Shopify connector that you want to access within Custom Code. You can rename these variables for easier access. For example, we’re accessing theuserId key output by the Shopify connector and assigning it to a variable named userId. We’re also taking the entire output of the Shopify connector and assigning it to a variable named productsData for quick access in Custom Code.
JavaScript