- Account Name
- Database Name
- Data Warehouse Name
- Snowflake Username
- Snowflake Password
- Role
How to get the Account Name
To obtain your account name, navigate to Admin on the sidebar then choose Account. There are two parts to your Account Name. Note down the top part and the bottom part.
How to get the Data Warehouse Name
Go to Admin on the sidebar then choose Warehouses. Then, note down the Warehouse Name from the list
How to get Database, Schema and Role
Go to Data on the sidebar, select your desired database and schema. There you will find the database (1), schema (2) and role (3). The role will be the role of the user you want to use to access.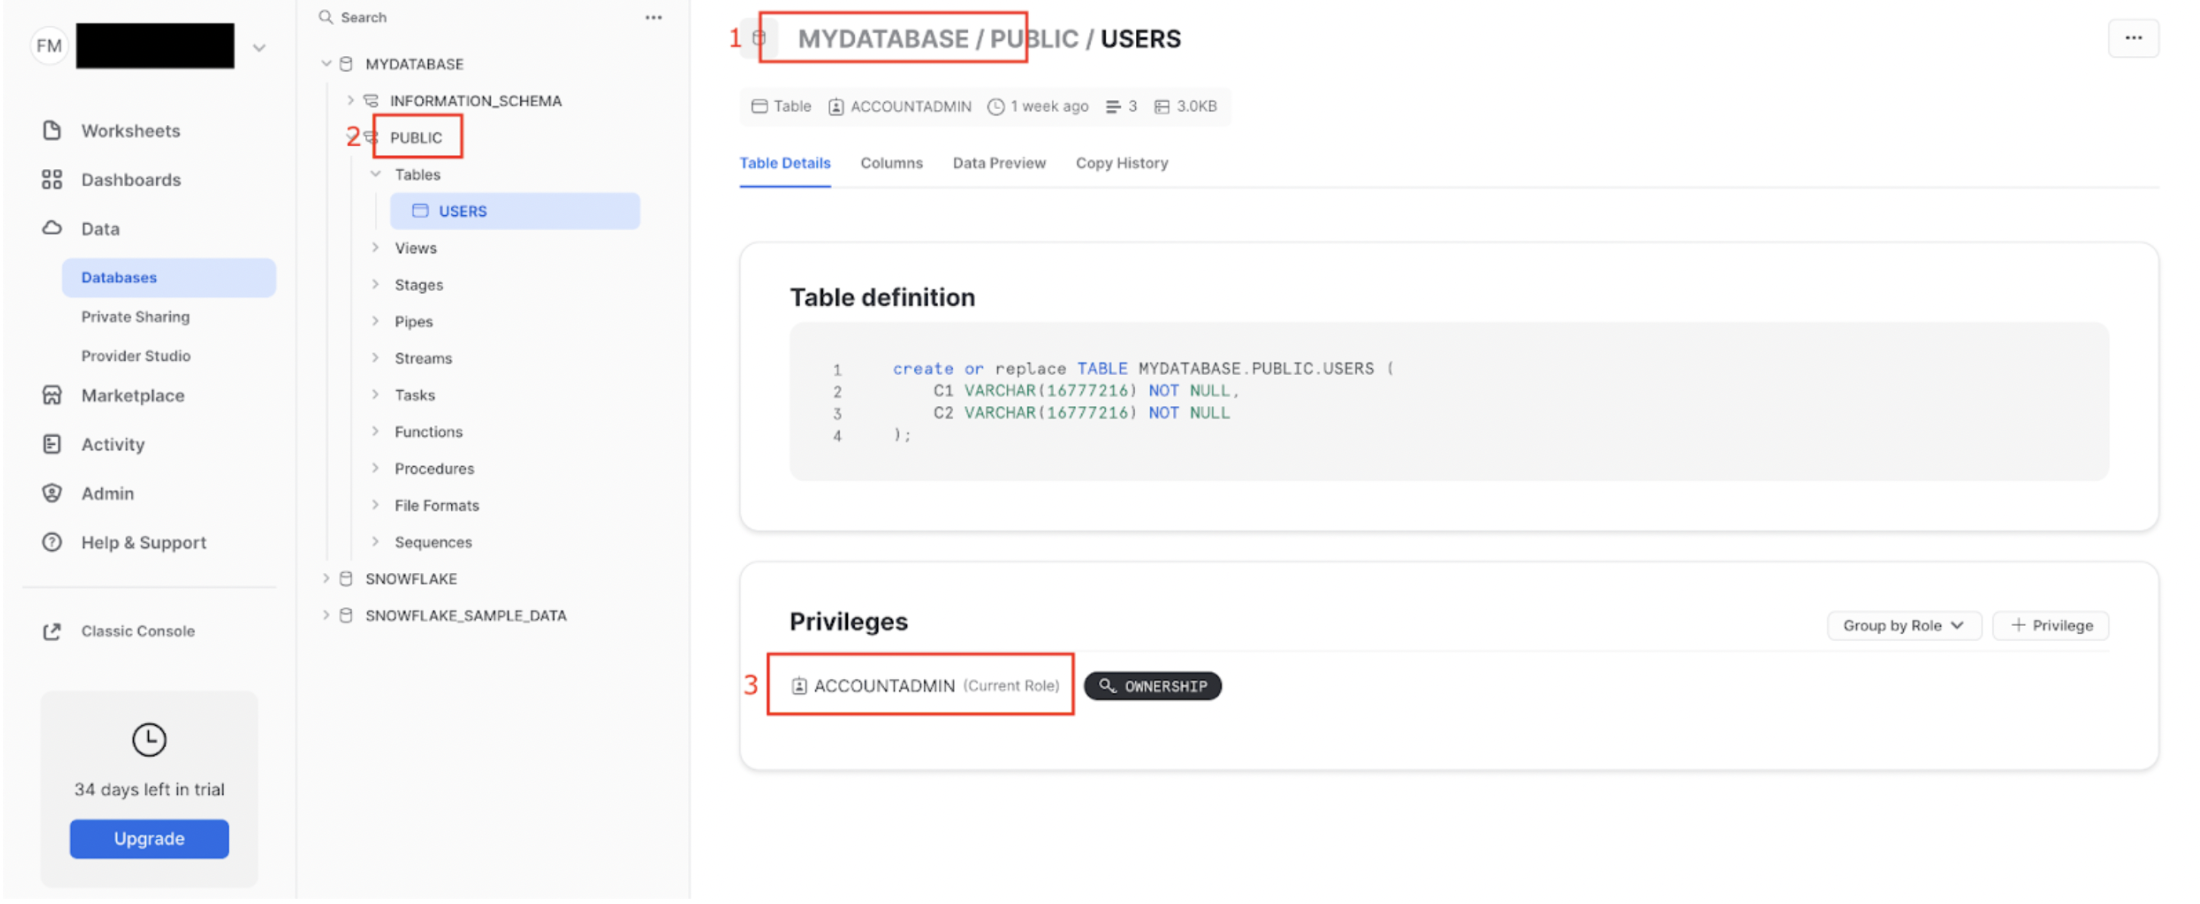
Complete Block Credentials
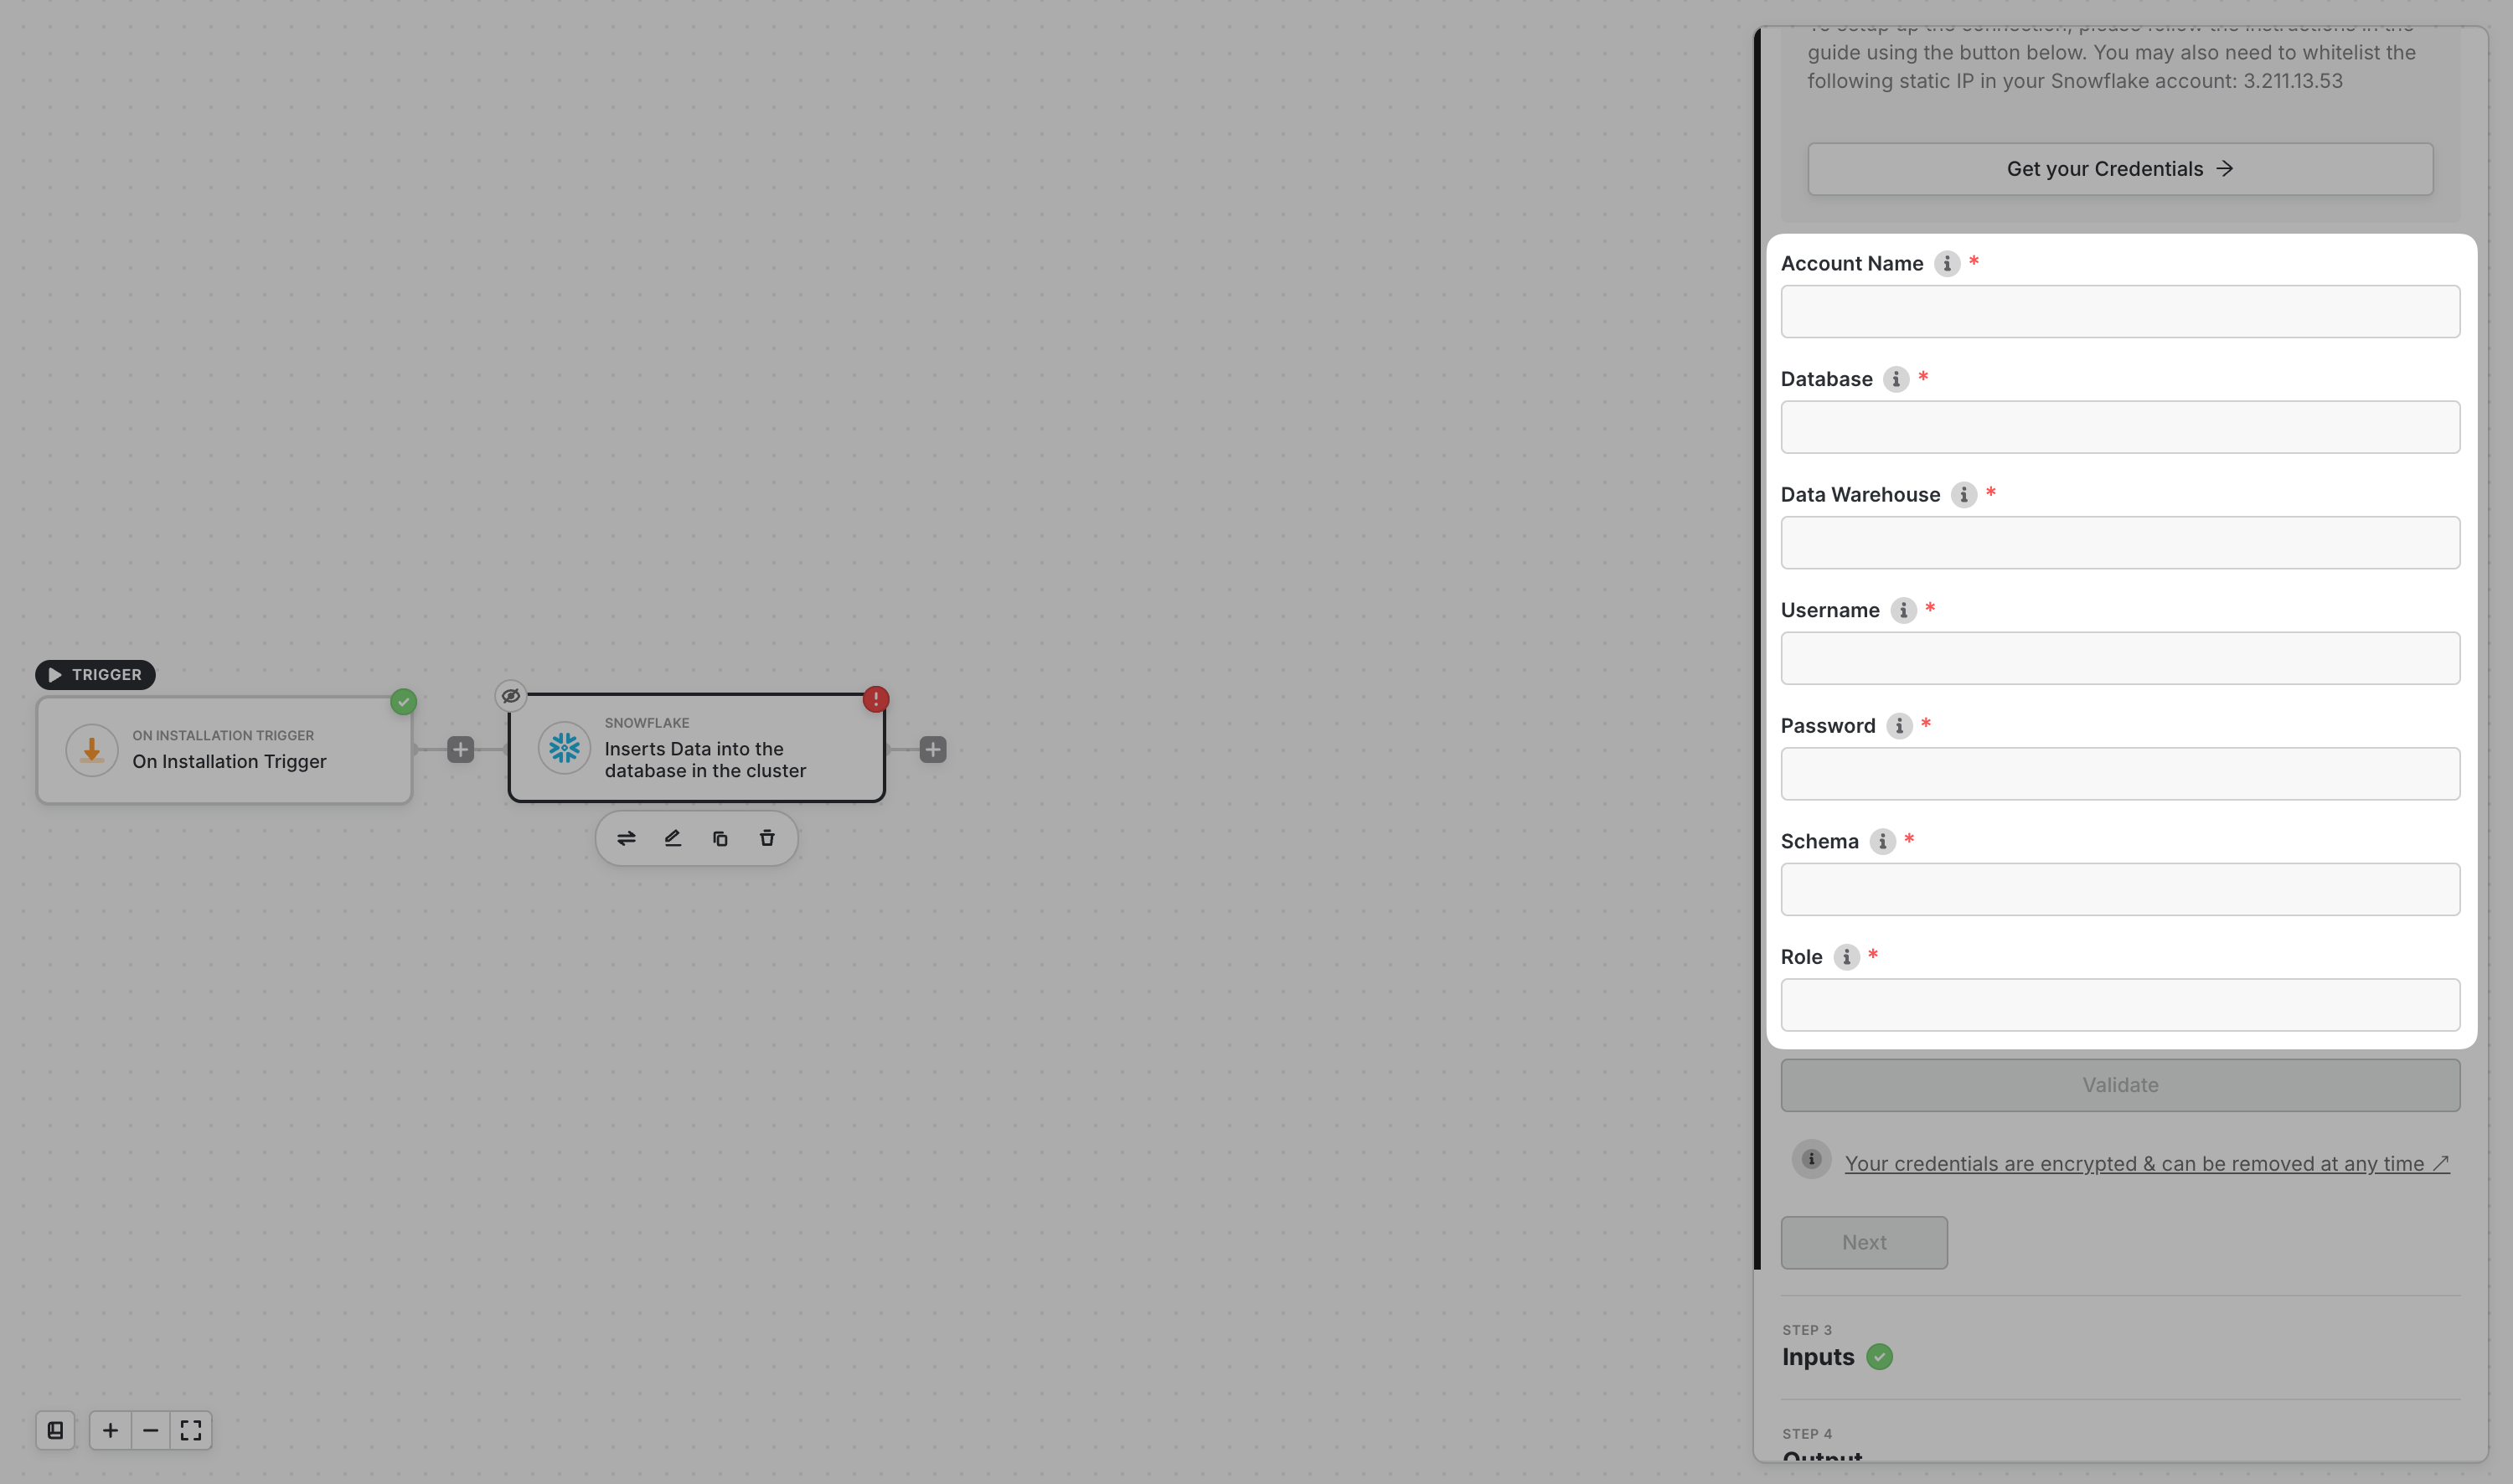
Now that you have everything needed, return to Alloy. For the Account Name, input the first part followed by a hyphen and the second part. Input the Database, Schema and Role. Finally input the Username and Password of the user you want to use for the credentials.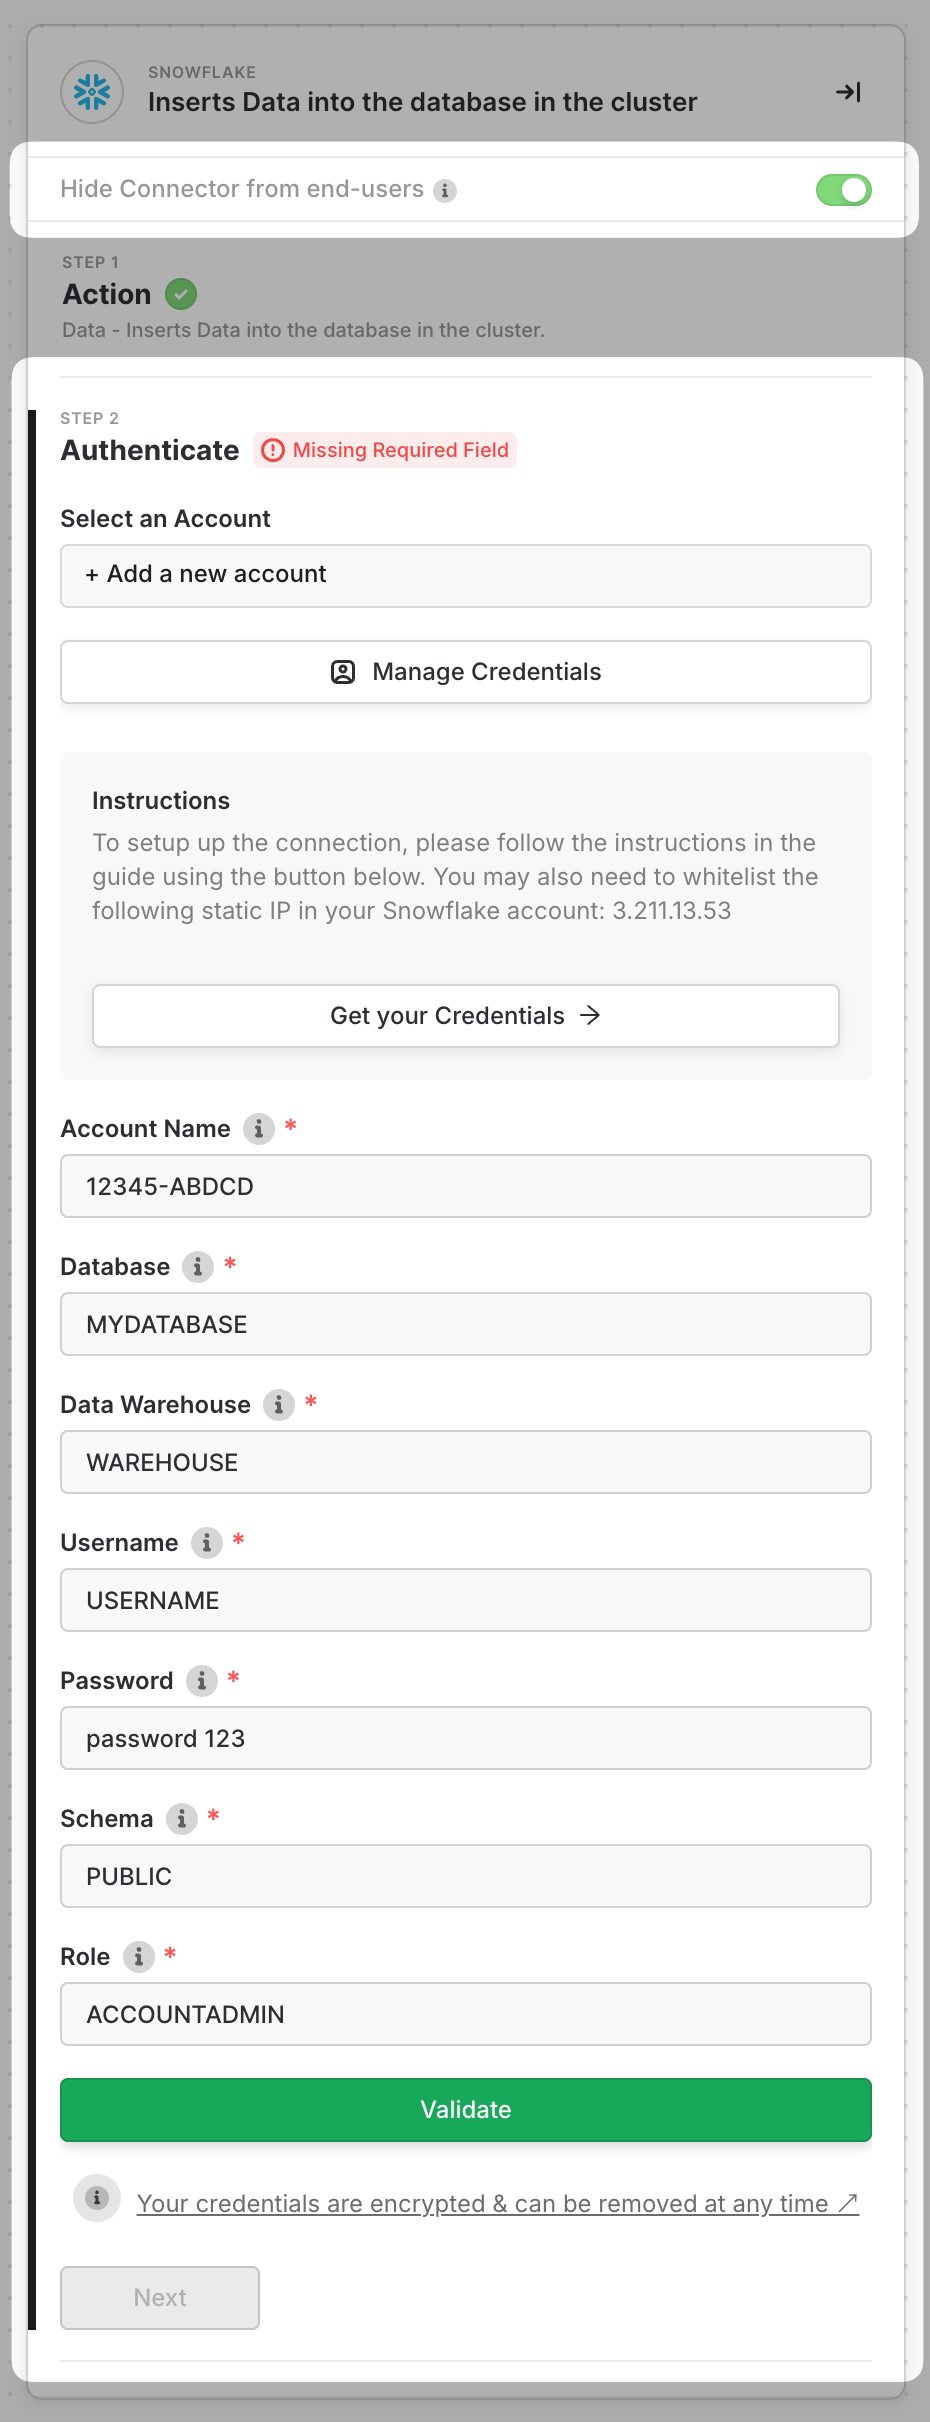
(Optional) Adding Alloy’s IP Address
If you have IP whitelisting on your Snowflake warehouse, you will need to whitelist Alloy servers to connect to Snowflake. To learn more about this, please read this article.1
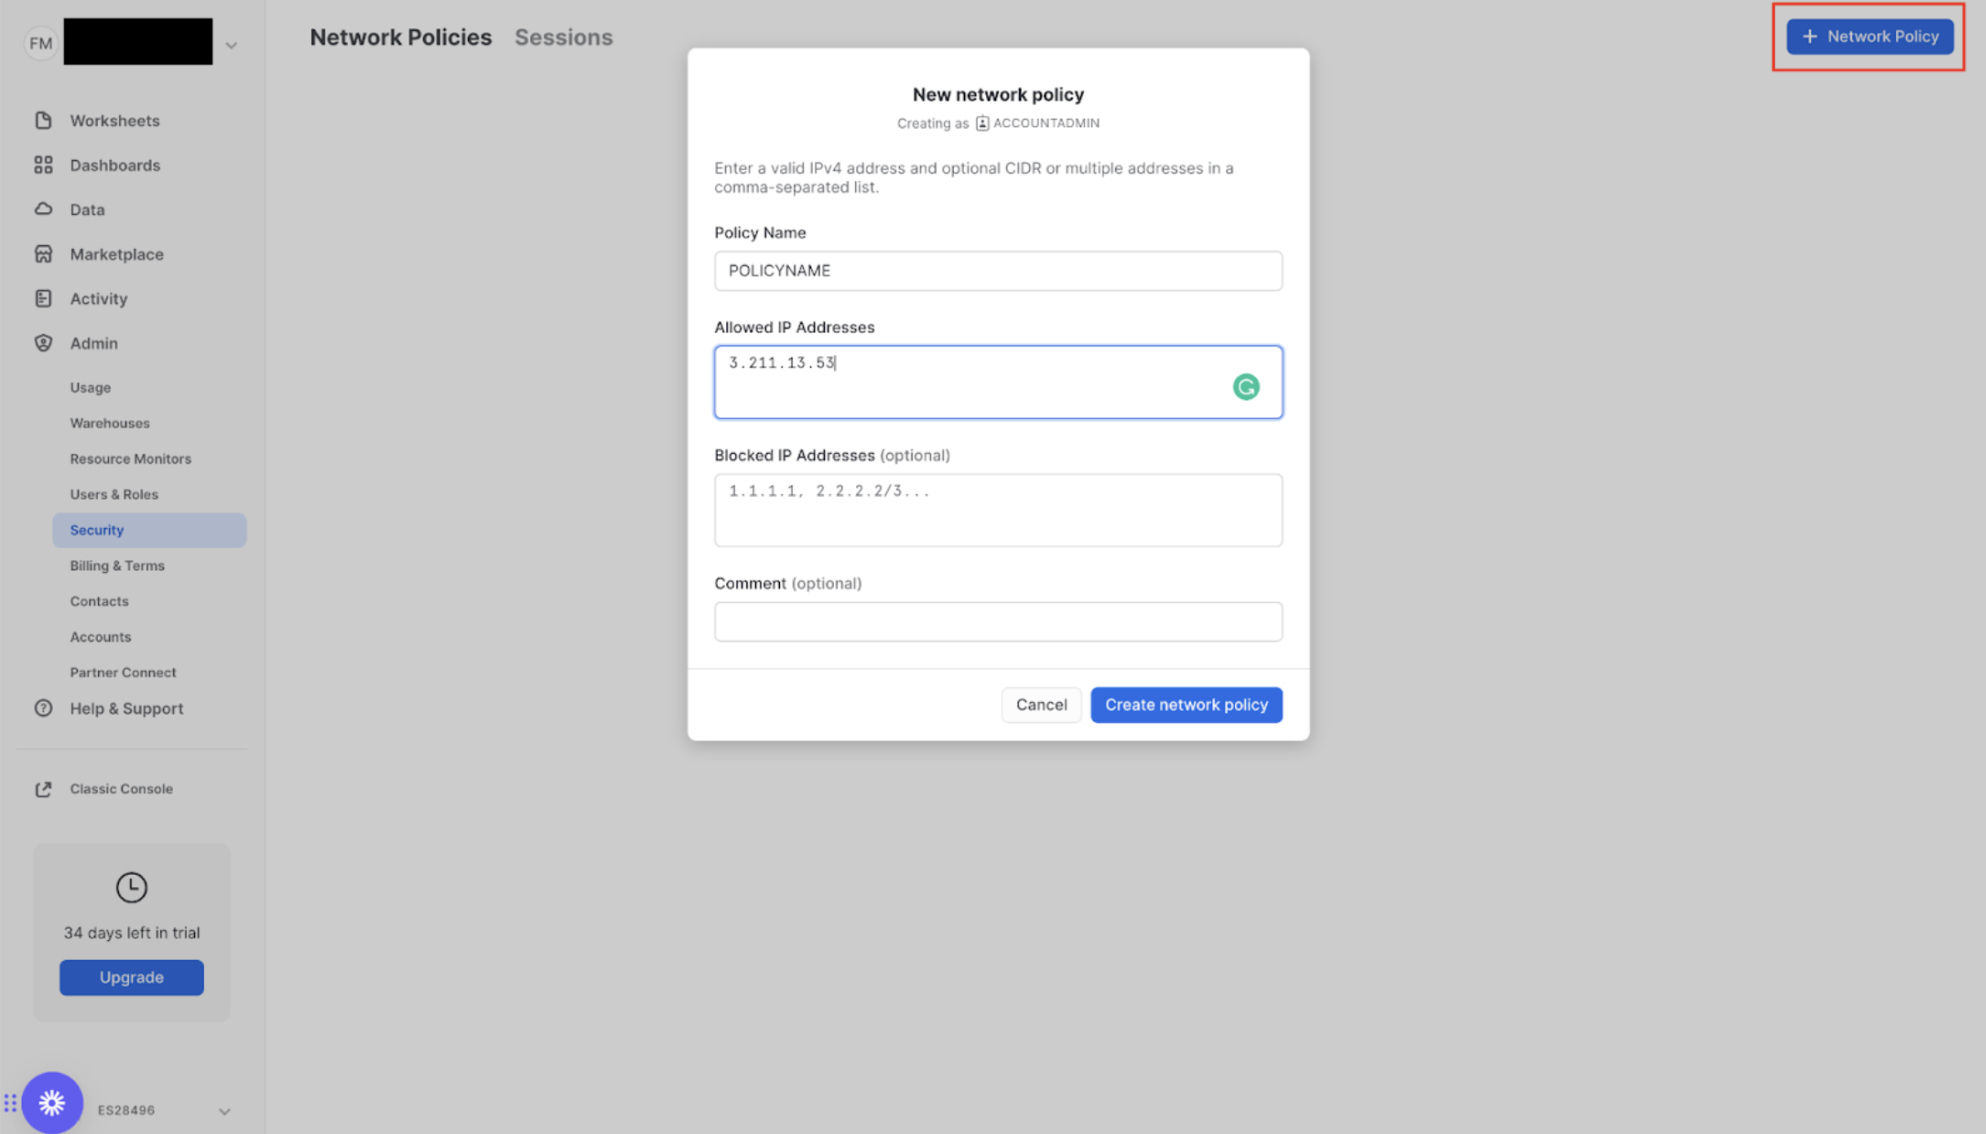
To enable whitelisting, first go to Admin on the sidebar and click Security
2
Click on the + Network Policy Button to add a network policy.
3
Input the IP Address under the Allowed IP Addresses
4
Then click on Create Network Policy on the pop-up to save.