This feature only applies to Embedded iPaaS
Who this guide is for
- Developers integrating a third‑party API that Alloy doesn’t yet support.
- Teams wrapping internal services as a connector so agents and flows can call them safely.
- Partners turning their public API into a first‑class Alloy integration.
Before you begin
- Have an API to wrap. Confirm base URL(s), auth scheme, request/response formats, rate limits, and error model.
- Get credentials. Create sandbox/test accounts and API keys or OAuth client credentials.
- Decide scope. List the initial Actions (e.g., Create Ticket, Search Contacts) and Triggers (e.g., New Order Created). Start small; ship value fast.
Authentication
Custom Connector supports:- OAuth 2.0
- API Key
- Basic
- Bearer/Custom
- None
Set Up Guide
Trial Access
Authentication (HTTP Basic Authentication)
Acuity Scheduling uses HTTP Basic Authentication with your User ID and API Key.Create your Acuity Scheduling account
- Sign up for a free trial at Acuity Scheduling (https://acuityscheduling.com).
- Once logged in, navigate to Business Settings → Integrations → API.
- Your User ID is displayed at the top of the API page (a numeric value).
- Click Show API Key to reveal your API Key, or generate a new one if needed.
- Copy your User ID and API Key.
- Enter your User ID as the username and API Key as the password into Alloy Automation.
OAuth 2.0
Use when the service supports OAuth. It gives per‑user or per‑tenant installs and easy revocation. Required fieldsauthorization_urltoken_urlclient_idandclient_secretscopes(only what you need)redirect_uri(use Alloy Automation’s redirect URI)
Token handling
Refresh tokens proactively (e.g., when expires_in < 5m), storetoken_type and use exactly as returned (Bearer, case‑sensitive).
Common pitfalls
Mismatched redirect_uri or missing code_verifier (for PKCE flows).API Key
Use for server‑to‑server or legacy APIs. Support header and query placements (e.g., Authorization: Api-Key, ?api_key=). Allow customer‑specific header names if the provider is non‑standard. Never log secrets; mask in UI and logs.Custom/Bearer
Some APIs use static bearer tokens or HMAC signatures. Expose configurable fields (e.g., tenant_id, region) and compute the signature per request.API definitions (Base URL & test)
After saving credentials, set a Base URL for the provider (e.g., https://api.spotify.com/v1). This reduces boilerplate in actions and centralizes environment changes. Use the built‑in Test request tool to validate your configuration before building actions.Creating a Custom Connector
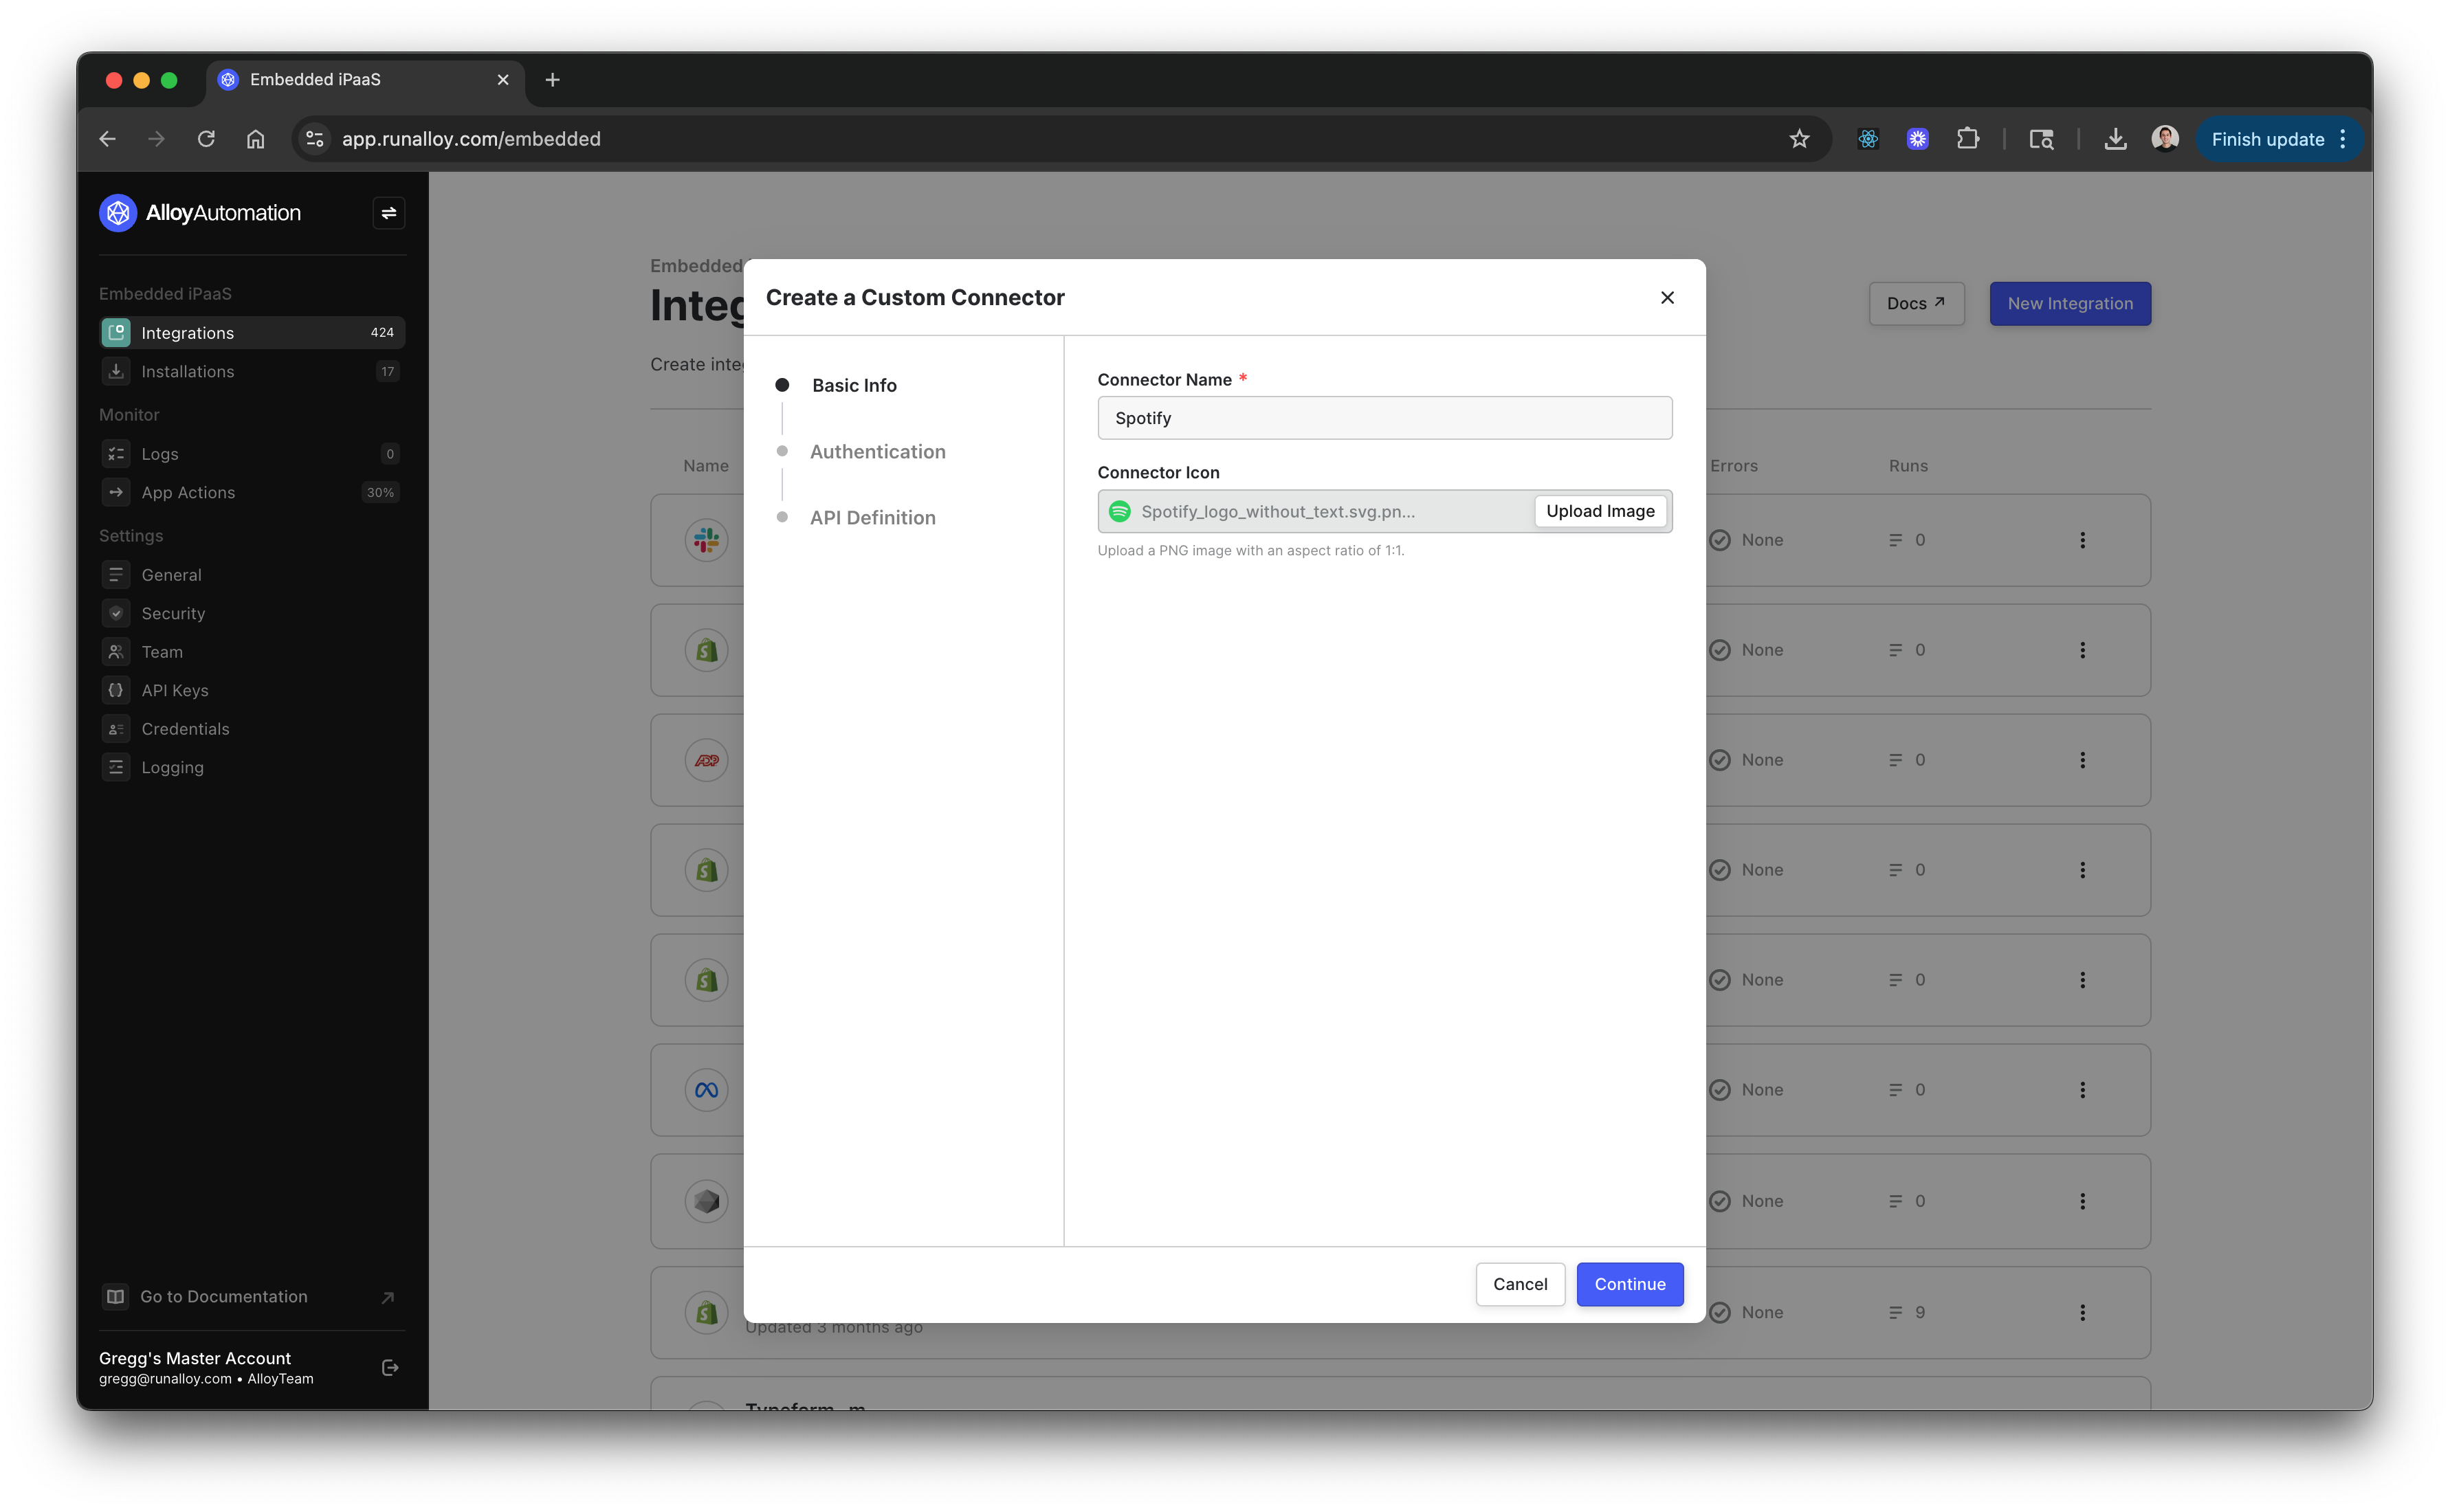
To start, click “Create a Custom Connector”.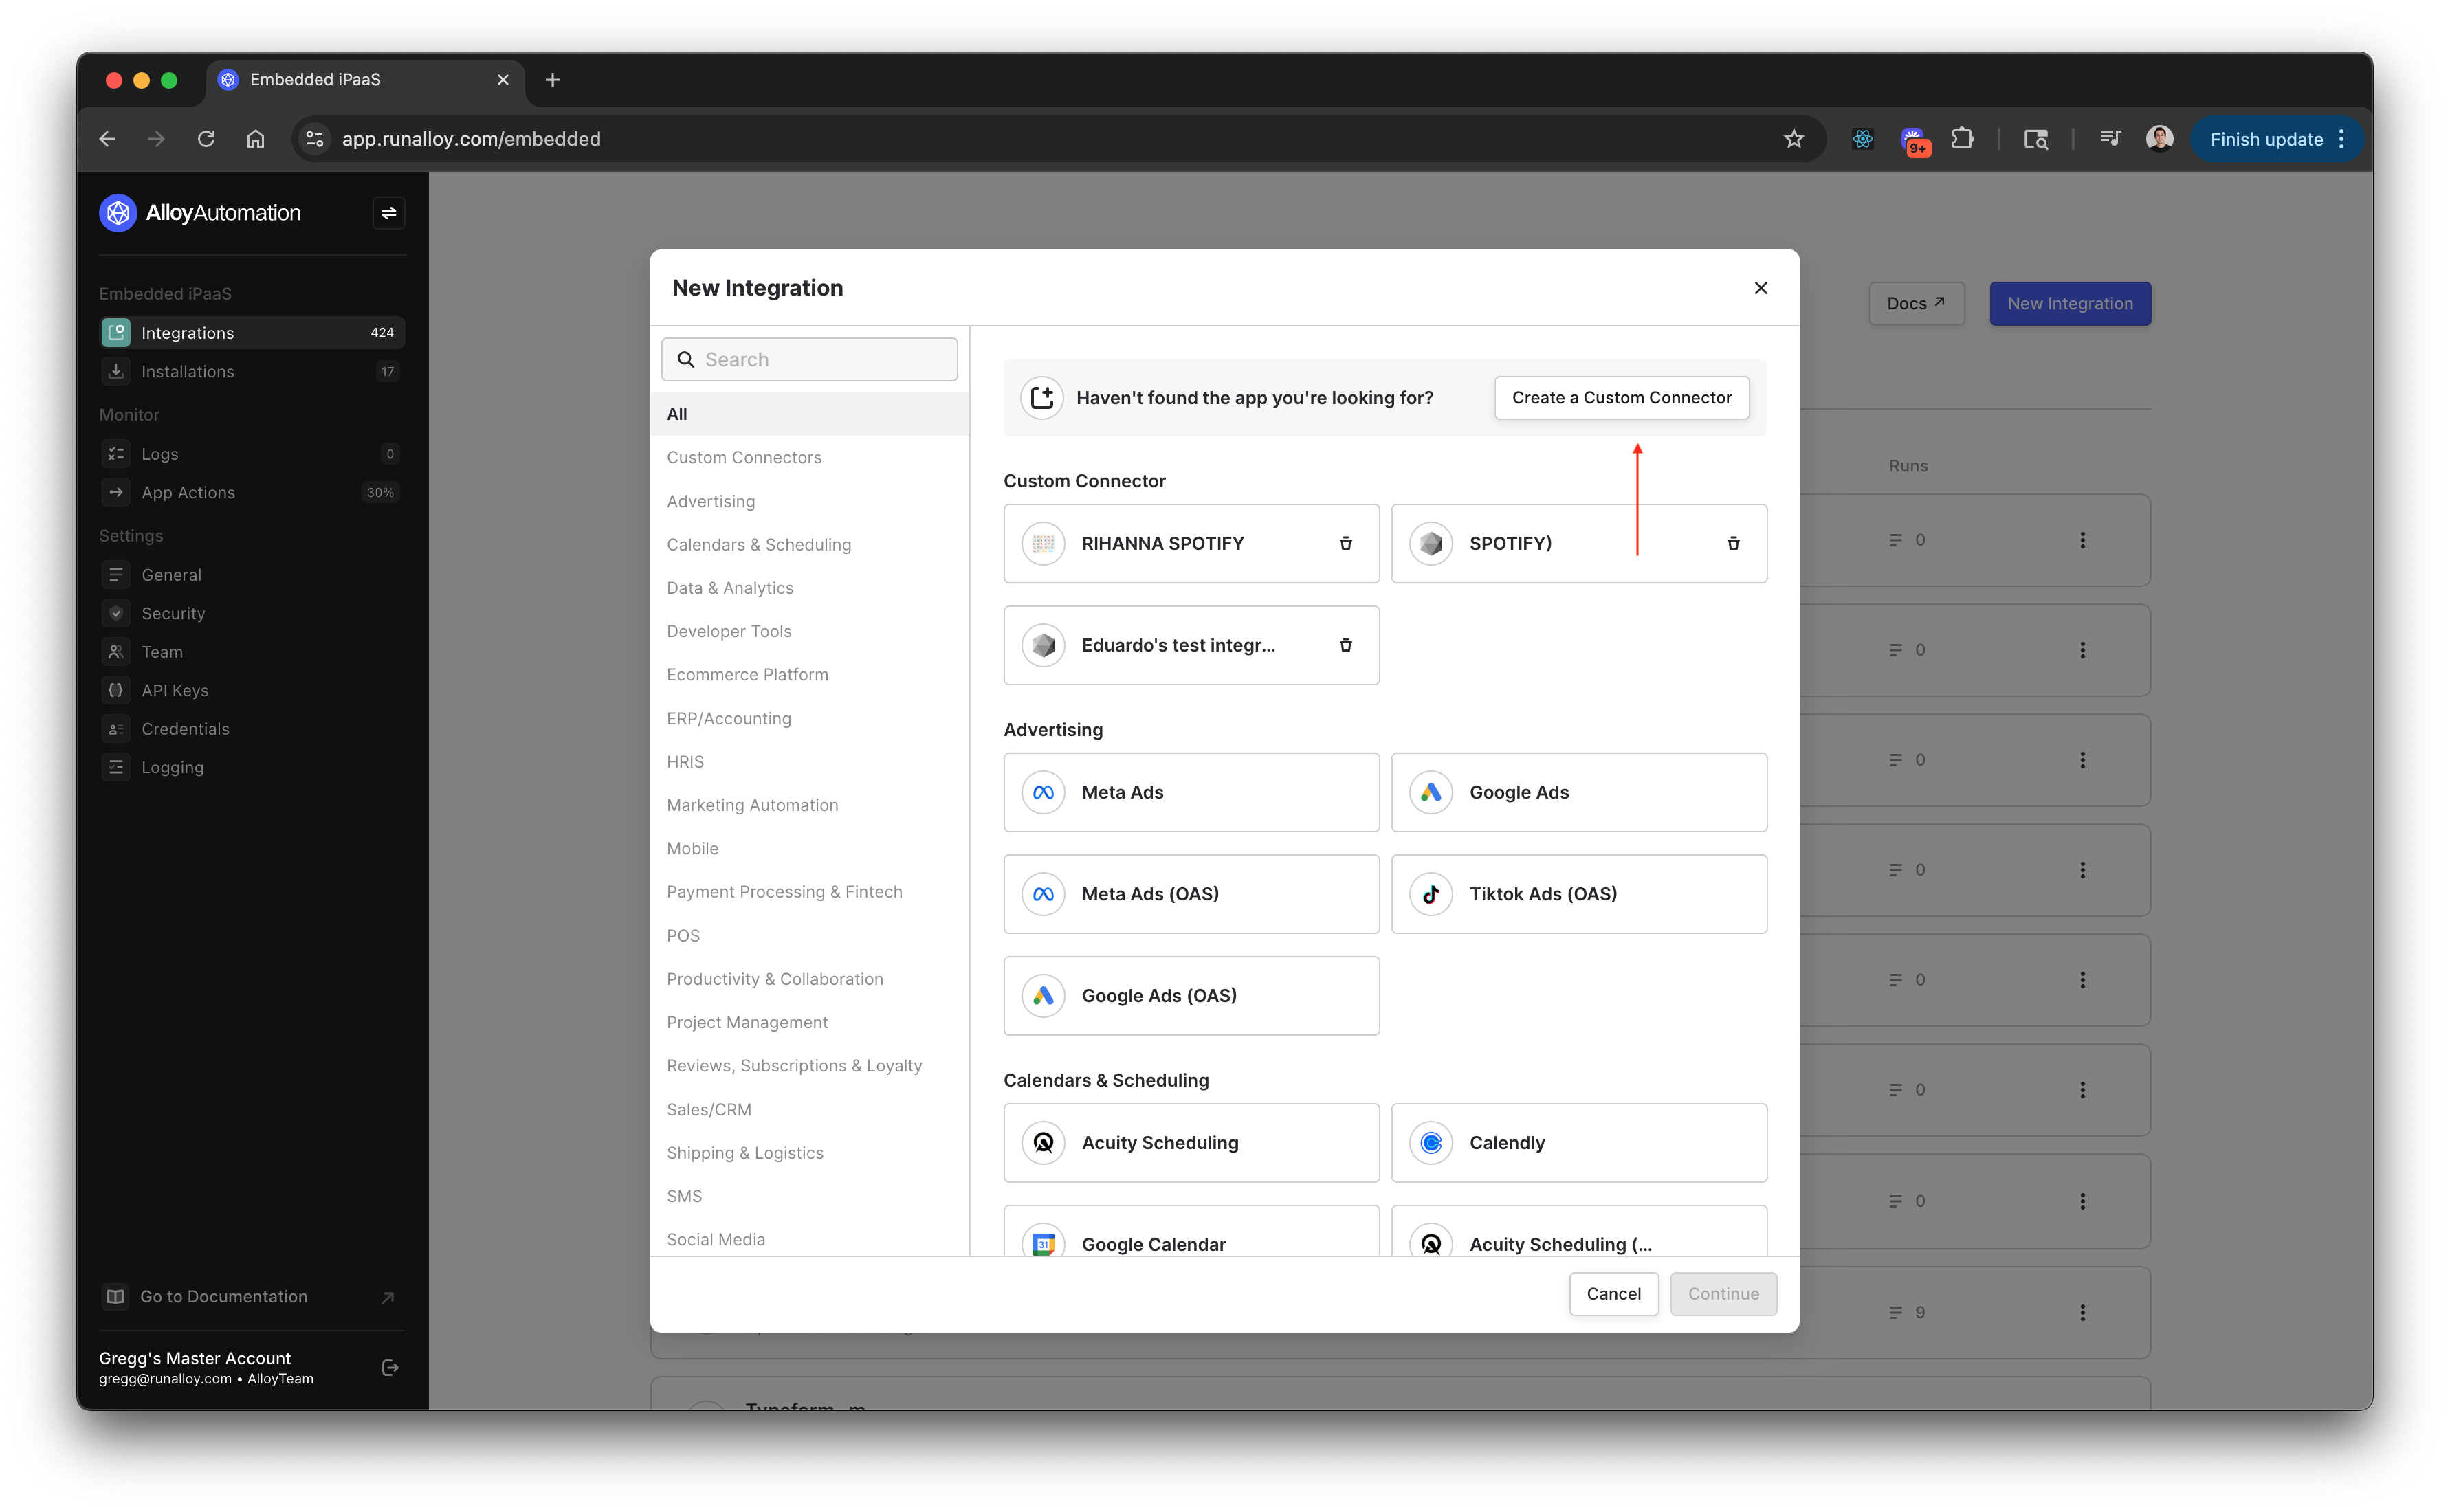 Next, input the connector’s name and logo. You can change this later on. In this example, we’ll be setting up a custom connector using Spotify’s APIs. To proceed, click the continue button.
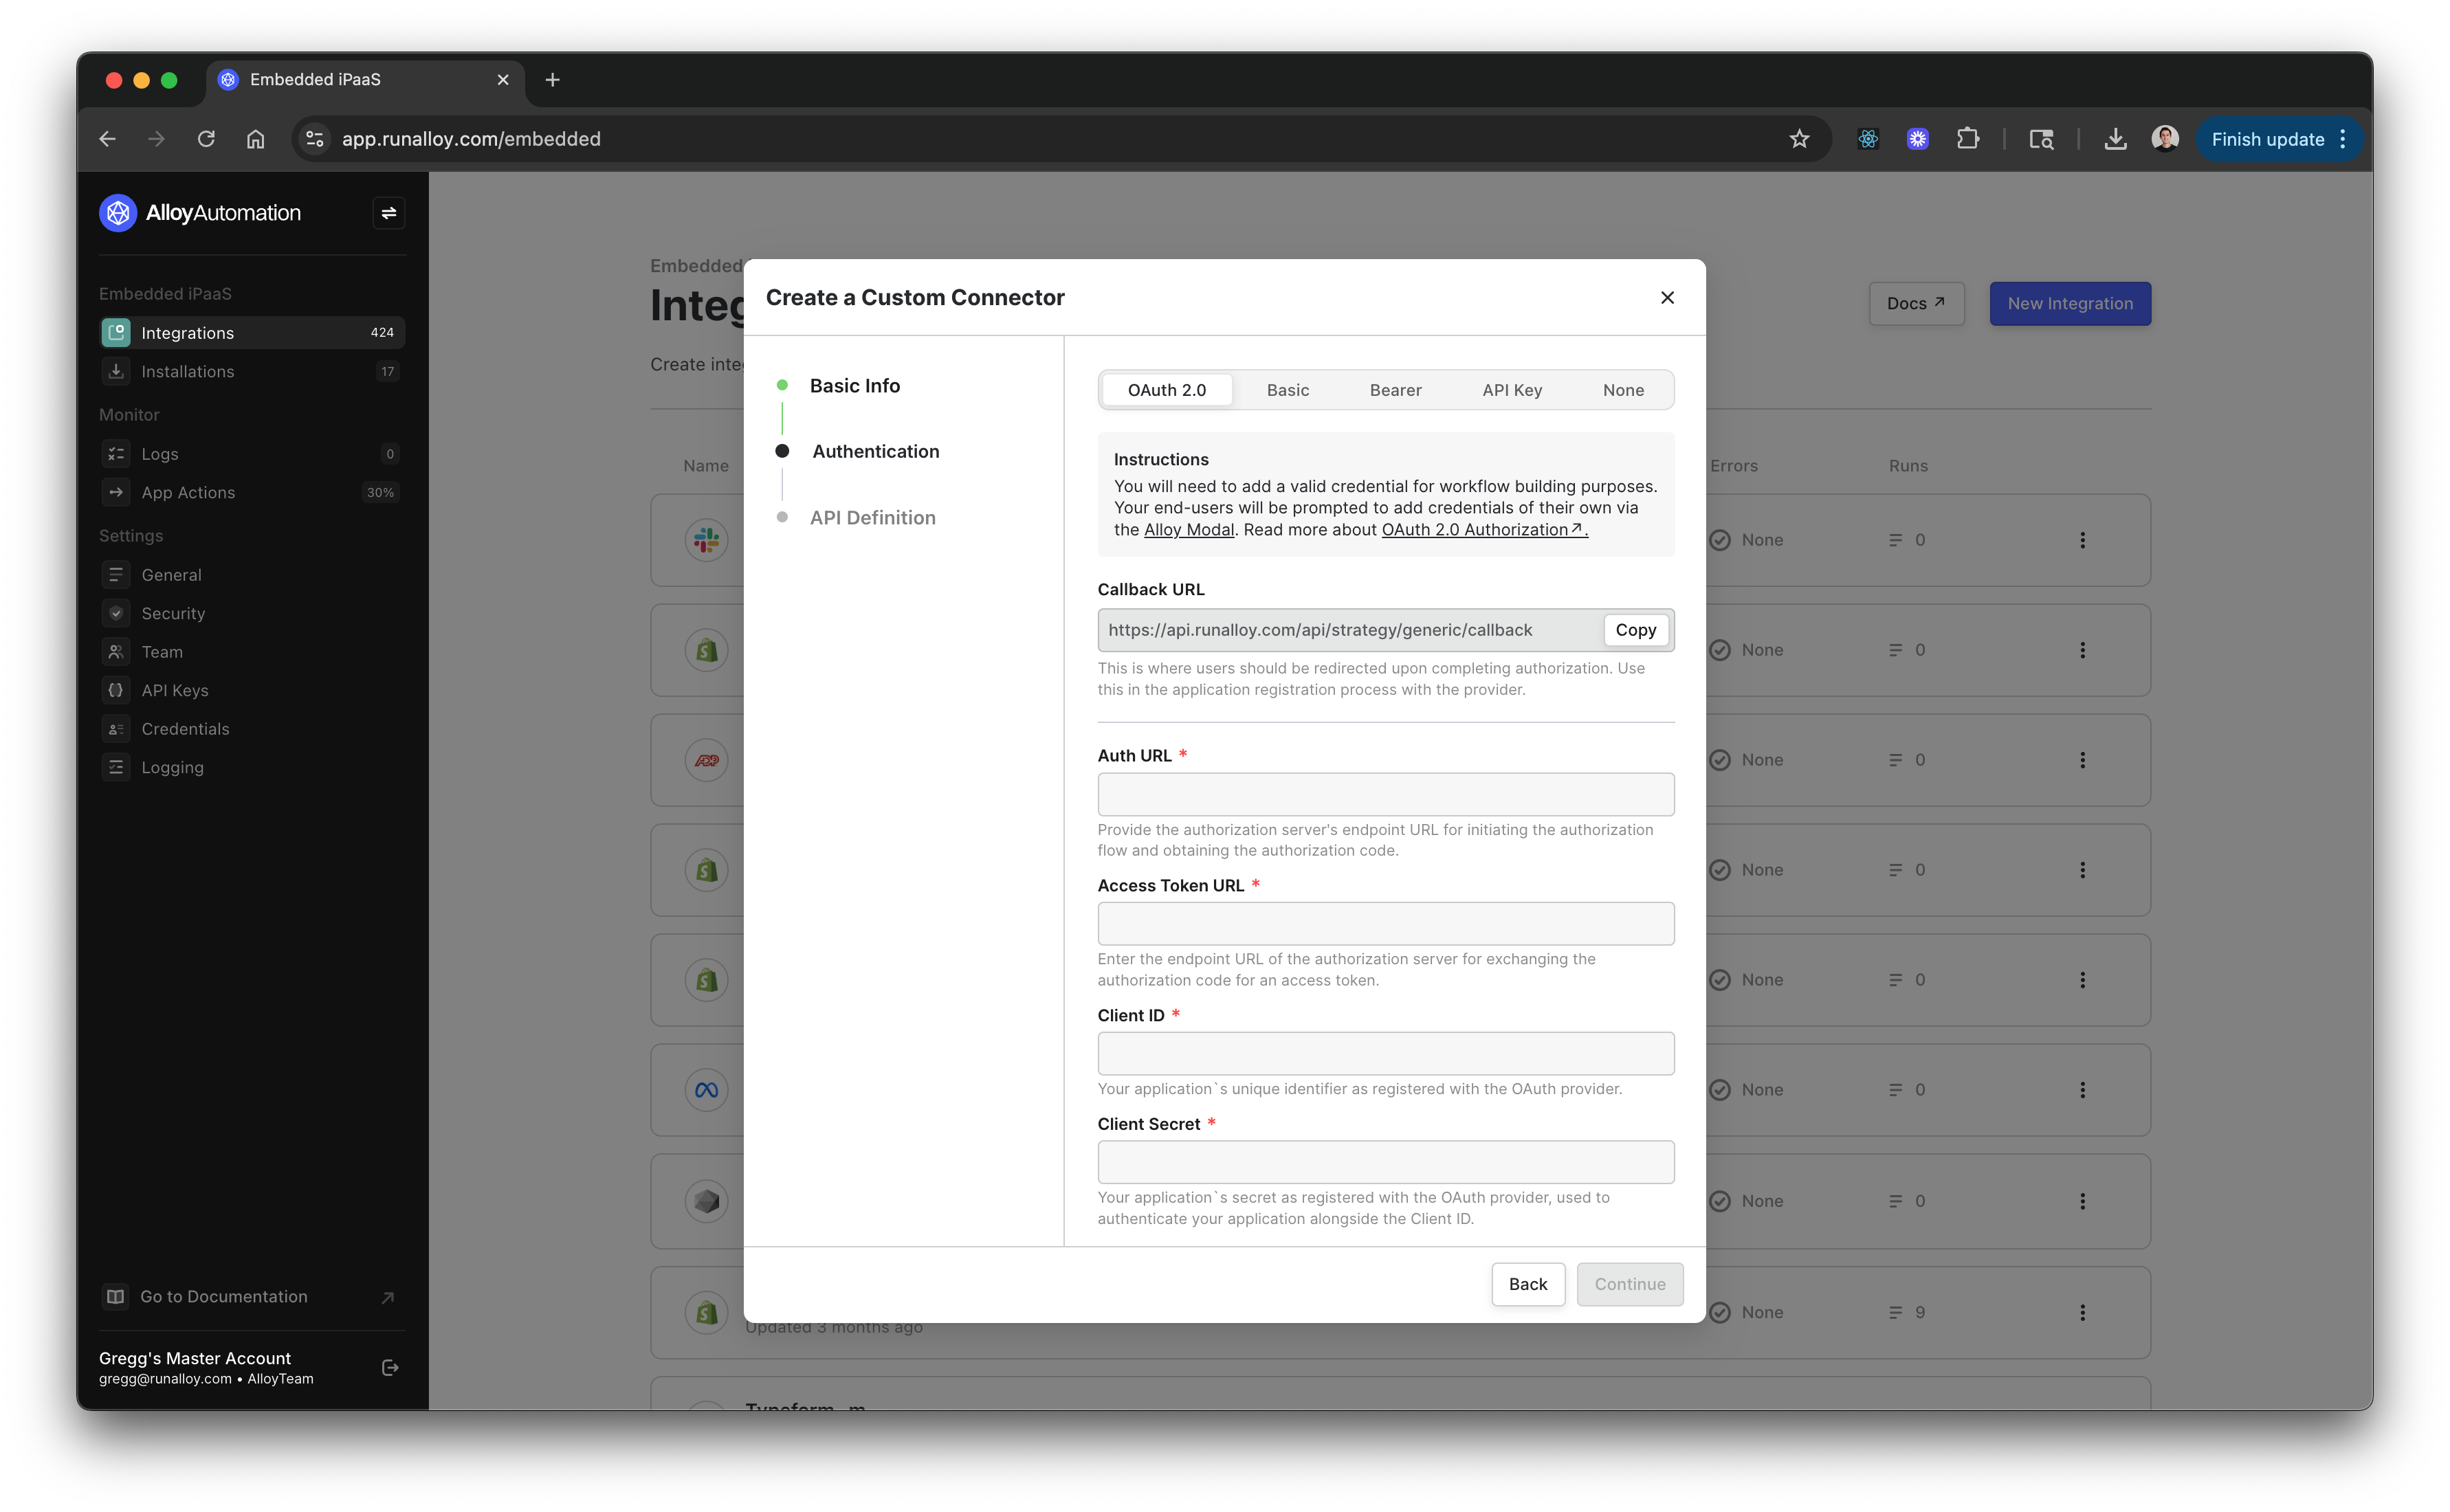
 You’ll be prompted to input the authentication details for the app you’re connecting to.
To authenticate with your chosen API, you can choose between OAuth 2.0, Basic, Bearer, API Key, or None. Your selection will dictate how Alloy authenticates with your chosen API and the fields presented to your end-users during their authentication experience.
To proceed with setting up your custom connector, You will need a valid credential with the app you’re looking to authenticate with. The credentials inputted for any method you select will be saved to your account and are required in workflow building.
You’ll be prompted to input the authentication details for the app you’re connecting to.
To authenticate with your chosen API, you can choose between OAuth 2.0, Basic, Bearer, API Key, or None. Your selection will dictate how Alloy authenticates with your chosen API and the fields presented to your end-users during their authentication experience.
To proceed with setting up your custom connector, You will need a valid credential with the app you’re looking to authenticate with. The credentials inputted for any method you select will be saved to your account and are required in workflow building.
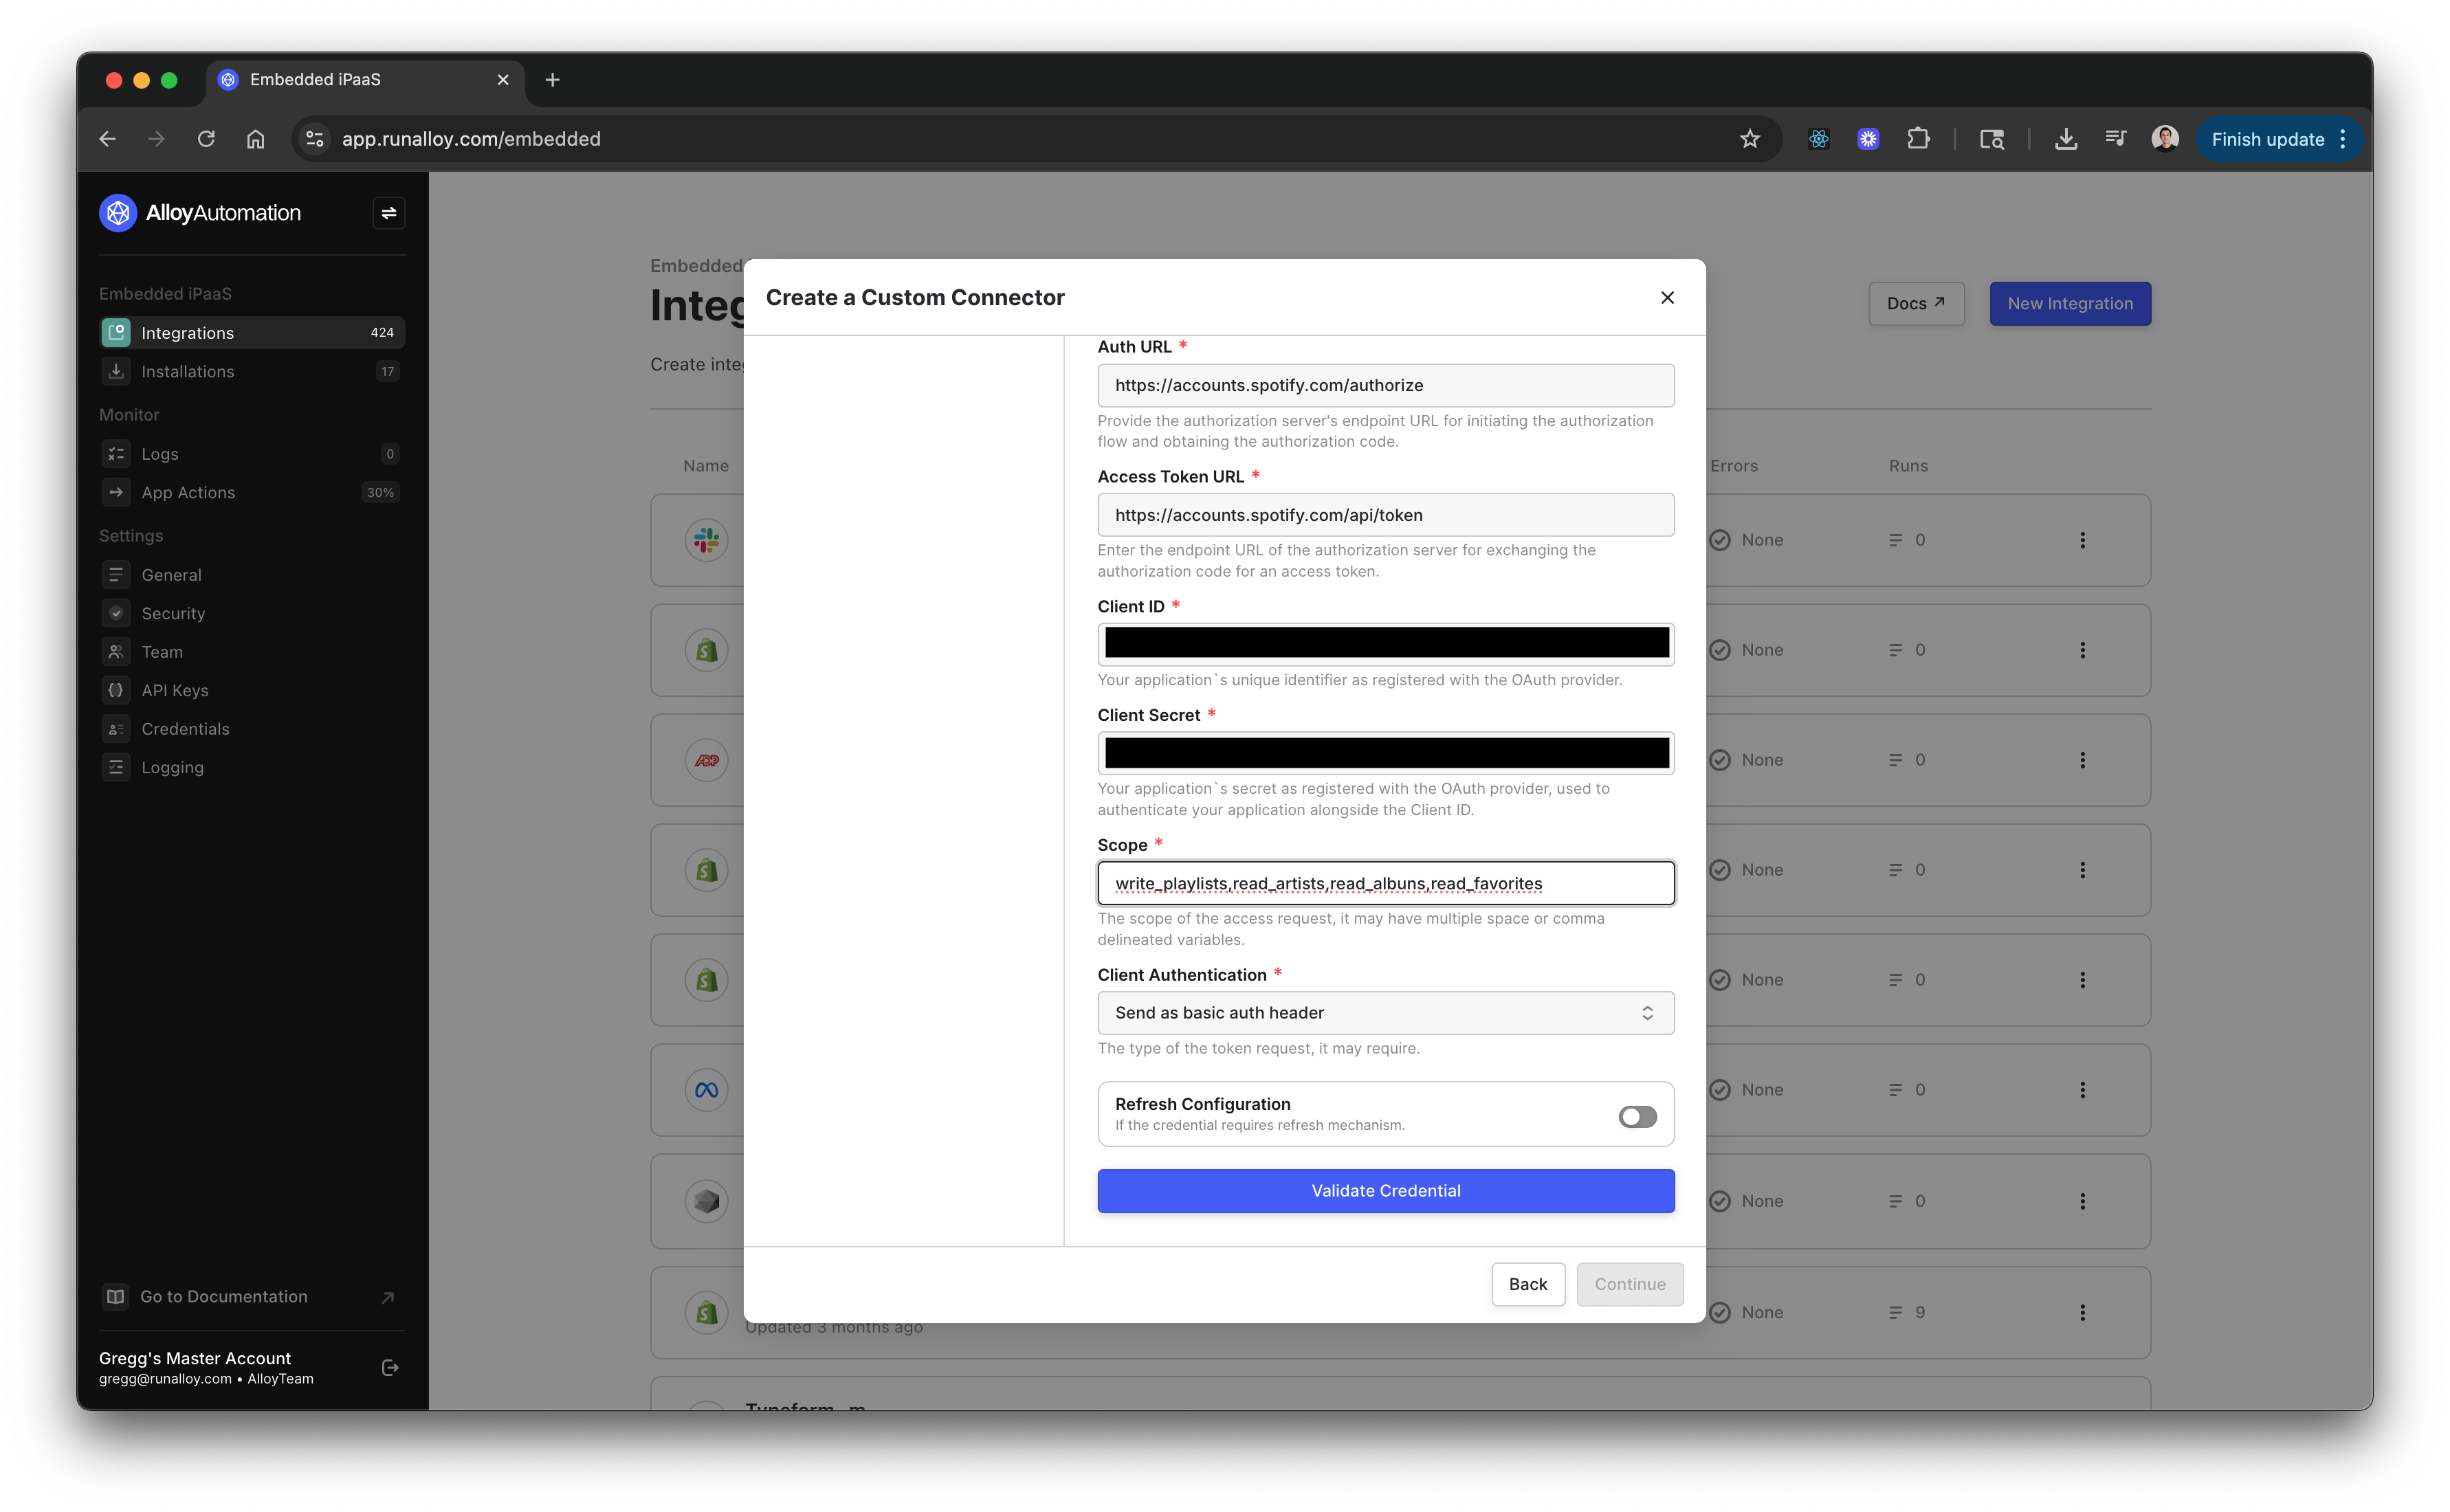
 At the bottom of the form, you can configure refresh parameters if the token refresh URL differs from the authentication URL.
 Once your credential is added, you will have the option to add a Base URL for the connector’s API. This makes it easier to manage the actions you create within Alloy later down the line.
Once set, you can make a test request to ensure the configuration works as expected.
Once your credential is added, you will have the option to add a Base URL for the connector’s API. This makes it easier to manage the actions you create within Alloy later down the line.
Once set, you can make a test request to ensure the configuration works as expected.